Clearing app cache data on Windows 11 helps free up storage space and resolve performance issues with installed applications. This straightforward process removes temporary files that apps store on the system, often improving their responsiveness and fixing minor glitches.
Understanding App Cache in Windows 11
Cache data consists of temporary files that applications create to load content faster and remember user preferences. Over time, these files accumulate and can take up significant disk space. Most people find that clearing cache regularly keeps their system running smoothly without affecting important personal data like documents or saved passwords.
The key is to understand that clearing cache differs from uninstalling apps. Cache removal only deletes temporary data, while the application itself remains installed with all its settings intact.
How to Clear App Cache Data Through Settings
Windows 11 provides a built-in method to clear cache for individual applications through the Settings app. This works best when targeting specific apps that seem sluggish or are consuming excessive storage.
Watch this: How to Clear App Cache Data on Windows 11 Through Settings
Step-by-Step Process
- Press the Windows key + I to open Settings
- Click on ‘Apps’ from the left sidebar
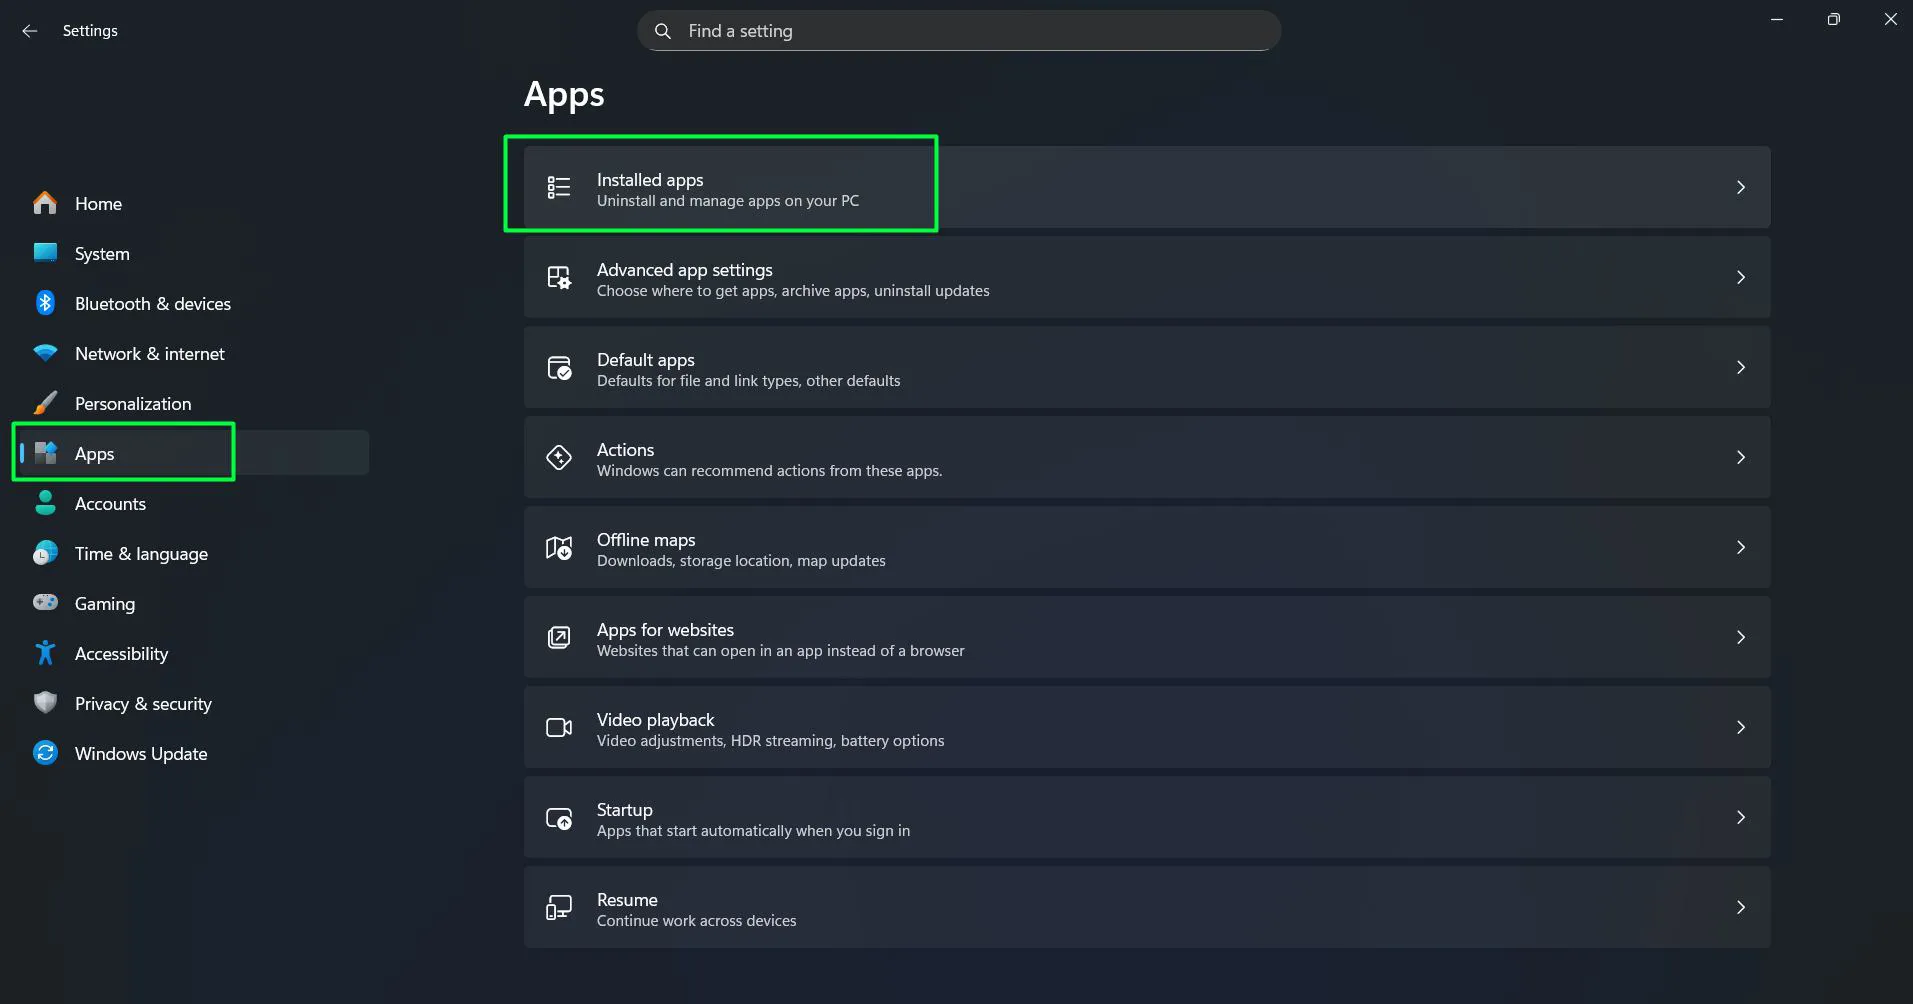
- Select ‘Installed apps’ from the right panel
- Scroll through the list or use the search box to find the app whose cache needs clearing
- Click the three-dot menu next to the app name
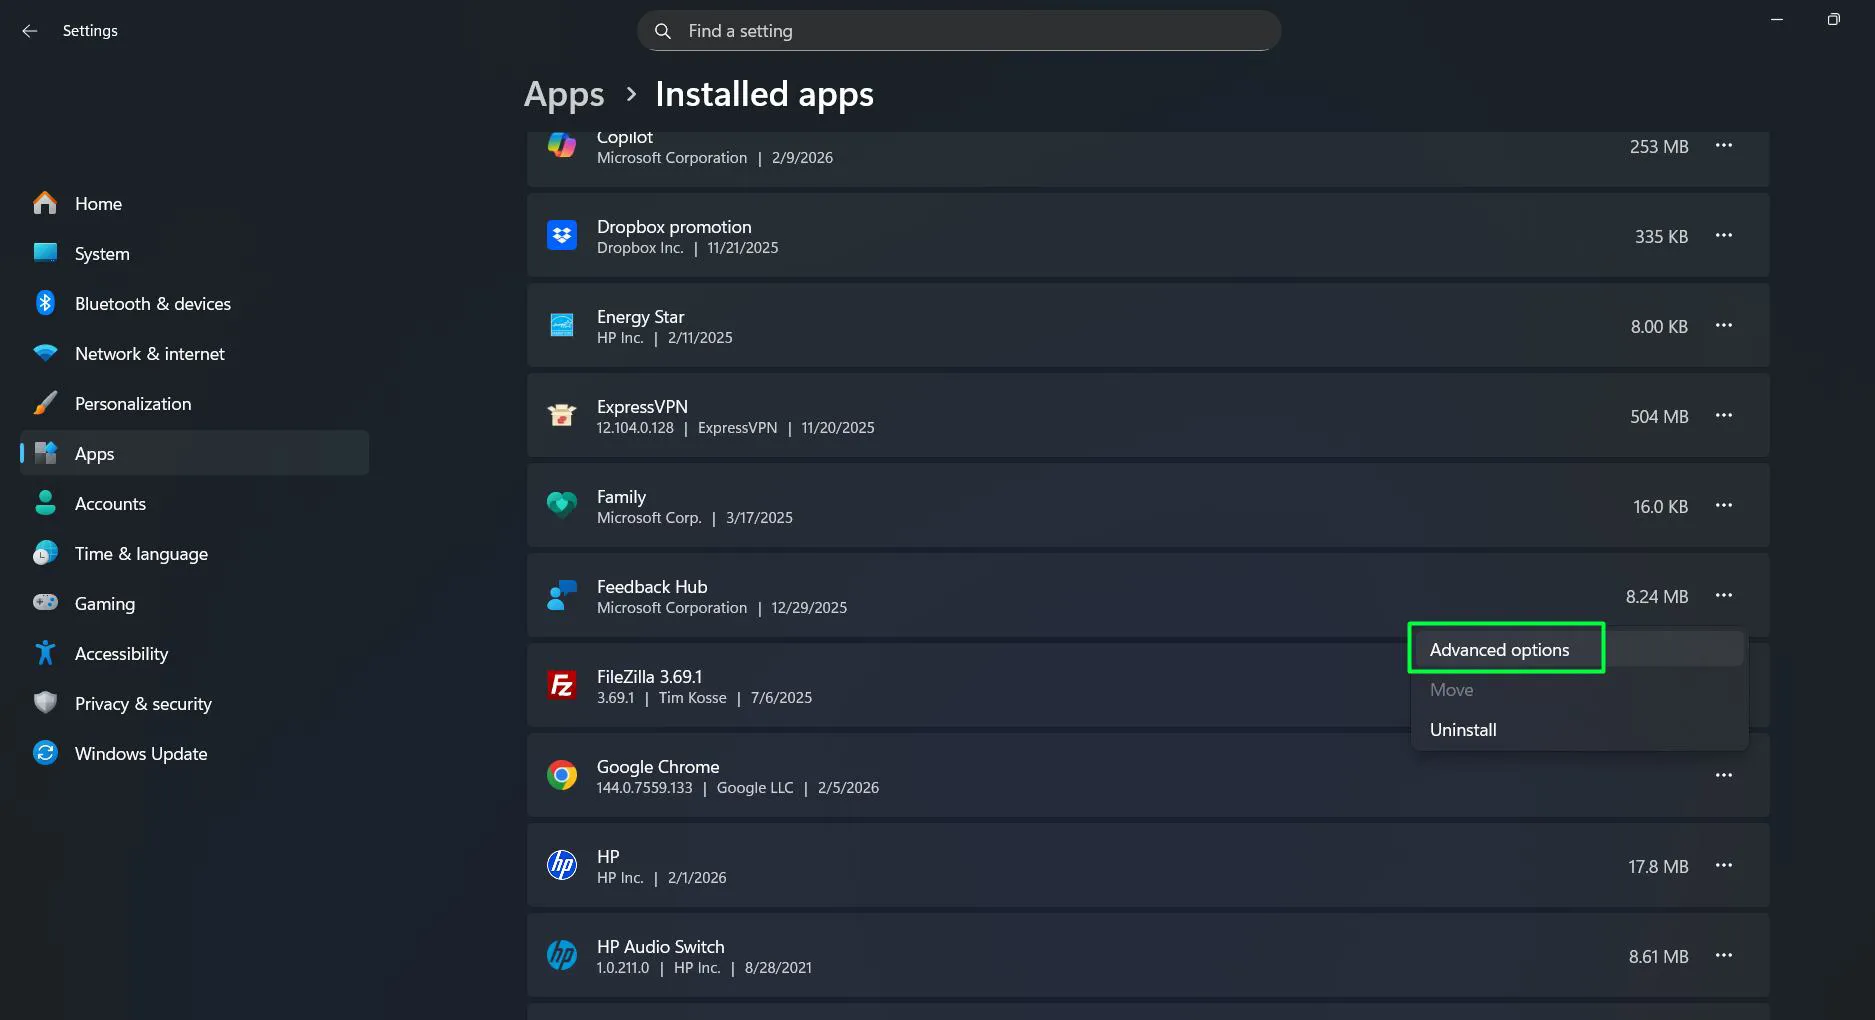
- Select ‘Advanced options’ (note: not all apps have this option)
- Scroll down to the ‘Reset’ section
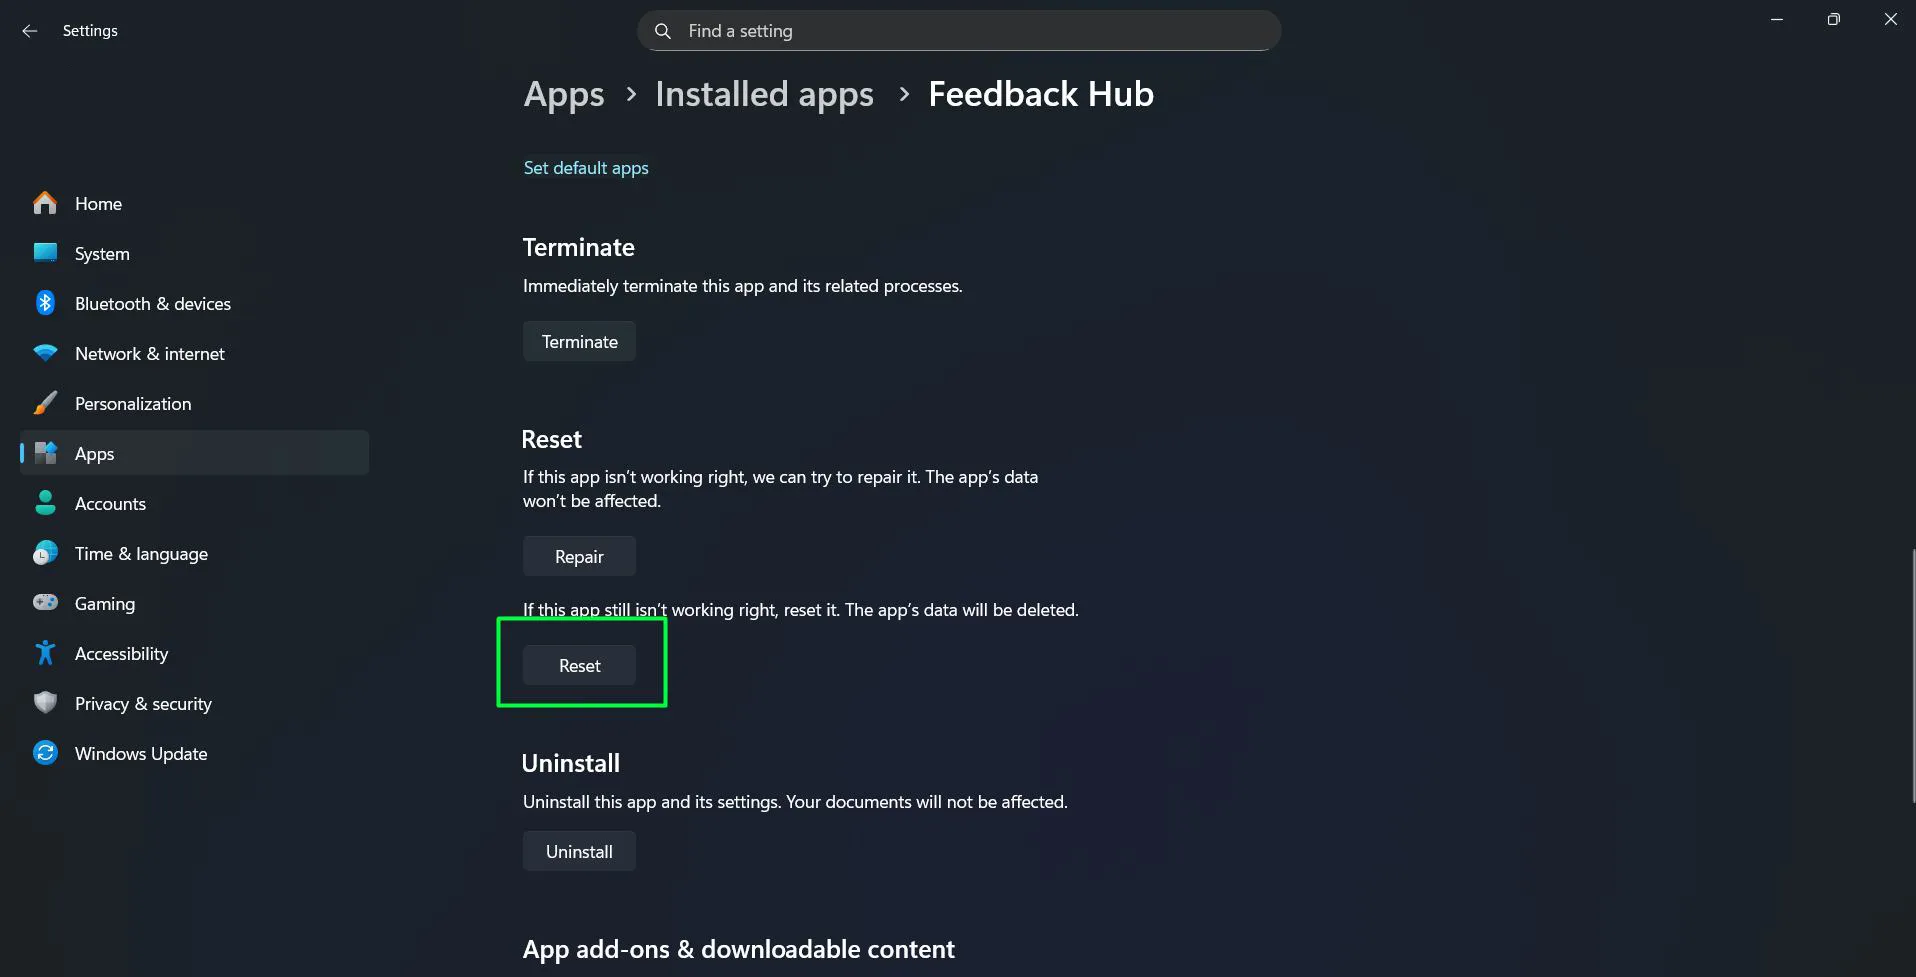
- Click the ‘Reset’ button under ‘Repair’ or use ‘Reset’ for a complete cache clear
- Confirm the action when prompted
The repair option attempts to fix app issues while preserving cache, whereas reset removes all app data including cache, returning the app to its original state.
Clearing Microsoft Store App Cache
Microsoft Store apps require a slightly different approach. The Store cache can become corrupted, causing download failures or app installation problems.
Watch this: Clearing Microsoft Store App Cache in Windows 11
Using WSReset Command
- Press Windows key + R to open the Run dialog
- Type ‘wsreset.exe’ in the text box
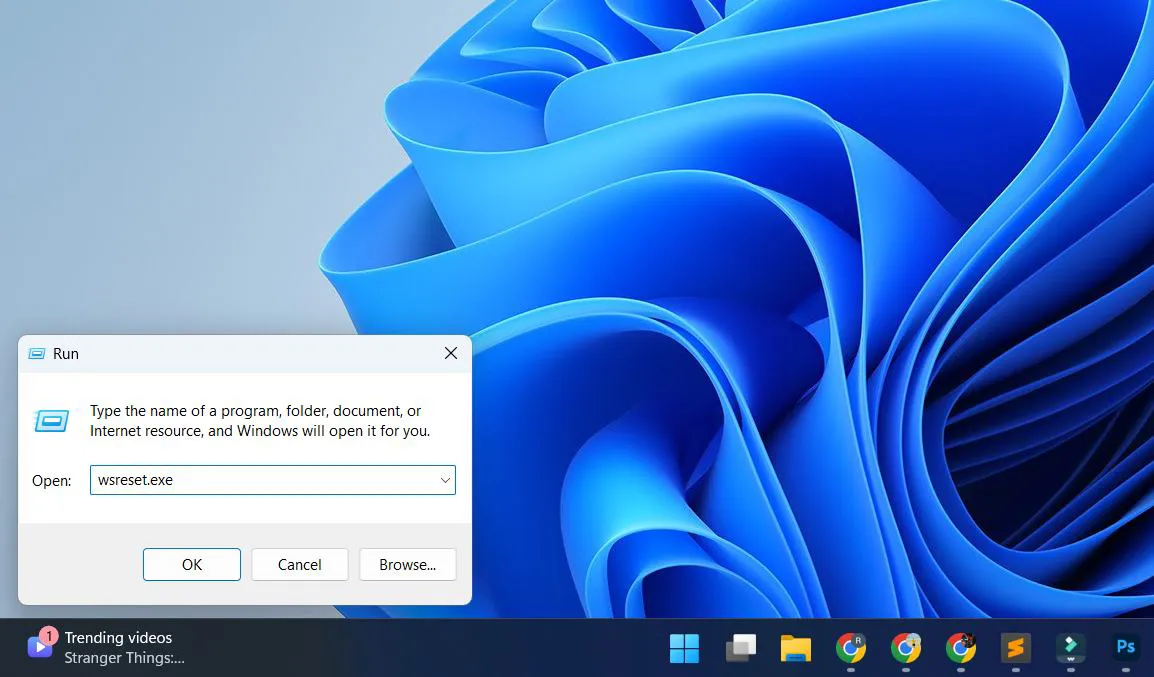
- Press Enter or click OK
- Wait for a blank Command Prompt window to appear and close automatically
- The Microsoft Store will open once the process completes
This command clears the Microsoft Store cache without affecting installed apps or their data. The entire process typically takes 10-15 seconds.
Clearing System Cache Files
Beyond individual app cache, Windows 11 accumulates system-wide temporary files that benefit from periodic clearing. For more detailed guidance on managing your Windows system, additional resources are available.
Using Disk Cleanup
- Press Windows key + S or click Windows Icon and type ‘Disk Cleanup’
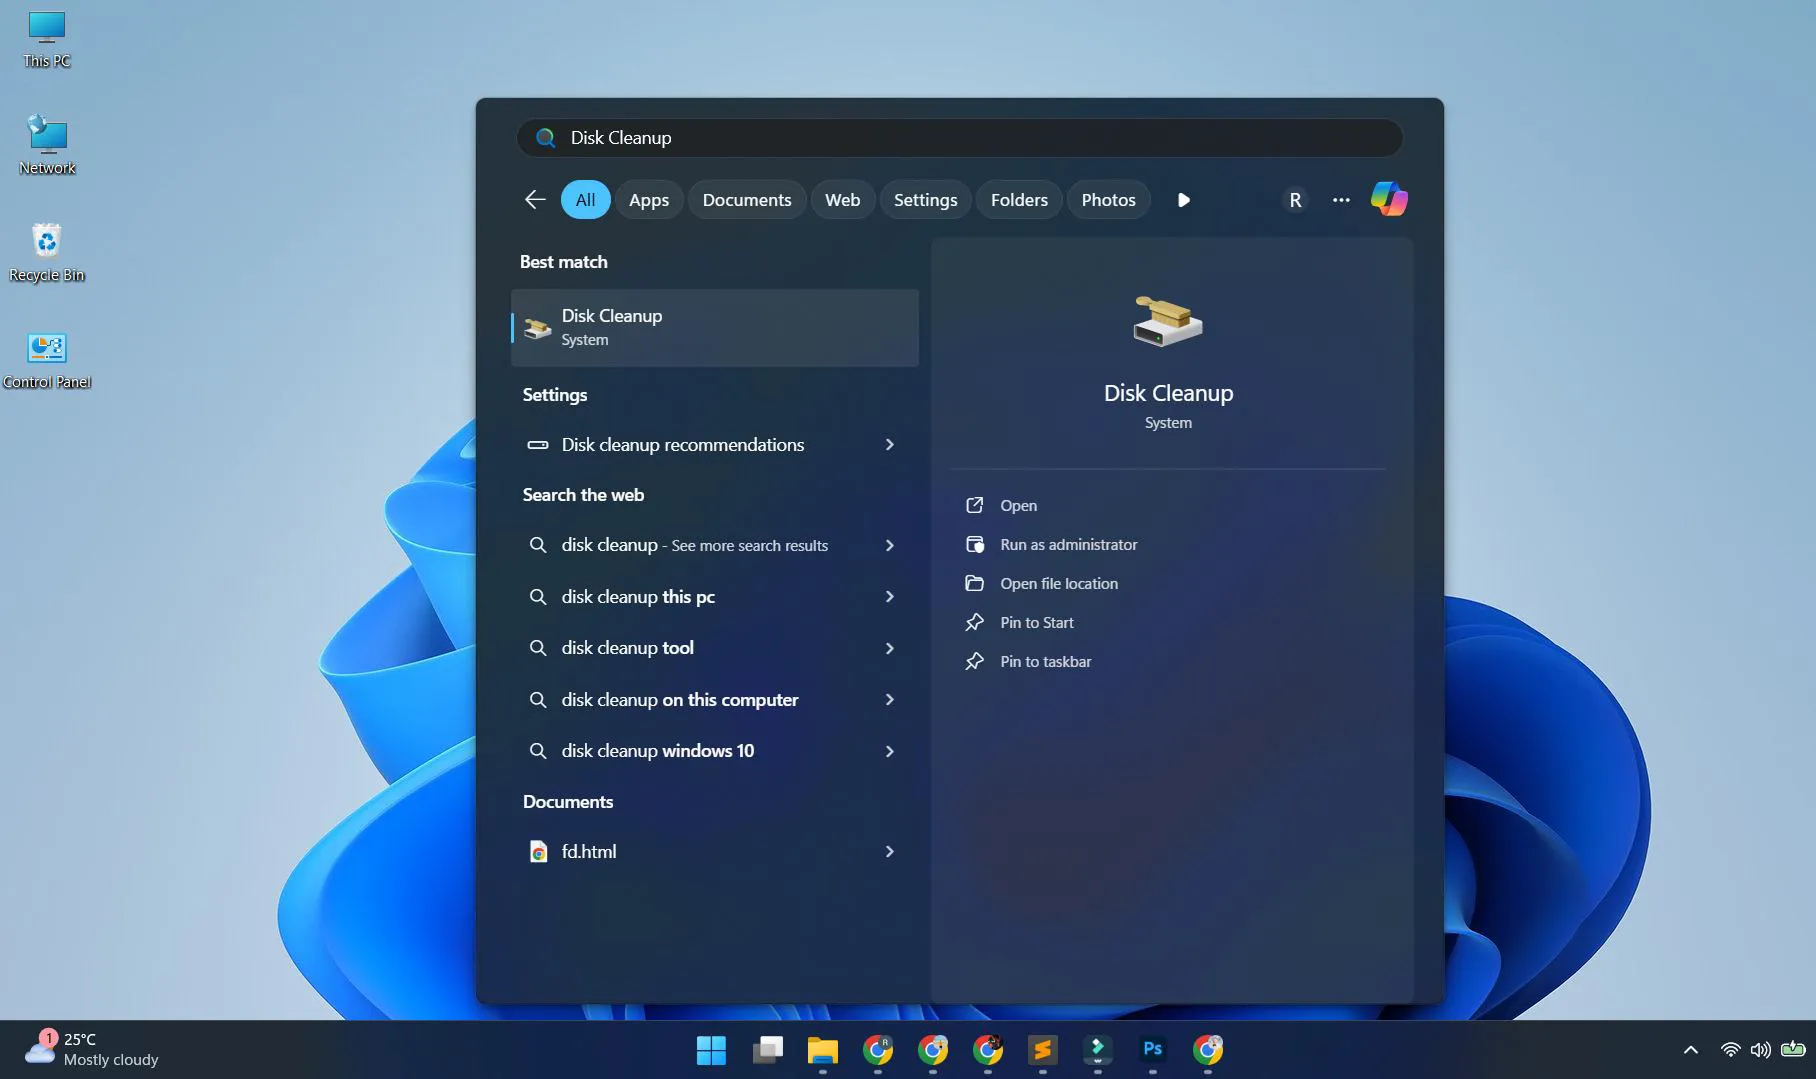
- Select ‘Disk Cleanup’ from the search results
- Choose the drive to clean (usually C:)
- Check the boxes next to ‘Temporary files’, ‘Temporary Internet Files’, and ‘Thumbnails’
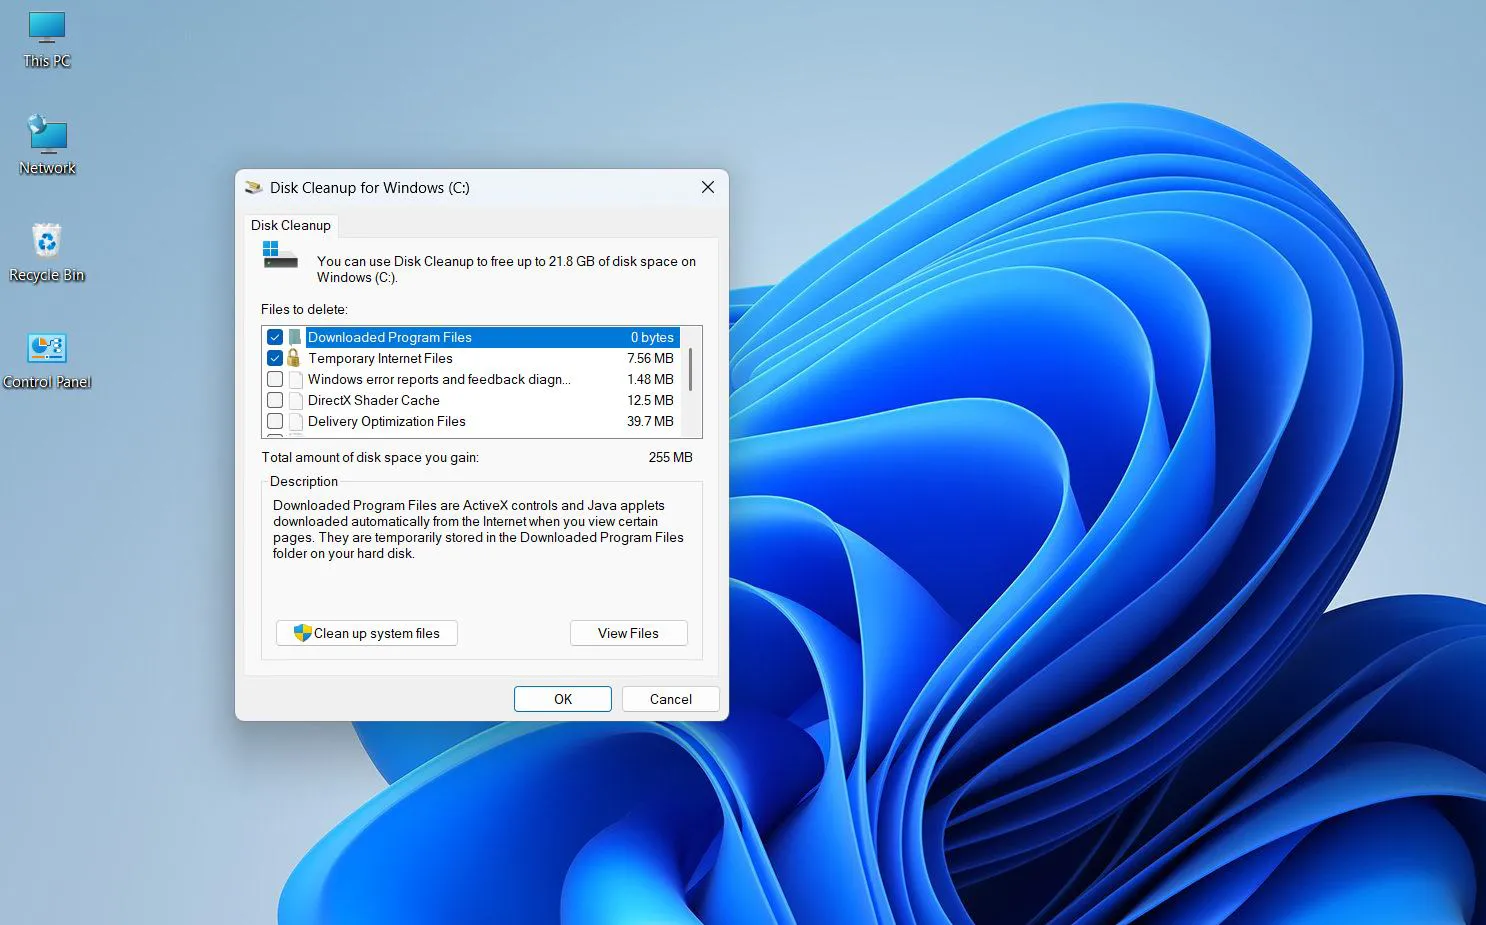
- Click ‘OK’ to proceed
- Confirm by clicking ‘Delete Files’
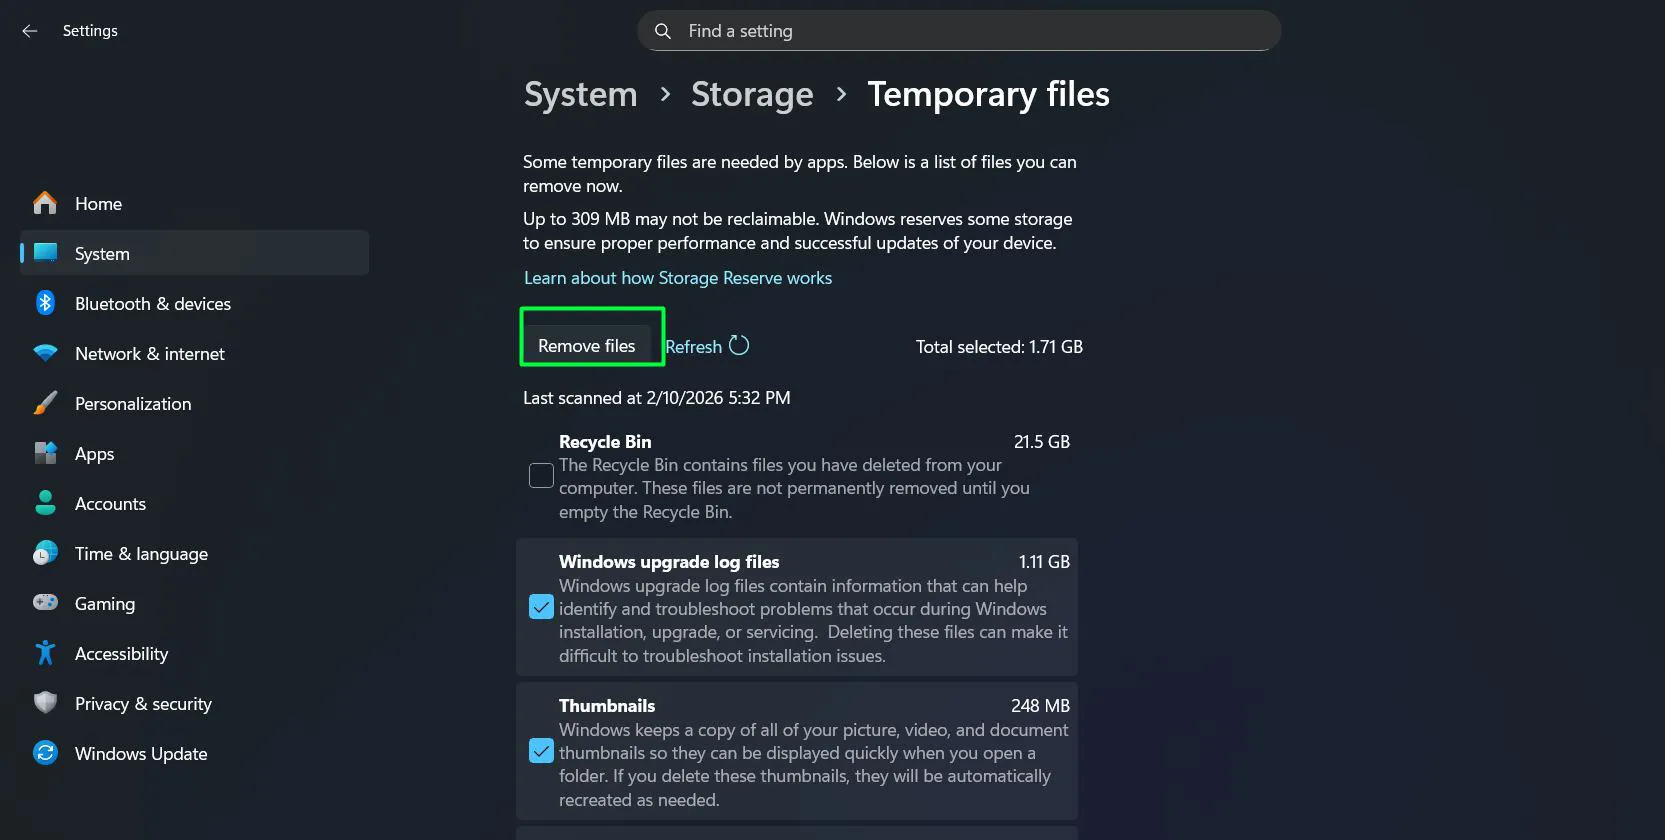
Using Storage Sense
- Open Settings (Windows key + I)
- Navigate to ‘System’ then ‘Storage’
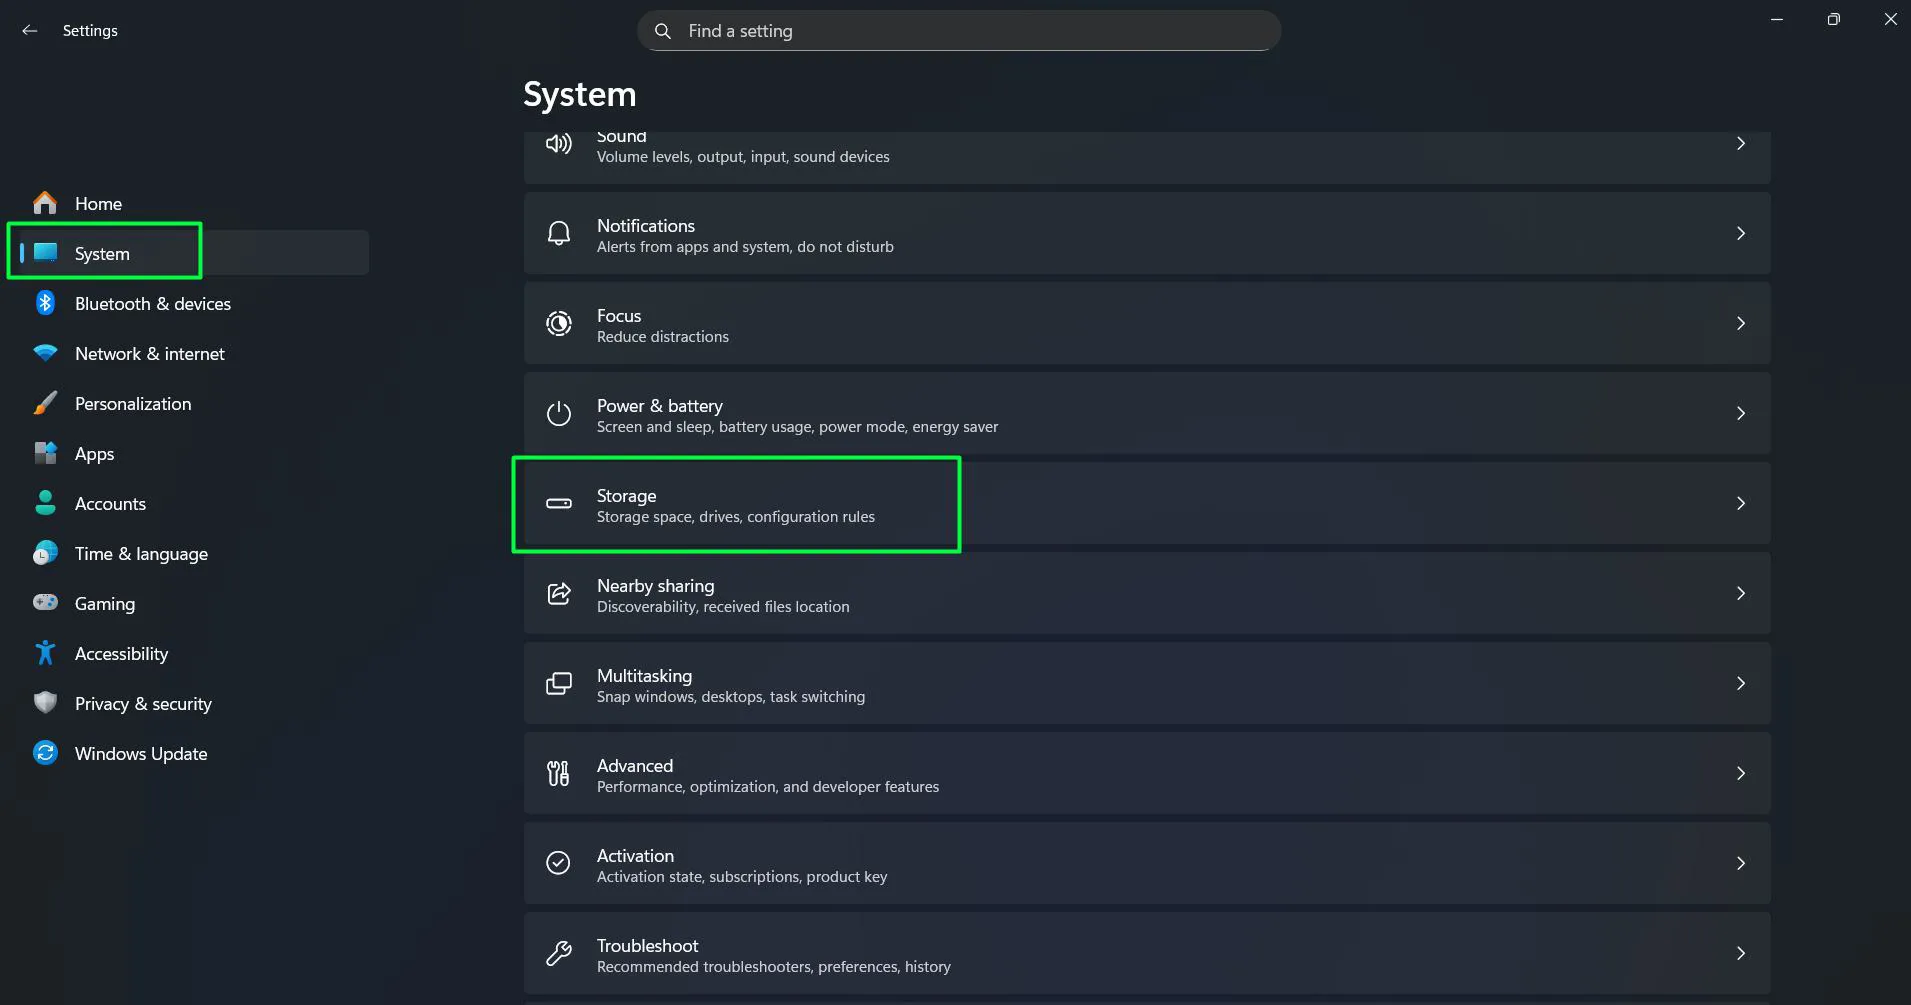
- Click on ‘Temporary files’

- Check all relevant items including ‘Temporary files’
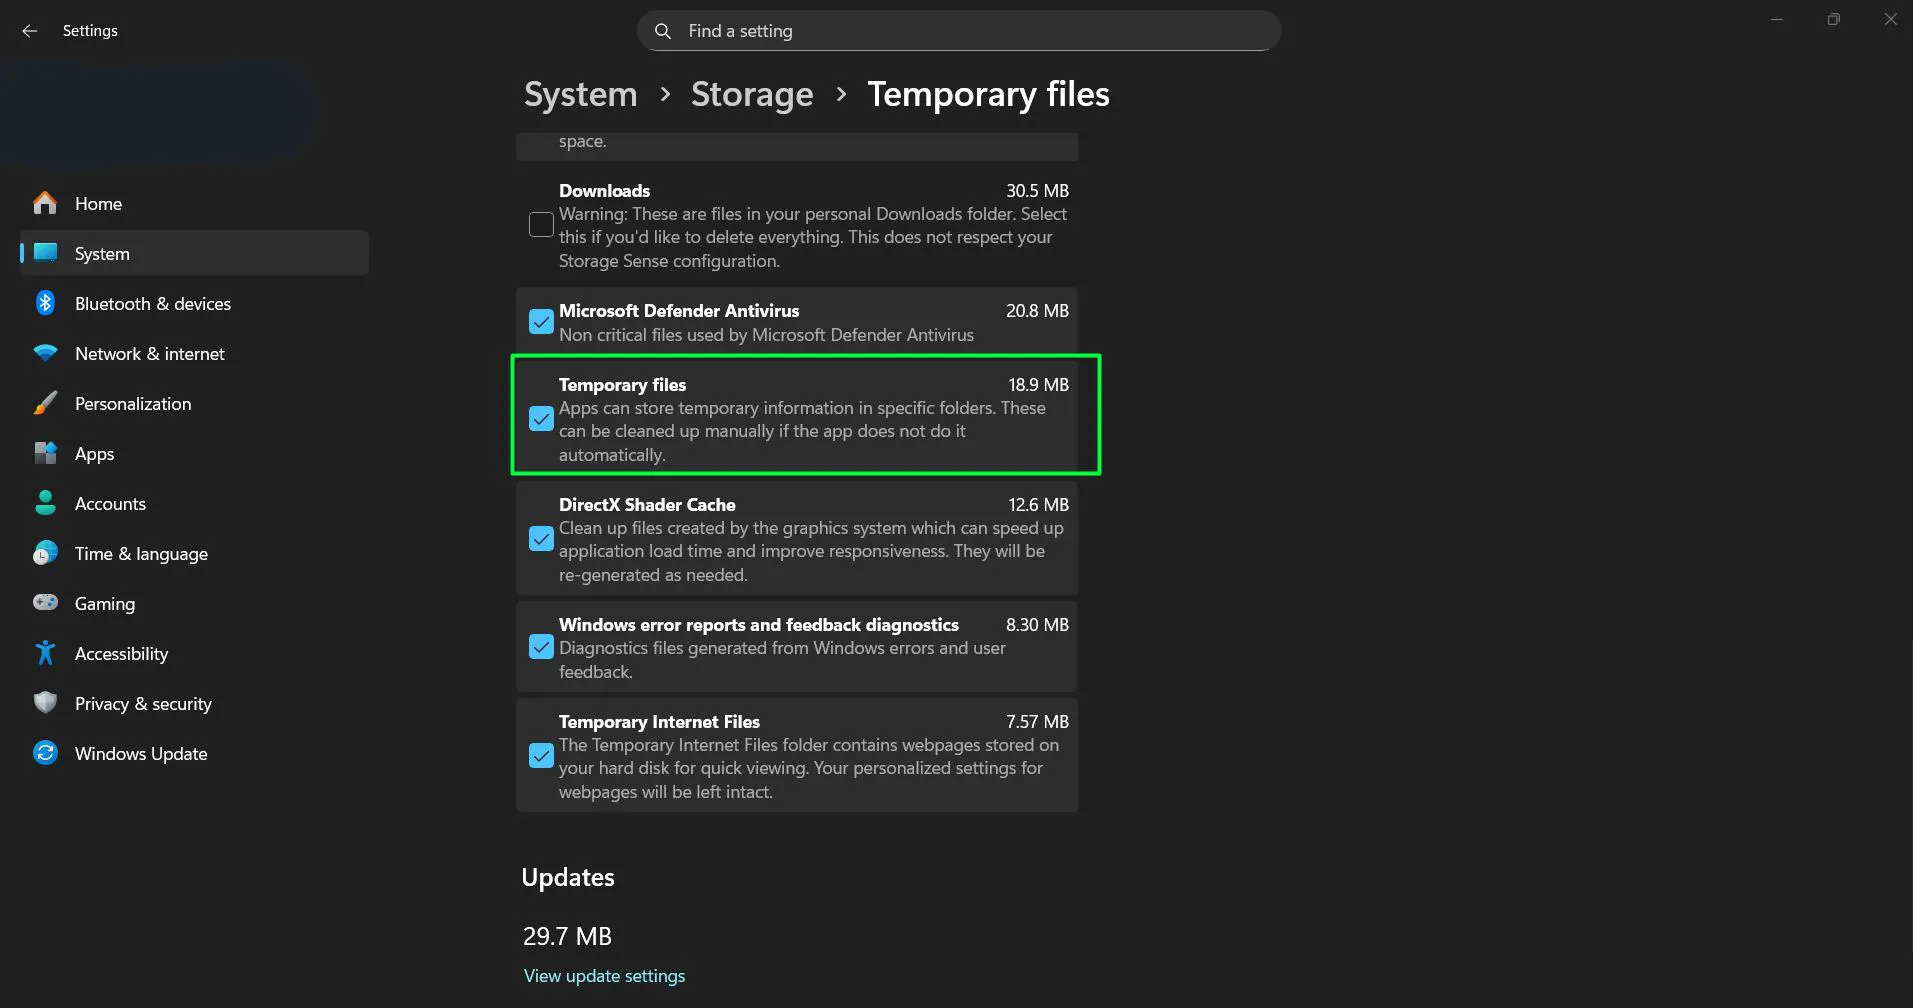
- Click ‘Remove files’ at the top
Storage Sense can also be configured to run automatically, clearing temporary files on a schedule. This works best when set to monthly intervals for most users.
Clearing Browser Cache
Web browsers store substantial cache data to speed up page loading. Each browser has its own cache clearing method.
Microsoft Edge
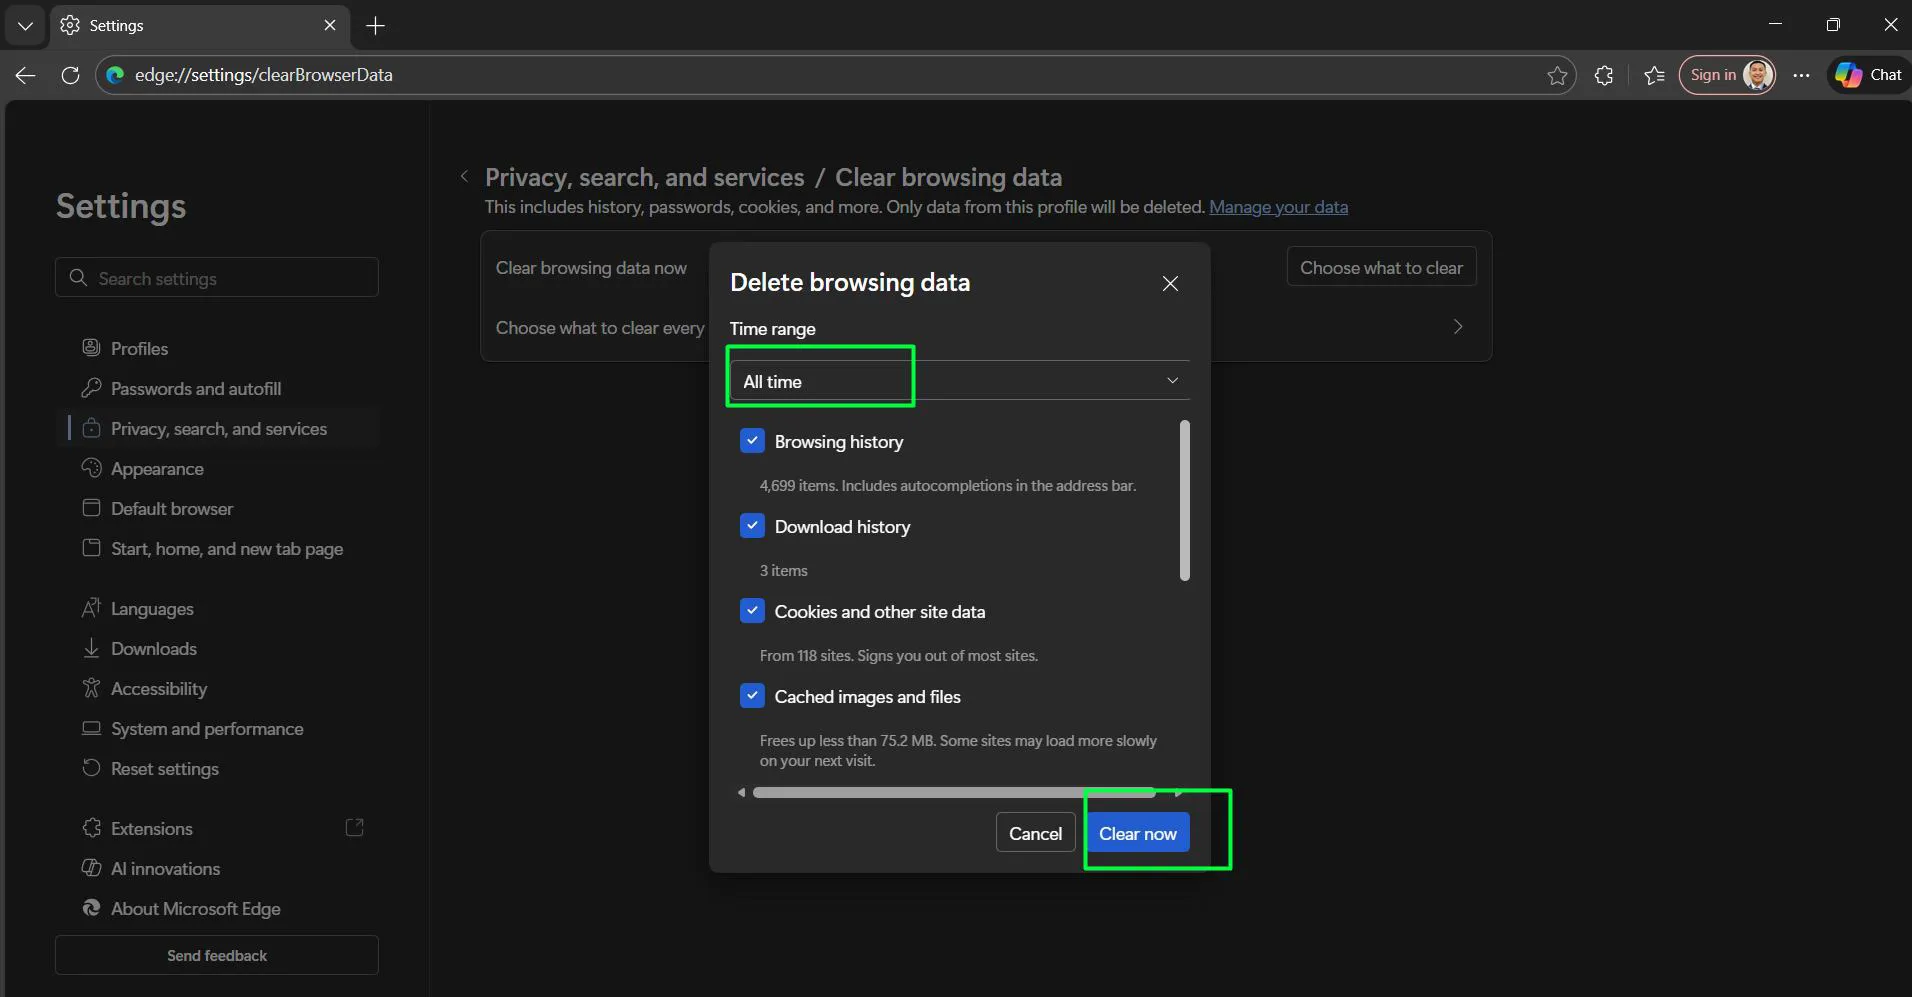
- Open Microsoft Edge
- Press Ctrl + Shift + Delete
- Select ‘All time’ from the Time range dropdown
- Check ‘Cached images and files’
- Click ‘Clear now’
Google Chrome
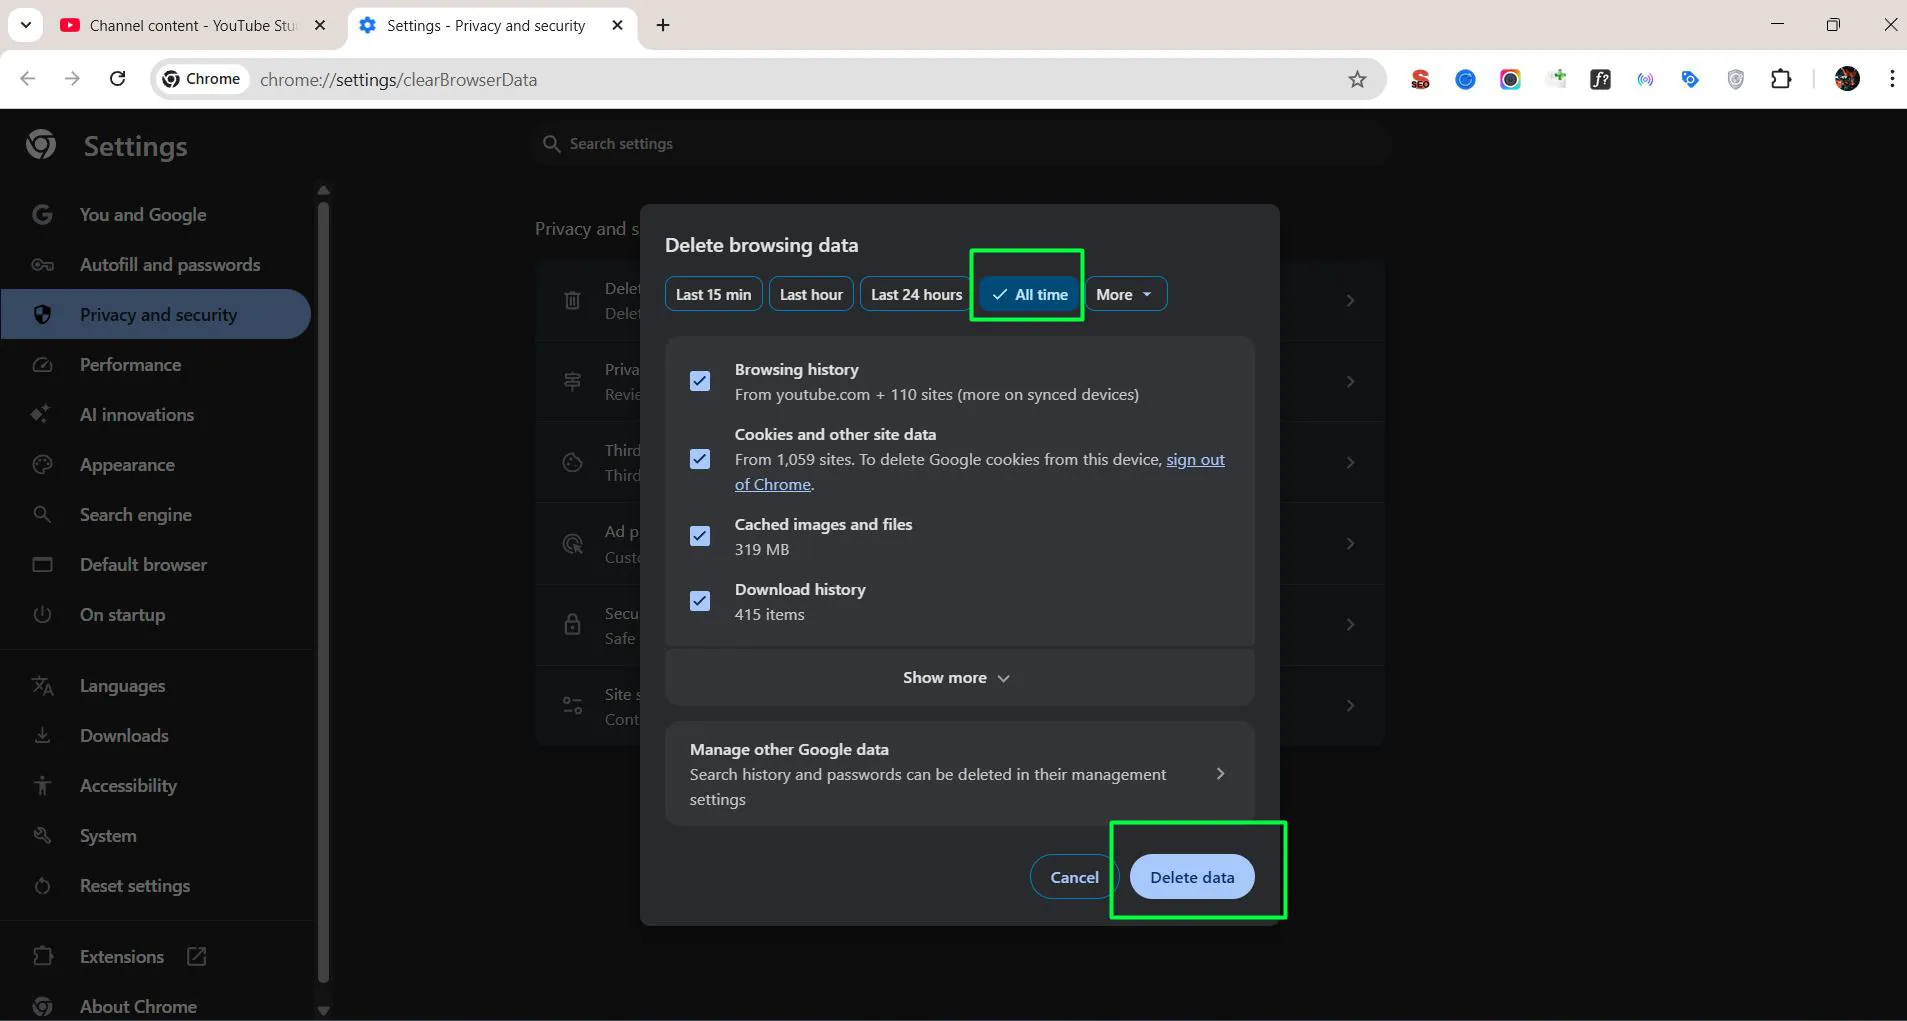
- Launch Google Chrome
- Press Ctrl + Shift + Delete
- Choose ‘All time’ for Time range
- Select ‘Cached images and files’
- Click ‘Clear data’
Browser cache clearing doesn’t log users out of websites when only cached files are selected, making it safe to perform regularly.
Clearing Location Cache
Windows 11 stores location data that some apps use. Clearing this cache can resolve location-related issues.
- Open Settings
- Go to ‘Privacy & security’
- Click ‘Location’ under App permissions
- Scroll down and click ‘Clear’ under Location history
Benefits of Regular Cache Clearing
Maintaining a regular cache clearing schedule provides several advantages. Applications load faster when outdated cache files are removed, and storage space becomes available for important files. Performance improvements are particularly noticeable on systems with limited storage capacity.
Most people find that monthly cache clearing strikes the right balance between maintaining performance and avoiding the minor inconvenience of apps rebuilding their cache. Systems with SSDs under 256GB benefit from more frequent clearing, perhaps every two weeks.
The process also helps resolve mysterious app behavior. When an application crashes unexpectedly or displays outdated information, clearing its cache often resolves the issue without requiring a full reinstall. Those managing various software applications will find this particularly useful.
What Happens After Clearing Cache
After cache deletion, applications need to rebuild their temporary files during first launch. This means apps might take slightly longer to open initially, but performance typically improves afterward. Login credentials remain saved unless the reset option was used instead of repair.
Websites visited through browsers will load fresh content, which might result in longer initial page load times. However, this ensures the most current version of web pages appears, eliminating issues caused by outdated cached content.
System-wide cache clearing frees up disk space immediately visible in File Explorer. The amount recovered varies based on how long since the last cleaning, but several gigabytes is common for systems that haven’t been maintained in months.
Frequently Asked Questions
Does clearing app cache delete personal files or app settings?
No, clearing cache only removes temporary files that apps create for faster performance. Personal documents, photos, saved passwords, and app settings remain untouched. The repair option preserves all app data while attempting to fix issues.
How often should cache be cleared on Windows 11?
Monthly cache clearing works well for most users. Systems with limited storage (under 256GB) benefit from clearing cache every two weeks. Computers with ample storage space can extend this to every two or three months without noticeable issues.
Will clearing cache speed up Windows 11?
Yes, clearing cache can improve system performance, especially when storage space is limited. Removing accumulated temporary files frees up disk space and can help apps run more smoothly. The performance gain is most noticeable on systems where storage is nearly full.
Can cache clearing fix app crashes in Windows 11?
Cache clearing often resolves app crashes caused by corrupted temporary files. When an app behaves unexpectedly or crashes repeatedly, clearing its cache should be one of the first solutions attempted before reinstalling the application completely.
Is it safe to clear all temporary files in Disk Cleanup?
Yes, all items listed in Disk Cleanup are safe to remove. Windows protects critical system files from deletion through this utility. Clearing temporary files, thumbnails, and cached content poses no risk to system stability or important data.
Does clearing browser cache log me out of websites?
No, clearing only cached images and files keeps login sessions active. To remain logged in, avoid selecting ‘Cookies and other site data’ when clearing cache. This allows cache removal without the inconvenience of re-entering credentials on every website.