Changing display language preferences easily in Windows allows the entire operating system interface to appear in a preferred language. This includes menus, settings, system messages, and built-in applications. The process takes just a few minutes and doesn’t require any additional software or technical expertise.
Accessing Language Settings in Windows 11
Windows provides a centralized location for all language-related configurations. The Settings app serves as the primary hub for adjusting display language preferences.
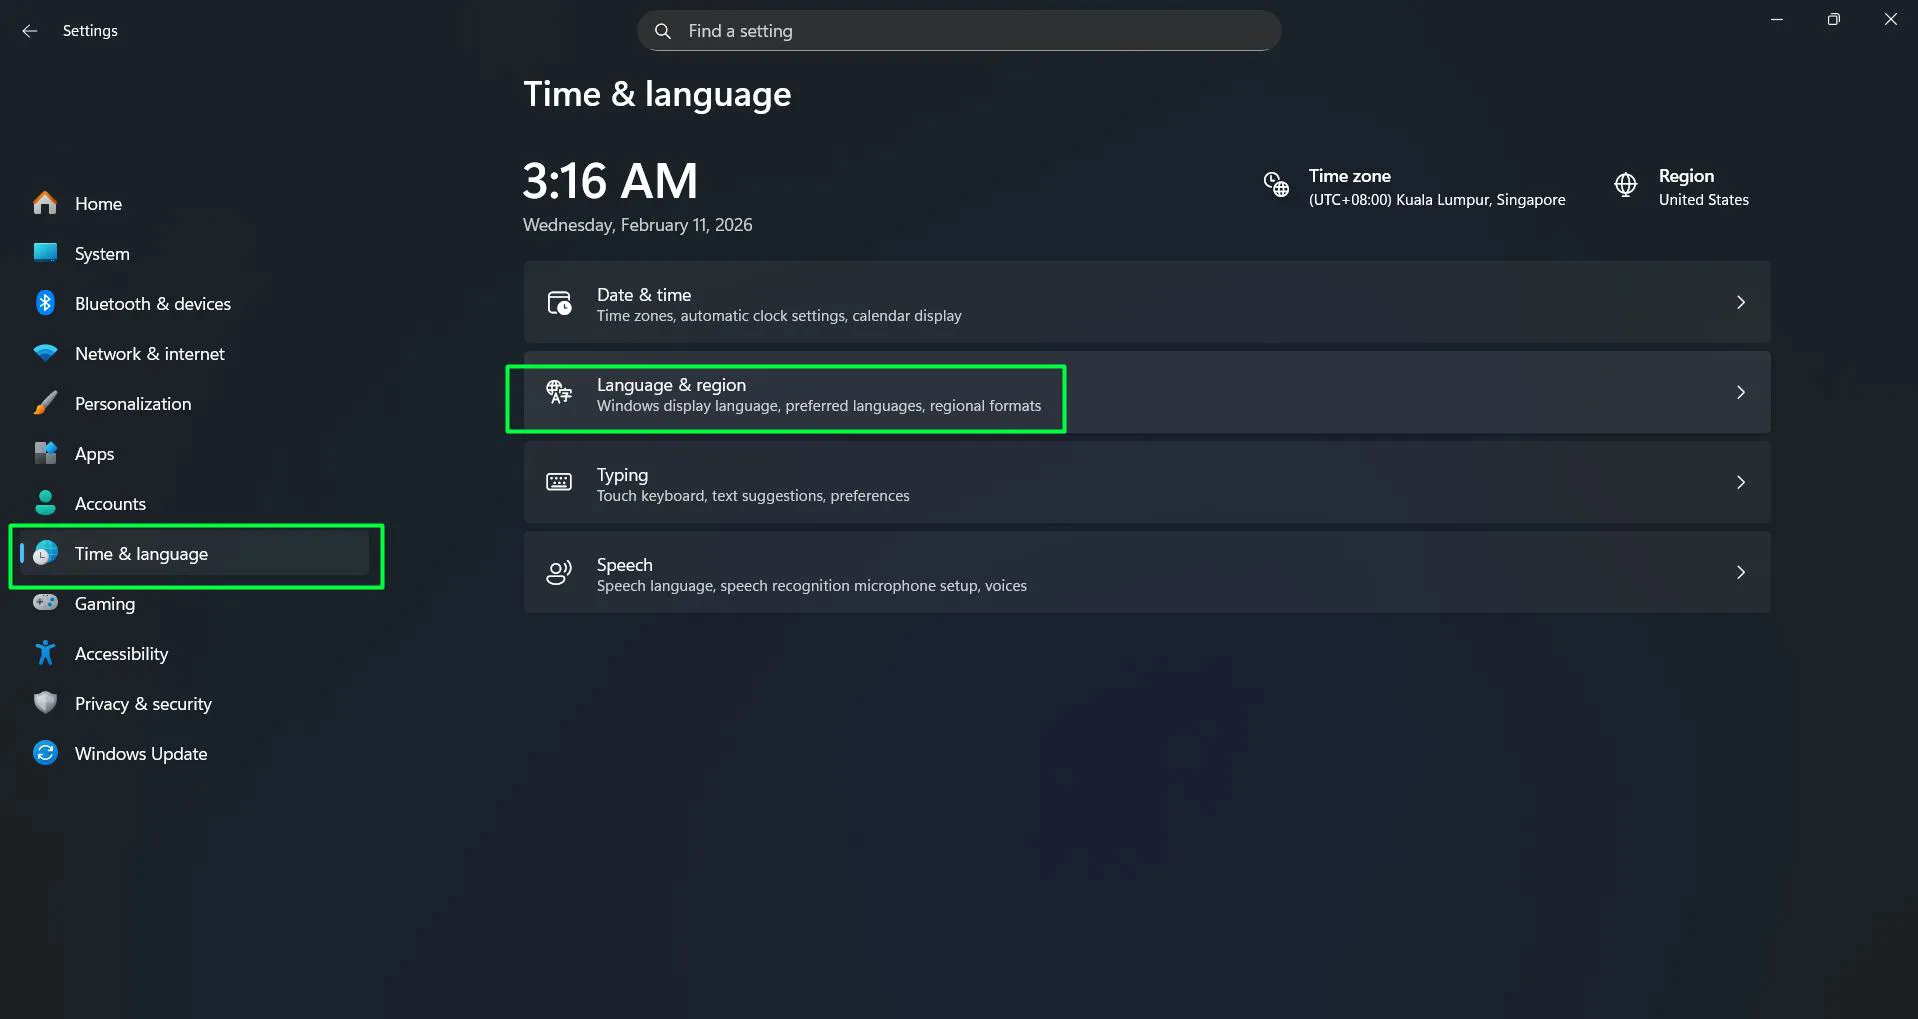
To begin, click the Start button and select the gear icon to open Settings. Alternatively, press Windows key + I as a quick shortcut. Once Settings opens, navigate to the Time & Language section. This area contains all language and regional format options.
Watch this: How to Change Display Language Preferences Easily in Windows 11
Adding a New Display Language
Before switching the display language, the desired language pack must be installed on the system. Windows 11 makes this straightforward through its language management interface.
- Open Settings – Press Windows key + I as a quick shortcut. Alternatively, click the Start button and select Settings (gear icon).
- Navigate to Time & Language – Once Settings opens, click on “Time & Language” from the main menu.
- Access Language & Region – Click on “Language & region” in the left sidebar.
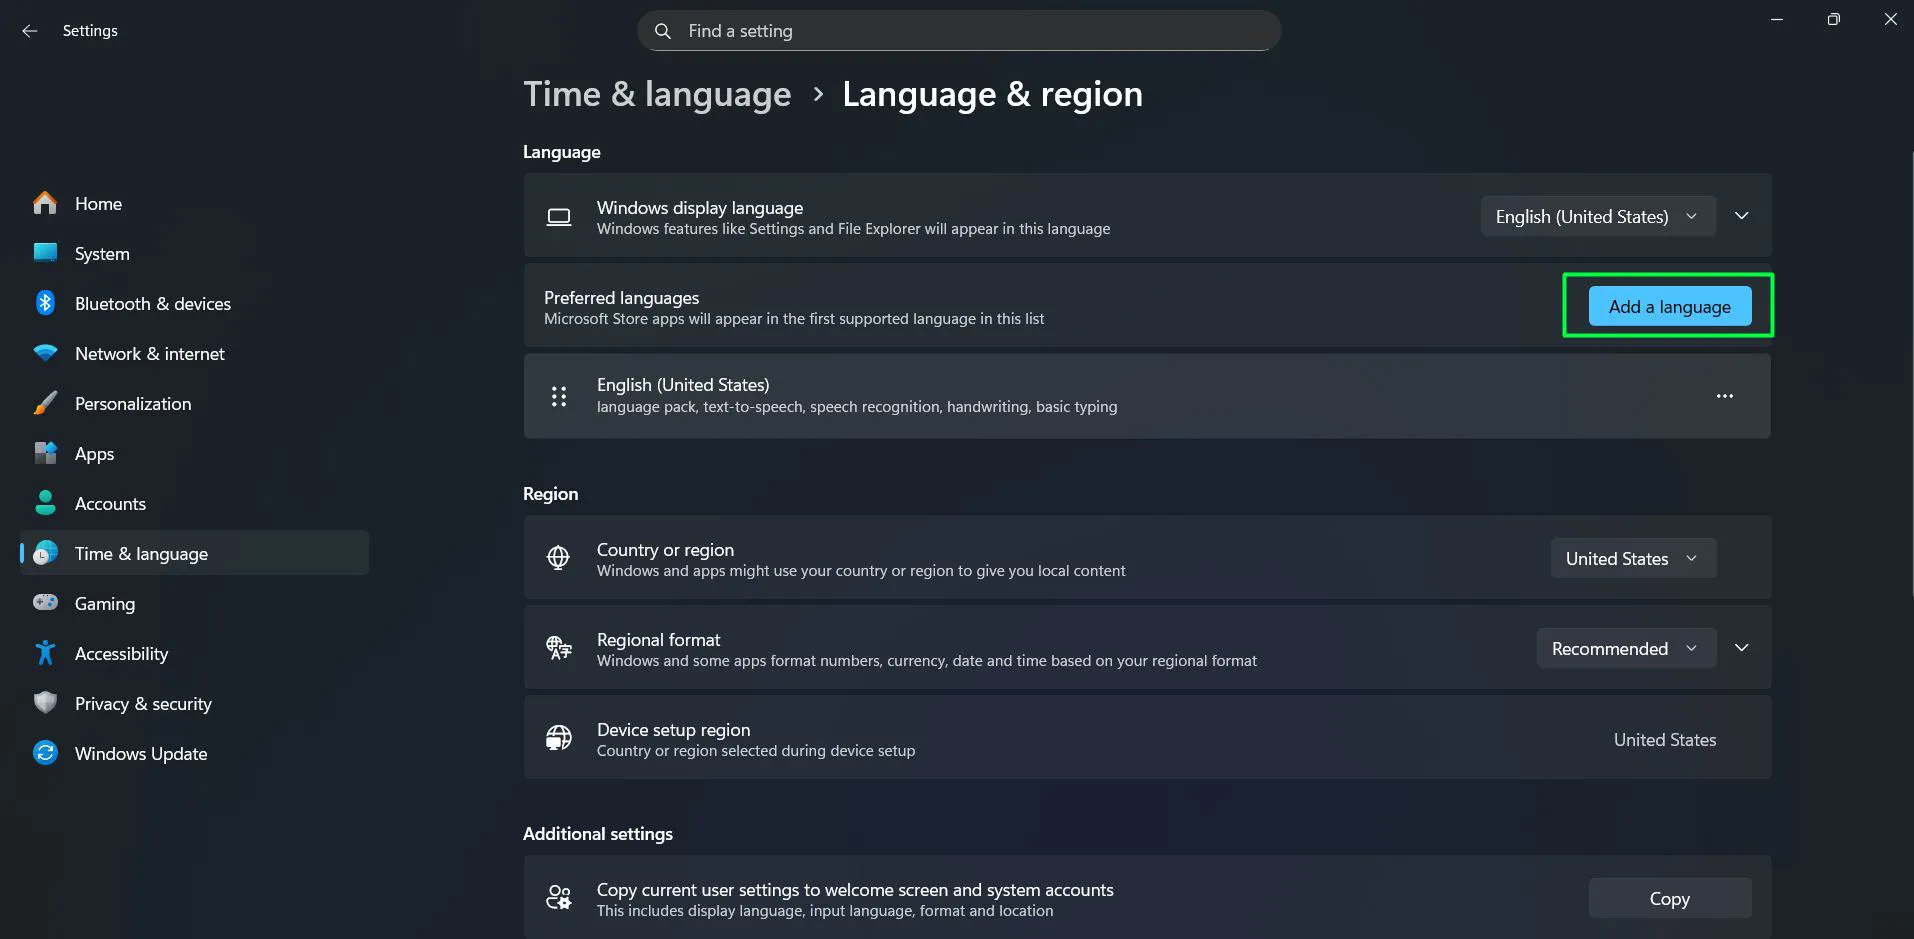
- Locate Preferred Languages – Scroll down to find the “Preferred languages” section.
- Add a Language – Click the “Add a language” button.
- Select Your Language – Browse or search for the desired language from the list.
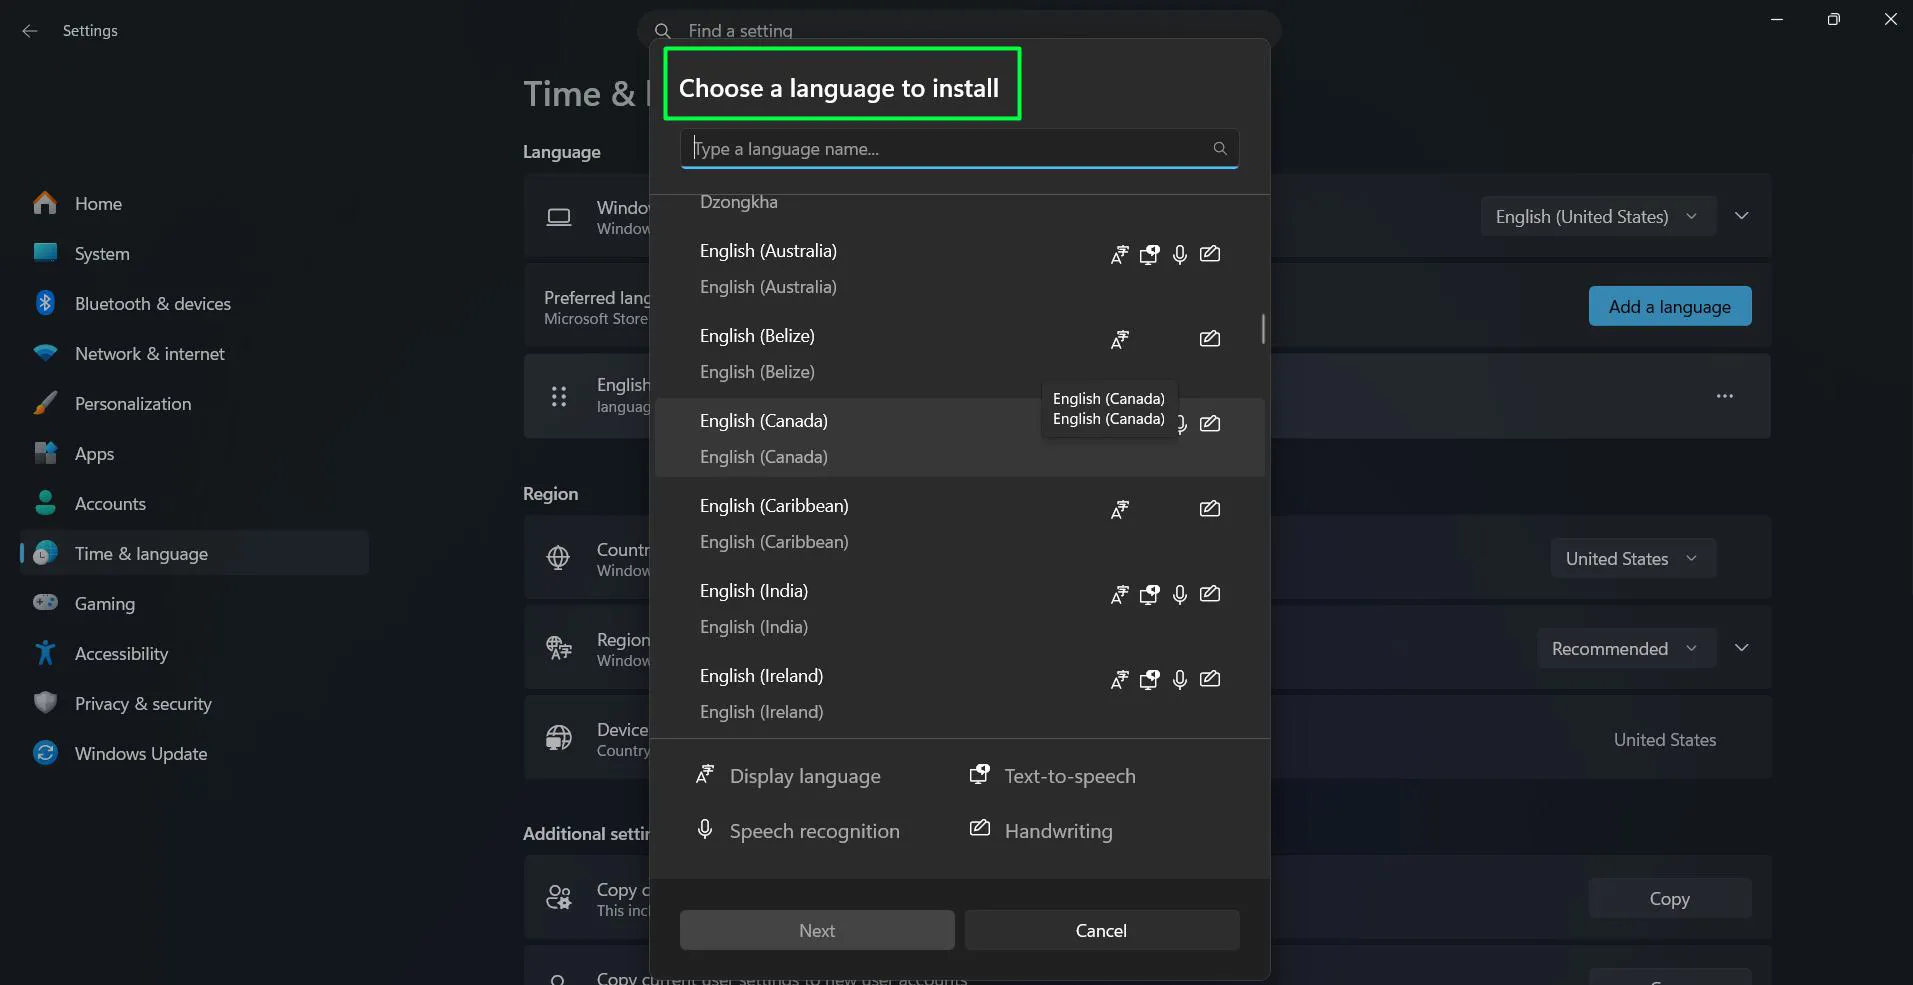
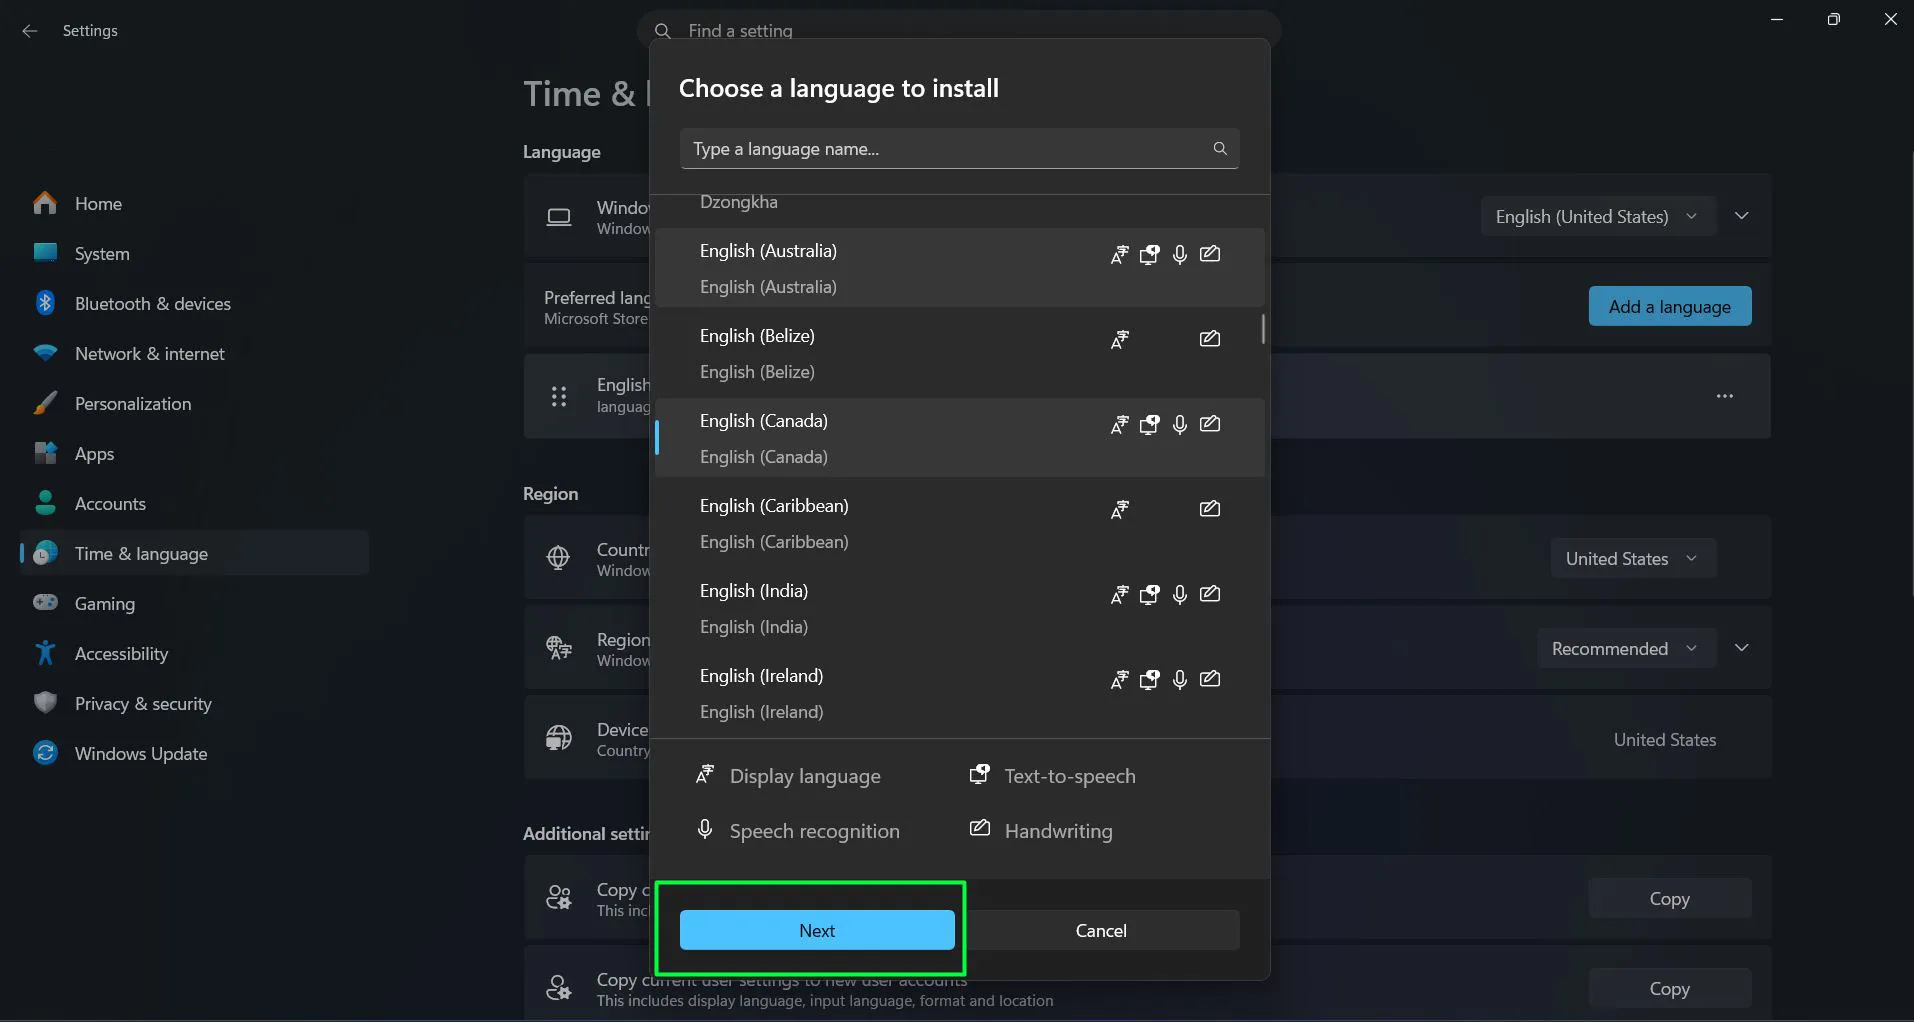
- Proceed – Select the language and click “Next.”
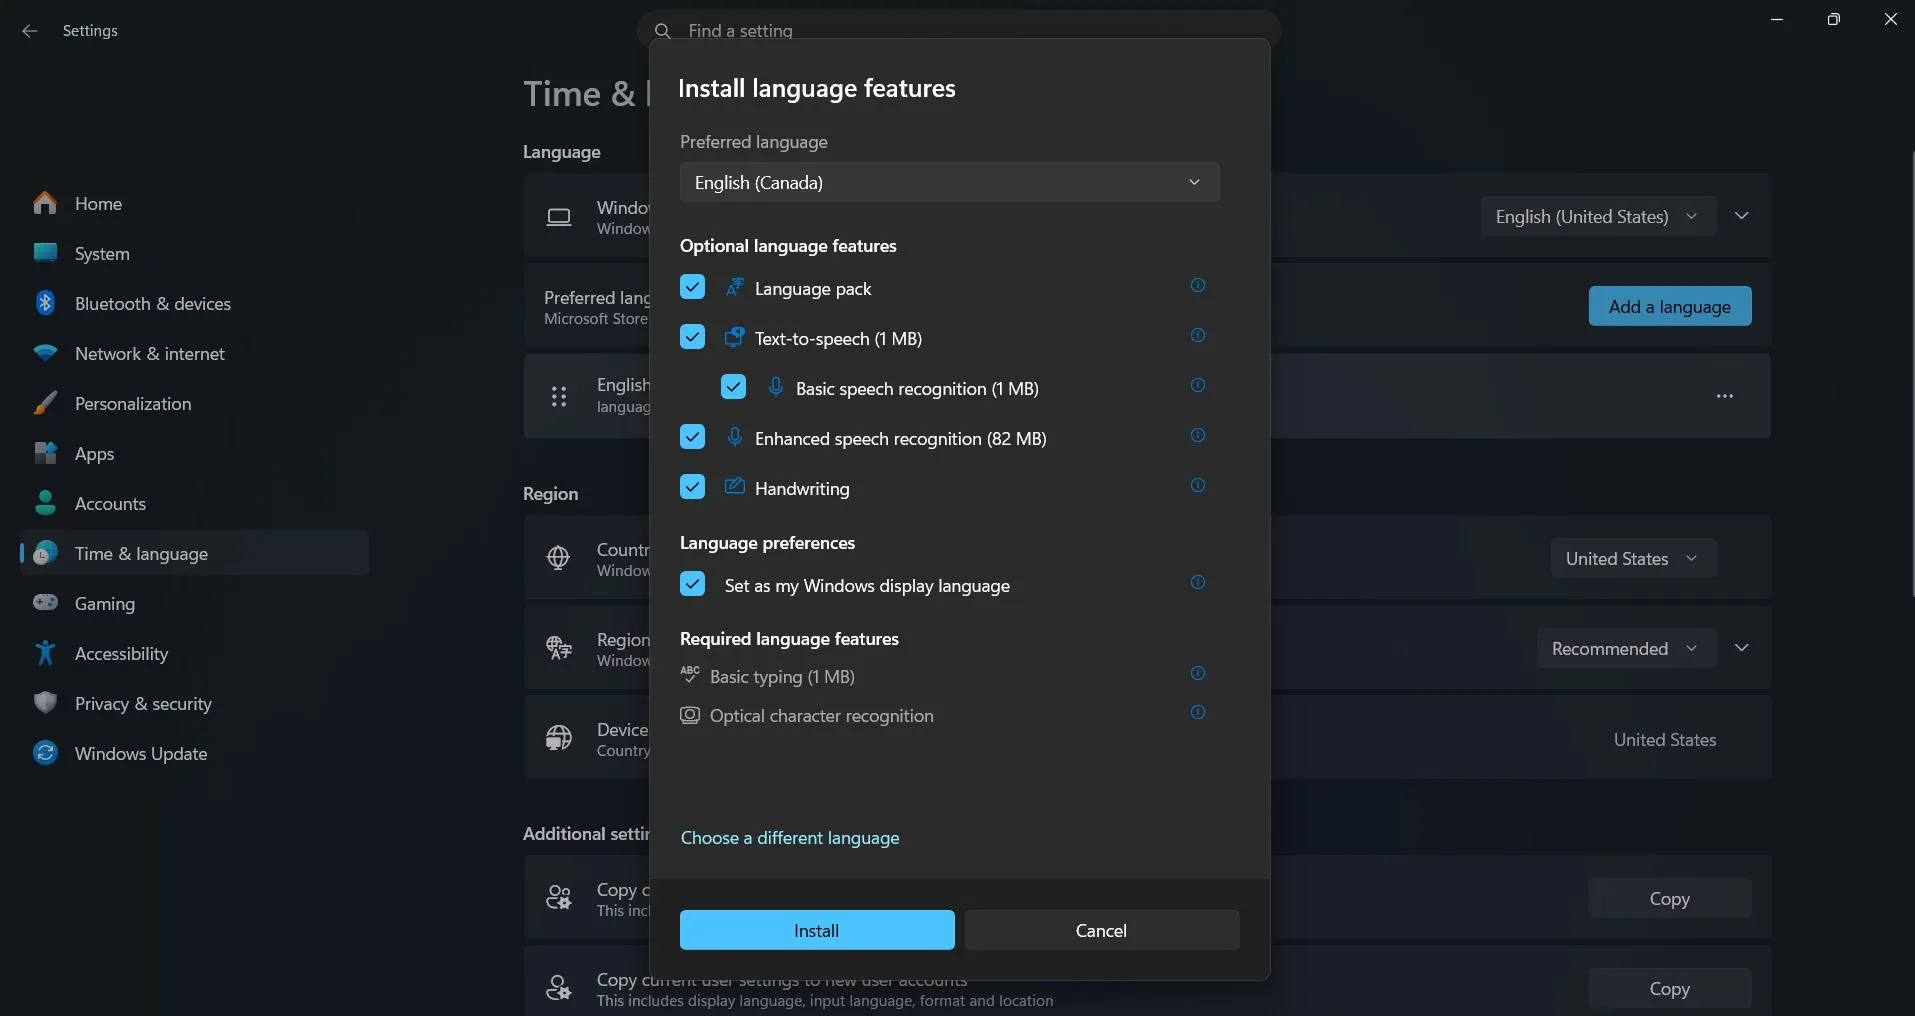
- Configure Options –
- Check the box for “Set as my Windows display language” if available
- Select any optional features needed (handwriting, speech, text-to-speech, etc.)
- Install – Click “Install” to download and install the language pack.
The download time varies depending on internet speed and the size of the language pack. Most language packs range from 50 MB to 200 MB. The system will show download progress in the language settings area.
Setting the Display Language
After the language pack installation completes, it needs to be set as the active display language. This tells Windows which language to use for all system interfaces.
- Return to Settings > Time & Language > Language & region
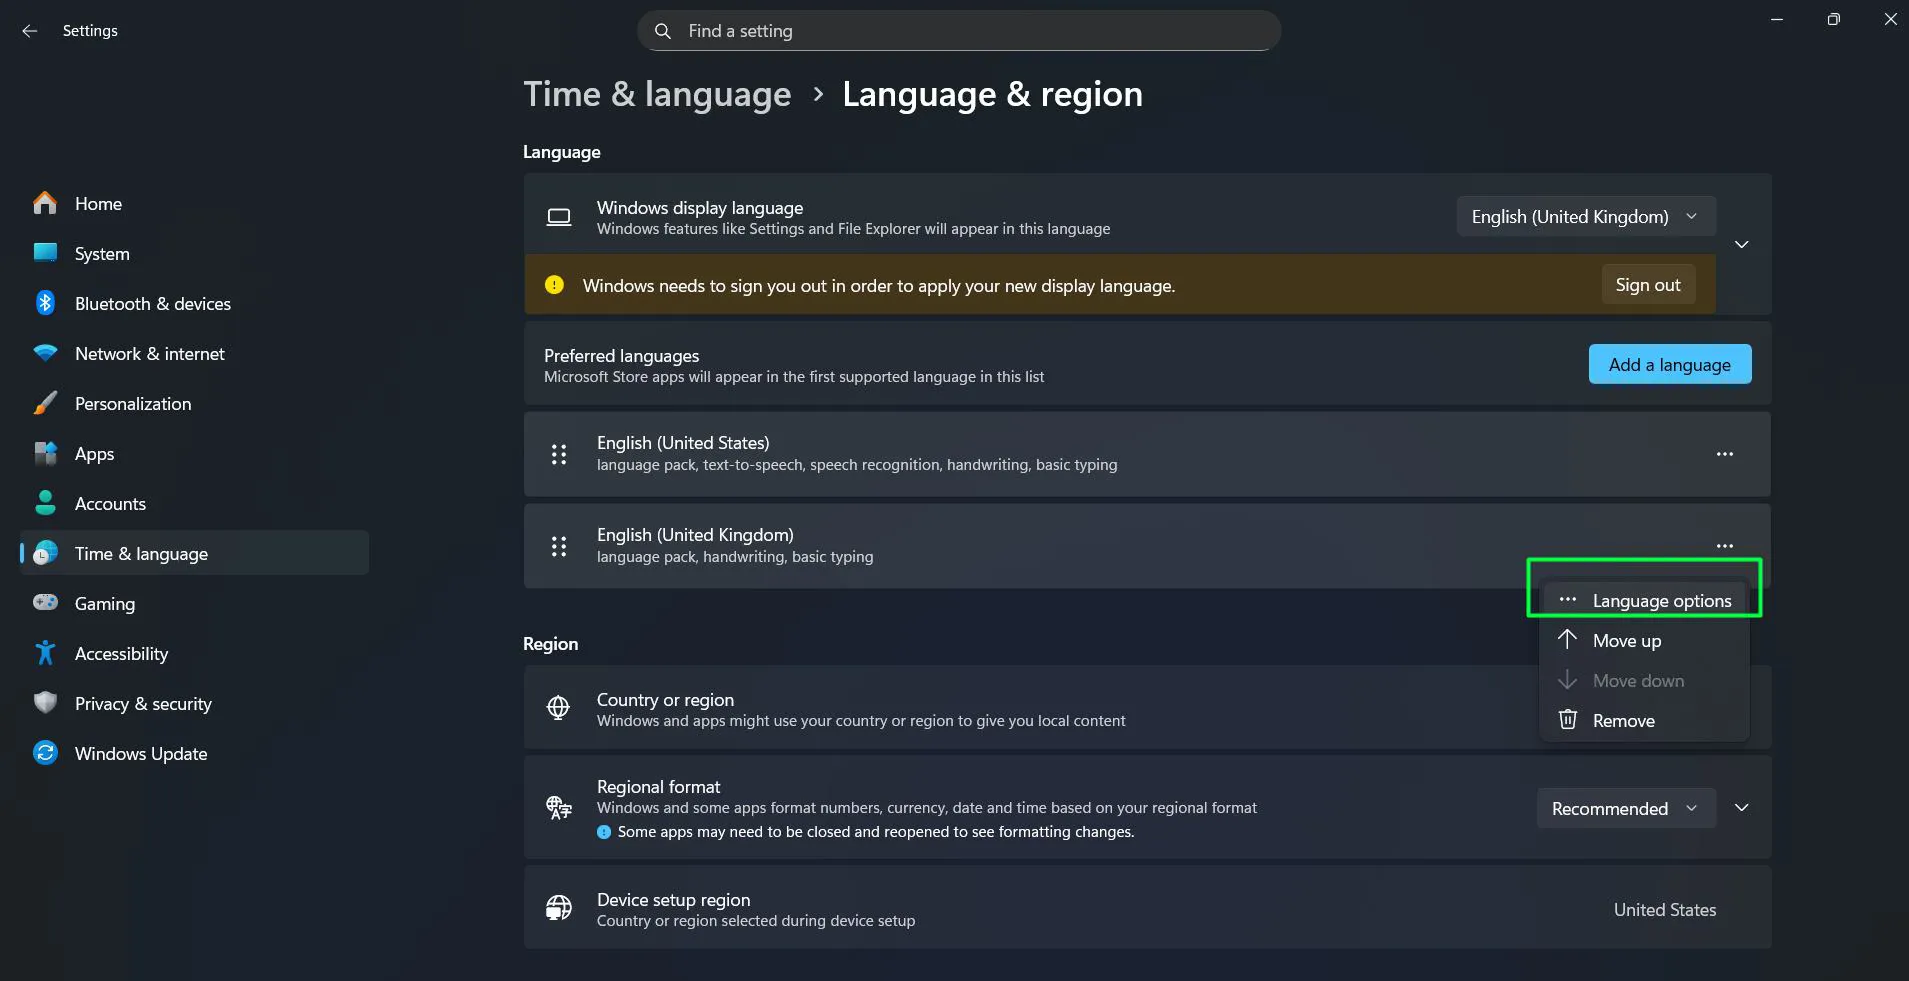
- Find the newly installed language in the ‘Preferred languages’ list
- Click the three-dot menu next to the language
- Select ‘Language options’
- Verify that ‘Language Features’ shows as installed
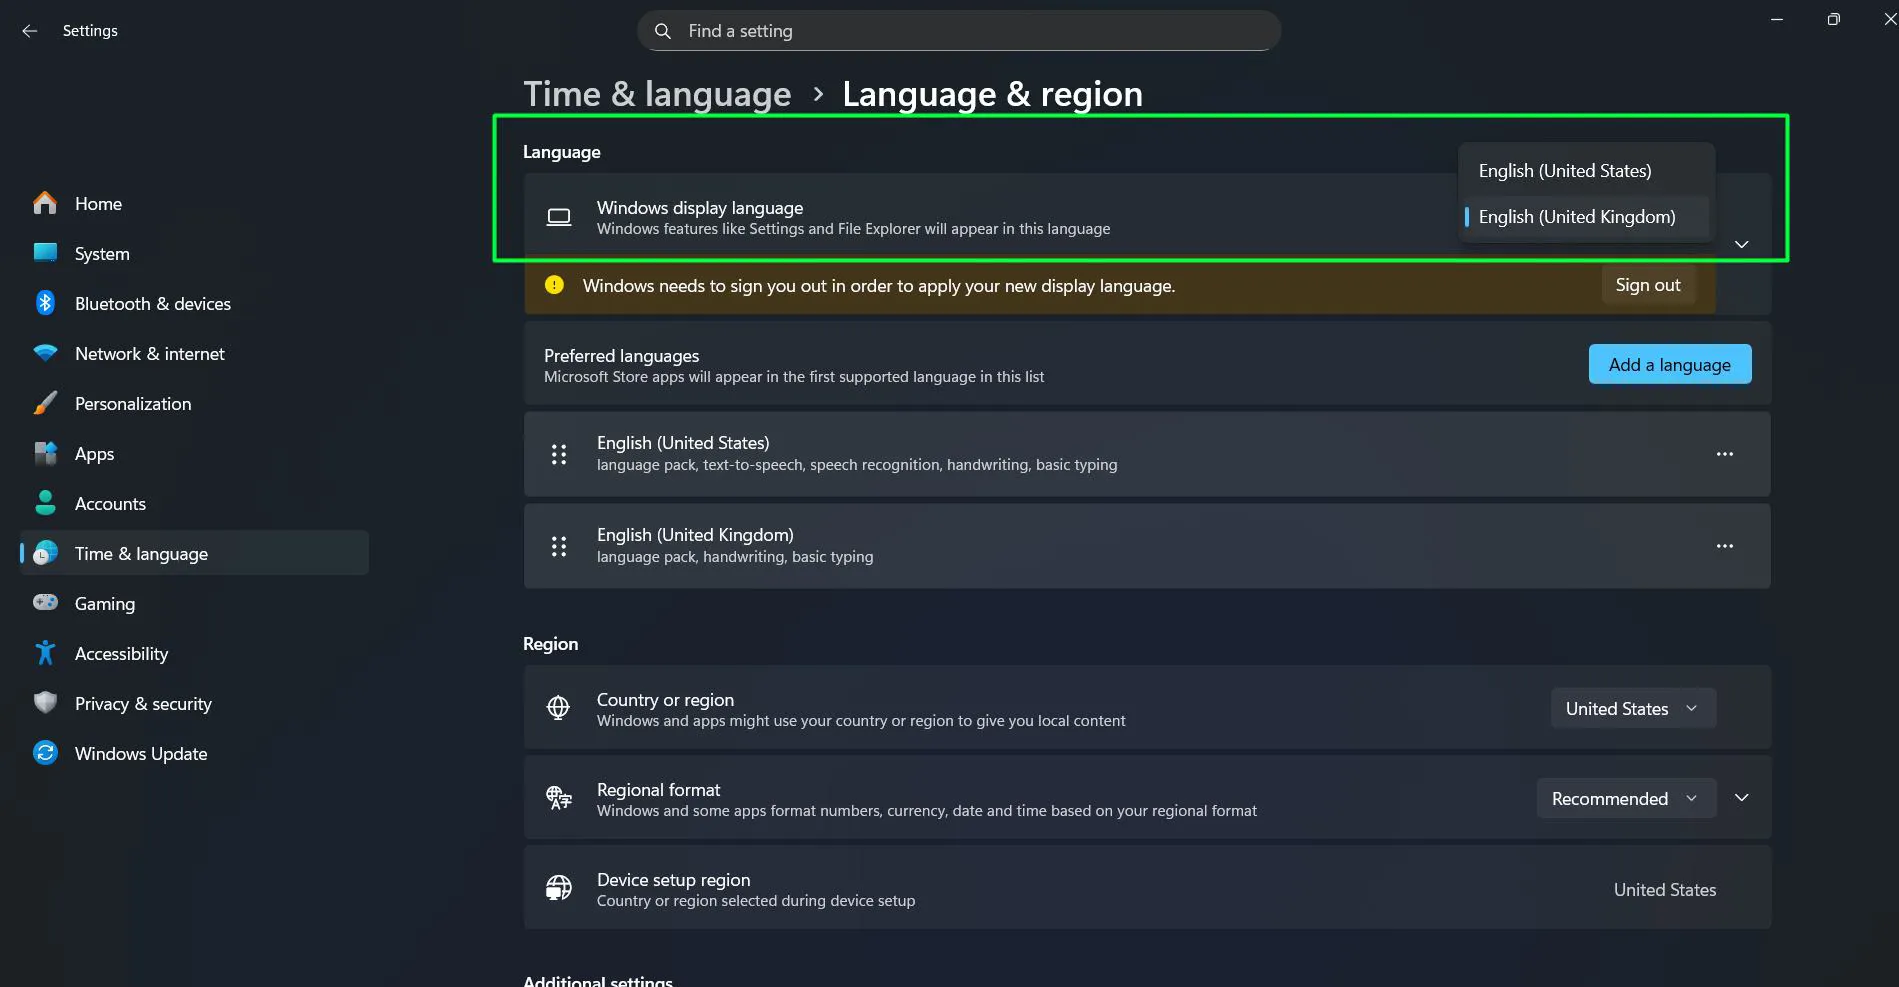
- Go back to the main Language & region page
- Under ‘Windows display language’, select the newly installed language from the dropdown menu
Most people find that the language change requires a sign-out or restart to take full effect. Windows will typically prompt for this action automatically.
Applying the Language Changes
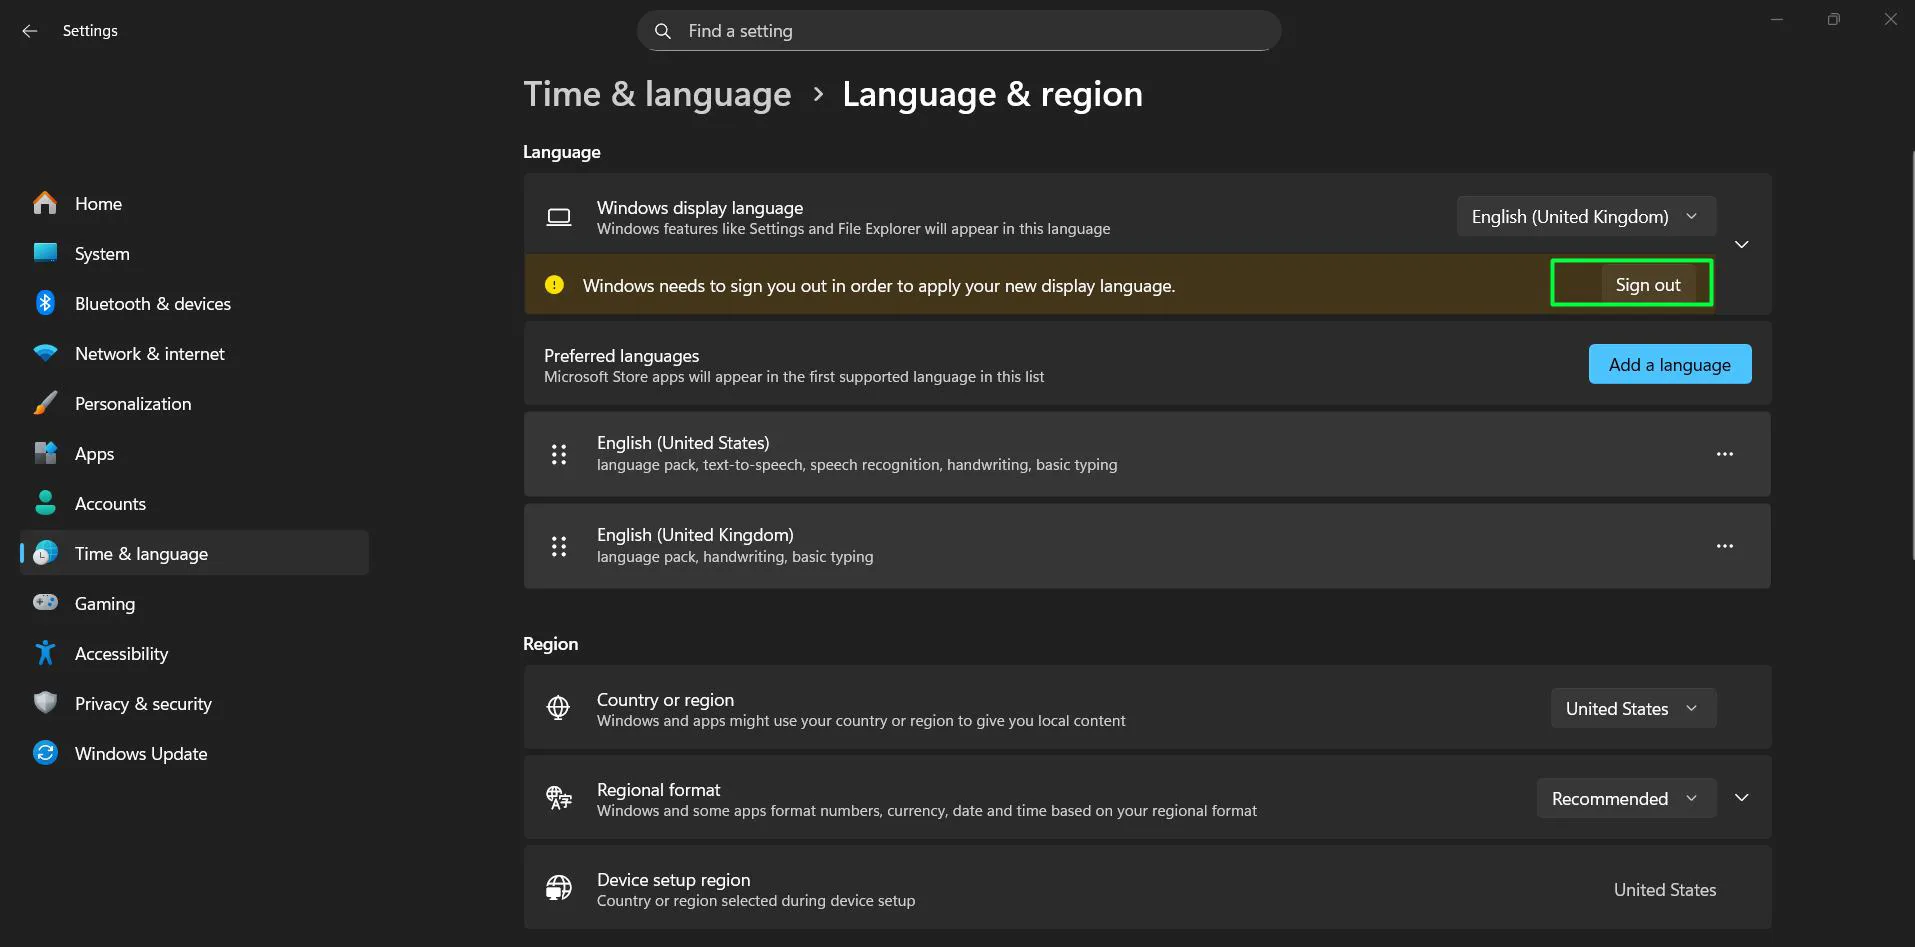
The final step involves logging out of the current session to allow Windows to apply the new language settings throughout the system.
Click ‘Yes, sign out now’ when prompted, or manually sign out by clicking the Start button, selecting the user account icon, and choosing ‘Sign out’. After signing back in, the entire Windows interface will display in the selected language.
Some built-in apps and features might still show in the previous language immediately after signing back in. This works best when allowing a few moments for all components to refresh. Opening and closing these apps usually resolves any temporary language display issues.
Managing Multiple Language Preferences
Windows supports multiple installed languages simultaneously. This feature benefits users who work in multilingual environments or share devices with family members who speak different languages.
The ‘Preferred languages’ list determines the order in which Windows attempts to display content when multiple languages are installed. Languages can be reordered by clicking the three-dot menu and selecting ‘Move up’ or ‘Move down’. The topmost language with a display pack becomes the active interface language.
Each language in the list can have different keyboard layouts, speech recognition, and handwriting options configured independently. These additional features enhance the overall language experience beyond just changing menu text.
Language Availability and Requirements
Not all Windows editions support every display language. Windows 10 and Windows 11 Home and Pro editions offer the widest language support, with over 100 languages available for download.
The key is to ensure an active internet connection during the language pack download process. Software updates should also be current, as Microsoft occasionally adds new languages or improves existing language packs through Windows Update.
Some regional variants of languages include specific features. For example, Spanish (Spain) differs slightly from Spanish (Mexico) in certain terminology and regional preferences. Selecting the appropriate regional variant ensures the most accurate language experience.
Keyboard Layouts and Input Methods
Changing the display language often requires adjusting keyboard layouts to match the new language. Different languages use different keyboard arrangements, and Windows automatically suggests appropriate keyboard layouts when installing a language pack.
The keyboard layout determines which characters appear when pressing specific keys. For instance, French keyboards place the letter ‘A’ where the ‘Q’ appears on English keyboards. Arabic and Hebrew keyboards include right-to-left text support and specific character sets not found on standard Latin keyboards.
To add or modify keyboard layouts, navigate to the language options for the installed language. Click on ‘Language options’ next to the desired language, then scroll to the ‘Keyboards’ section. The ‘Add a keyboard’ button reveals all available layout options for that language. Multiple keyboard layouts can coexist for a single language, allowing flexibility when typing.
Switching between keyboard layouts happens through the system tray. The language indicator near the clock shows the current input method. Clicking this indicator displays all available keyboards, and selecting one switches the input method immediately. The keyboard shortcut Windows key + Spacebar cycles through all installed keyboards without using the mouse.
Some languages offer specialized input methods beyond standard keyboards. Chinese, Japanese, and Korean use Input Method Editors (IMEs) that convert phonetic typing into complex characters. These IMEs provide prediction, autocomplete, and character selection features that make typing in these languages efficient. Installing the language pack automatically includes the appropriate IME when available.
Touch keyboard users benefit from language-specific layouts as well. When using a touchscreen device or tablet mode, the on-screen keyboard adapts to the selected language, displaying appropriate character sets and prediction options. This works best when the display language and keyboard layout match the user’s typing needs.
Regional Formats and Their Impact
Display language changes affect how Windows presents information, but regional format settings control how dates, times, numbers, and currency appear throughout the system. These two settings work independently, creating flexible customization options.
Regional formats determine practical display elements like whether dates appear as MM/DD/YYYY or DD/MM/YYYY, whether the decimal separator is a period or comma, and which currency symbol appears in financial applications. The system can display menus in English while formatting dates in the German style, or show French menus while using US number formats.
To adjust regional formats, visit Settings > Time & Language > Language & region and locate the ‘Regional format’ section. The dropdown menu shows the current format setting, which might differ from the display language. Clicking ‘Change formats’ opens detailed options for customizing date, time, first day of the week, short date, long date, short time, and long time formats.
Calendar systems vary across cultures, and Windows accommodates these differences through regional settings. The Gregorian calendar is standard in most Western countries, but other options include the Japanese Emperor Era calendar, Korean Tangun Era calendar, Taiwan calendar, and Thai Buddhist calendar. Users can select their preferred calendar system from the regional format options.
Currency display follows regional format settings as well. When regional format is set to United States, prices show with dollar signs and periods as decimal separators. Switching to Germany changes the display to Euro symbols with commas as decimal separators. This affects spreadsheet applications, financial software, and any program that displays monetary values.
Time zone settings connect to regional formats but remain separate from language preferences. The correct time zone ensures that scheduled tasks, calendar appointments, and system timestamps reflect the actual local time. Settings > Time & Language > Date & time contains time zone configuration options, including automatic time zone detection based on location services.
Number formatting conventions differ significantly between regions. Some countries use spaces as thousands separators, others use commas or periods. The fractional separator might be a comma in one region and a period in another. These differences appear in calculator applications, spreadsheets, and anywhere numbers display. Matching regional formats to personal or business requirements prevents confusion when sharing documents or collaborating across borders.
Removing Unused Language Packs
Language packs that are no longer needed can be removed to free up storage space. Each language pack consumes disk space even when not actively in use.
- Open Settings > Time & Language > Language & region
- Locate the language to remove in the ‘Preferred languages’ list
- Click the three-dot menu next to the language
- Select ‘Remove’
- Confirm the removal when prompted
The system prevents removal of the currently active display language. To remove it, first switch to a different language, sign out, sign back in, and then remove the unwanted language pack.
Frequently Asked Questions
How long does it take to change the Windows display language?
Changing the display language typically takes 5-10 minutes total. The actual language pack download requires 2-5 minutes depending on internet speed, while applying the changes after sign-out is nearly instant. The entire process is complete once the system displays the new language after signing back in.
Can the display language be changed without administrator rights?
Standard user accounts can change the display language only if the language pack is already installed on the system. Installing new language packs requires administrator privileges. Users without admin access should contact their system administrator to have the desired language pack installed first.
Will changing the display language affect installed programs?
Changing the Windows display language affects only the operating system interface and built-in Microsoft applications. Third-party programs maintain their own language settings independently. Some applications automatically detect the Windows language and adjust accordingly, while others require manual language configuration within their own settings.
What happens to files and folders after changing the display language?
Personal files, folders, and documents remain completely unaffected by display language changes. Only system folder names like ‘Documents’, ‘Downloads’, and ‘Desktop’ will appear in the new language. The actual content of files stays exactly as it was before the language change.
Is it possible to use different languages for different user accounts?
Yes, each user account on a Windows computer can have its own display language preference. The language setting applies per user account, not system-wide. This allows family members or colleagues sharing a device to each use their preferred language when signed into their respective accounts.