Key Takeaways
- Windows 11 lets you control GPU power settings through both the Windows Graphics Settings and the NVIDIA/AMD control panels.
- Setting the GPU to ‘High Performance’ mode prioritizes speed, while ‘Power Saving’ mode reduces energy use.
- Per-app GPU power preferences give you fine-grained control over which programs get more GPU resources.
- Changes take effect immediately – no restart required in most cases.
- Using the correct power plan in Windows settings directly impacts GPU behavior.
How to Manage GPU Power Settings in Windows 11
Managing power settings for GPU on Windows 11 is something every PC user should know, whether the goal is squeezing out more gaming performance or cutting down on power consumption during light tasks. Windows 11 offers several built-in ways to control how much power the GPU uses, and this guide walks through each method clearly and simply.
The good news is that none of these steps require third-party software. Everything needed is already inside Windows 11 itself.
Watch this: Manage GPU Power Settings in Windows 11 Easily
Method 1: Set GPU Power Preference Per App Using Windows Graphics Settings
This is the most straightforward method for controlling GPU power on a per-application basis. It works for both integrated and dedicated GPUs.
- Step 1: Open the Start menu and go to Settings (the gear icon).
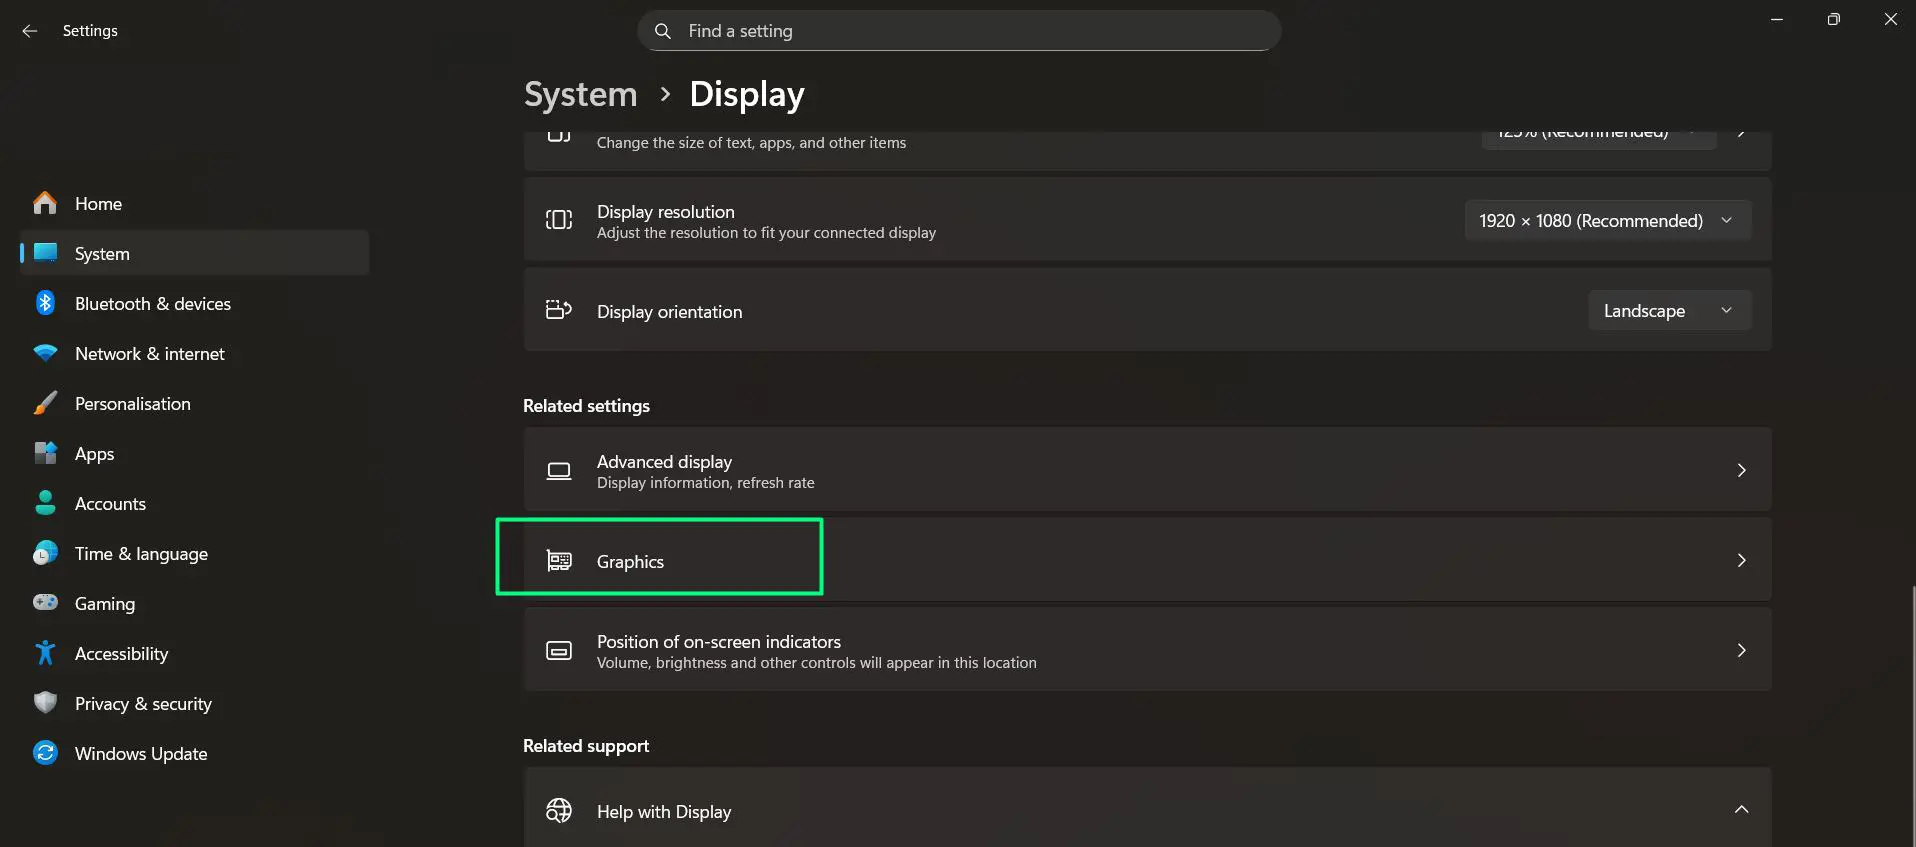
- Step 2: Click on ‘System’, then select ‘Display’.

- Step 3: Scroll down and click on ‘Graphics’.
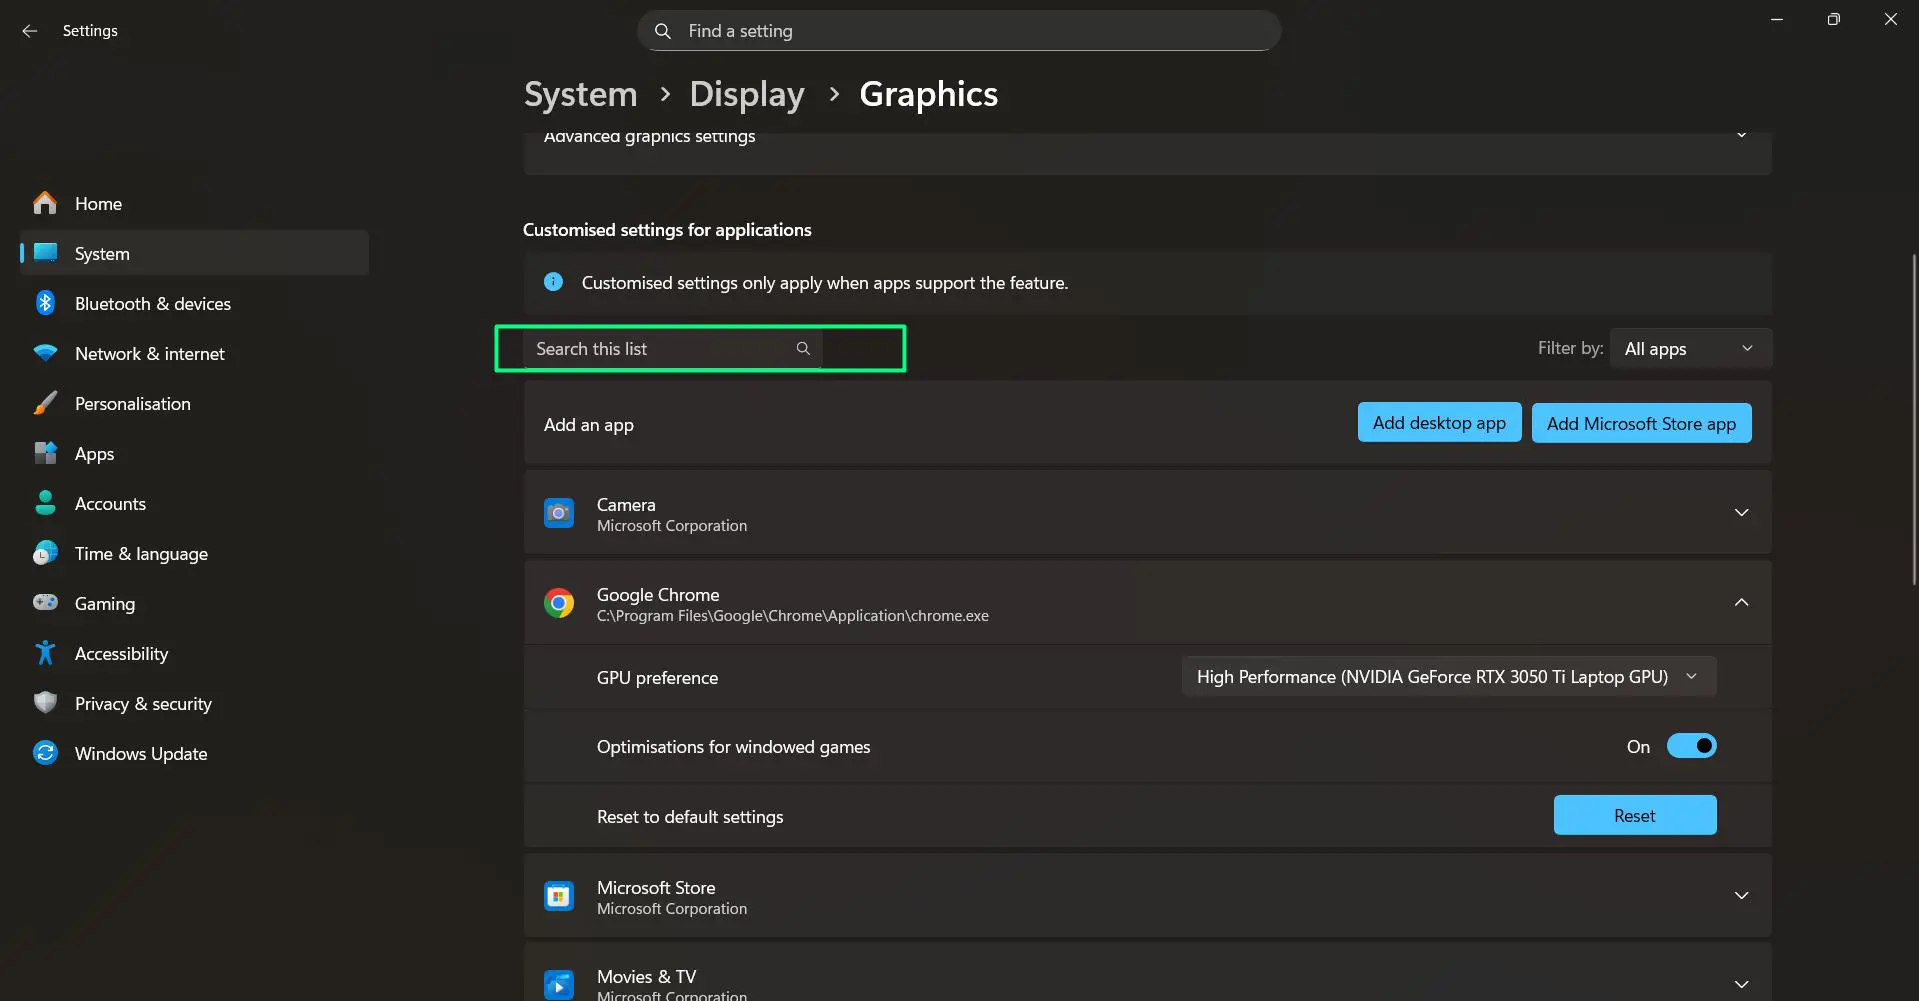
- Step 4: Under ‘Customised settings for applications’, look for the app in the list. Use the ‘Search this list’ bar to find it faster, or use the ‘Filter by’ dropdown to narrow results.
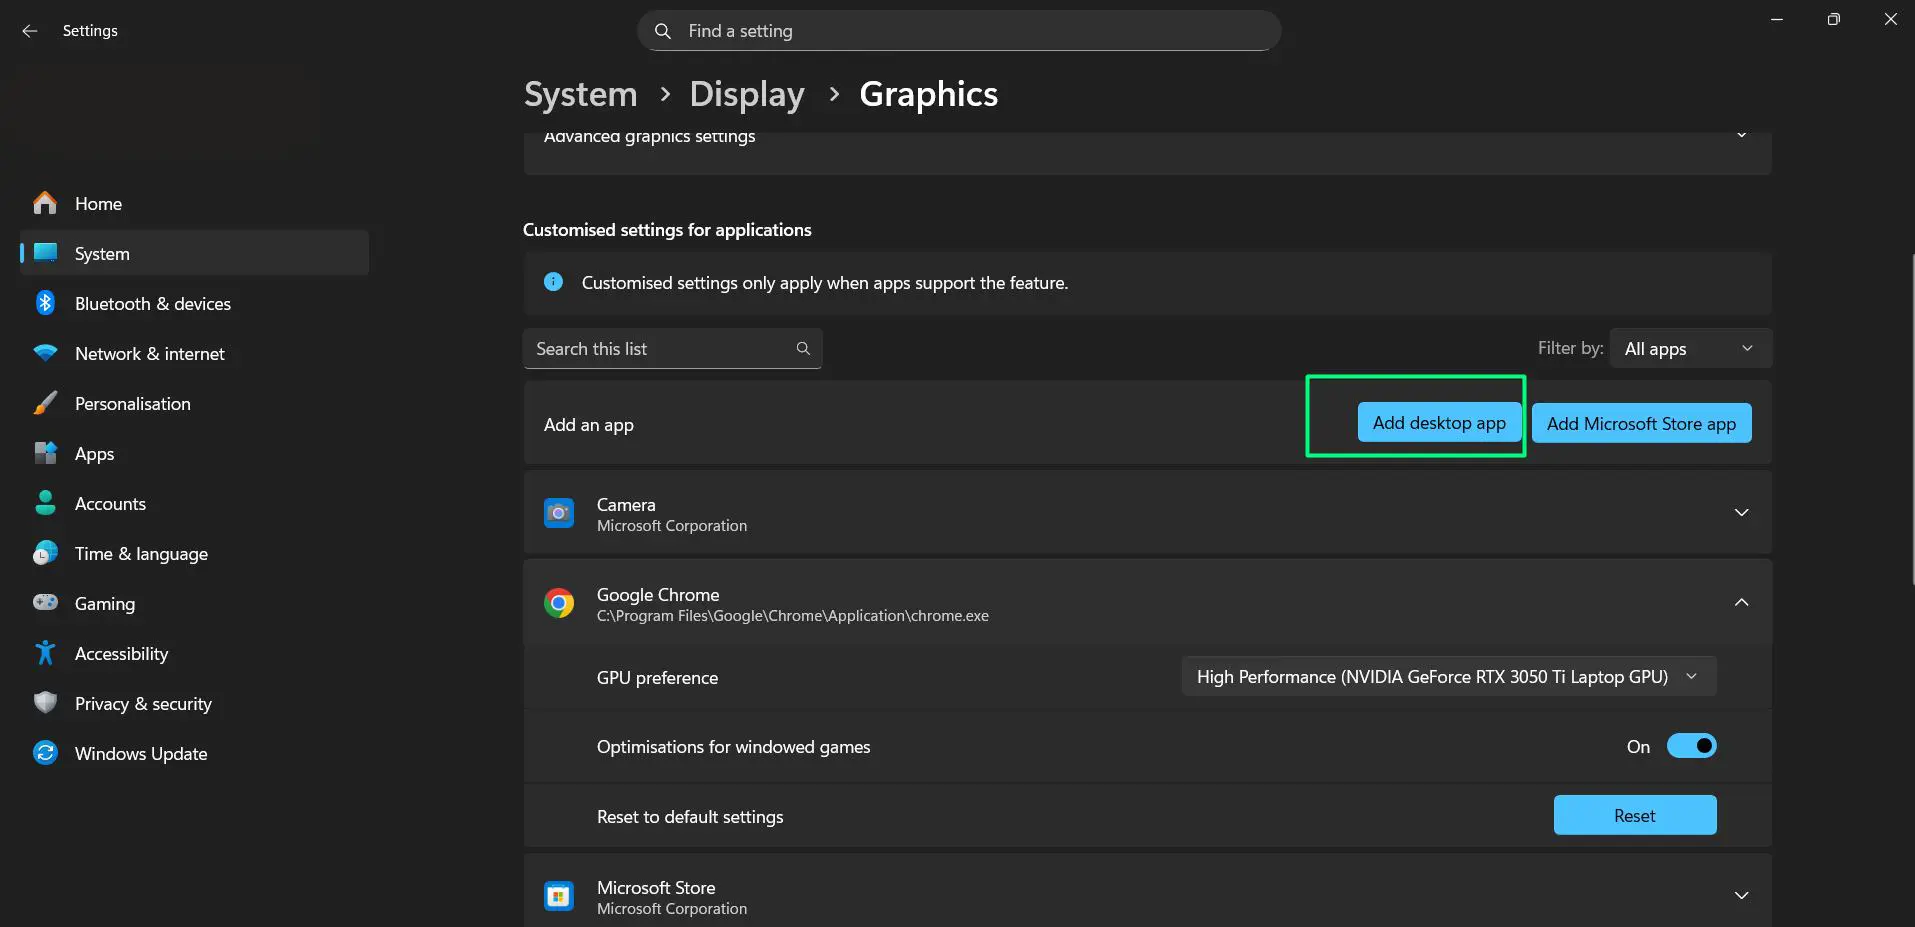
- Step 5: If the app is not listed, click ‘Add desktop app’ to browse for a traditional application
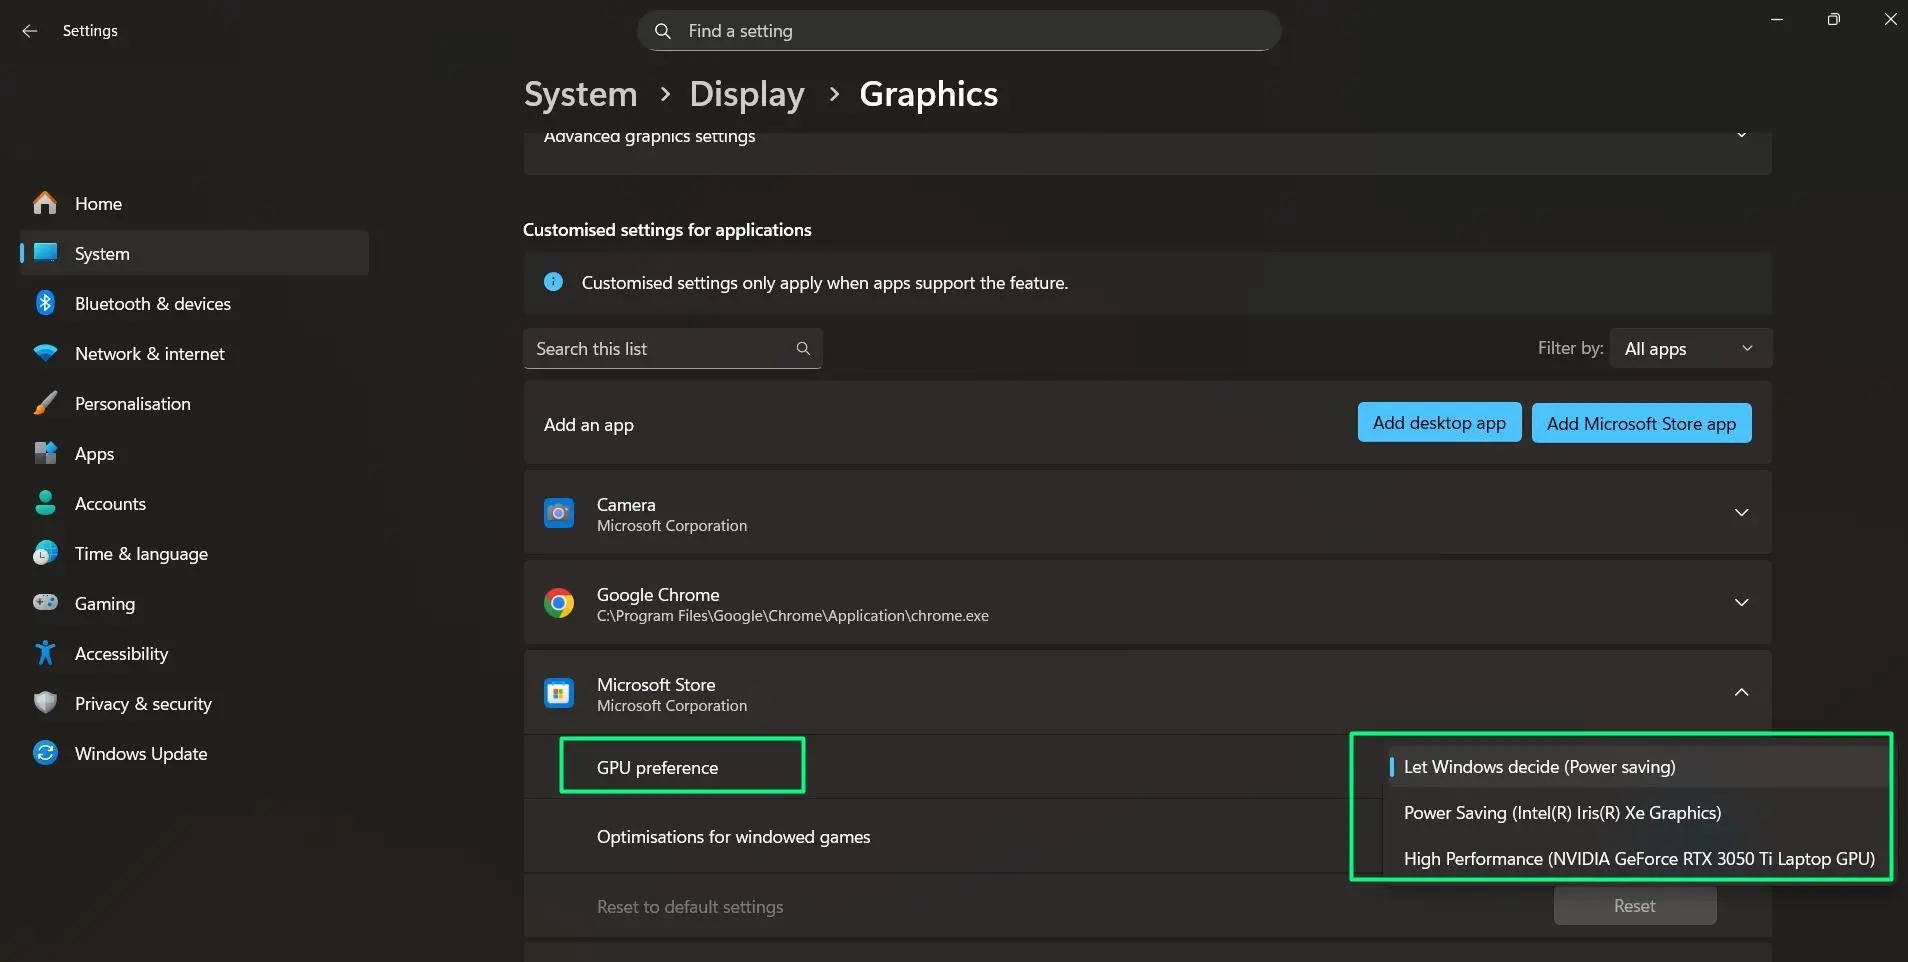
- Step 6: Click on the app name to expand it, then click the ‘GPU preference’ dropdown and select the preferred option – ‘Power saving’, ‘Let Windows decide’, or ‘High Performance’.
The dropdown will also show the name of the GPU being assigned, for example ‘High Performance (NVIDIA GeForce RTX 3050 Ti Laptop GPU)’.
- Step 7: To undo any changes made for a specific app, scroll down within the app’s expanded section and click ‘Reset to default settings’.
Most people find that setting games or creative applications to ‘High performance’ and browsers or office apps to ‘Power saving’ gives the best balance between speed and battery life. Also worth noting – the ‘Optimisations for windowed games’ toggle is available here and can be enabled to reduce latency in compatible games running in windowed mode.
Method 2: Change the Windows Power Plan to Control GPU Behavior
The overall Windows power plan directly affects how the GPU performs. Choosing ‘Balanced’ limits GPU power during light tasks, while ‘High Performance’ keeps the GPU running at full capacity.
- Step 1: Press the Windows key + R, type ‘powercfg.cpl’, and hit Enter.
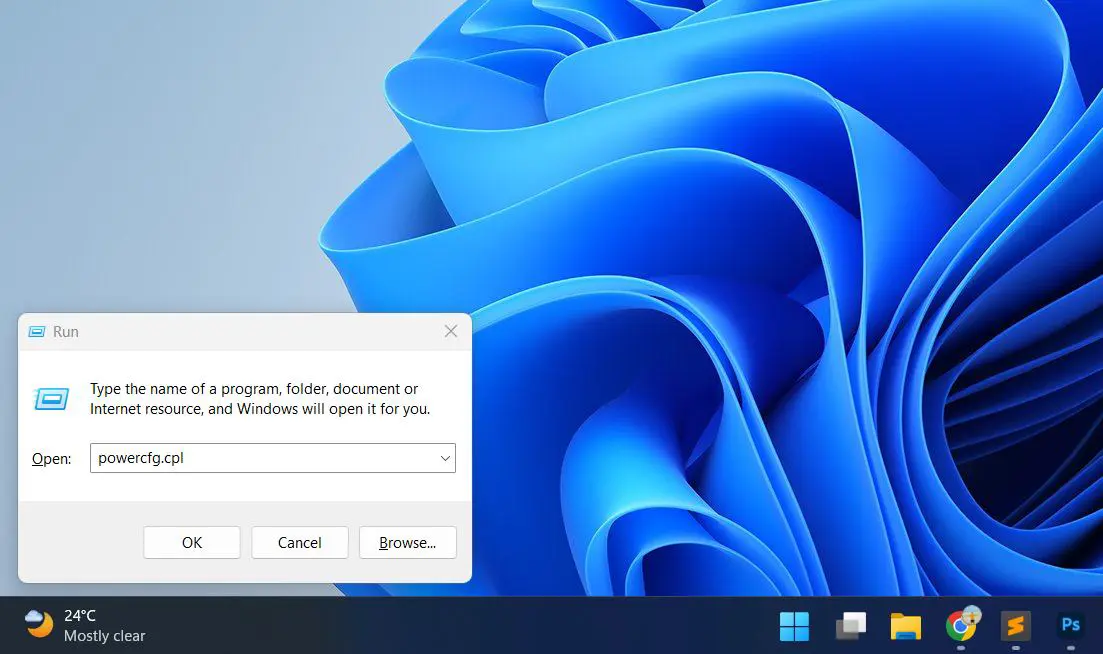
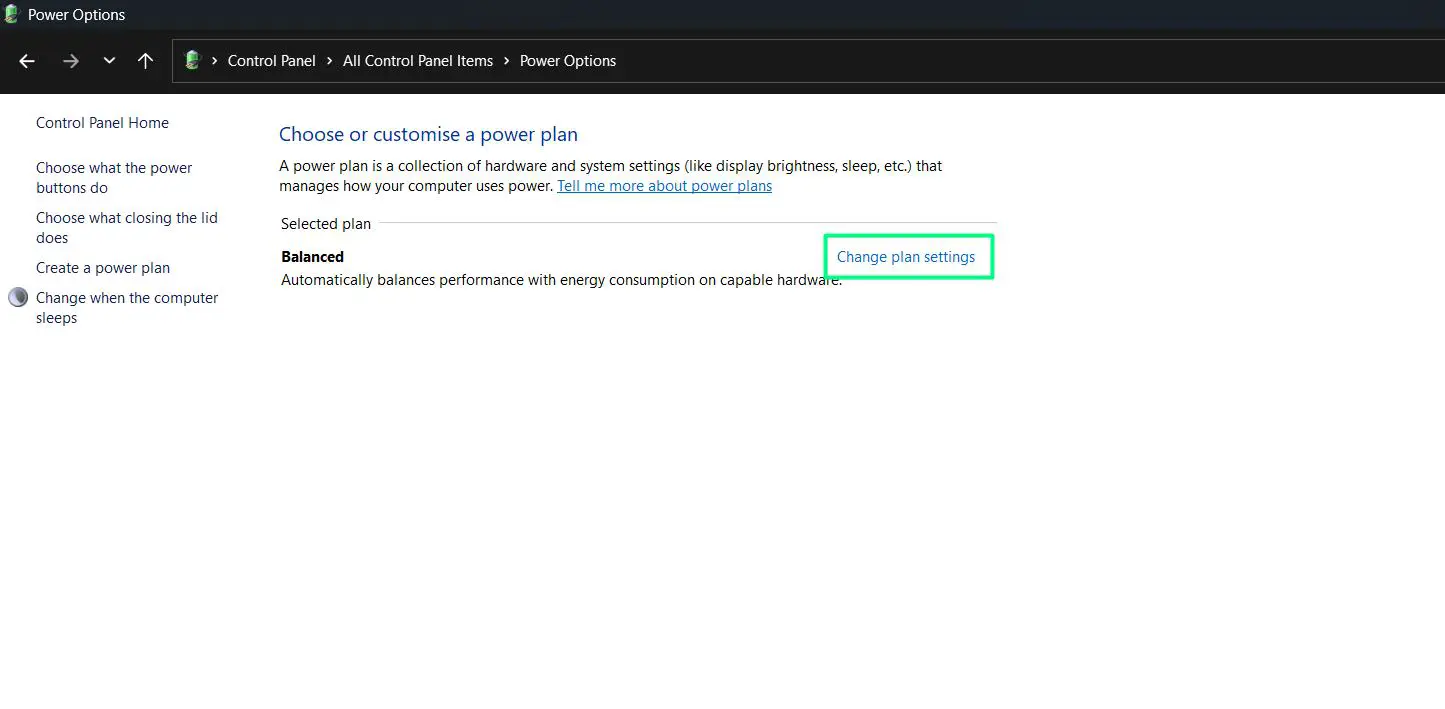
- Step 2: The ‘Power Options’ window will open showing the ‘Choose or customise a power plan’ screen. The currently active plan will be shown under ‘Selected plan’ – on most Windows 11 systems this defaults to ‘Balanced’.
- Step 3: Click ‘Change plan settings’ next to the selected plan.
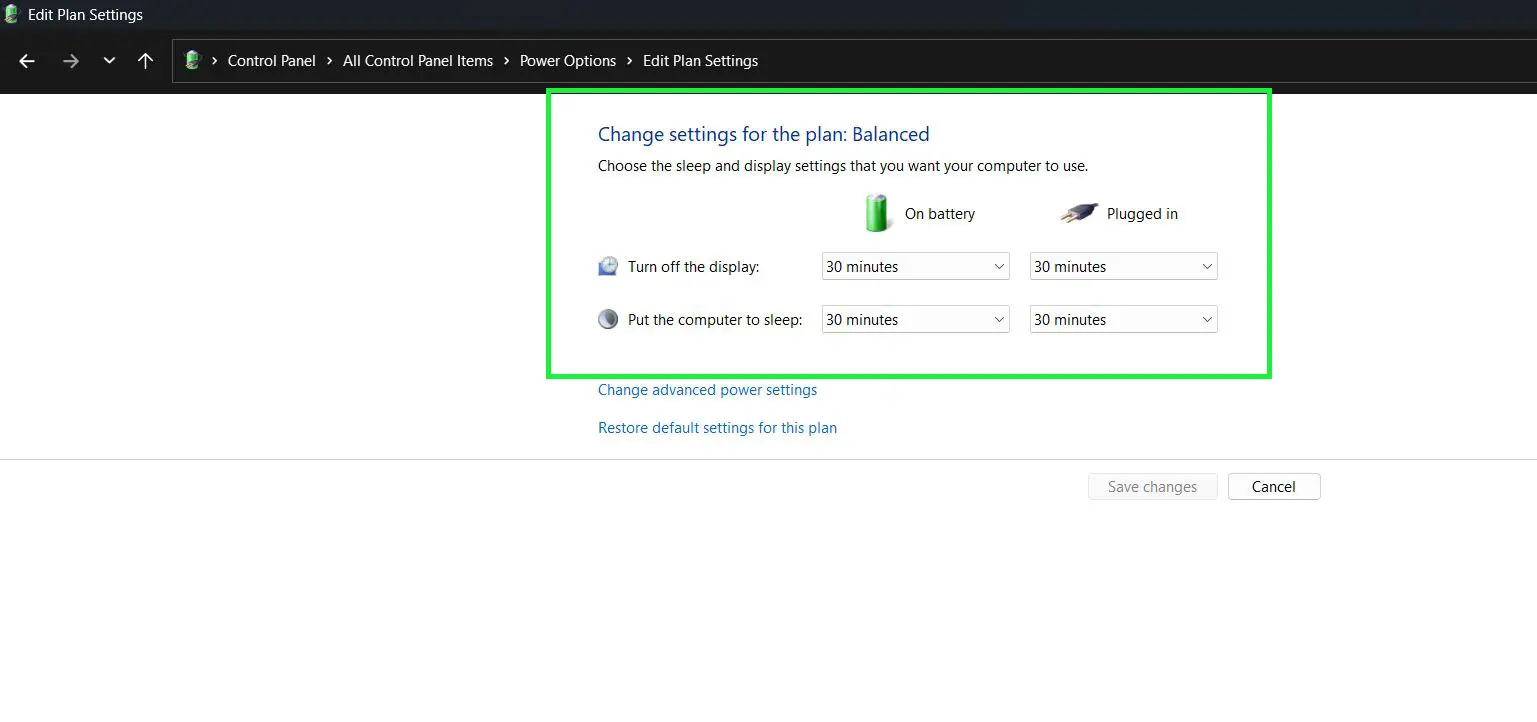
- Step 4: The ‘Edit Plan Settings’ screen will open. Here, adjust how long the display stays on and when the computer sleeps – with separate columns for ‘On battery’ and ‘Plugged in’.
- Step 5: To access deeper GPU-related power options, click ‘Change advanced power settings’.
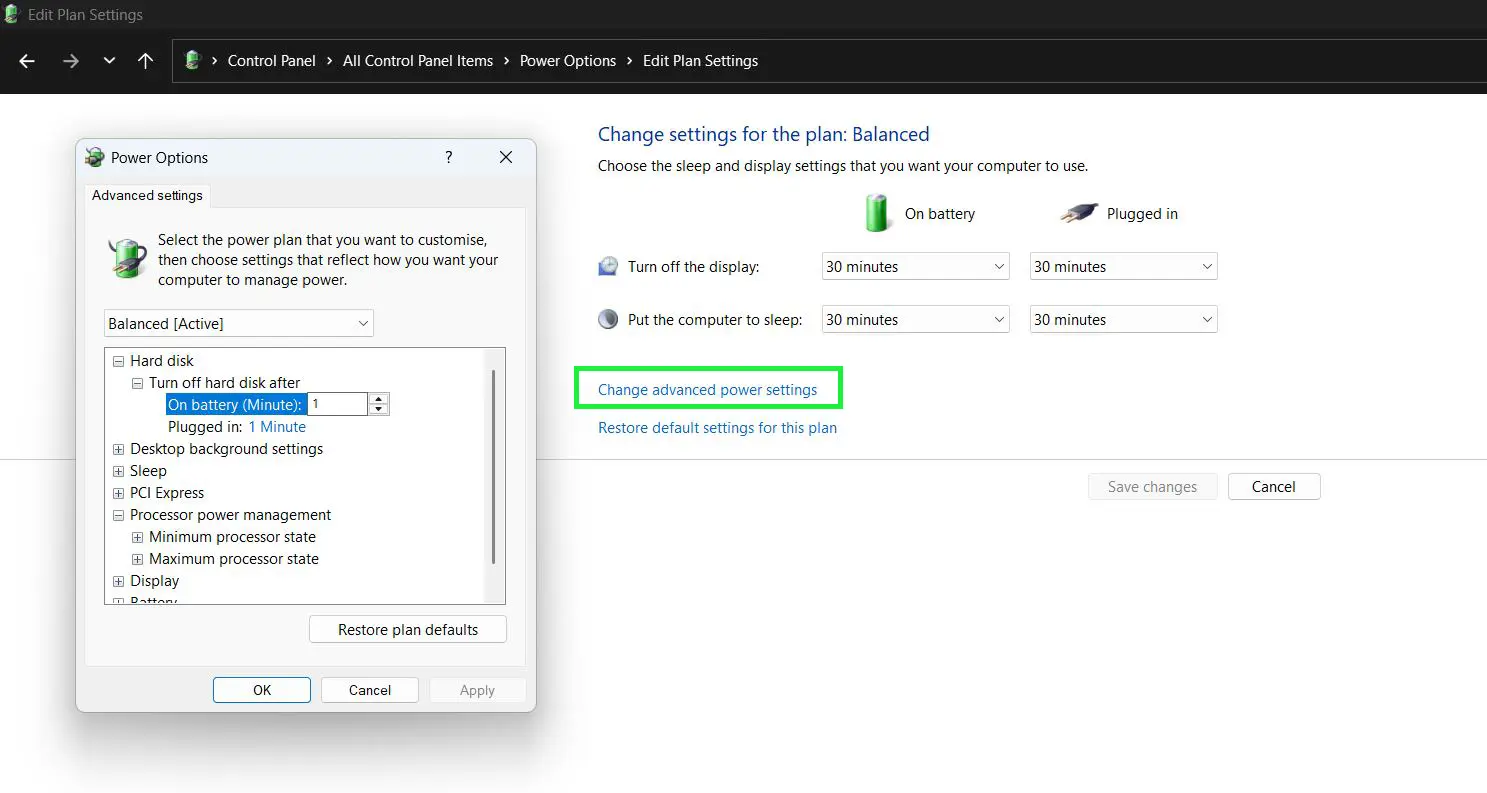
- Step 6: Click ‘Save changes’ when done.
The key is to match the power plan with the current use case. For gaming or video editing, ‘High performance’ is the right pick. For everyday browsing or document work, ‘Balanced’ is the smarter choice.
Pro Tip: If running a laptop, the ‘Edit Plan Settings’ screen lets you configure different timeouts for ‘On battery’ and ‘Plugged in’ separately – a simple way to keep full performance when connected to power while saving battery automatically when unplugged.
Method 3: Adjust GPU Power Settings Using NVIDIA Control Panel
For users with an NVIDIA GPU, the NVIDIA Control Panel offers more detailed control over power management than Windows alone provides.
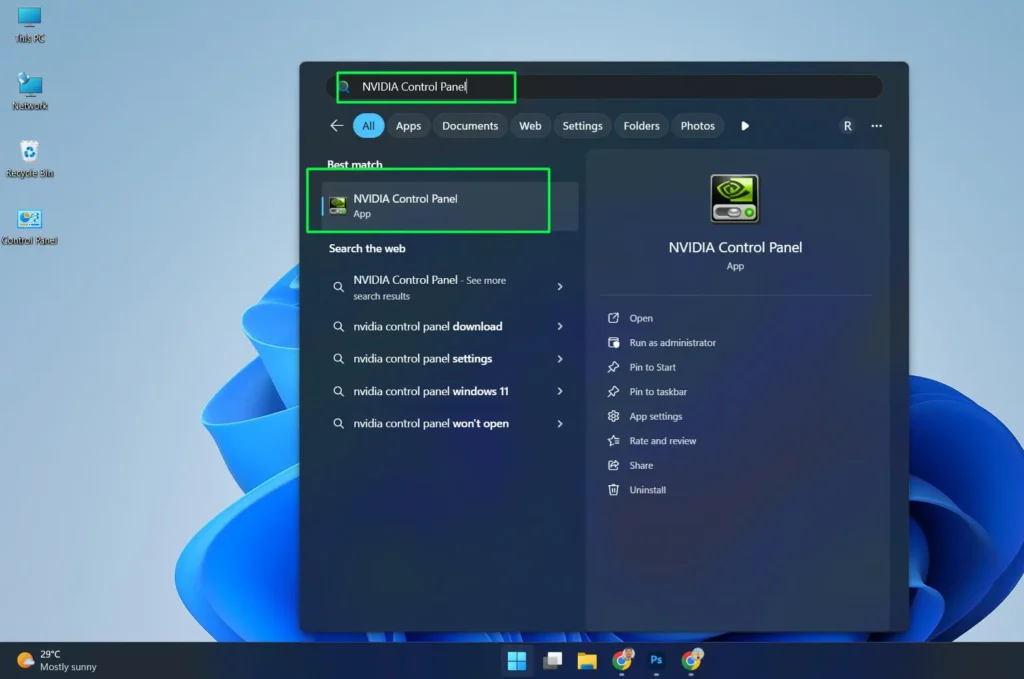
- Step 1: Press the Windows key, type ‘NVIDIA Control Panel’ in the search bar, and click it to open.
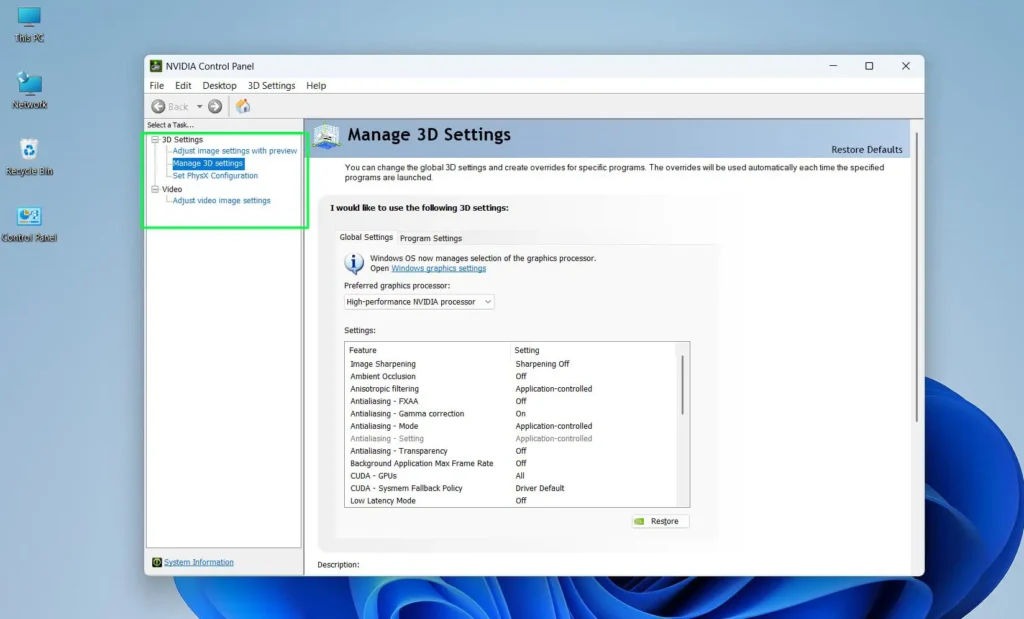
- Step 2: In the left panel, click on ‘Manage 3D settings’.
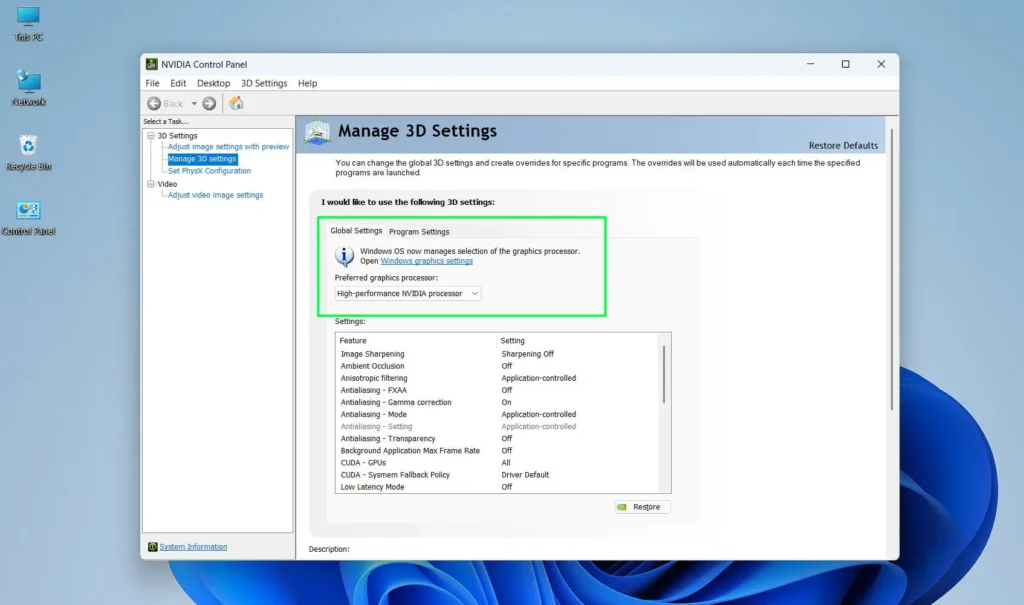
- Step 3: Click the ‘Global Settings’ tab to apply settings to all applications, or use ‘Program Settings’ to configure a specific app.
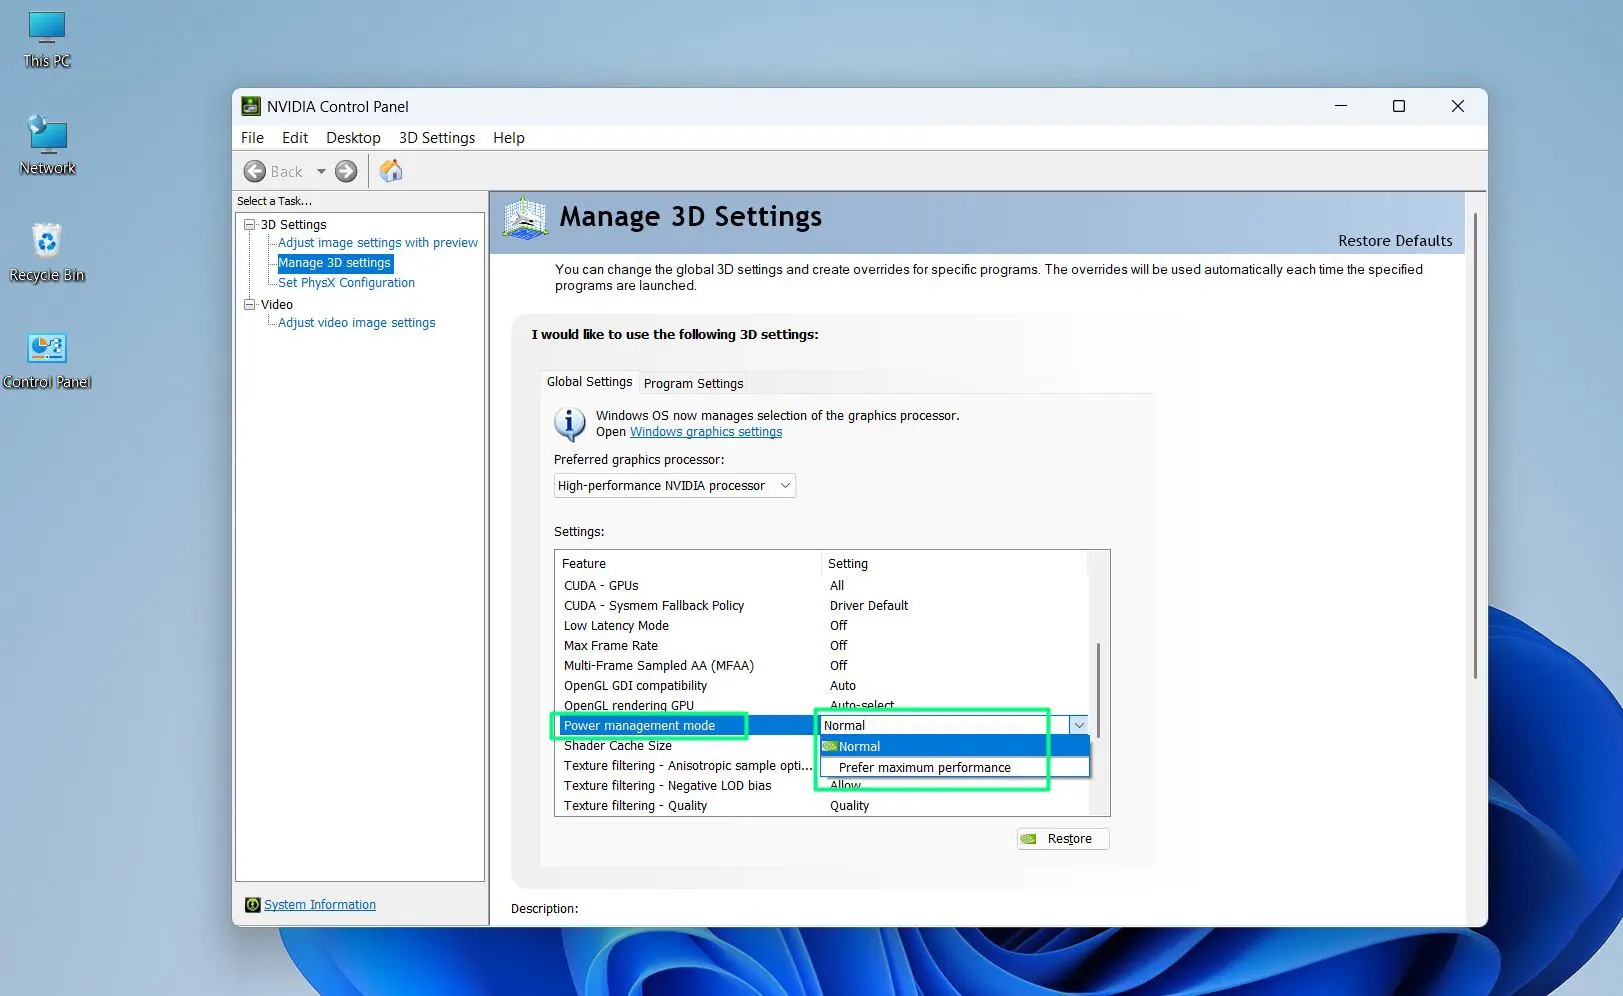
- Step 4: Scroll through the list and locate ‘Power management mode’.
- Step 5: Click the dropdown next to it and choose either ‘Prefer maximum performance’ or ‘Normal’.
- Step 6: Click ‘Apply’ in the bottom right corner.
‘Prefer maximum performance’ tells the GPU to always run at its highest clock speed. This works best when consistent frame rates matter, like in competitive gaming. ‘Optimal power’ allows the driver to scale performance up and down based on demand, which is ideal for mixed workloads.
Method 4: Adjust GPU Power Settings Using AMD Radeon Software
AMD users have similar control through Radeon Software. The steps are slightly different but just as straightforward.
- Step 1: Right-click the desktop and select ‘AMD Radeon Software’. Alternatively, search for it in the Start menu.
- Step 2: Click on the ‘Performance’ tab at the top.
- Step 3: Select ‘Tuning’ from the submenu.
- Step 4: Under ‘Tuning Control’, choose ‘Auto’ for automatic power management, or switch to ‘Manual’ to set custom power limits.
- Step 5: If using Manual mode, adjust the ‘Power Limit’ slider to the desired level. Moving it right increases power and performance; moving it left reduces power draw.
- Step 6: Click ‘Apply Changes’.
This level of control is particularly useful for users who want to reduce GPU temperatures or noise while still getting solid performance from their hardware.
Pro Tip: After adjusting power settings in either NVIDIA Control Panel or AMD Radeon Software, run a short benchmark or the target application for a few minutes to confirm the changes are having the expected effect before finalizing the setup.
Method 5: Use Windows 11 Energy Saver Mode (Laptops Only)
For laptop users, Windows 11 includes an Energy Saver mode that reduces power consumption by limiting background activity, which in turn affects how much power the GPU uses during idle or light tasks.
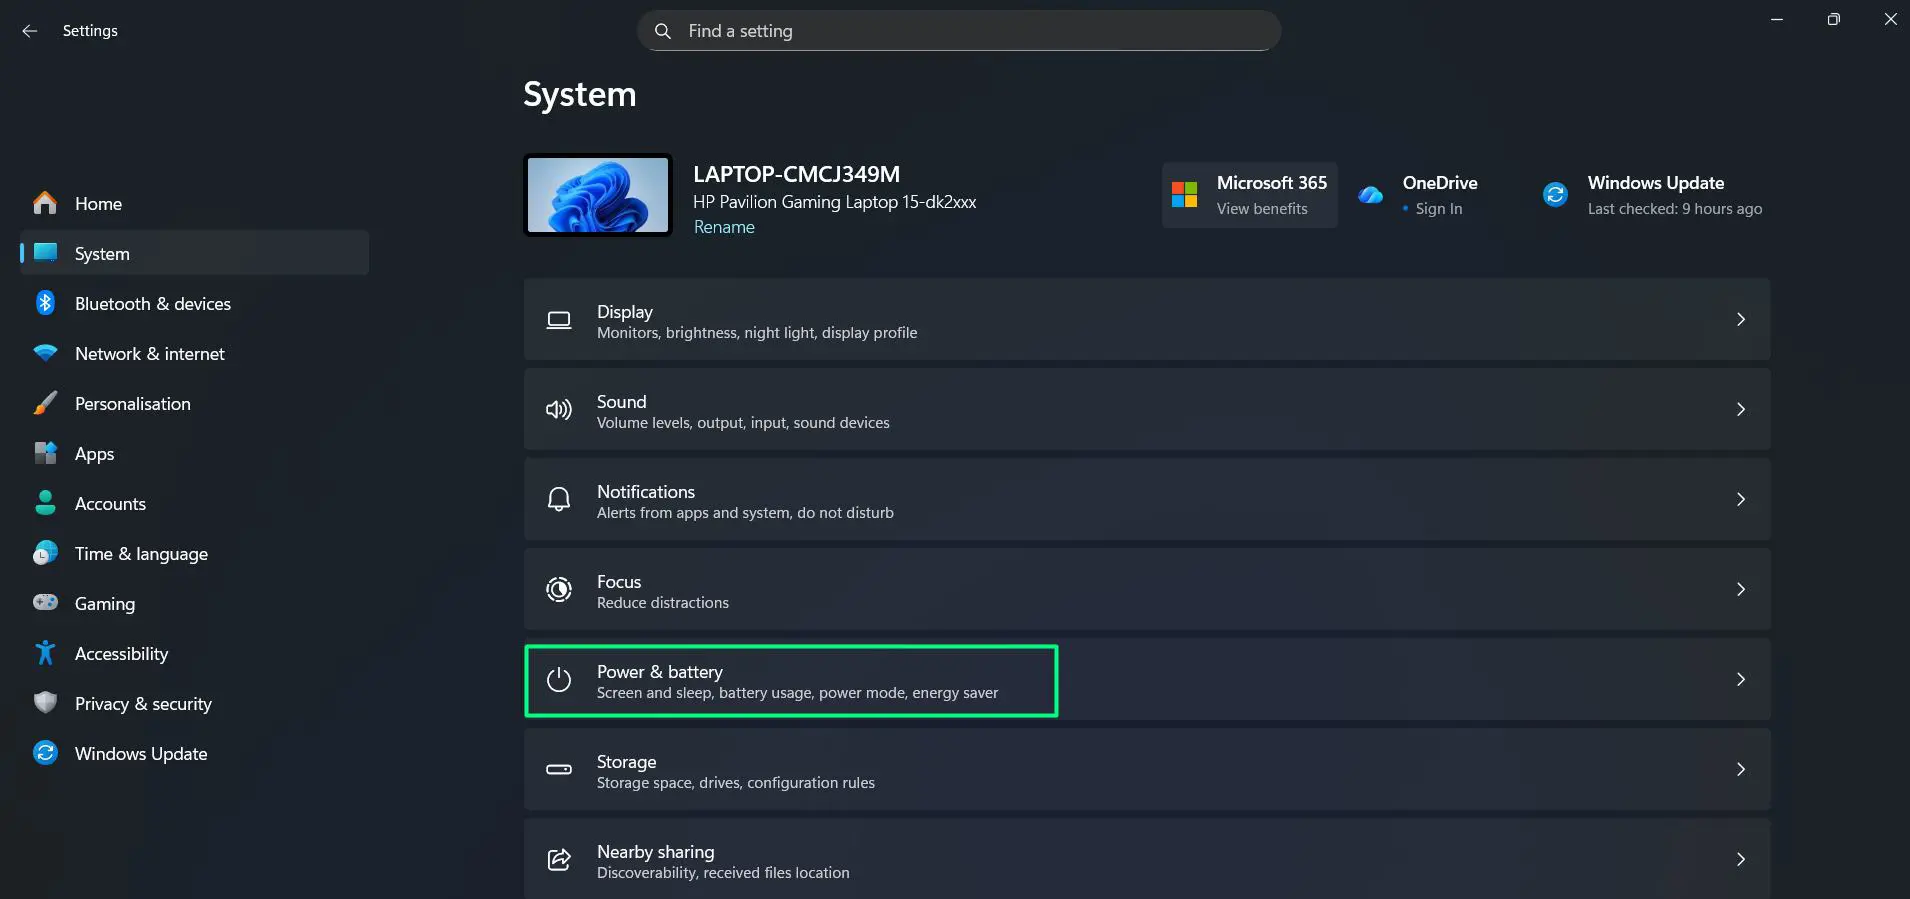
- Step 1: Open Settings and go to ‘System’, then ‘Power & battery’.
- Step 2: The current battery percentage and charging status will be visible at the top of the page.
- Step 3: Scroll down and locate the ‘Energy saver’ section. Click on it to expand the options.
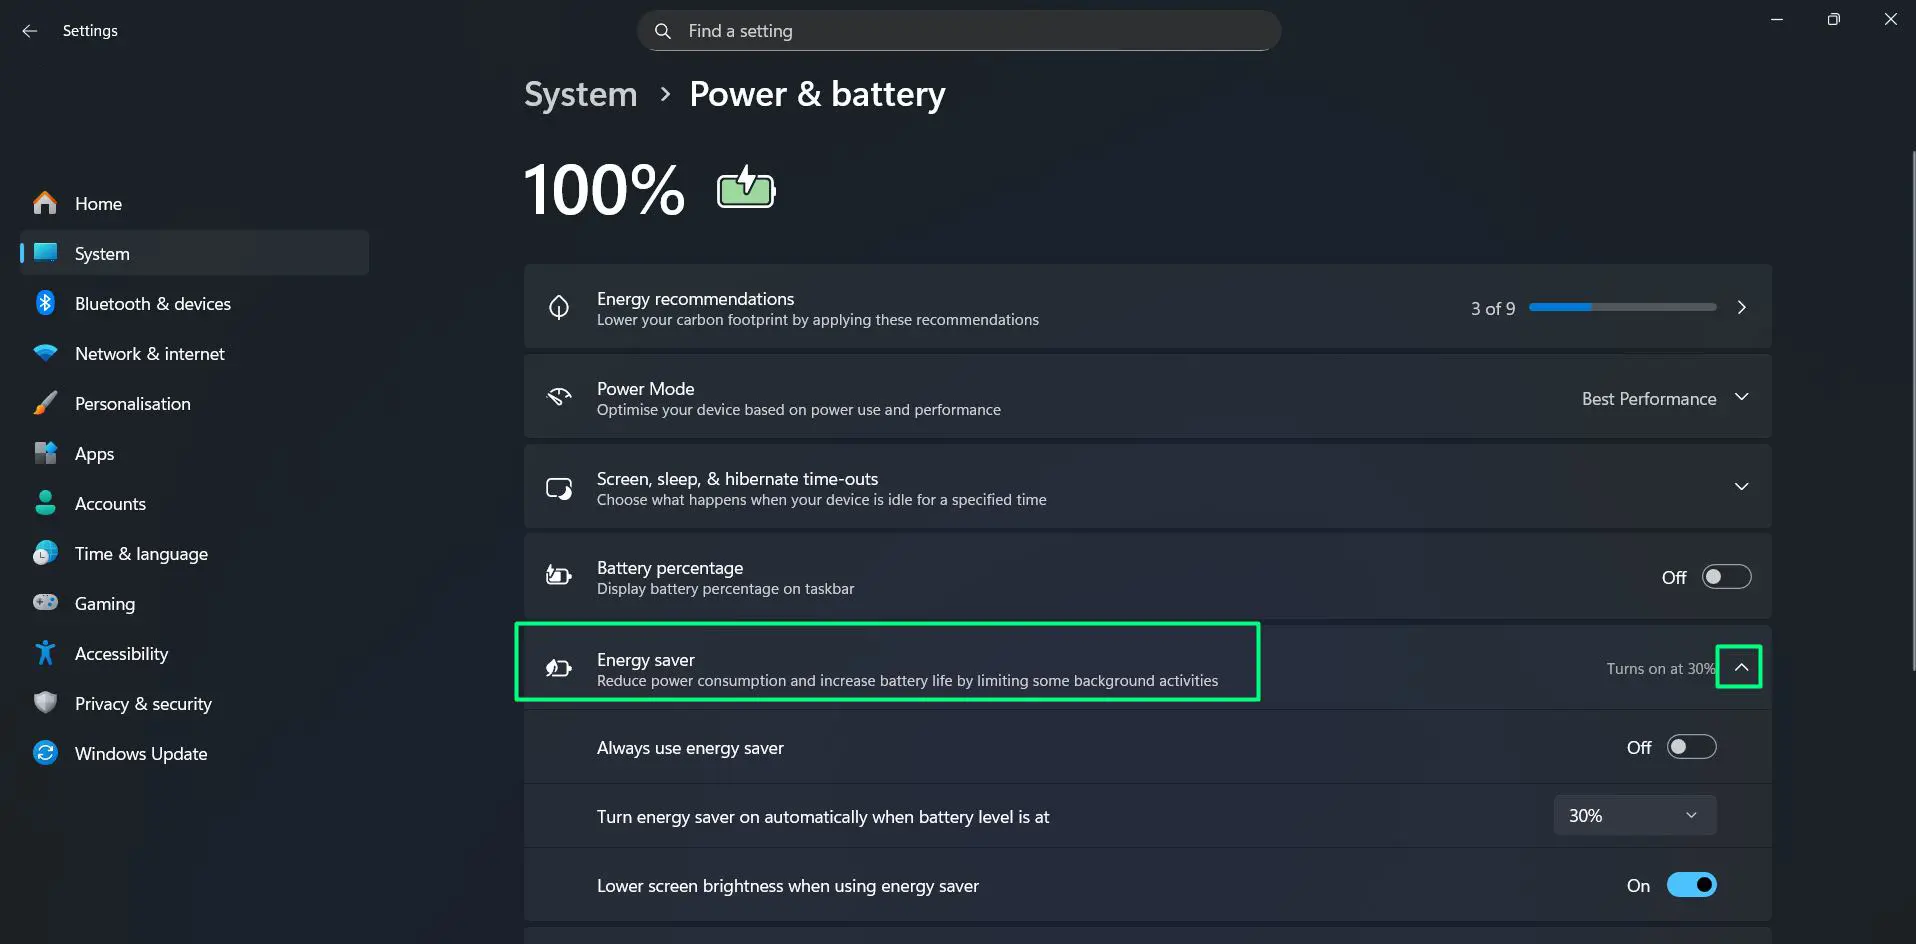
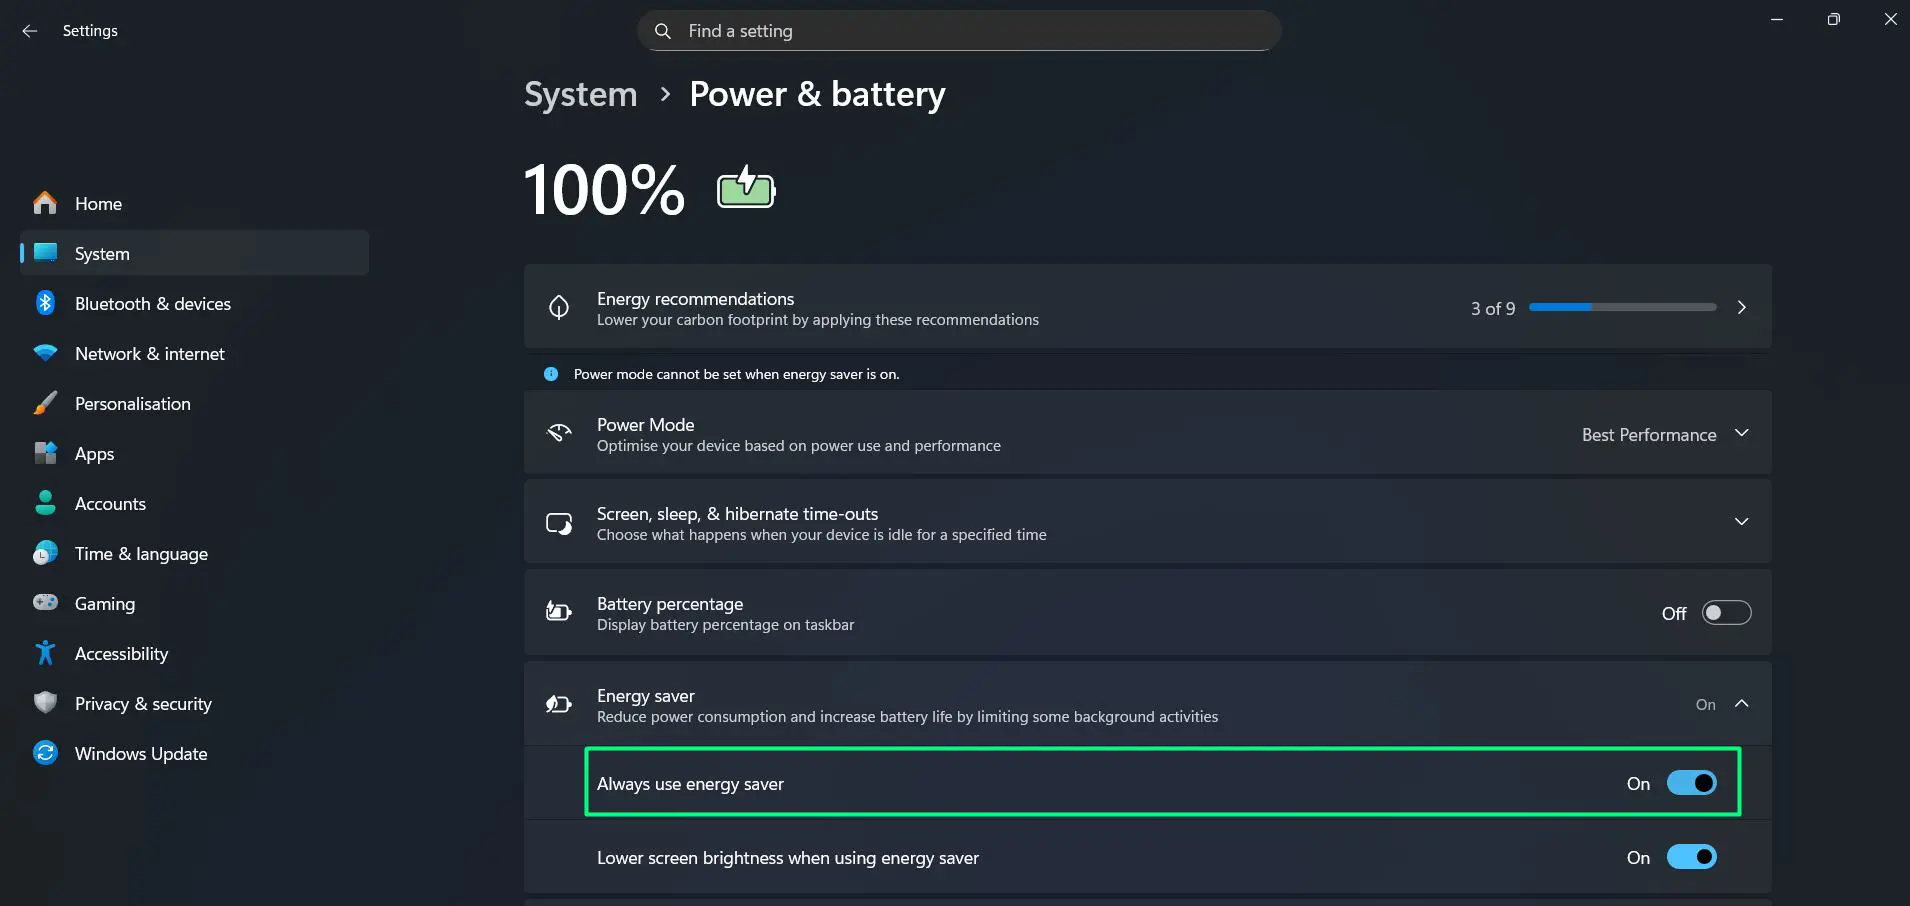
- Step 4: To always keep Energy Saver active, toggle on ‘Always use energy saver’.
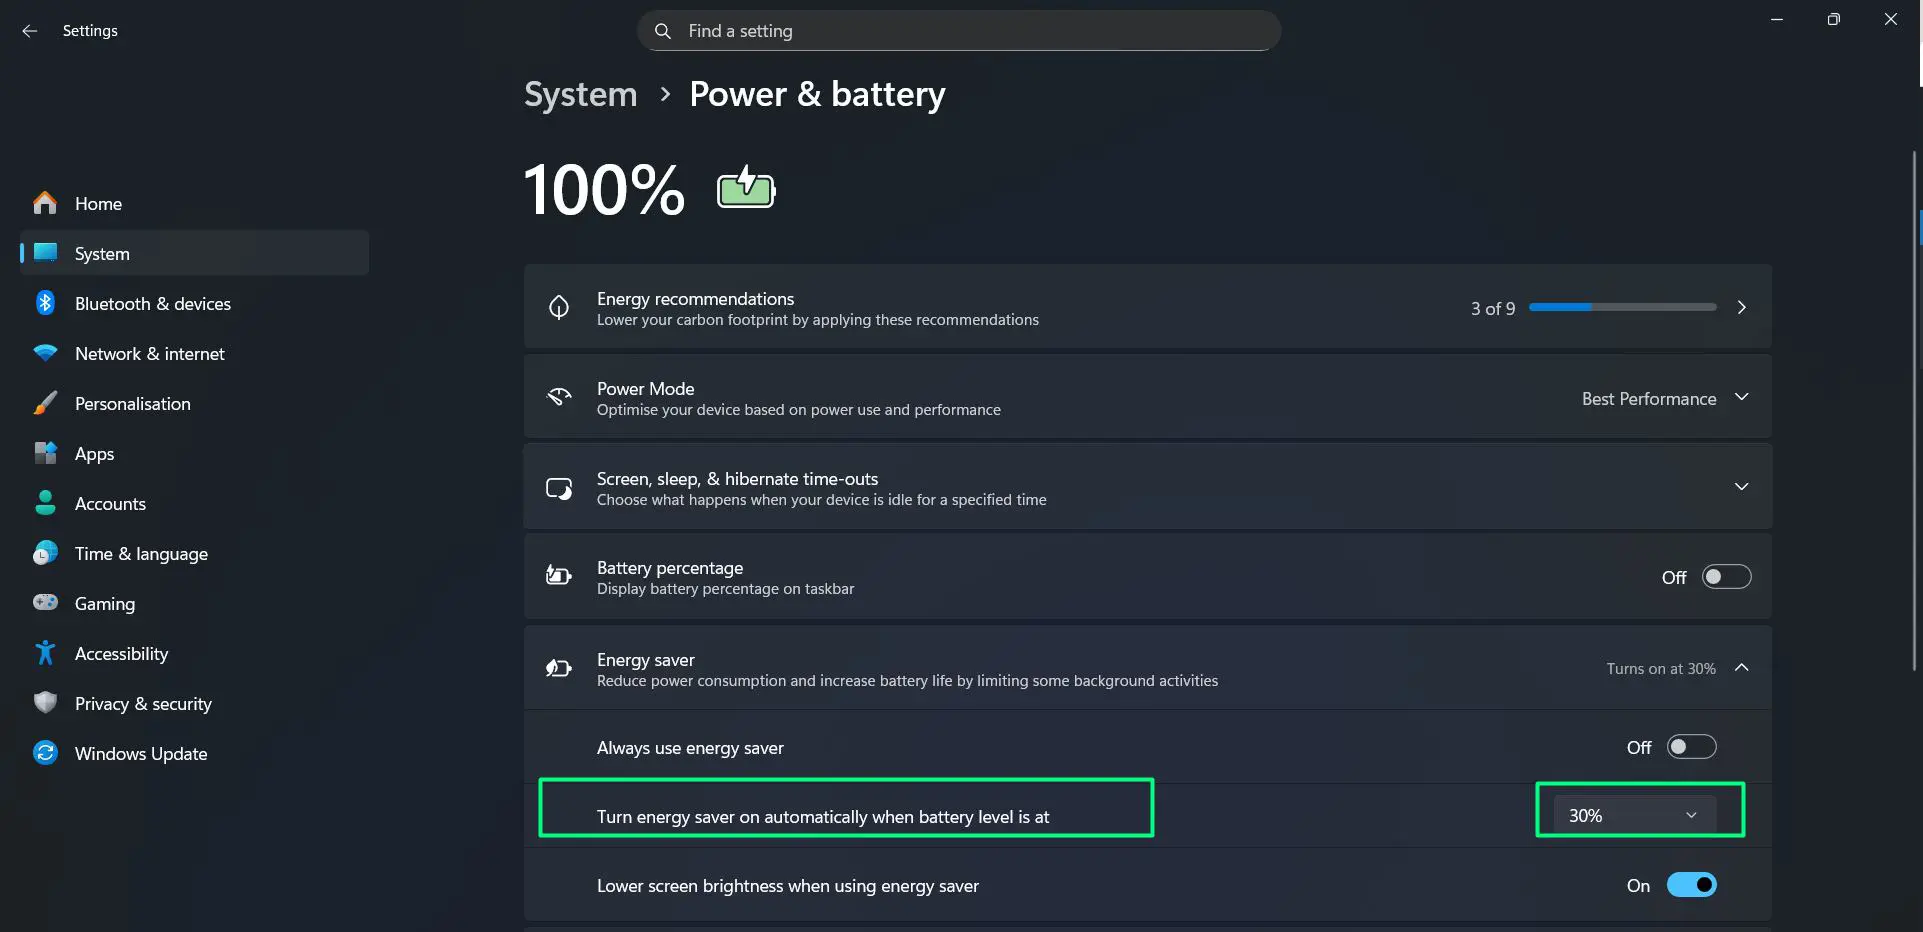
- Step 5: To have it activate automatically, click the dropdown next to ‘Turn energy saver on automatically when battery level is at’ and select the preferred battery percentage. By default this is set to 30%.
- Step 6: Optionally, the ‘Lower screen brightness when using energy saver’ toggle can be left on to save additional power when the mode activates.
When Energy Saver is active, Windows limits background activity and reduces overall system power draw including GPU usage. It is best suited for light tasks like browsing or reading – not for gaming or video editing. Also worth noting, the ‘Power Mode’ option just above Energy Saver lets you quickly switch between ‘Best Performance’, ‘Balanced’, and other modes directly from this same screen.
Tips for Getting the Most Out of GPU Power Settings on Windows 11
Knowing where the settings are is one thing – knowing how to use them smartly is another. These practical tips help get the most out of GPU power management without overcomplicating things.
Match the Power Setting to the Task
Not every task needs full GPU power. Running a GPU at maximum performance while browsing or typing documents wastes energy and generates unnecessary heat. The smarter approach is to reserve ‘High performance’ mode for demanding tasks like gaming, 3D rendering, or video editing, and switch back to ‘Balanced’ or ‘Power saving’ for everything else. This small habit alone can noticeably extend the lifespan of the GPU over time.
Keep GPU Drivers Up to Date
Power management features rely heavily on the GPU driver to function correctly. An outdated driver can cause power settings to behave inconsistently or not apply at all. Always make sure the latest driver is installed from the official NVIDIA, AMD, or Intel website before adjusting power settings. Updated drivers also often include improved power efficiency profiles that were not available in older versions.
Monitor GPU Temperature After Changing Settings
After switching to a higher power mode, it is worth keeping an eye on GPU temperatures, especially in systems with limited airflow. Tools like HWiNFO64 or GPU-Z display real-time temperature readings. If the GPU runs consistently above 85-90 degrees Celsius under load, consider adjusting the power settings back down slightly or improving case ventilation before pushing the GPU harder.
Use ‘High Performance’ Windows Power Plan When Gaming
The Windows power plan and GPU power settings work together. Even if the GPU is set to ‘High performance’ in the NVIDIA or AMD panel, a restrictive Windows power plan can still throttle overall system performance. For the best gaming results, set both the Windows power plan and the GPU preference to ‘High performance’ at the same time.
Reset to Default If Something Feels Off
If GPU behavior seems unusual after making changes – such as unexpected frame drops or higher-than-normal temperatures – restoring the default settings is always a safe move. In the NVIDIA Control Panel, click ‘Restore’ under ‘Manage 3D settings’. In AMD Radeon Software, select ‘Reset’ under the Tuning section. Windows Graphics Settings can be adjusted back to ‘Let Windows decide’ for each app. Starting fresh from defaults is always better than guessing what went wrong.
Frequently Asked Questions
What is the best GPU power setting for gaming on Windows 11?
For gaming, setting the GPU to ‘High performance’ in Windows Graphics Settings and selecting ‘Prefer maximum performance’ in the NVIDIA Control Panel or enabling manual tuning in AMD Radeon Software gives the most consistent frame rates and responsiveness.
Will changing GPU power settings damage the graphics card?
No. Adjusting power settings within the provided software tools and within manufacturer limits will not damage a GPU. These settings are designed to be user-adjustable. Only extreme manual overclocking beyond safe ranges carries risk, and that is outside the scope of standard power settings.
Do GPU power settings reset after a Windows update?
Sometimes. Major Windows updates can occasionally reset system settings including power preferences. It is a good habit to check GPU power settings after a significant update to make sure everything is still configured as intended.
Can GPU power settings affect laptop battery life?
Yes, significantly. Setting the GPU to ‘High performance’ mode while on battery will drain it much faster. Using ‘Power saving’ mode or letting Windows decide is recommended when unplugged to extend battery runtime.
Is there a difference between managing GPU power in Windows Settings vs the NVIDIA or AMD control panel?
Yes. Windows Settings controls which GPU an application uses and sets a general preference. The NVIDIA and AMD panels provide deeper control, including clock speed management, fan behavior, and detailed per-application tuning that Windows Settings does not offer.