Quick Summary
Managing apps on Windows 11 is straightforward once the right path is known. Below is a quick overview of what this guide covers.
- How to uninstall programs using the Settings app
- How to remove apps via the Control Panel
- How to uninstall directly from the Start Menu
- How to install new programs from the Microsoft Store
- How to install programs from external sources
Managing software on Windows 11 does not have to be complicated. Whether uninstalling an old app that is slowing things down or installing a new tool for work, Windows 11 offers several quick and easy ways to get it done. This guide walks through every method clearly, step by step, with no fluff.
How to Remove App or Programs in Windows 11 Using Settings
The Settings app is the most modern and recommended way to uninstall programs in Windows 11. Most people find this method the fastest for everyday use.
Watch this: How to Remove App or Programs in Windows 11 Easily
- Step 1: Press the Windows key and click on ‘Settings’ (the gear icon).

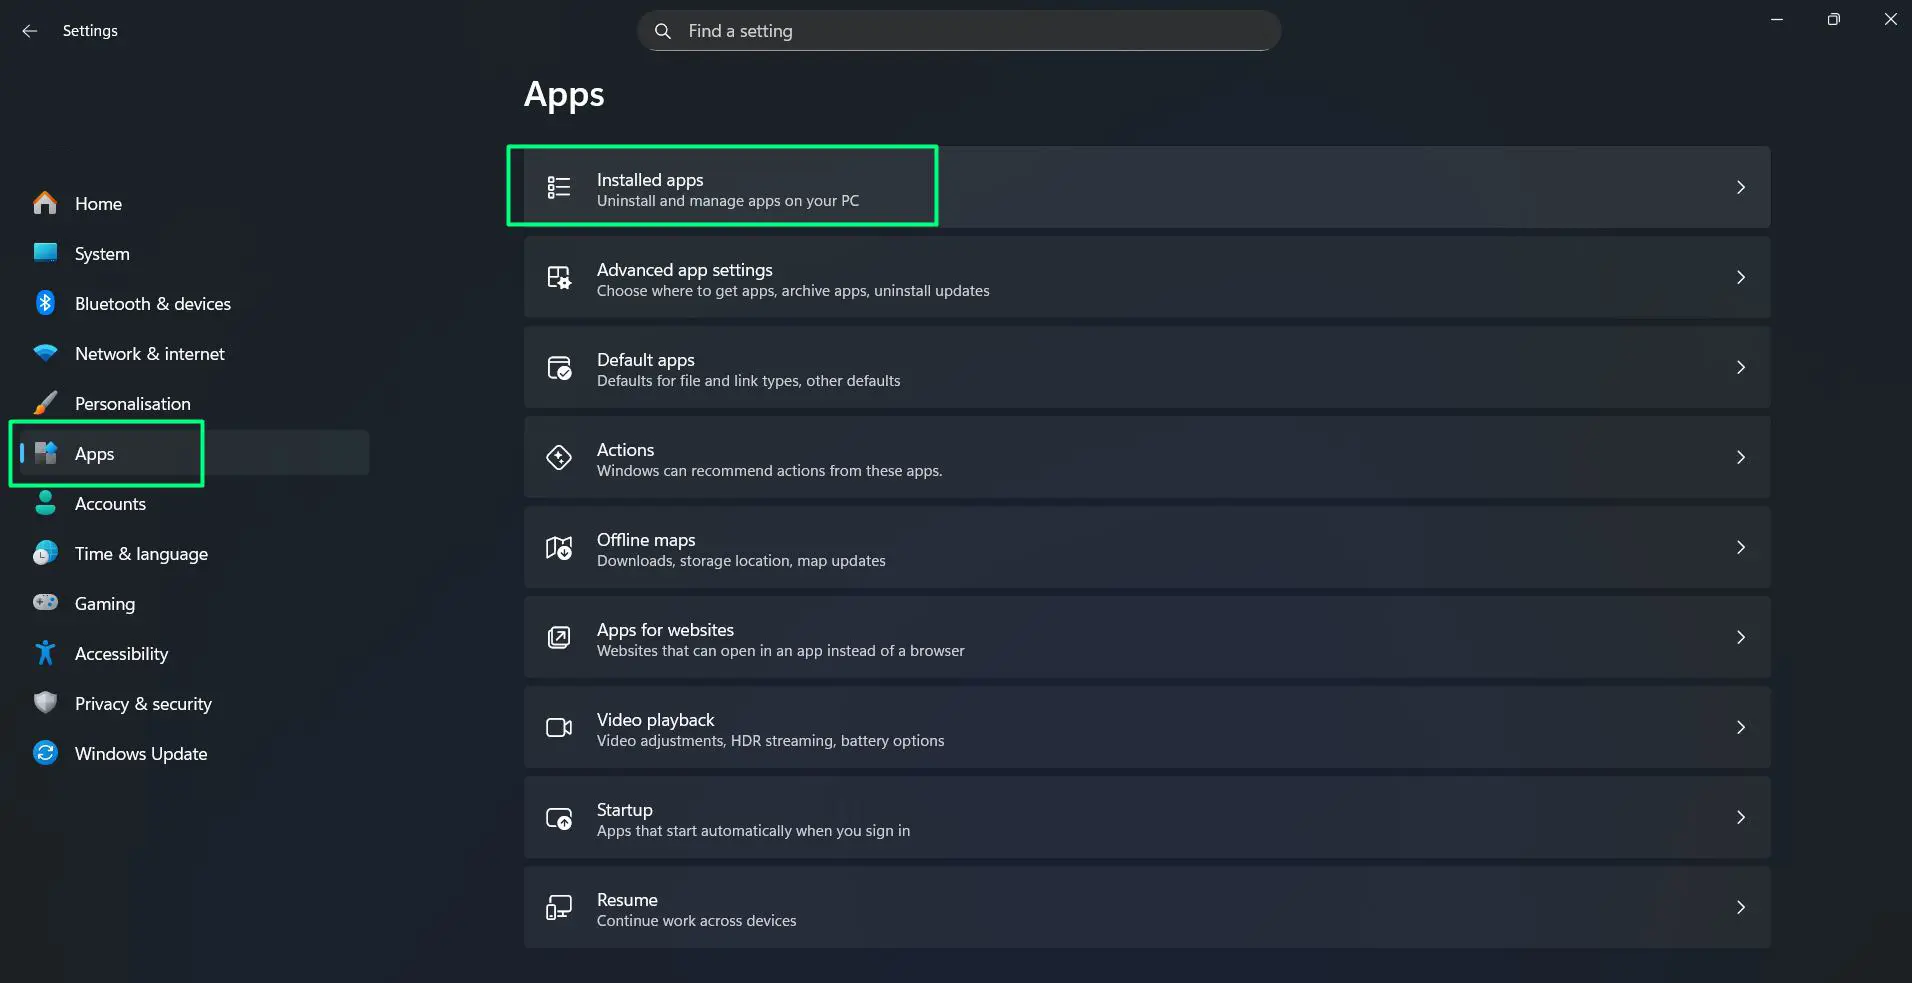
- Step 2: Click on ‘Apps’ from the left-side menu.
- Step 3: Select ‘Installed apps’ to see a full list of everything installed.
- Step 4: Find the program to remove by scrolling or using the search bar at the top.
- Step 5: Click the three-dot menu icon next to the program name.
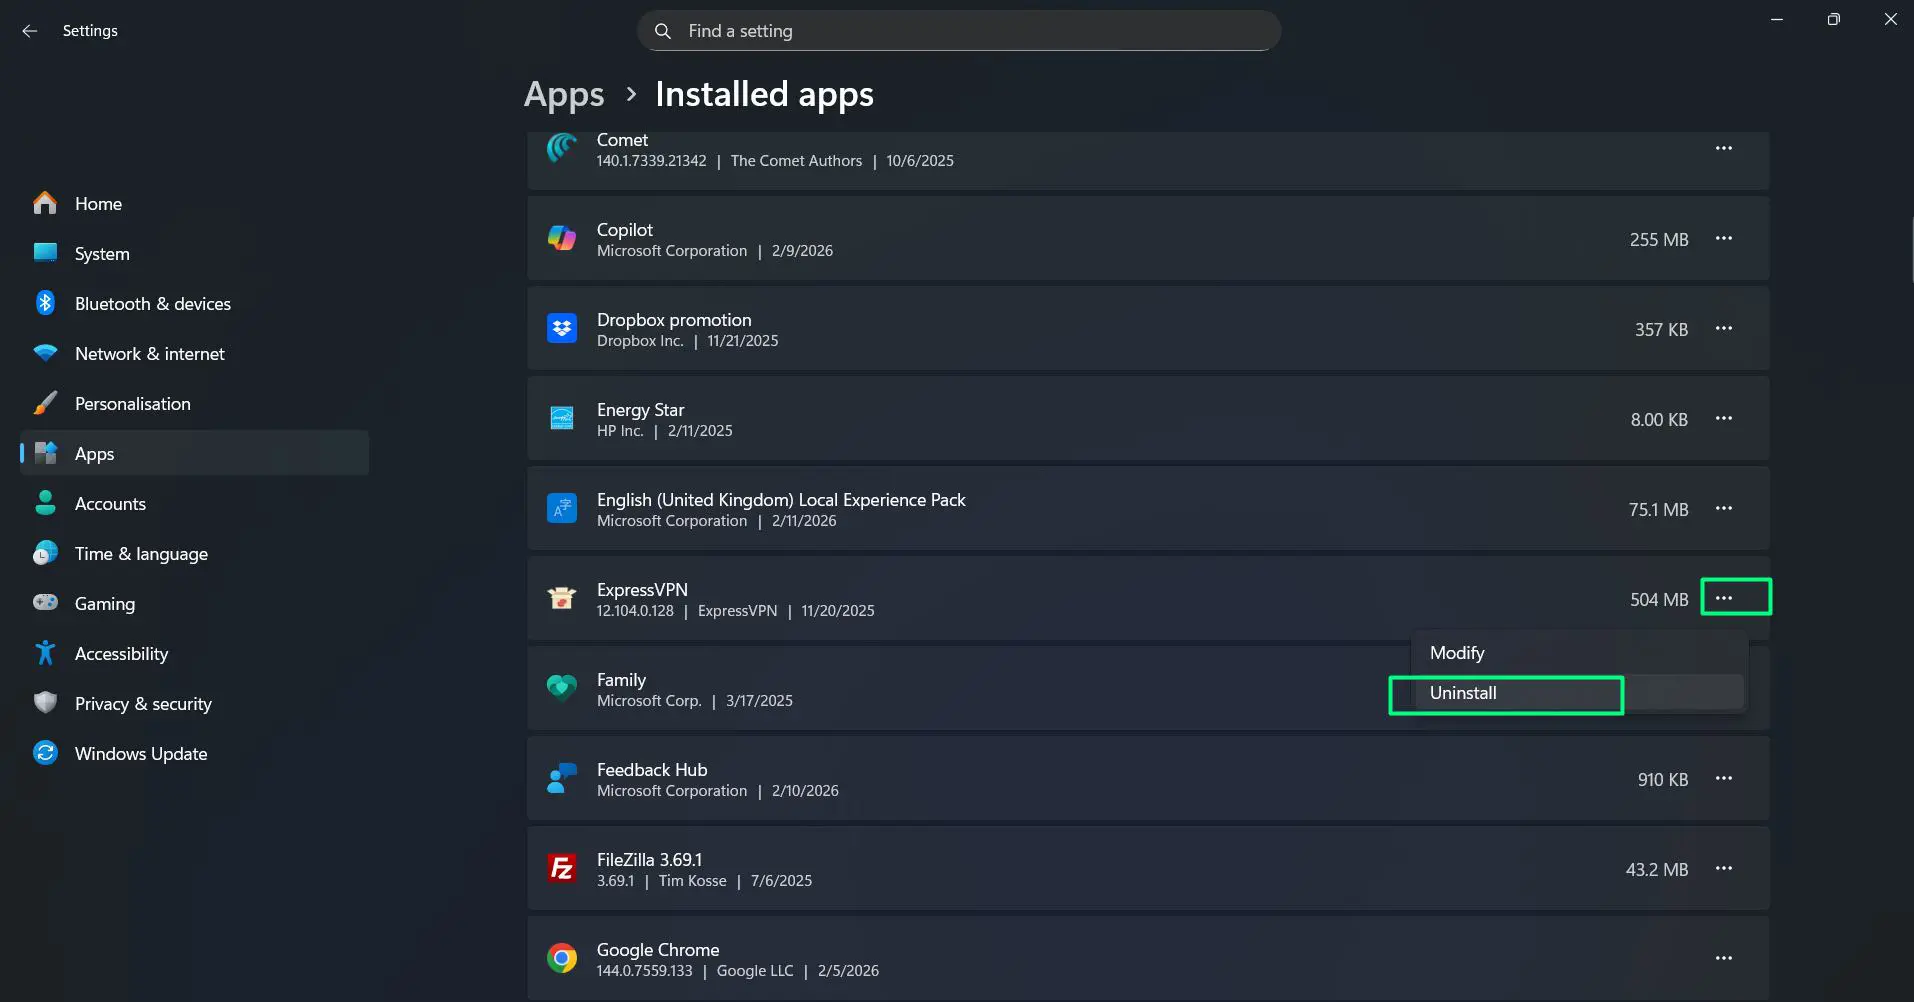
- Step 6: Click ‘Uninstall’ and confirm when prompted.
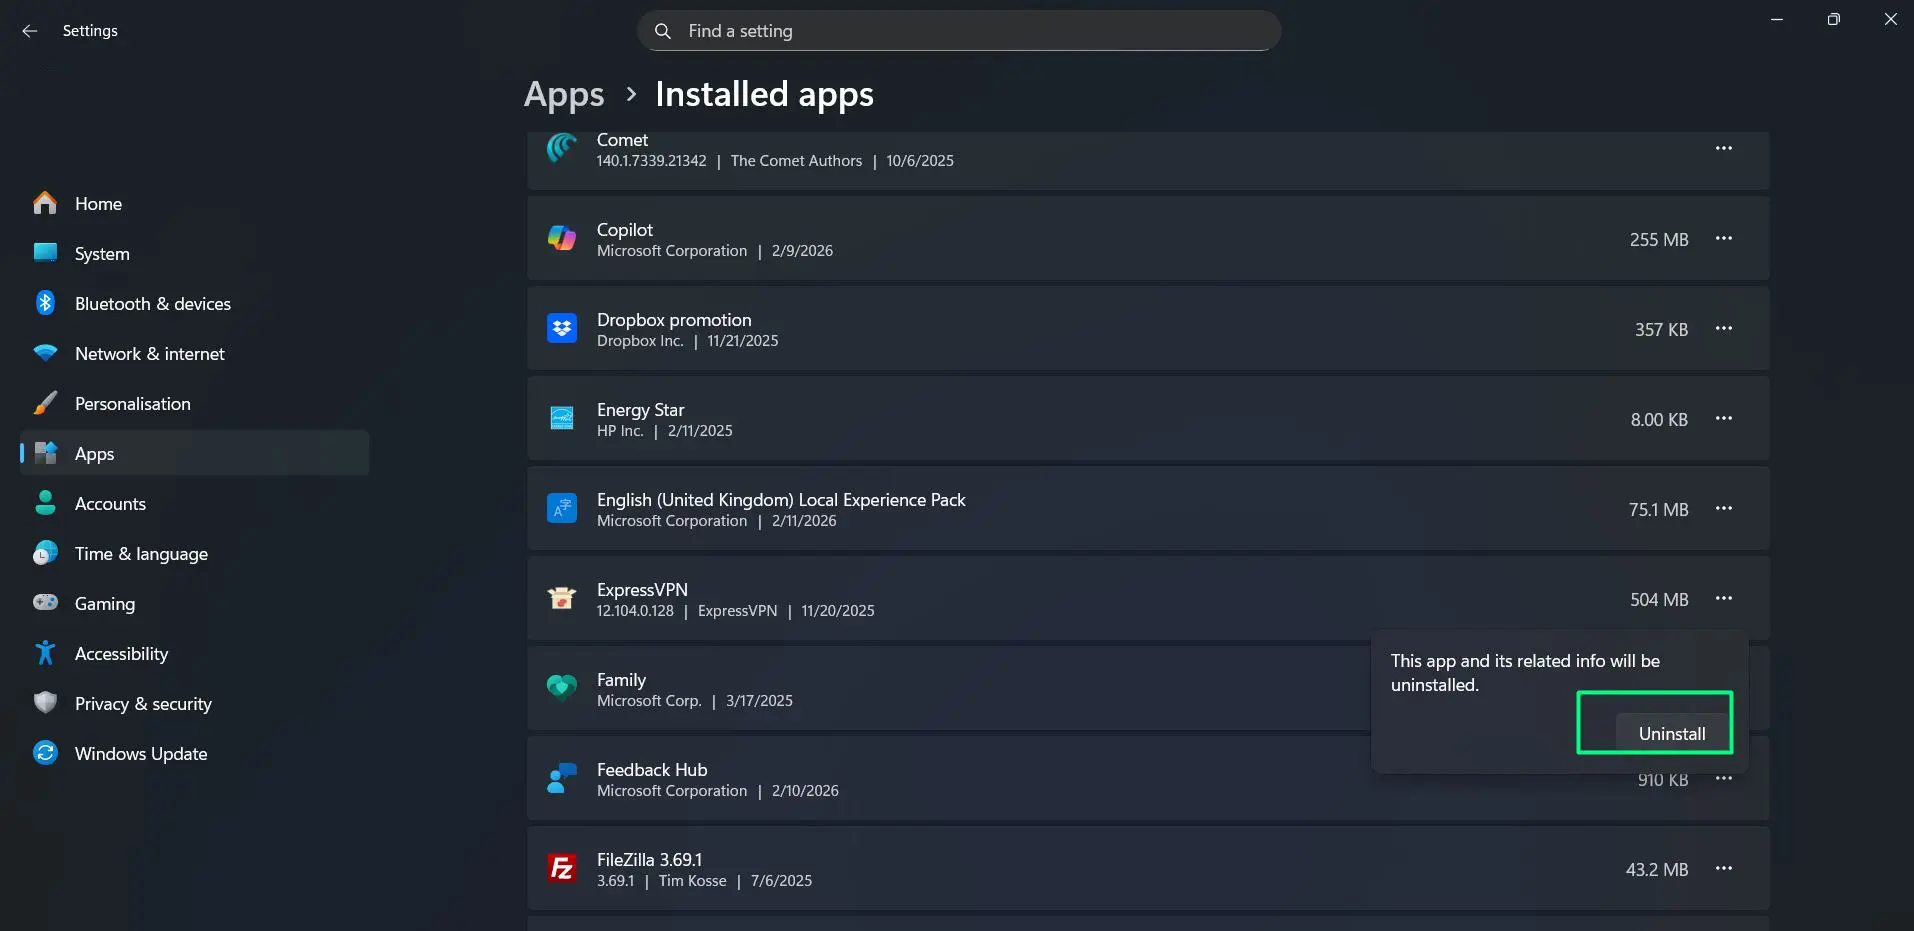
Windows will handle the rest automatically. Some apps may ask to confirm the decision one more time before fully removing.
How to Remove Programs Using Control Panel
The Control Panel method is the classic ‘add or remove programs’ experience that Windows users have relied on for years. It still works perfectly in Windows 11 and is especially useful for older desktop software.
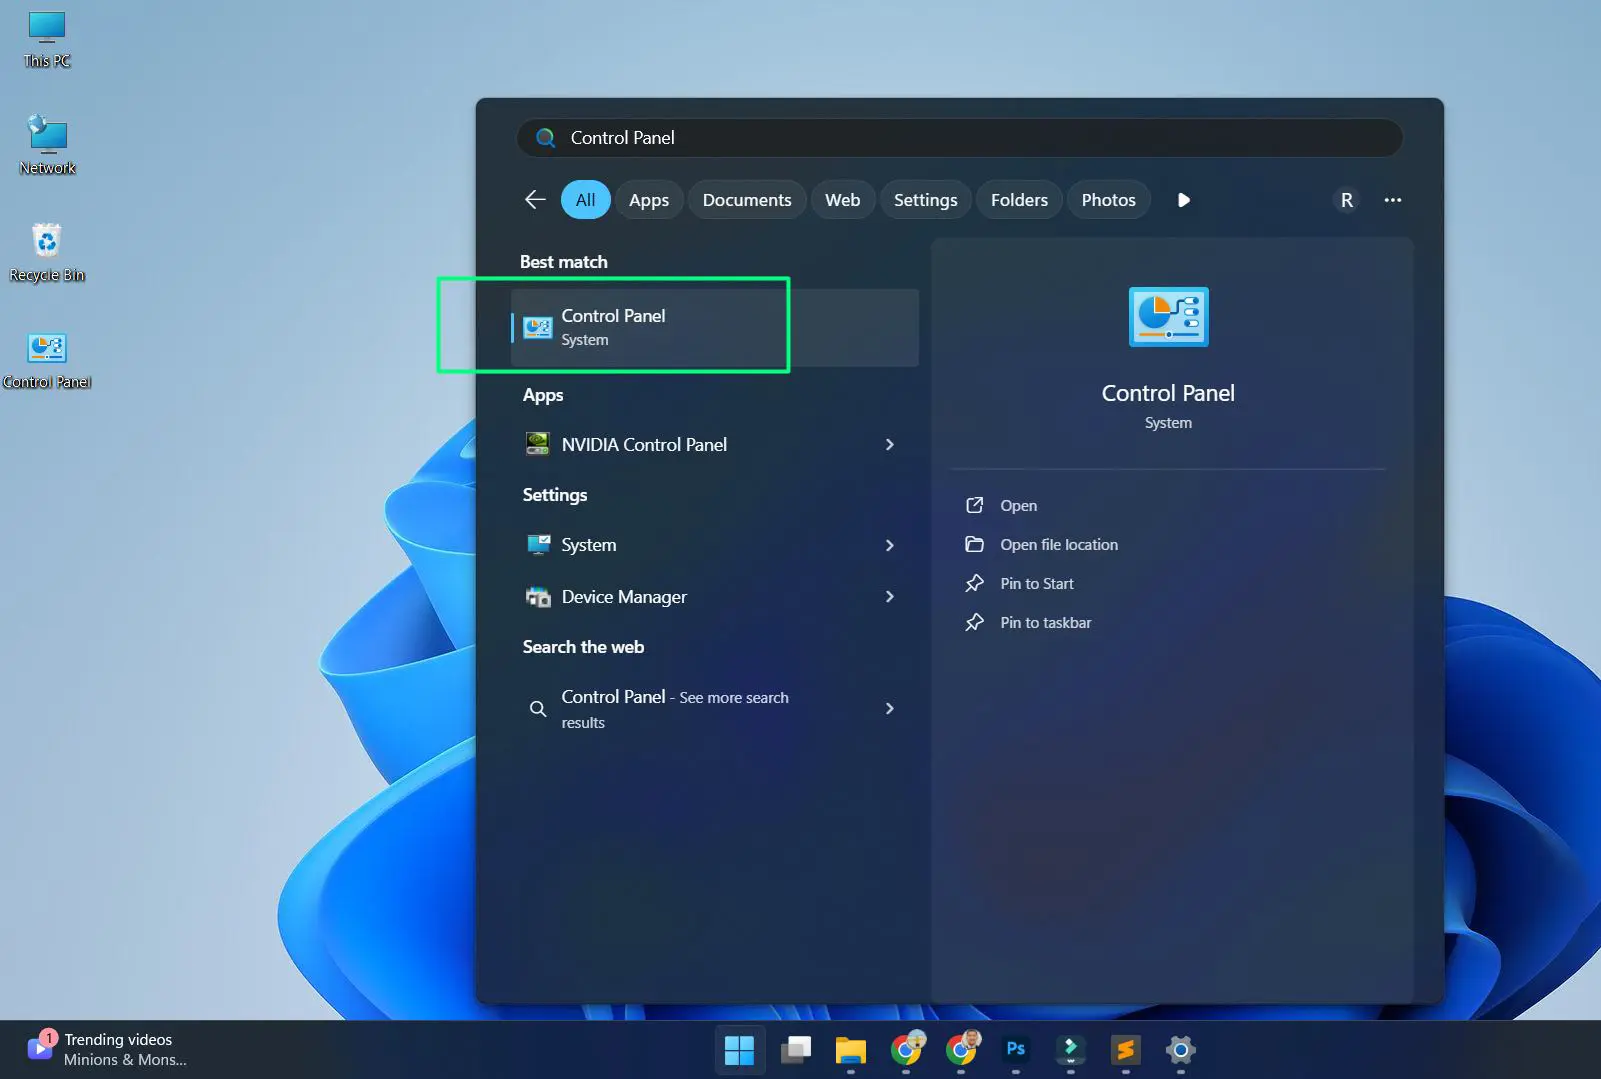
- Step 1: Click the Start button and type ‘Control Panel’ in the search bar.
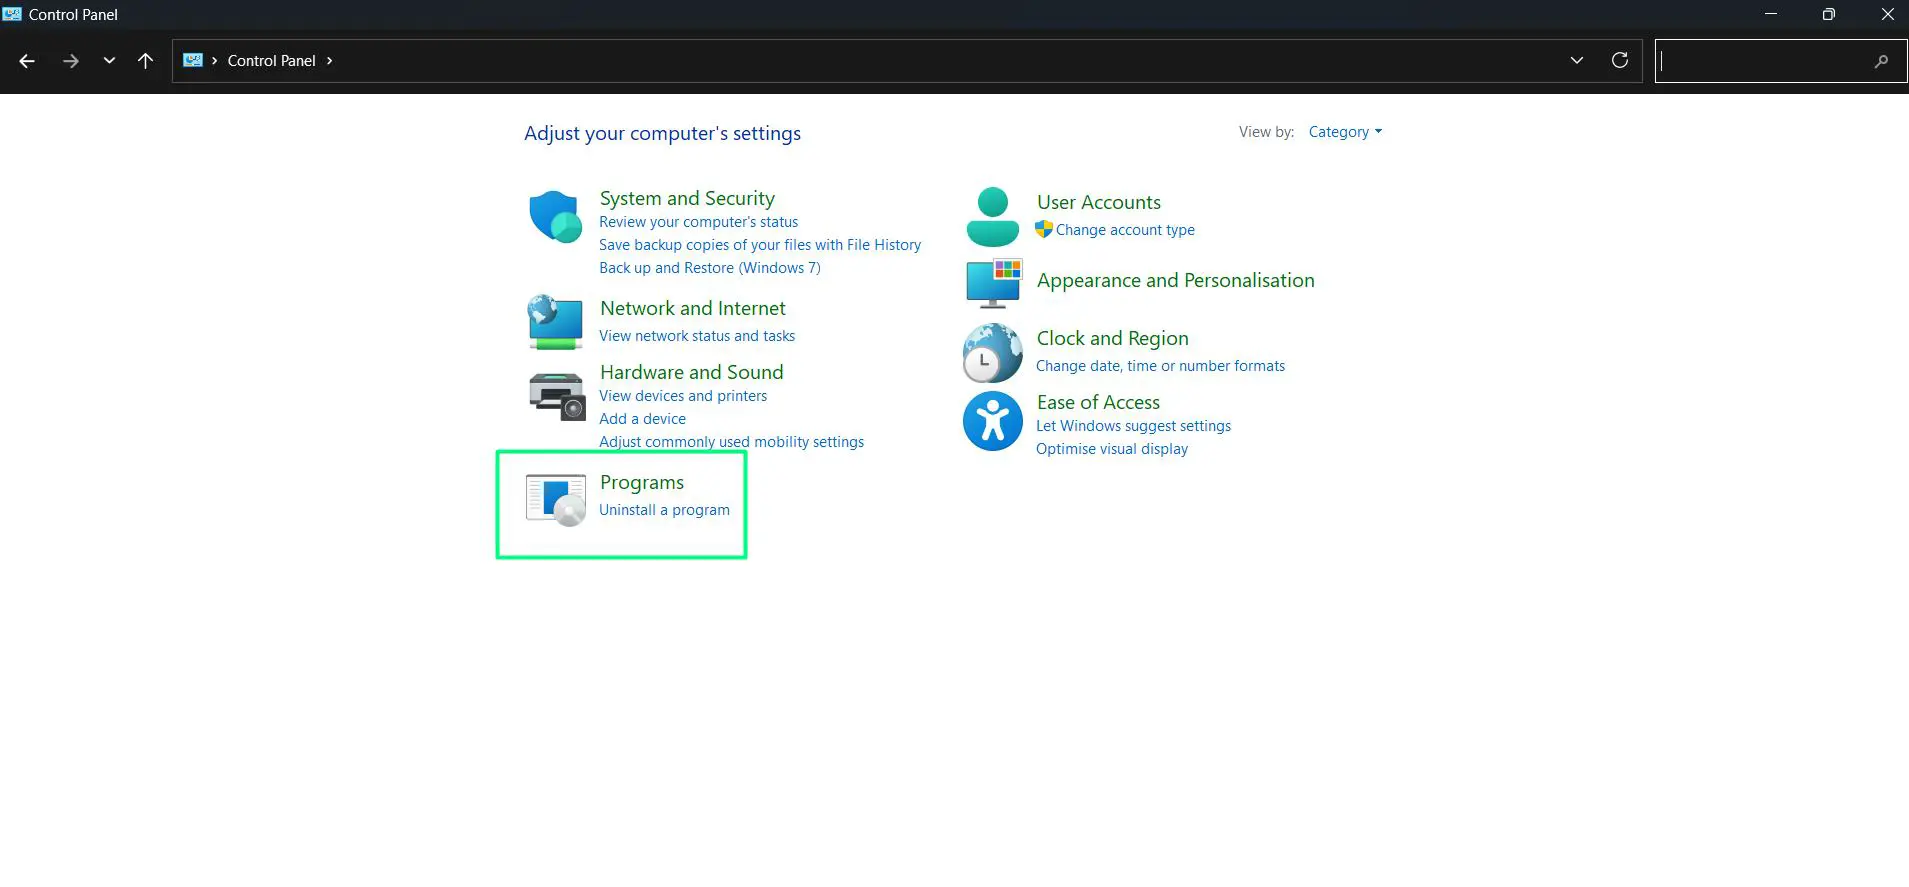
- Step 2: Open Control Panel from the results.
- Step 3: Click on ‘Programs’
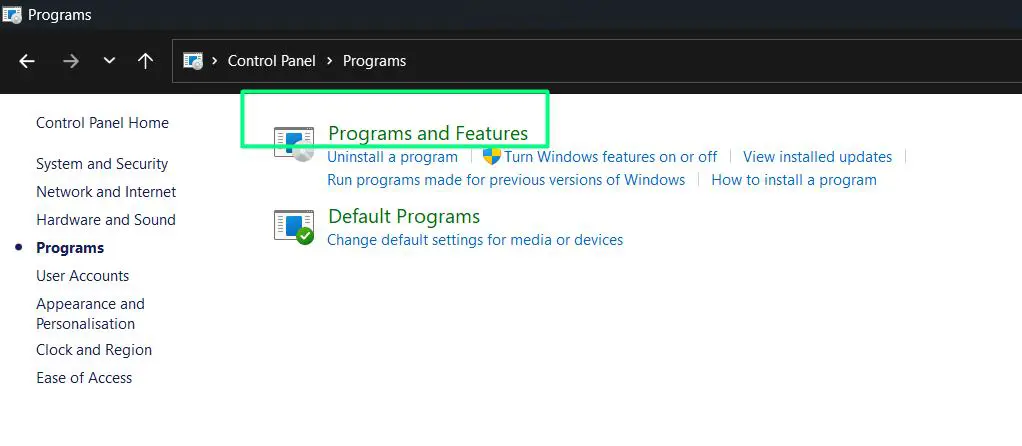
- Step 4: Click ‘Programs and Features’.
- Step 5: Browse or search for the program to uninstall.
- Step 6: Right-click the program you want to remove and select ‘Uninstall’.
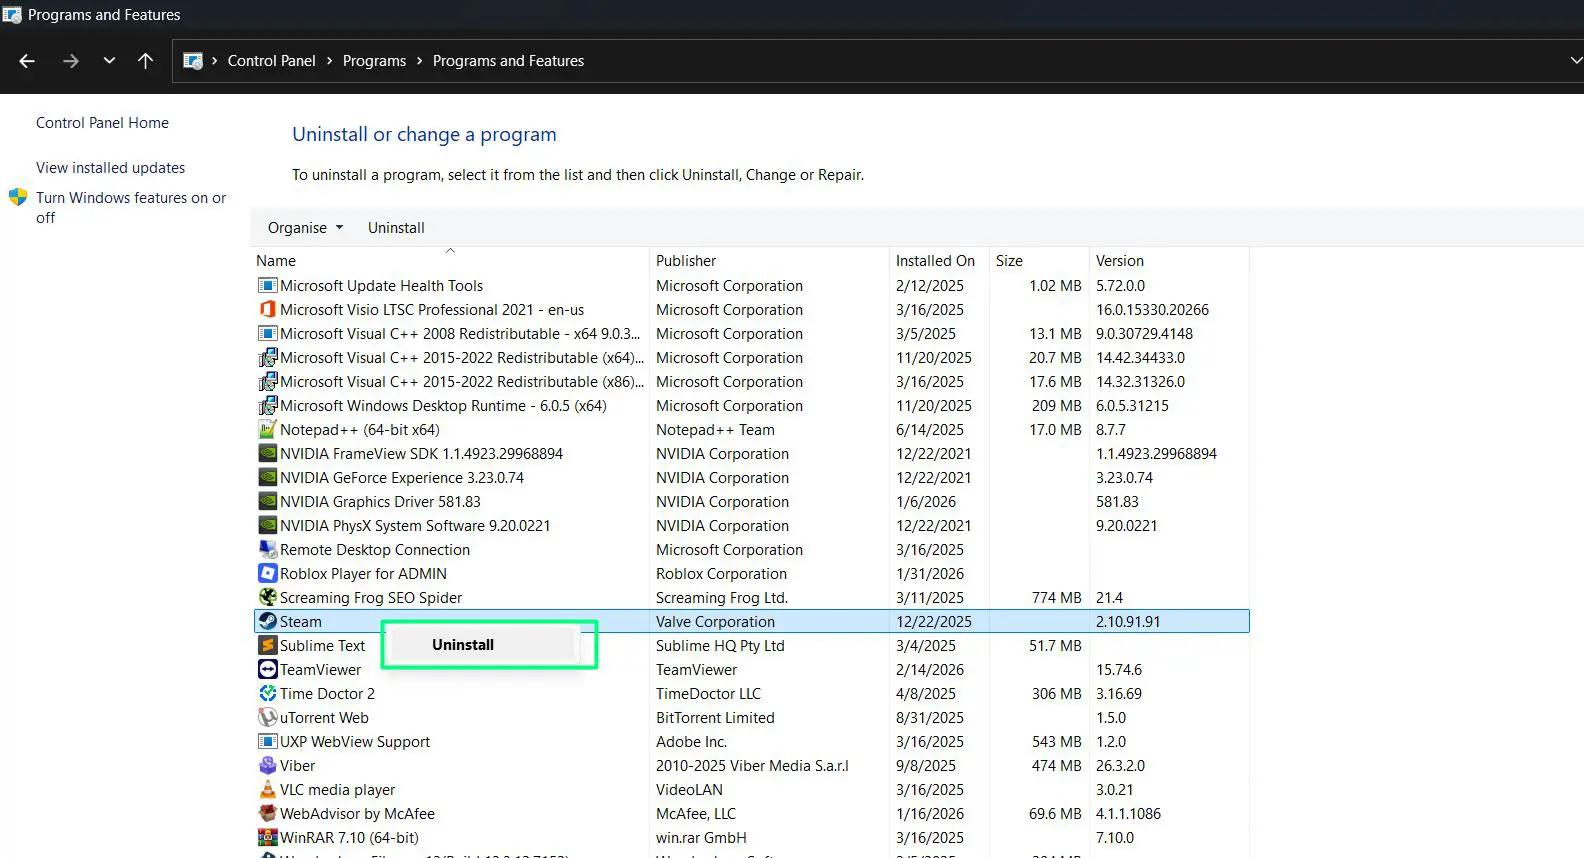
- Step 7: Follow the on-screen prompts to complete the removal.
This method is particularly reliable for legacy software that may not appear properly in the modern Settings app.
How to Uninstall Apps Directly from the Start Menu
This is easily the quickest route when the app is already pinned or visible in the Start Menu. The key is knowing that a simple right-click does the job.
- Step 1: Click the Start button or press the Windows key.
- Step 2: Locate the app either in the pinned section or by searching for it.
- Step 3: Right-click on the app icon.
- Step 4: Select ‘Uninstall’ from the context menu.
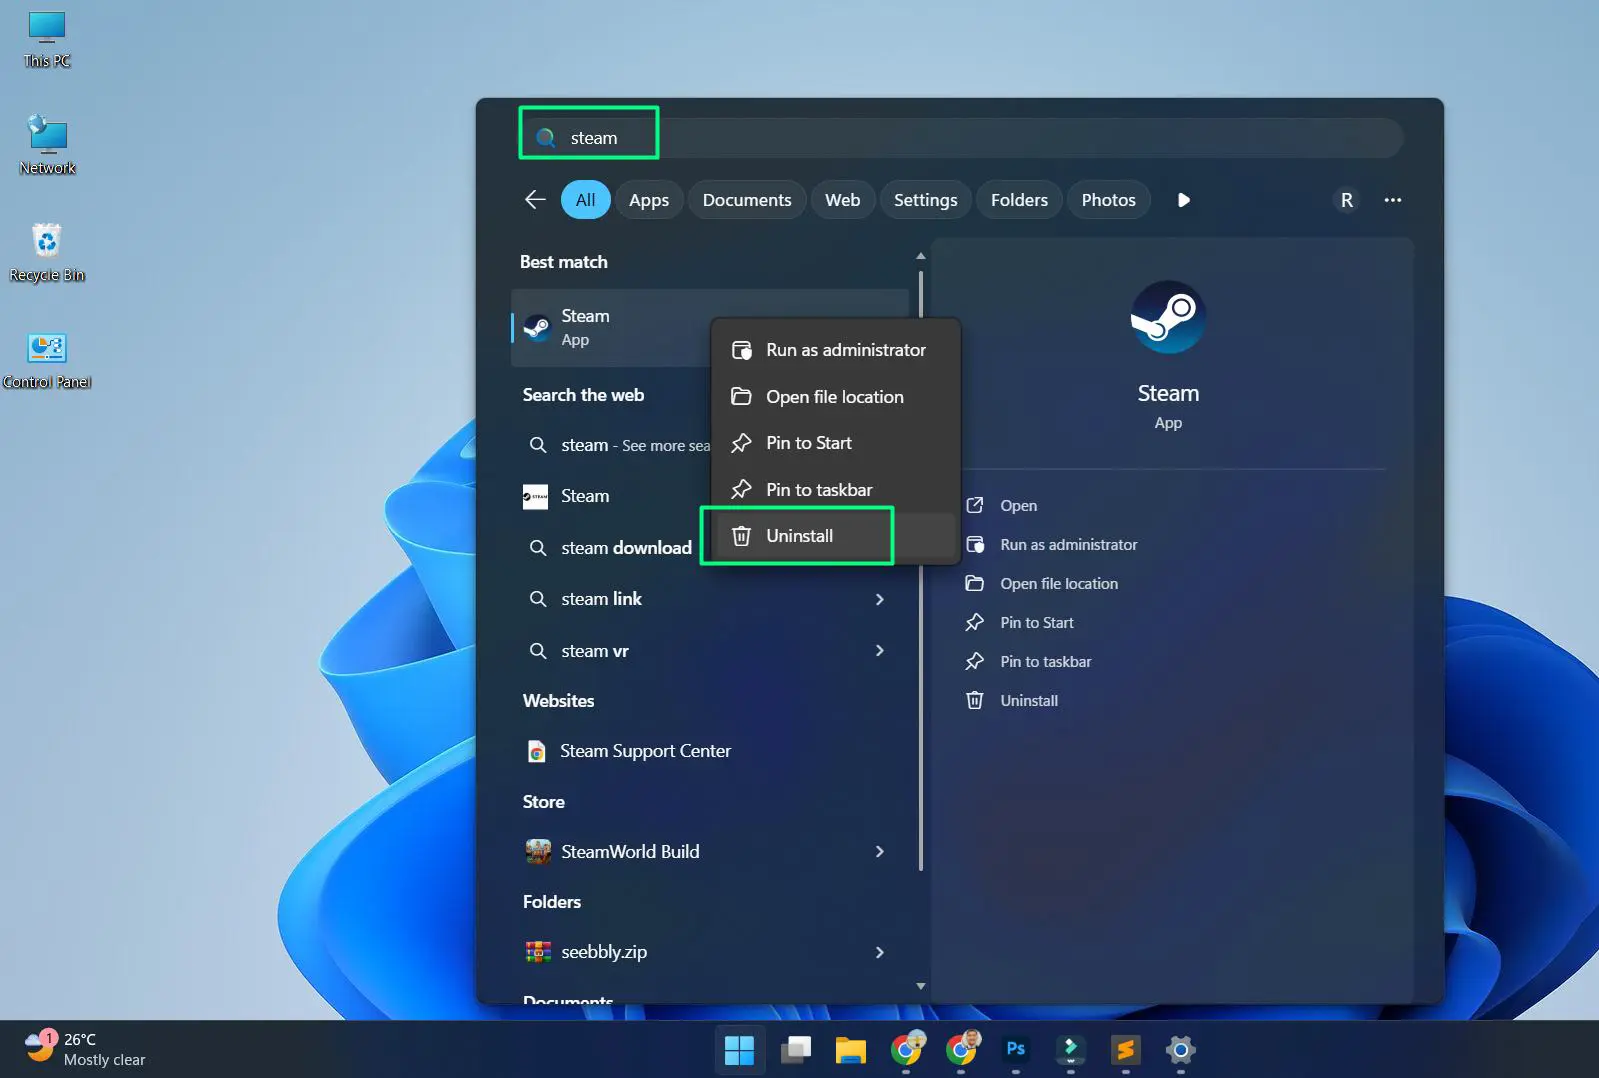
- Step 5: Confirm the uninstall when Windows asks for confirmation.
This works best when dealing with Microsoft Store apps. Traditional desktop programs will redirect to the Settings or Control Panel uninstall flow.
How to Add Programs in Windows 11 from the Microsoft Store
Installing apps from the Microsoft Store is the safest and most straightforward method. Every app goes through a verification process, which reduces security risks.
Watch this tutorial: Add Programs in Windows 11 from the Microsoft Store
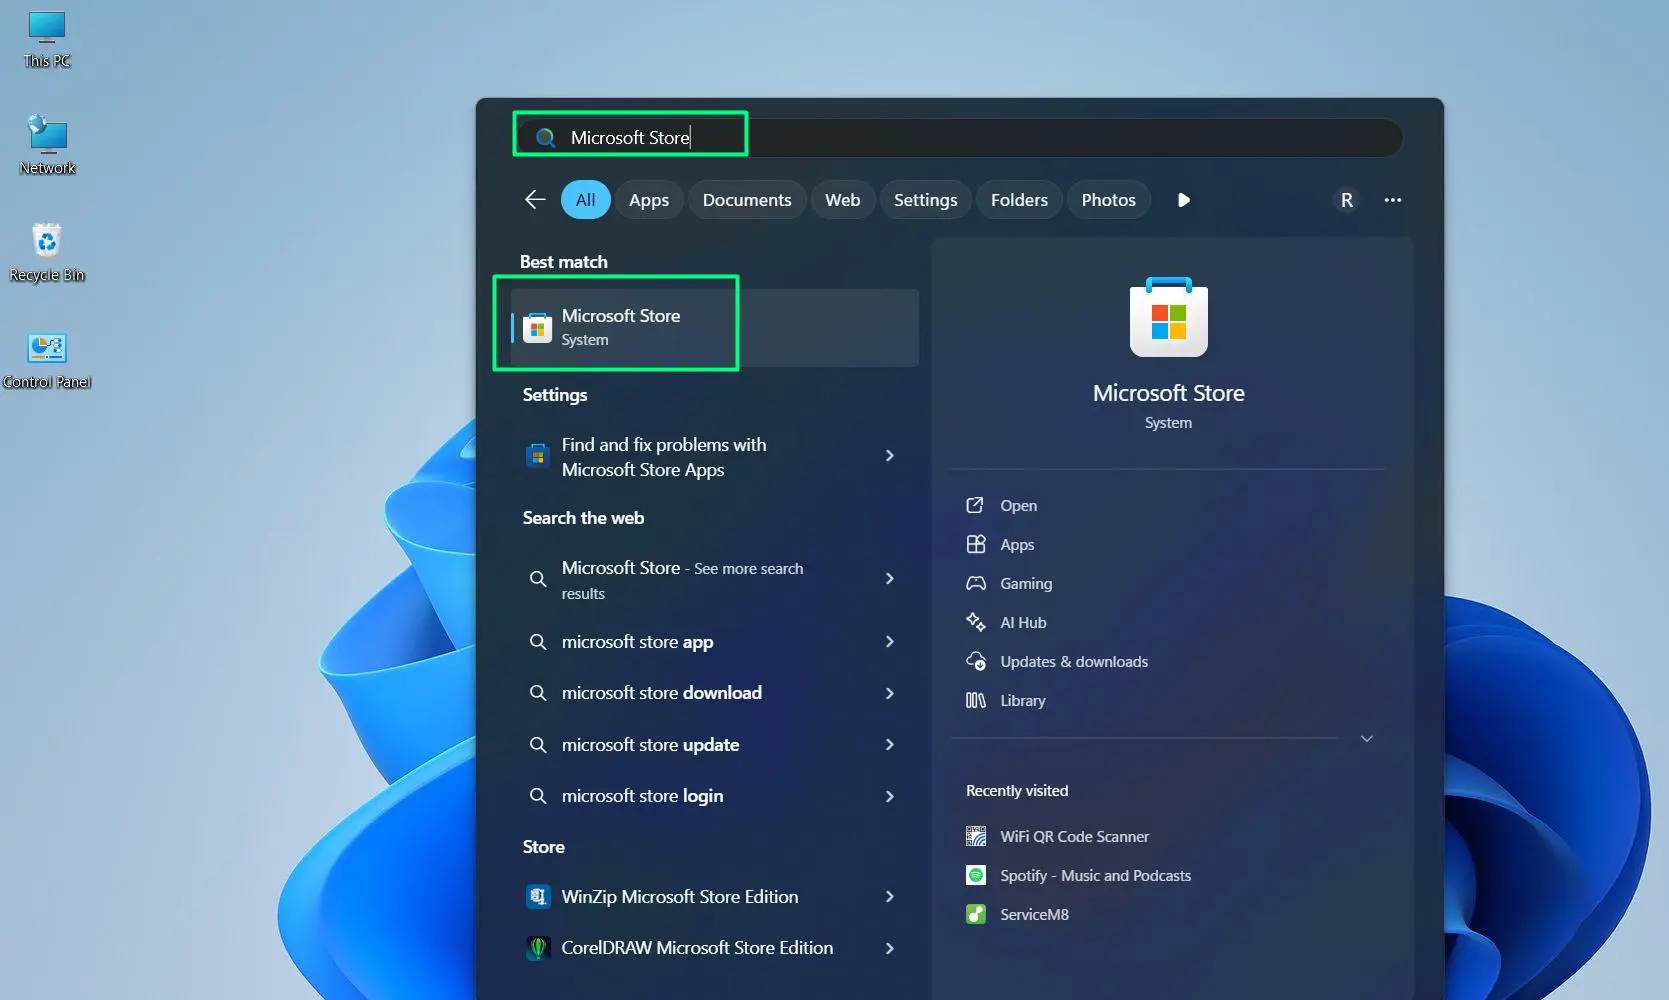
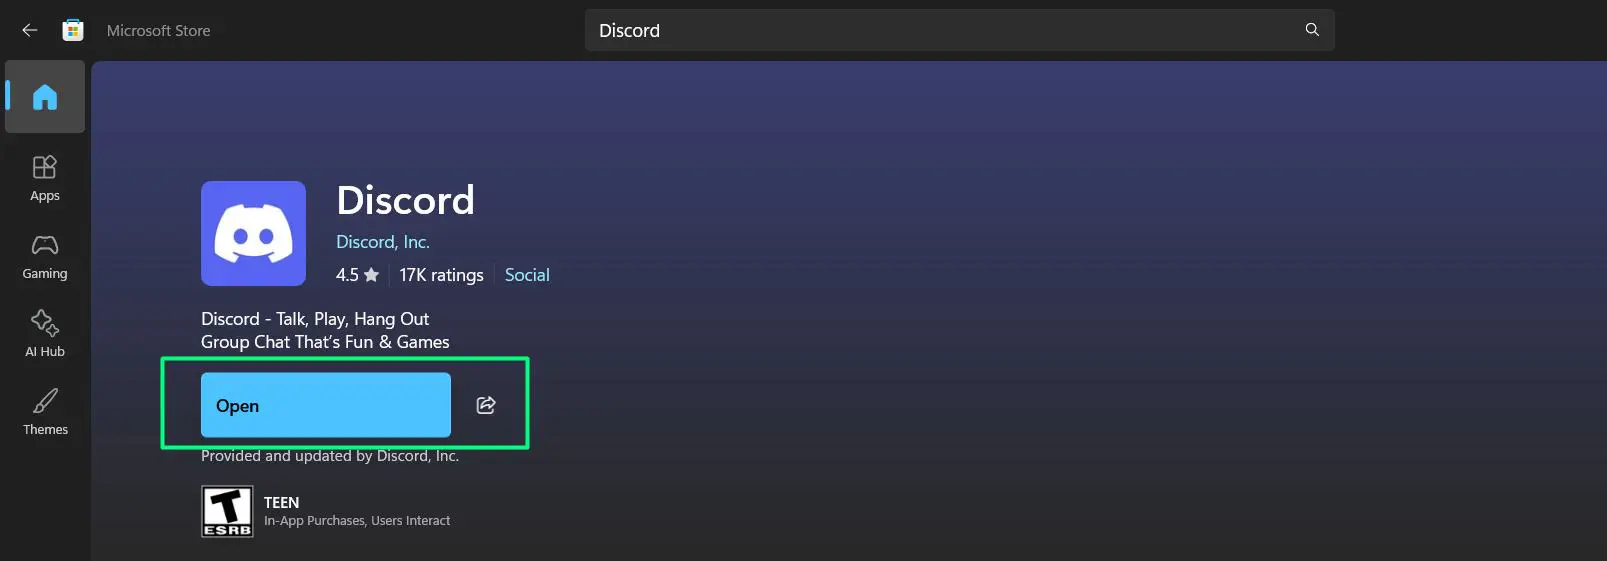
- Step 1: Press the Start button, type “Microsoft Store” in the search bar, and select it to open.
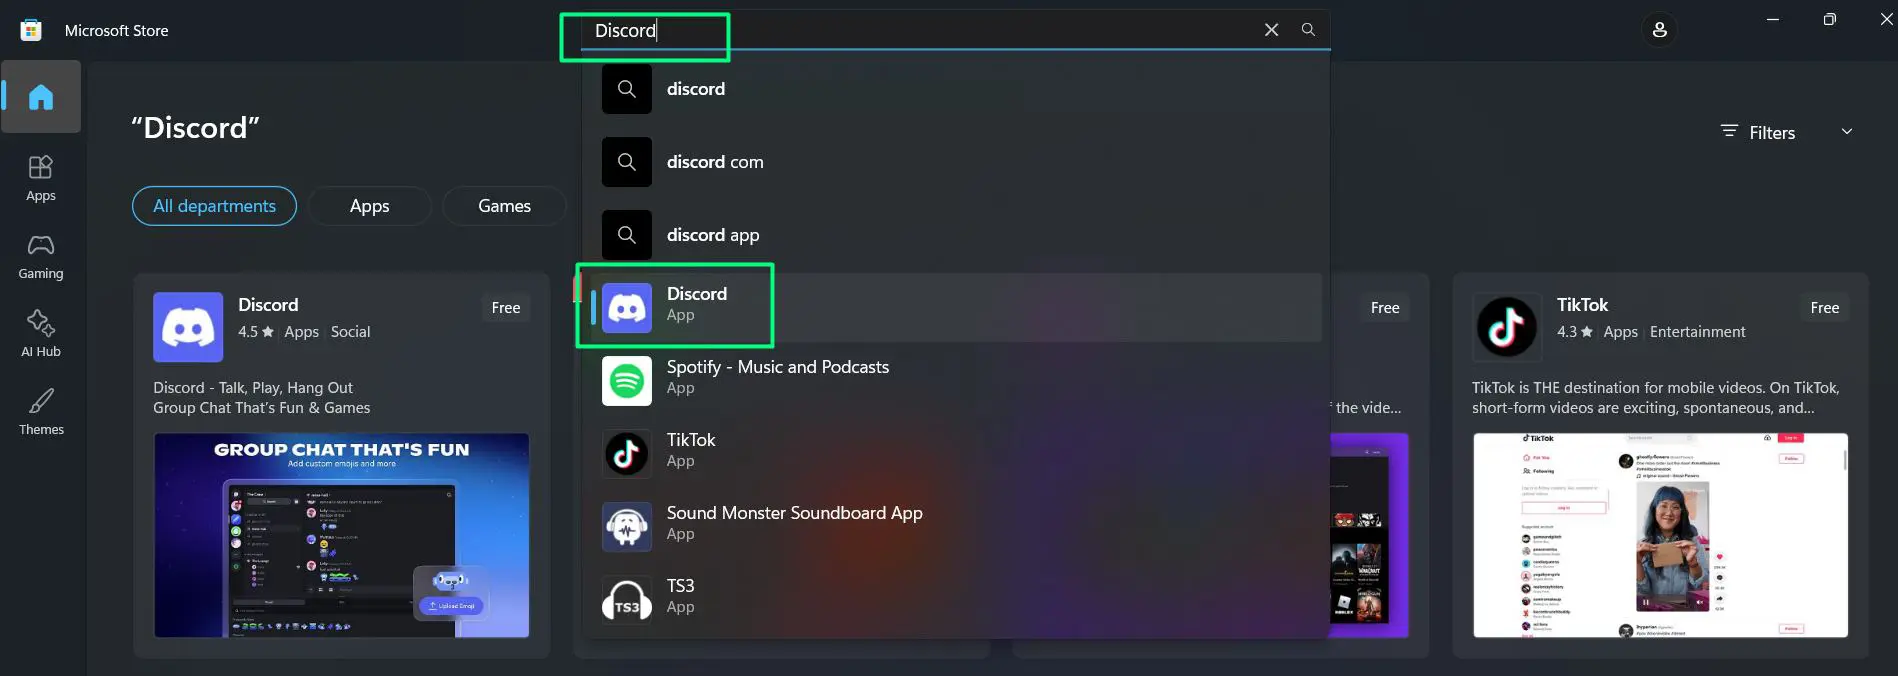
- Step 2: Use the search bar at the top to find the desired app or program.
- Step 3: Click on the app from the search results.
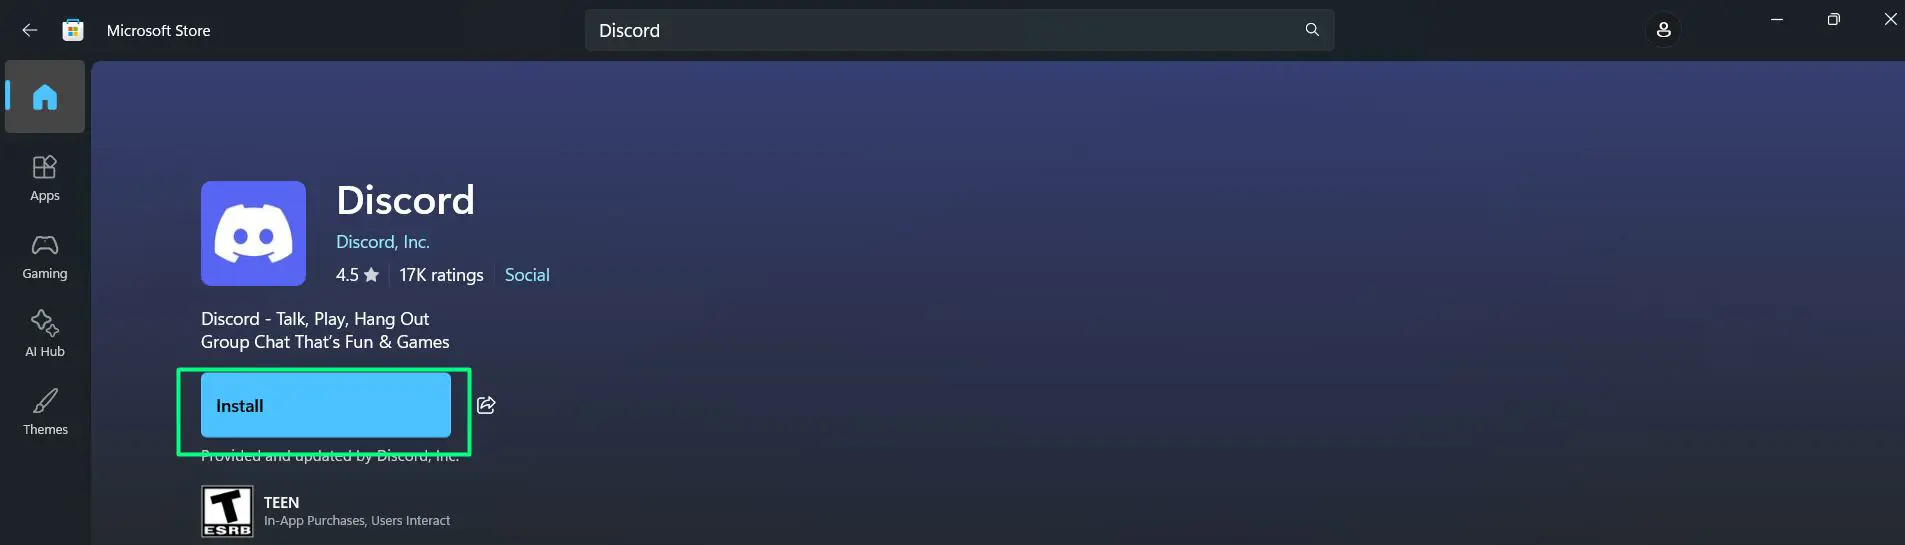
- Step 4: Click the ‘Get’ or ‘Install’ button.
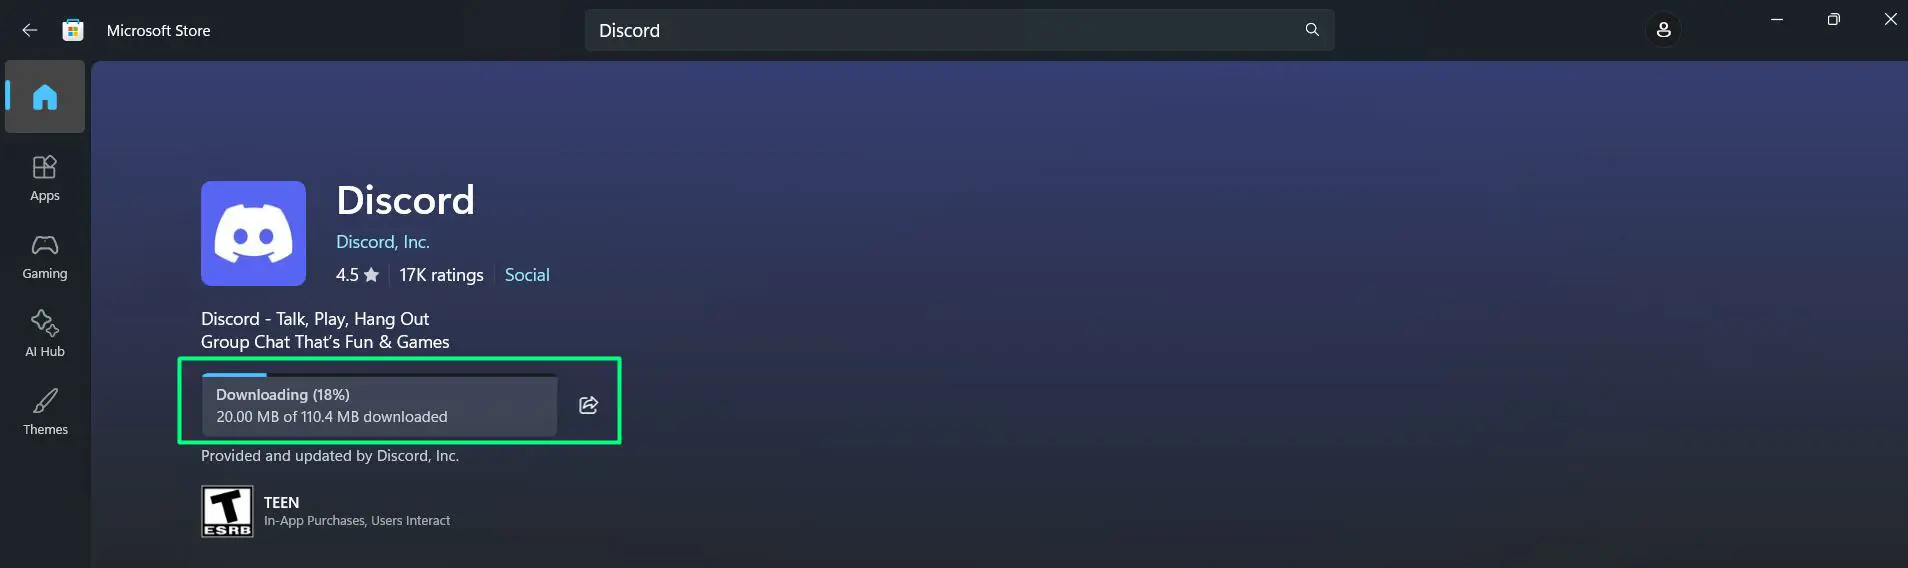
- Step 5: Wait for the download and installation to finish.
- Step 6: Click ‘Open’ to launch the app immediately, or find it later in the Start Menu.
Pro-Tip: Always check the app rating and reviews in the Microsoft Store before installing. A highly rated app with thousands of reviews is almost always a safe and reliable choice.
How to Install Programs from External Sources (EXE or MSI Files)
Not every program is available on the Microsoft Store. Many professional tools, games, and utilities come as downloadable installer files from official websites. Here is how to handle those safely on Windows 11.
- Step 1: Download the installer file (.exe or .msi) from the official website of the software.
- Step 2: Once downloaded, locate the file in the ‘Downloads’ folder.
- Step 3: Double-click the installer file to begin the setup process.
- Step 4: If Windows SmartScreen shows a warning, click ‘More info’ and then ‘Run anyway’ only if the source is trusted.
- Step 5: Follow the installation wizard steps, choosing the preferred settings.
- Step 6: Click ‘Finish’ or ‘Close’ once the installation is complete.
The program will typically create a shortcut on the Desktop or appear in the Start Menu after installation is done.
Pro-Tip: Always download software exclusively from the official developer website or a trusted platform. Downloading from third-party or unofficial sources is the number one way malware ends up on a computer.
How to Check All Installed Programs in Windows 11
Keeping track of what is installed on a system is good practice, especially when managing storage or troubleshooting performance. Windows 11 makes this easy.
- Step 1: Open ‘Settings’ and go to ‘Apps’.
- Step 2: Click ‘Installed apps’.
- Step 3: Use the sort and filter options at the top to organize by name, size, or install date.
Sorting by size is a great way to spot large programs that are no longer needed and free up disk space quickly.
Helpful Tips for Managing Programs in Windows 11
Knowing how to add or remove programs in Windows 11 is one thing, but managing them smartly over time makes a real difference in system performance and security. These practical tips are worth keeping in mind.
- Regularly audit installed apps. Every few months, go through the ‘Installed apps’ list in Settings and remove anything that is no longer used. Unused programs take up storage space and can sometimes run background processes that slow things down.
- Sort by install date to spot unfamiliar programs. If the computer feels slower than usual, sorting the installed apps list by date can quickly reveal recently added programs that might be causing the issue.
- Check program size before uninstalling. Sorting apps by size in the Installed apps list helps identify the biggest storage offenders. Removing one large unused program can free up more space than deleting dozens of small files.
- Restart after uninstalling. Some programs, especially system utilities or drivers, require a restart to fully complete the removal process. When in doubt, a quick restart ensures everything is properly cleaned up.
- Use official sources every time. Whether installing a browser, a design tool, or a game launcher, always go directly to the official website. This single habit eliminates most risks tied to downloading software on any Windows machine.
- Keep an eye on startup programs after installing new software. Some programs automatically add themselves to the startup list after installation. Head to Task Manager – Startup apps to review and disable anything that does not need to launch at boot, which keeps startup times fast.
- Check compatibility before installing older software. Most older programs run fine on Windows 11, but checking the developer’s site for a Windows 11 compatible version first avoids potential Windows compatibility issues down the line.
Frequently Asked Questions
Where is ‘Add or Remove Programs’ in Windows 11?
In Windows 11, the equivalent of ‘Add or Remove Programs’ is found under Settings – Apps – Installed apps. The classic Control Panel version is still accessible by searching ‘Programs and Features’ in the Start Menu search bar.
Can programs be removed without going into Settings?
Yes. Right-clicking an app in the Start Menu gives a direct ‘Uninstall’ option. This is one of the fastest ways to remove apps without opening any extra windows.
What is the difference between uninstalling from Settings versus Control Panel?
Both accomplish the same goal. The Settings app is more modern and better suited for Microsoft Store apps, while Control Panel is often more reliable for older desktop software and legacy programs.
Is it safe to install programs from outside the Microsoft Store?
Yes, as long as the download comes from the official developer website or a verified trusted source. Always avoid downloading software from unfamiliar third-party sites to stay protected.
How do multiple programs get uninstalled at once in Windows 11?
Windows 11 does not natively support batch uninstalling. Each program needs to be removed one at a time through Settings or Control Panel. Third-party tools like Bulk Crap Uninstaller can handle multiple removals at once if needed.
Will uninstalling a program delete its saved files?
Not always. Some programs leave behind folders, settings, or saved data in locations like AppData even after being uninstalled. These leftovers can be manually deleted from File Explorer if needed.