Knowing how to change your IP address on Windows 11 is one of those practical skills that comes in handy more often than most people expect. Whether the goal is to connect to a specific network, avoid IP conflicts, or use a static address for a home server, Windows 11 makes this possible through built-in settings – no third-party tools required.
Key Takeaways
- Windows 11 supports both automatic (DHCP) and manual (static) IP address configuration
- The quickest way to change an IP is using ‘ipconfig /release’ and ‘ipconfig /renew’ in Terminal
- A static IP set through Windows Settings is best for devices that need a consistent address, like printers or servers
- Changes take effect immediately after saving – no restart needed in most cases
- Both IPv4 and IPv6 addresses can be configured manually in Windows 11
Method 1: Release and Renew IP Address (Most Common)
This is the fastest and most commonly used method to change an IP address on Windows 11. It works by telling the network adapter to drop its current IP and request a fresh one from the router. This is especially useful when dealing with IP conflicts or a stale address that is causing connection issues.
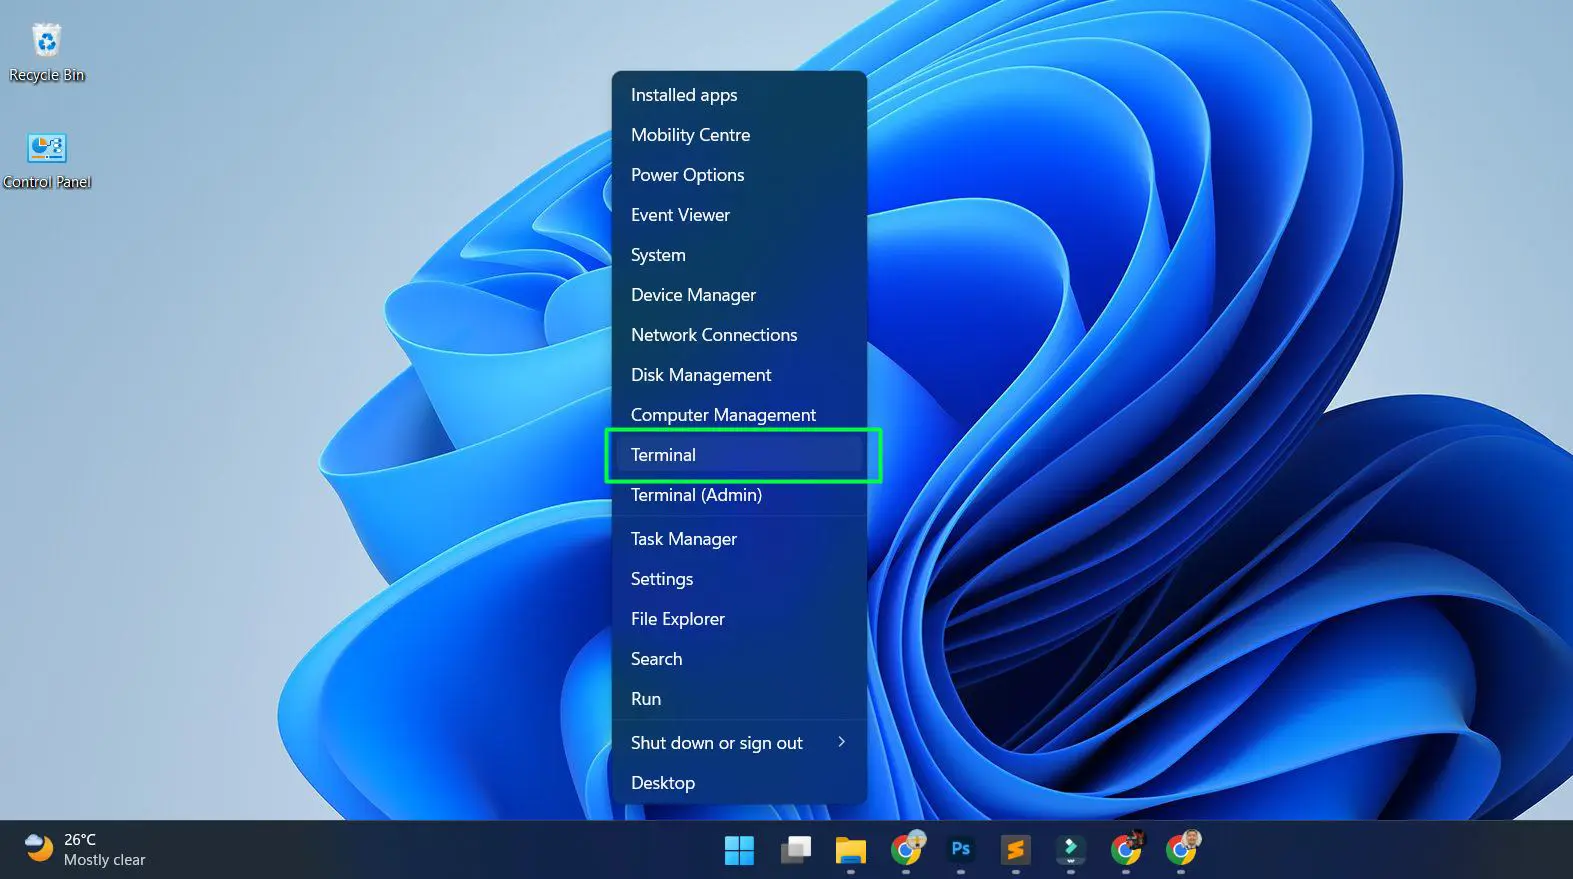
- Step 1: Right-click the Windows icon on the taskbar and Select ‘Terminal’
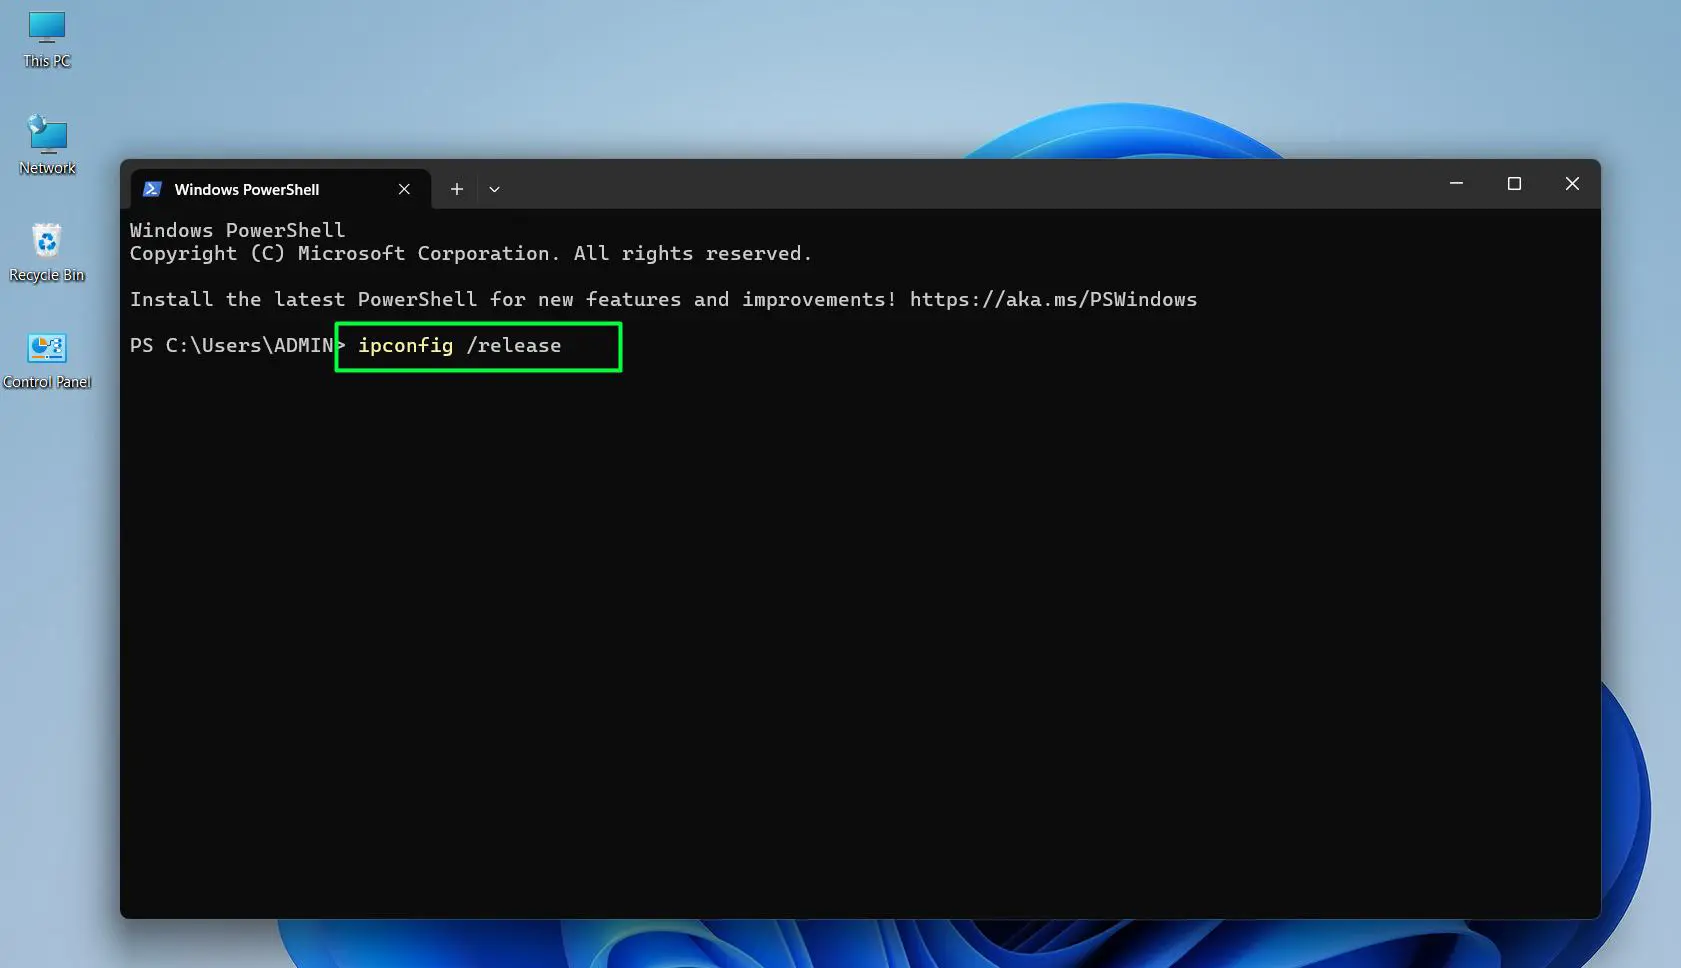
- Step 2: Type the following command and press Enter: ipconfig /release
– Wait a moment for the current IP address to be released – the network connection will briefly drop
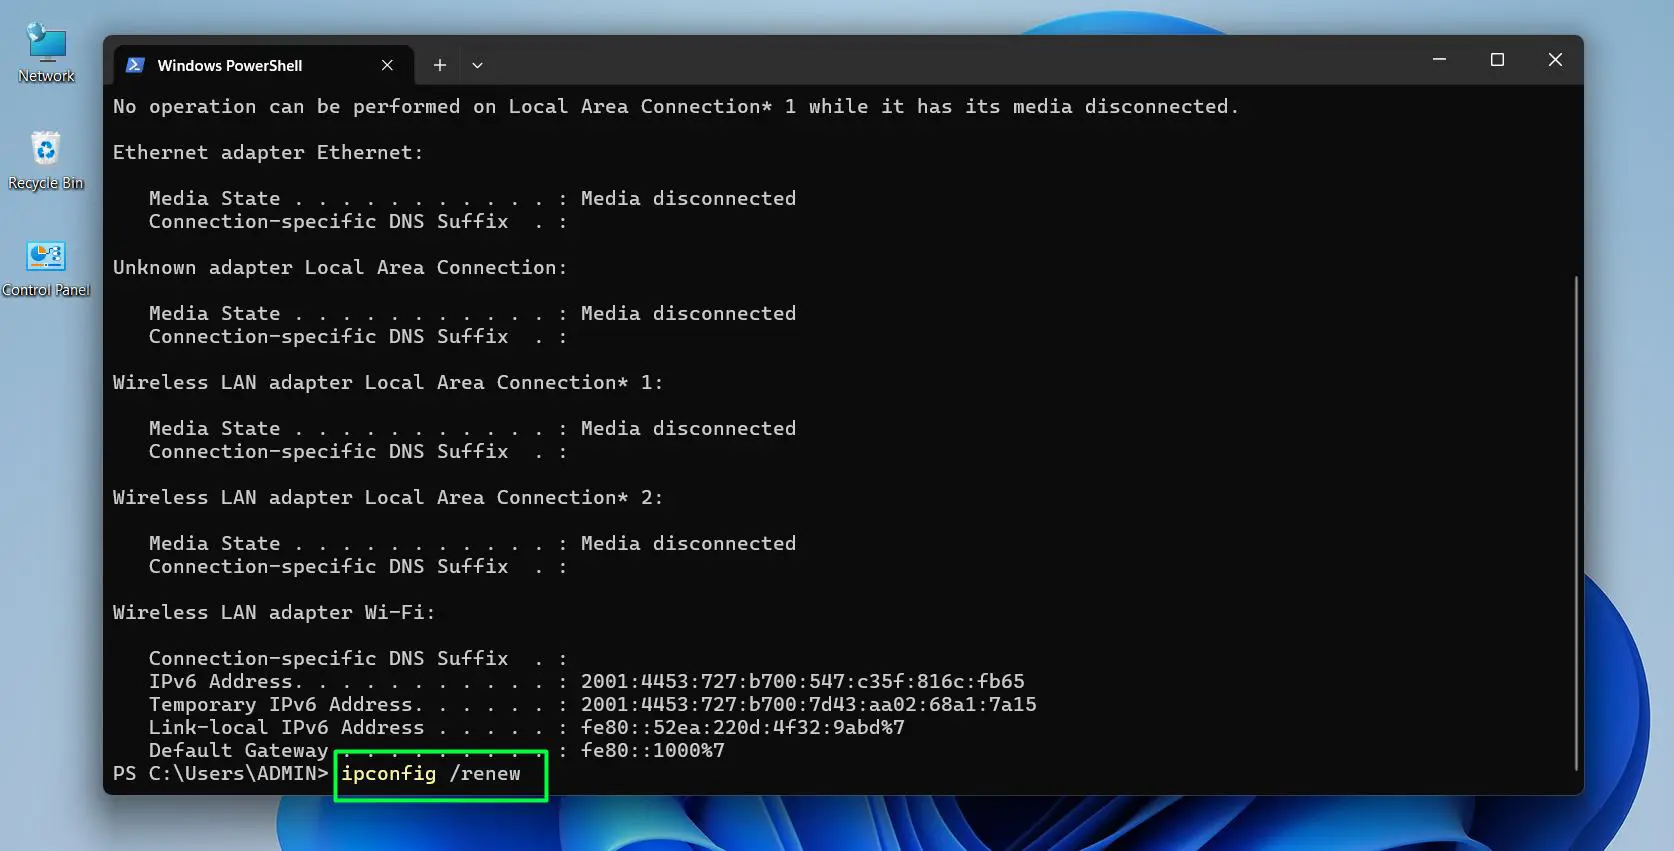
- Step 3: Type the next command and press Enter: ipconfig /renew
– Windows will now request a new IP address from the router automatically
- Step 4: Once complete, type ipconfig and press Enter to confirm the new IP address has been assigned

The whole process takes under 30 seconds in most cases. The router assigns a different IP address from its available pool, which is exactly what makes this method so effective for resolving conflicts or refreshing a connection. Most people find this is all they need for everyday network issues.
Pro Tip: Before setting a static IP, ping the address first to confirm no other device on the network is already using it. Open Terminal and type ping 192.168.1.100 (replace with the desired IP). If there is no reply, the address is free to use. This prevents IP conflicts that can knock devices off the network.
Method 2: Change Your IP Address Through Windows 11 Settings
This method is the right choice when a specific, permanent IP address is needed – like setting up a home server, a shared printer, or any device that other machines on the network need to reach consistently. The Settings app in Windows 11 makes this straightforward with no commands required.
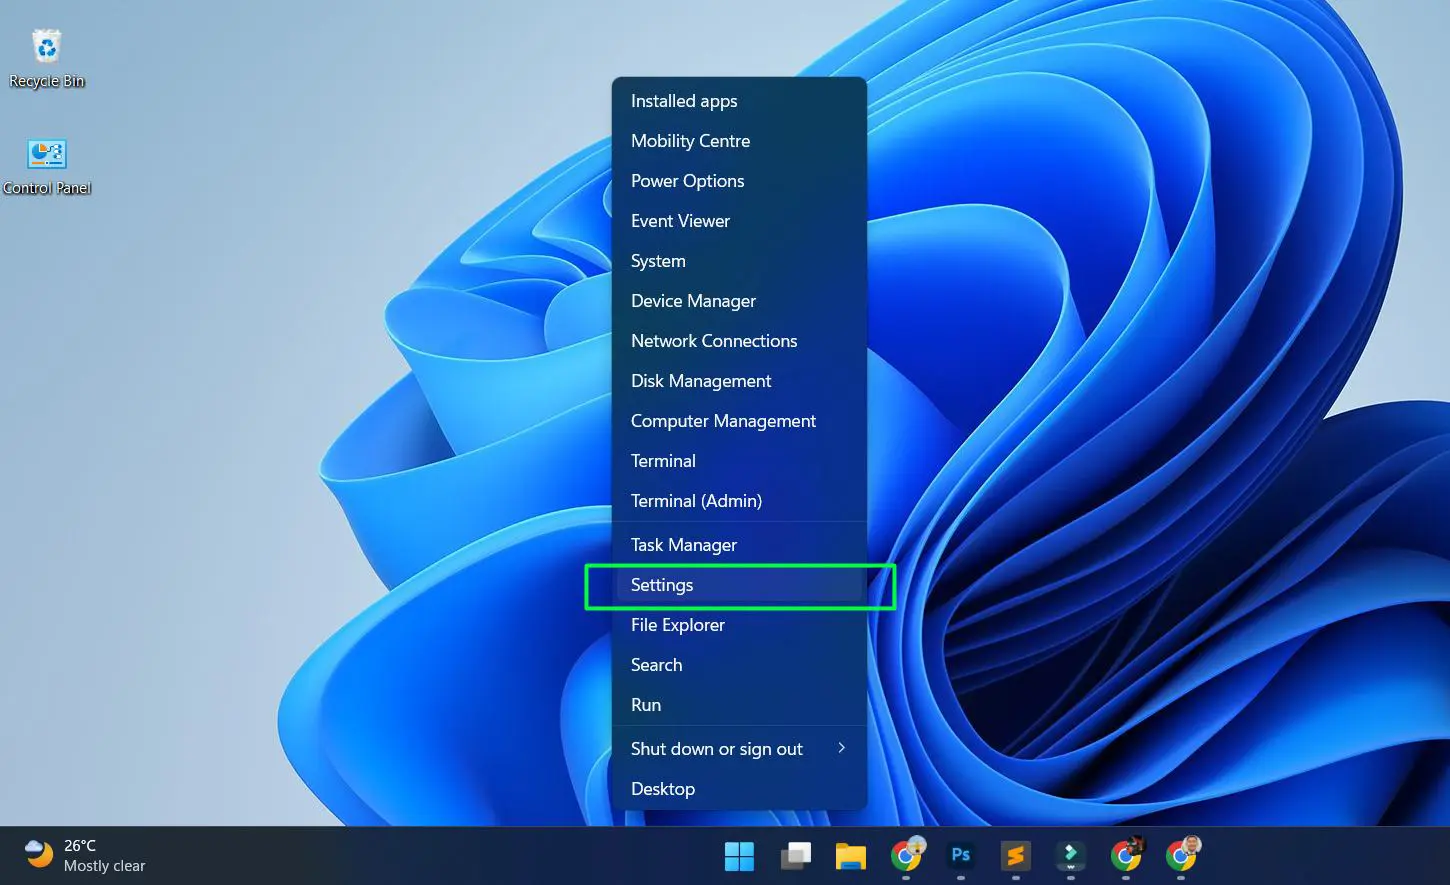
- Step 1: Right-click the Windows icon on the taskbar and select ‘Settings’, or press Windows + I
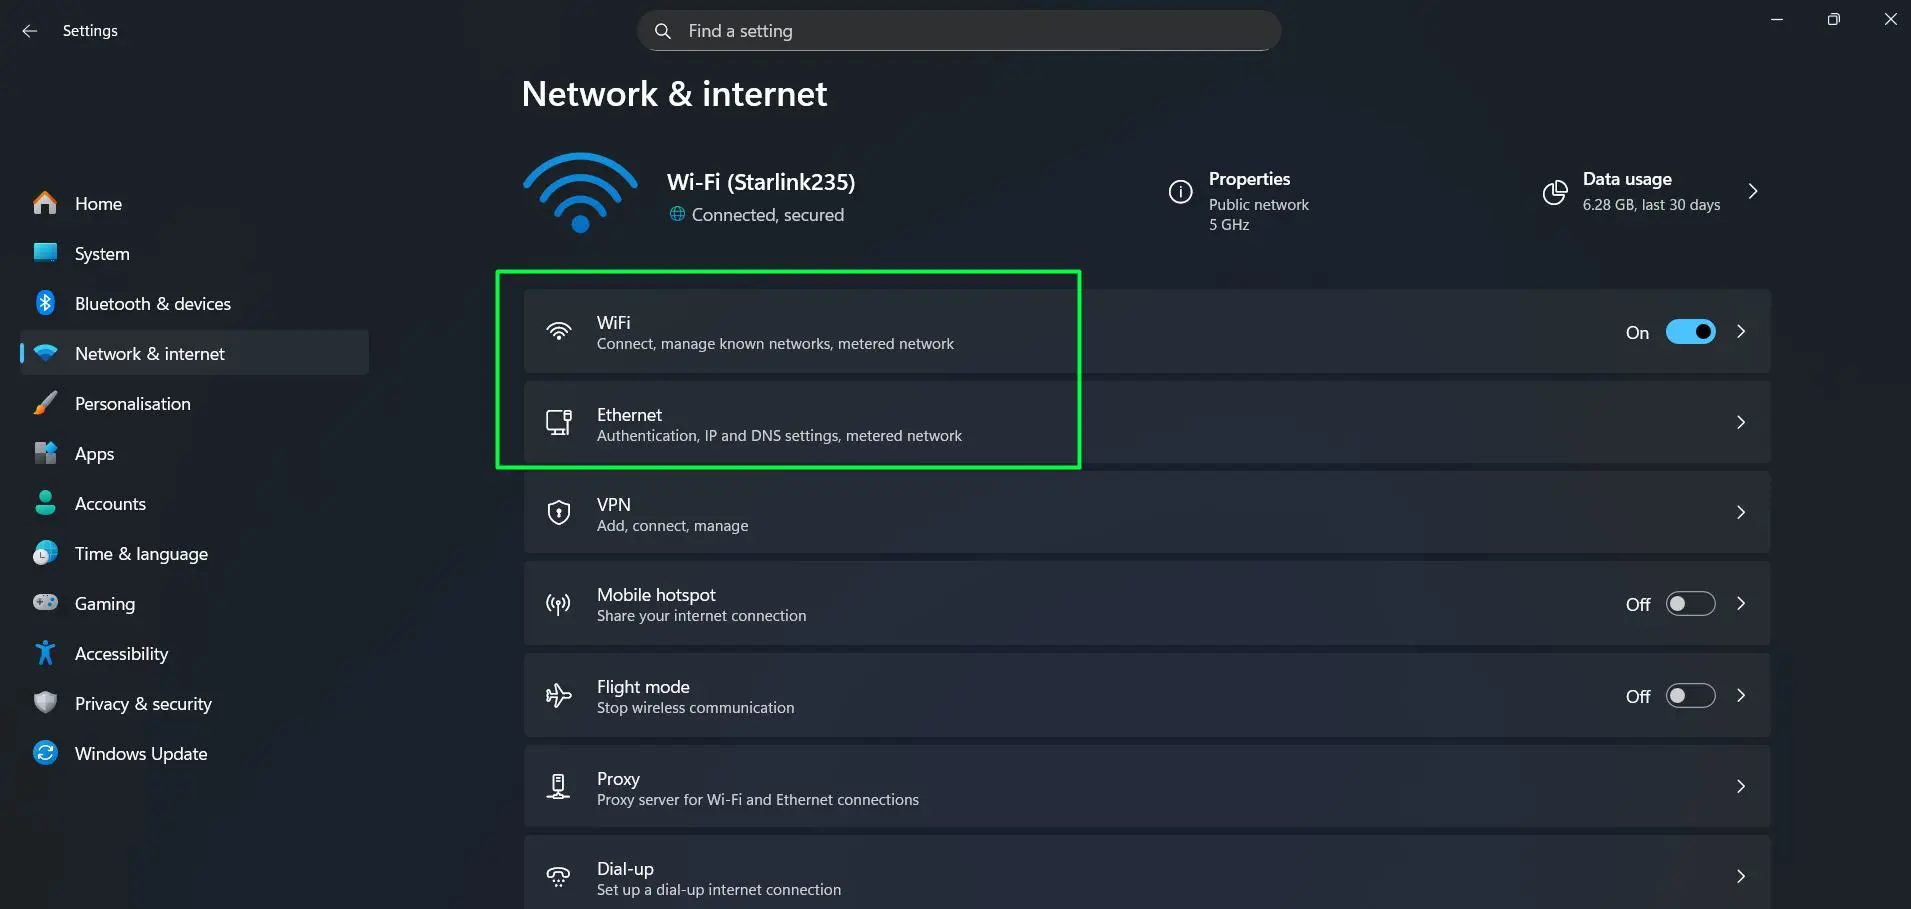
- Step 2: Go to ‘Network and Internet’ from the left sidebar
- Step 3: Click on ‘Wi-Fi’ if using wireless, or ‘Ethernet’ if using a wired connection
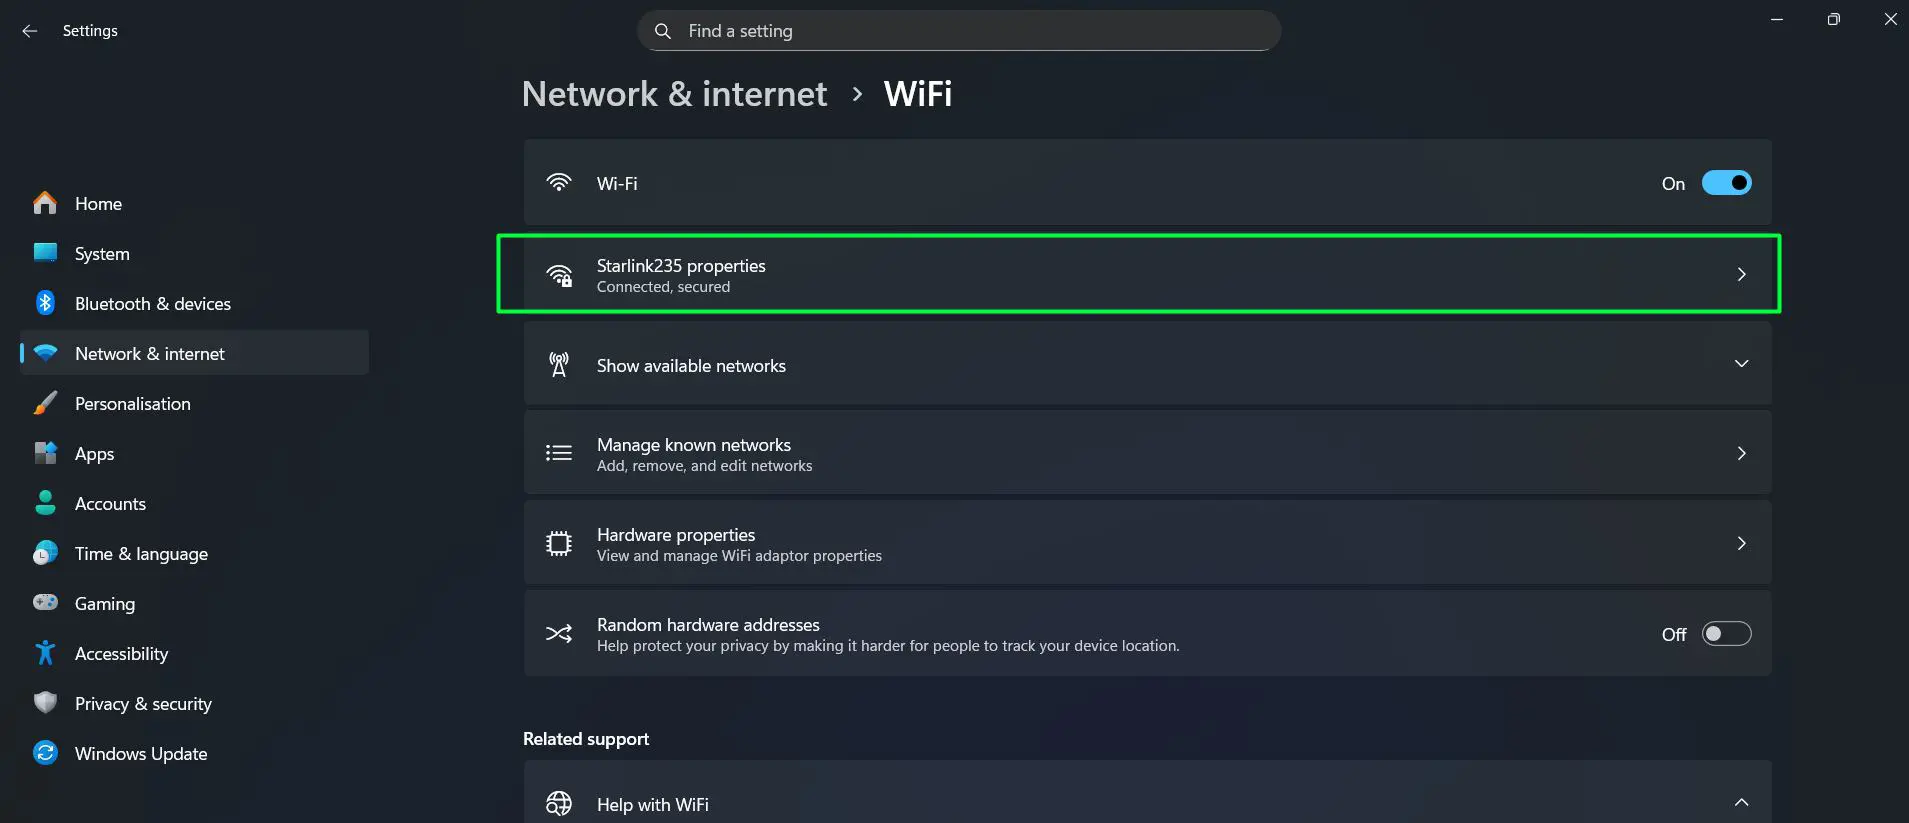
- Step 4: Click on the connected network name
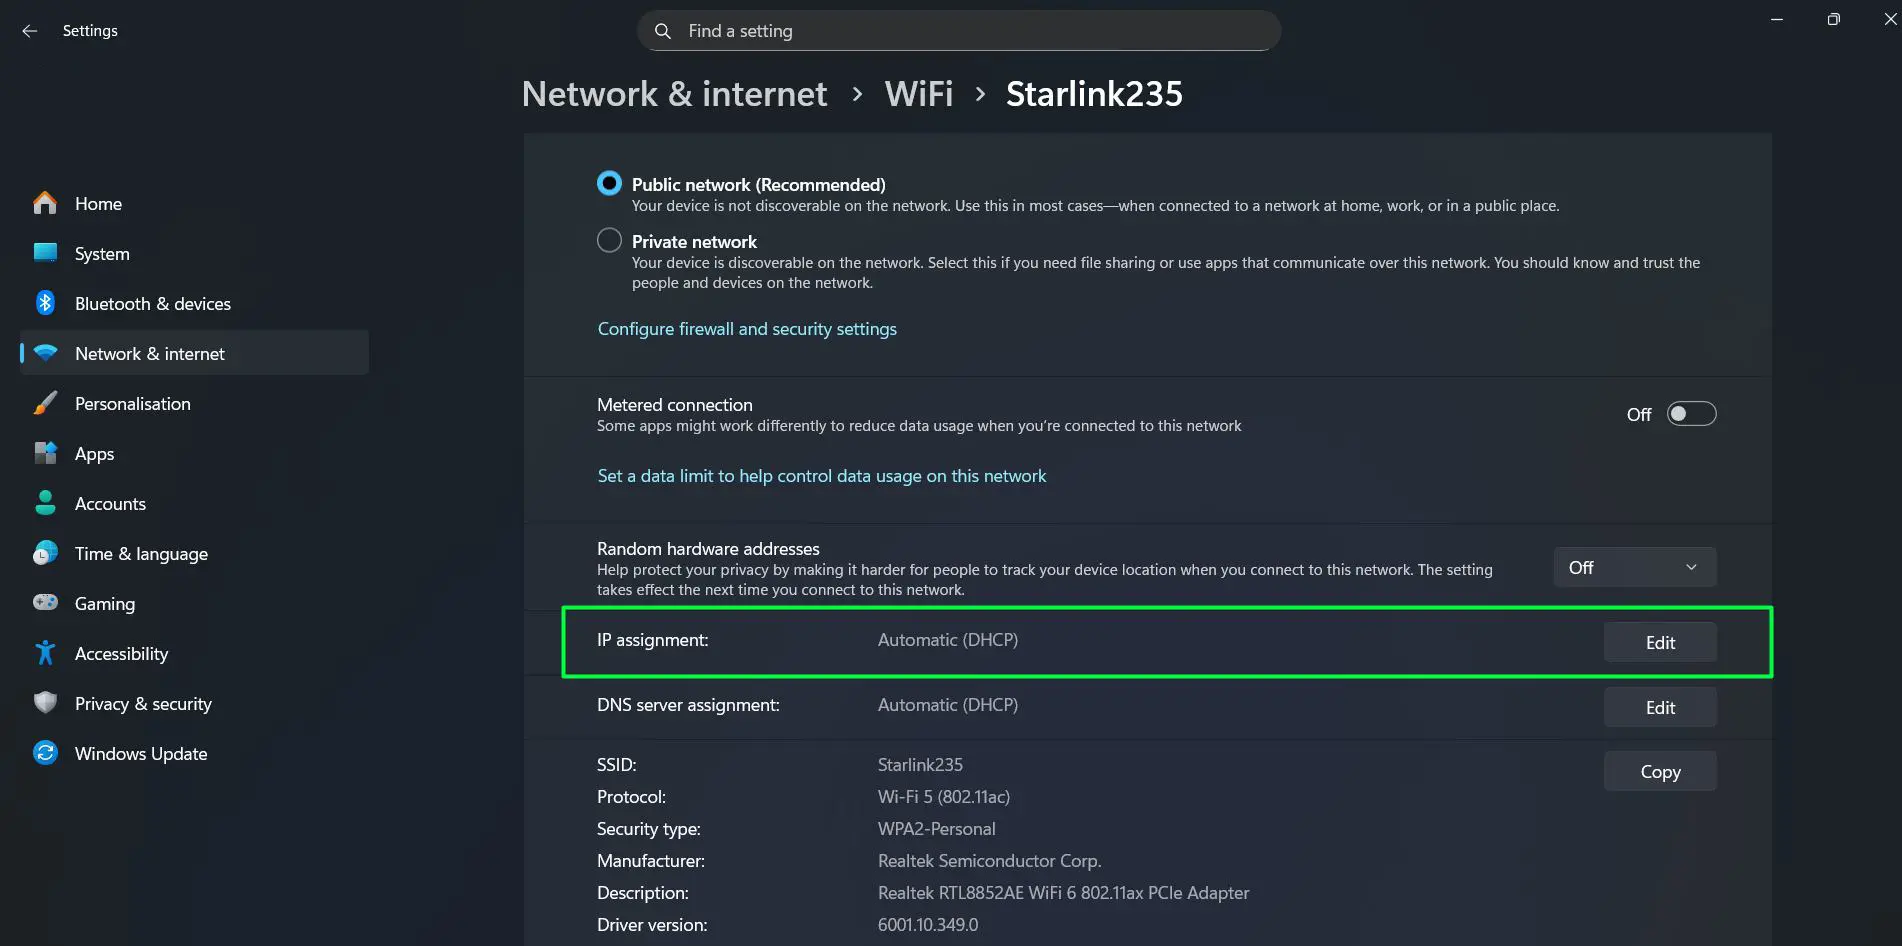
- Step 5: Scroll down to ‘IP assignment’ and click the ‘Edit’ button
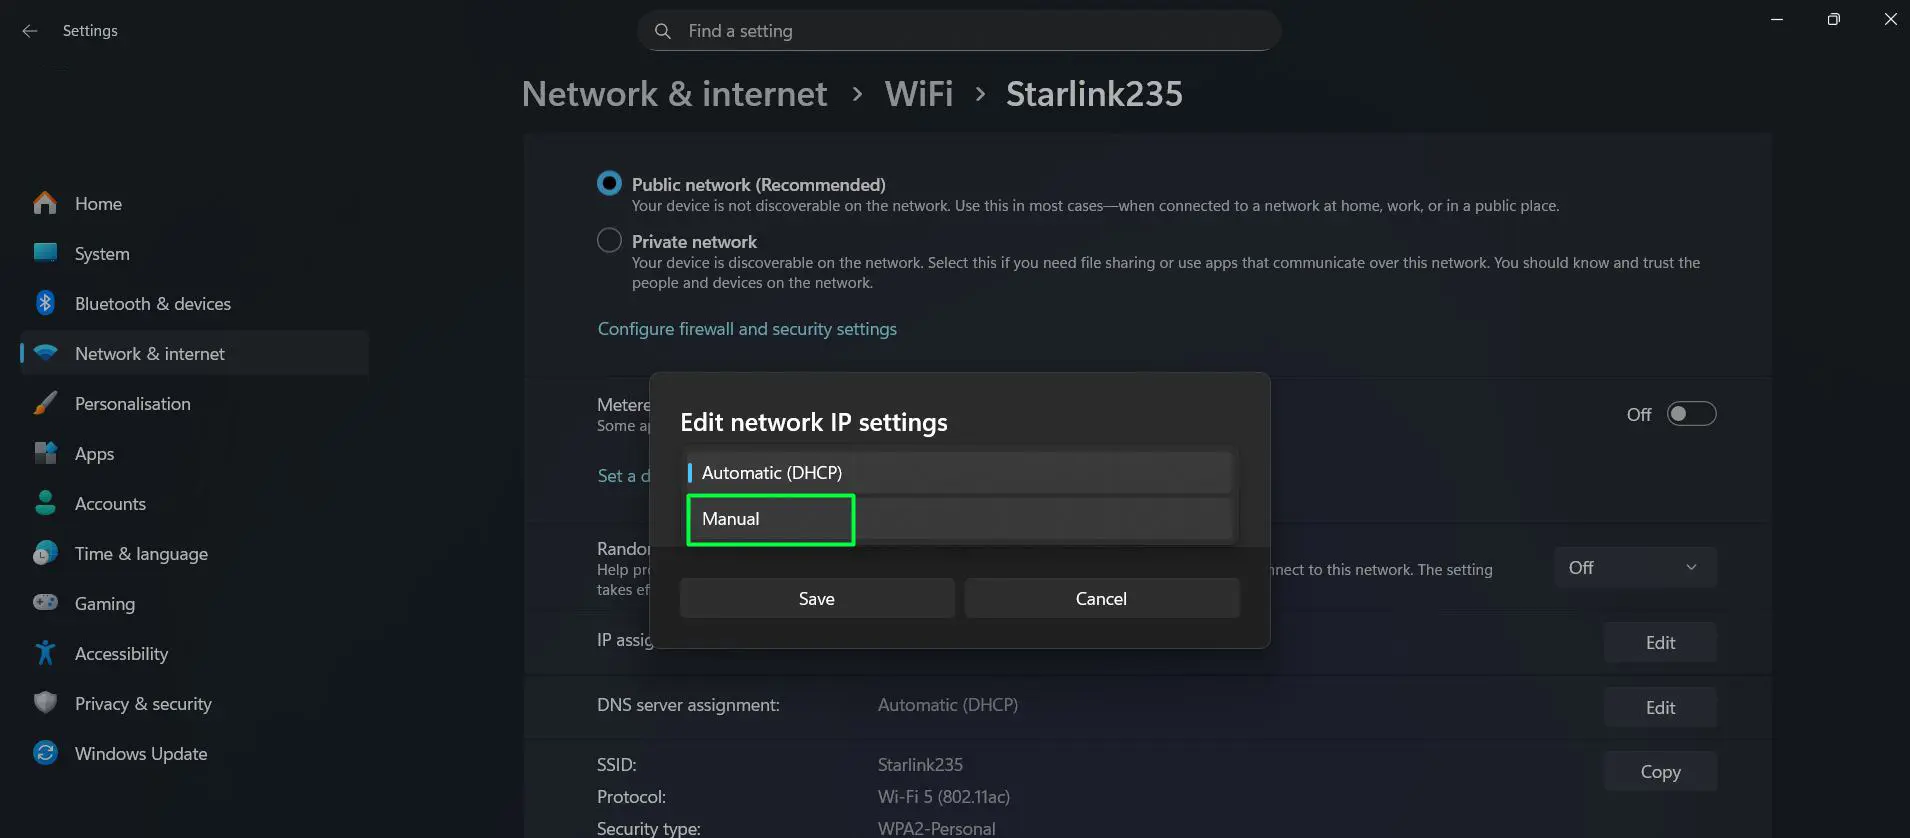
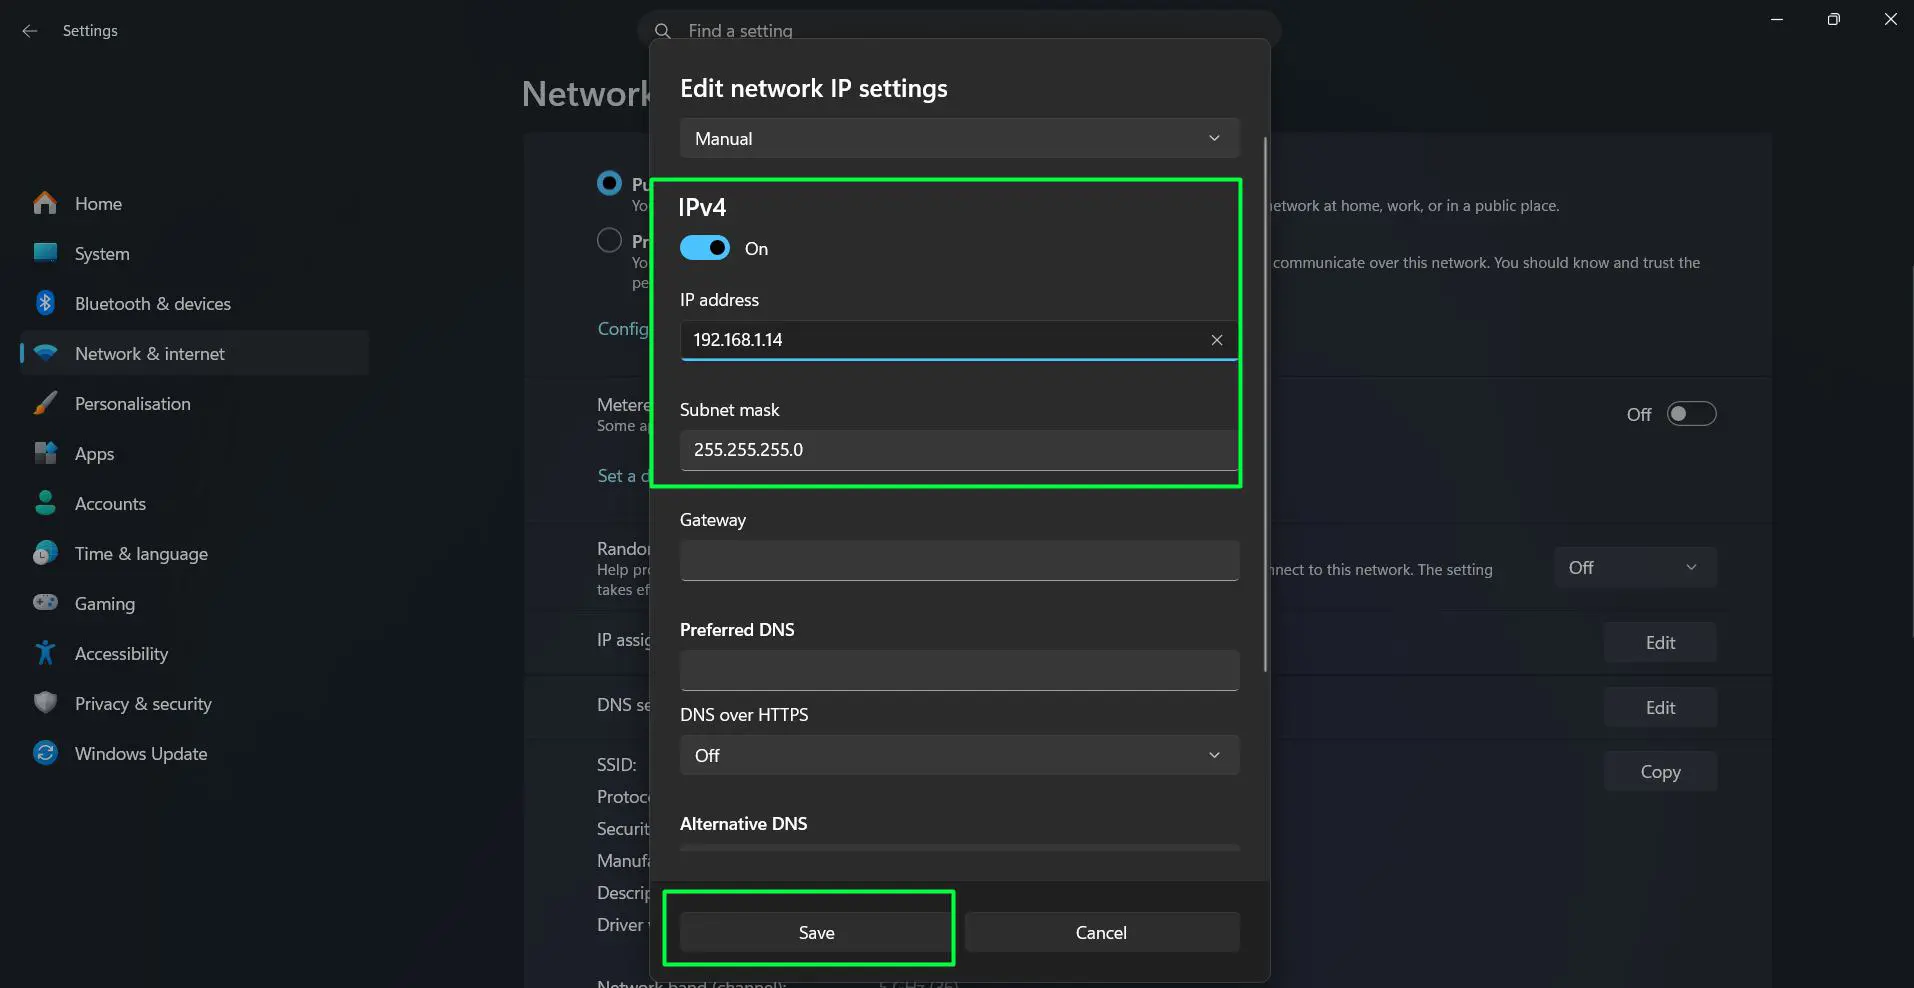
- Step 6: In the dropdown, switch from ‘Automatic (DHCP)’ to ‘Manual’
- Step 7: Toggle on the ‘IPv4’ switch
- Step 8: Enter the desired IP address, subnet mask (usually 255.255.255.0), and the gateway address (the router’s IP)
- Step 9: Enter a preferred DNS server – 8.8.8.8 (Google) or 1.1.1.1 (Cloudflare) are reliable options
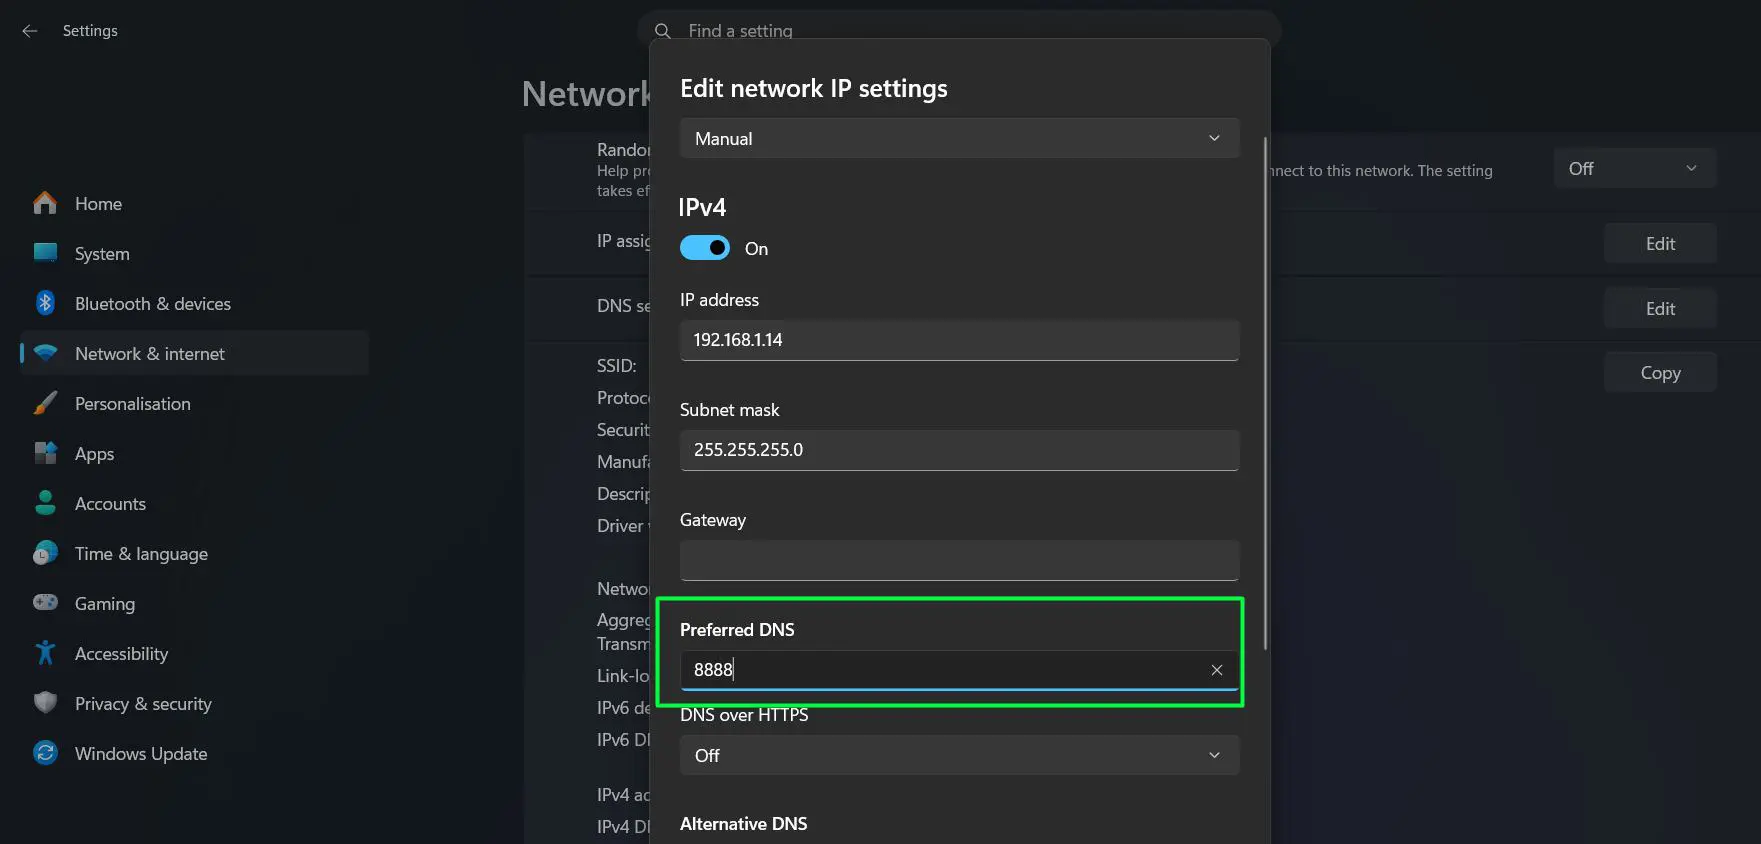
- Step 10: Click ‘Save’ to apply the changes
The key is to make sure the IP address entered is within the correct subnet range for the router. For most home networks, the gateway is either 192.168.1.1 or 192.168.0.1, so the static IP should follow the same pattern – like 192.168.1.150 or 192.168.0.150. Picking an address toward the higher end of the range helps avoid conflicts with addresses the router typically assigns automatically.
For more Windows tips and guides, there are plenty of resources available covering every aspect of the operating system in detail.
Pro Tip: Always write down the original IP settings before making changes. A quick way to do this is to run ipconfig /all in Terminal and take a screenshot. This makes it easy to revert if something goes wrong.
How to Switch Back to Automatic IP (DHCP)
If a static IP was set but the device now needs to go back to automatic addressing, here is how to do it quickly through Settings.
- Step 1: Go to Settings – Network and Internet
- Step 2: Click on the active connection (Wi-Fi or Ethernet)
- Step 3: Click ‘Edit’ next to ‘IP assignment’
- Step 4: Select ‘Automatic (DHCP)’ from the dropdown
- Step 5: Click ‘Save’
The router will then automatically assign a new IP address, typically within a few seconds.
How to Find Your Current IP Address on Windows 11
Before changing anything, it helps to know what the current IP address is. This gives a reference point and makes it easier to pick a suitable static address that does not conflict with other devices already on the network.
There are two quick ways to check this on Windows 11.
Option A: Check via Settings
- Step 1: Open Settings and go to ‘Network and Internet’
- Step 2: Click on the active connection – either ‘Wi-Fi’ or ‘Ethernet’
- Step 3: Click on the connected network name
- Step 4: Scroll down to the ‘Properties’ section
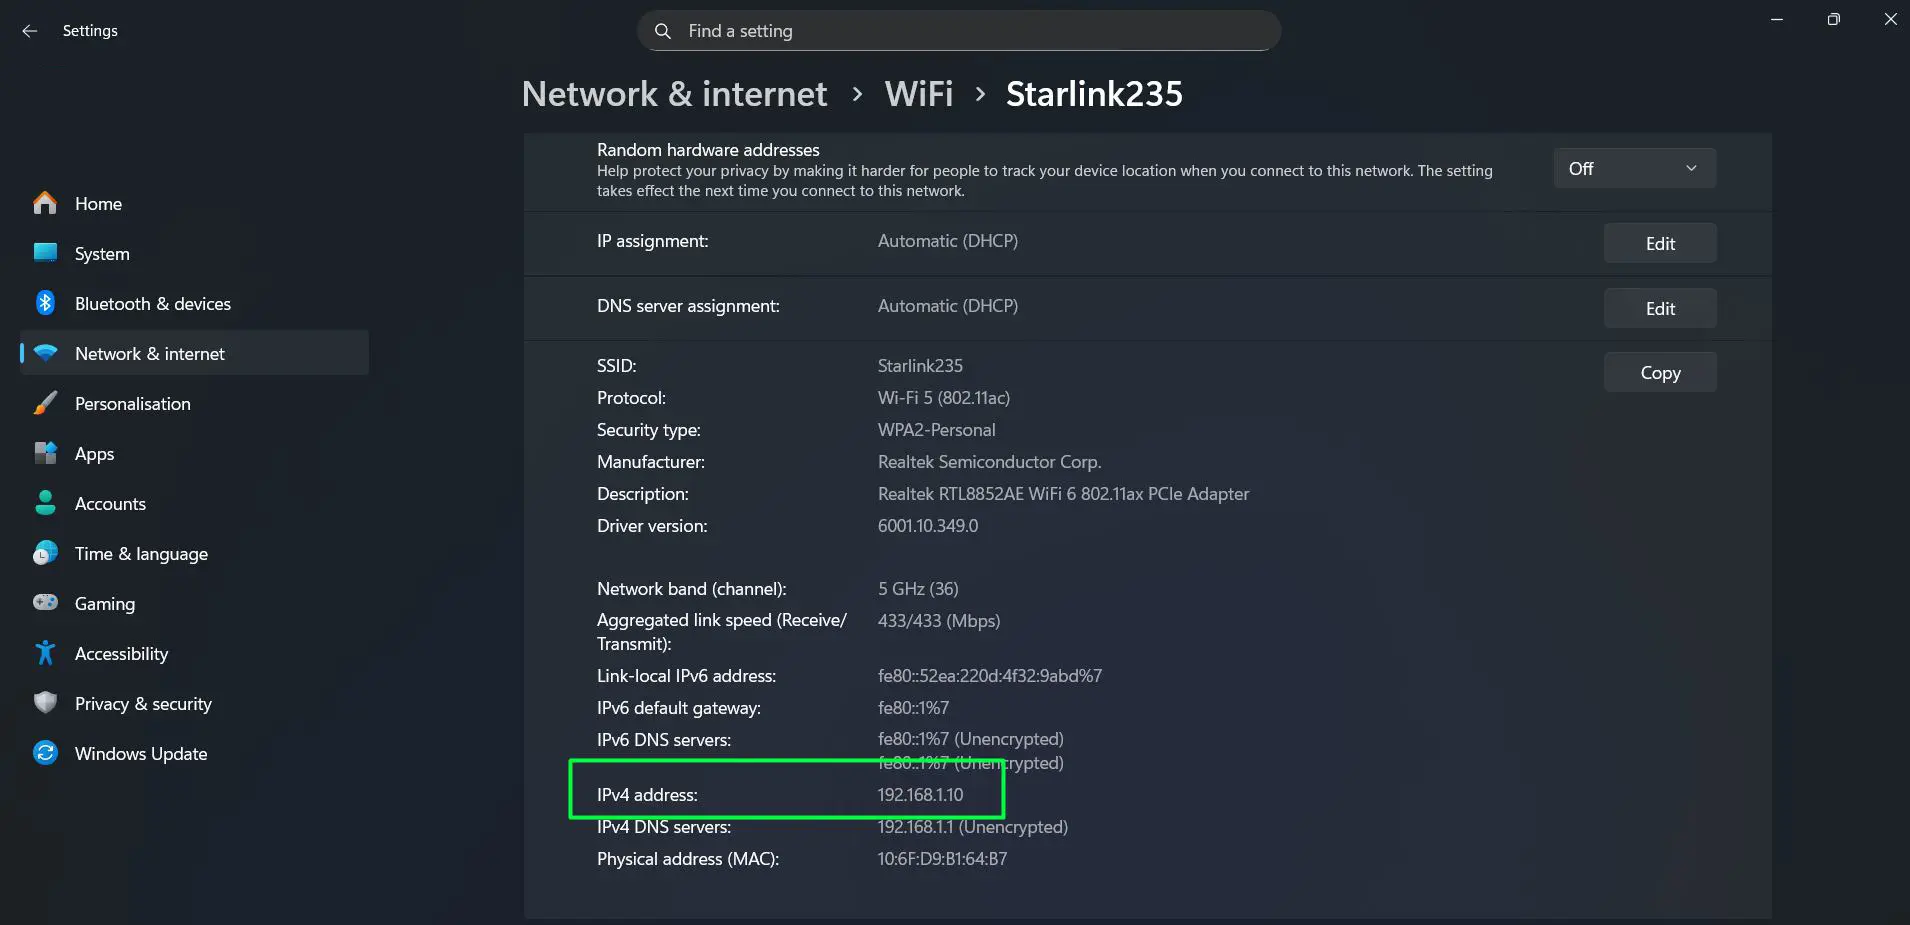
- Step 5: The current IPv4 address, subnet mask, and DNS server are listed there
Option B: Check via Command Prompt
- Step 1: Right-click the Windows icon on the taskbar and Select ‘Terminal’
- Step 2: In the Command Prompt window, type: ipconfig and press Enter
- Step 3: Look for the active adapter section – it will show the ‘IPv4 Address’, ‘Subnet Mask’, and ‘Default Gateway’
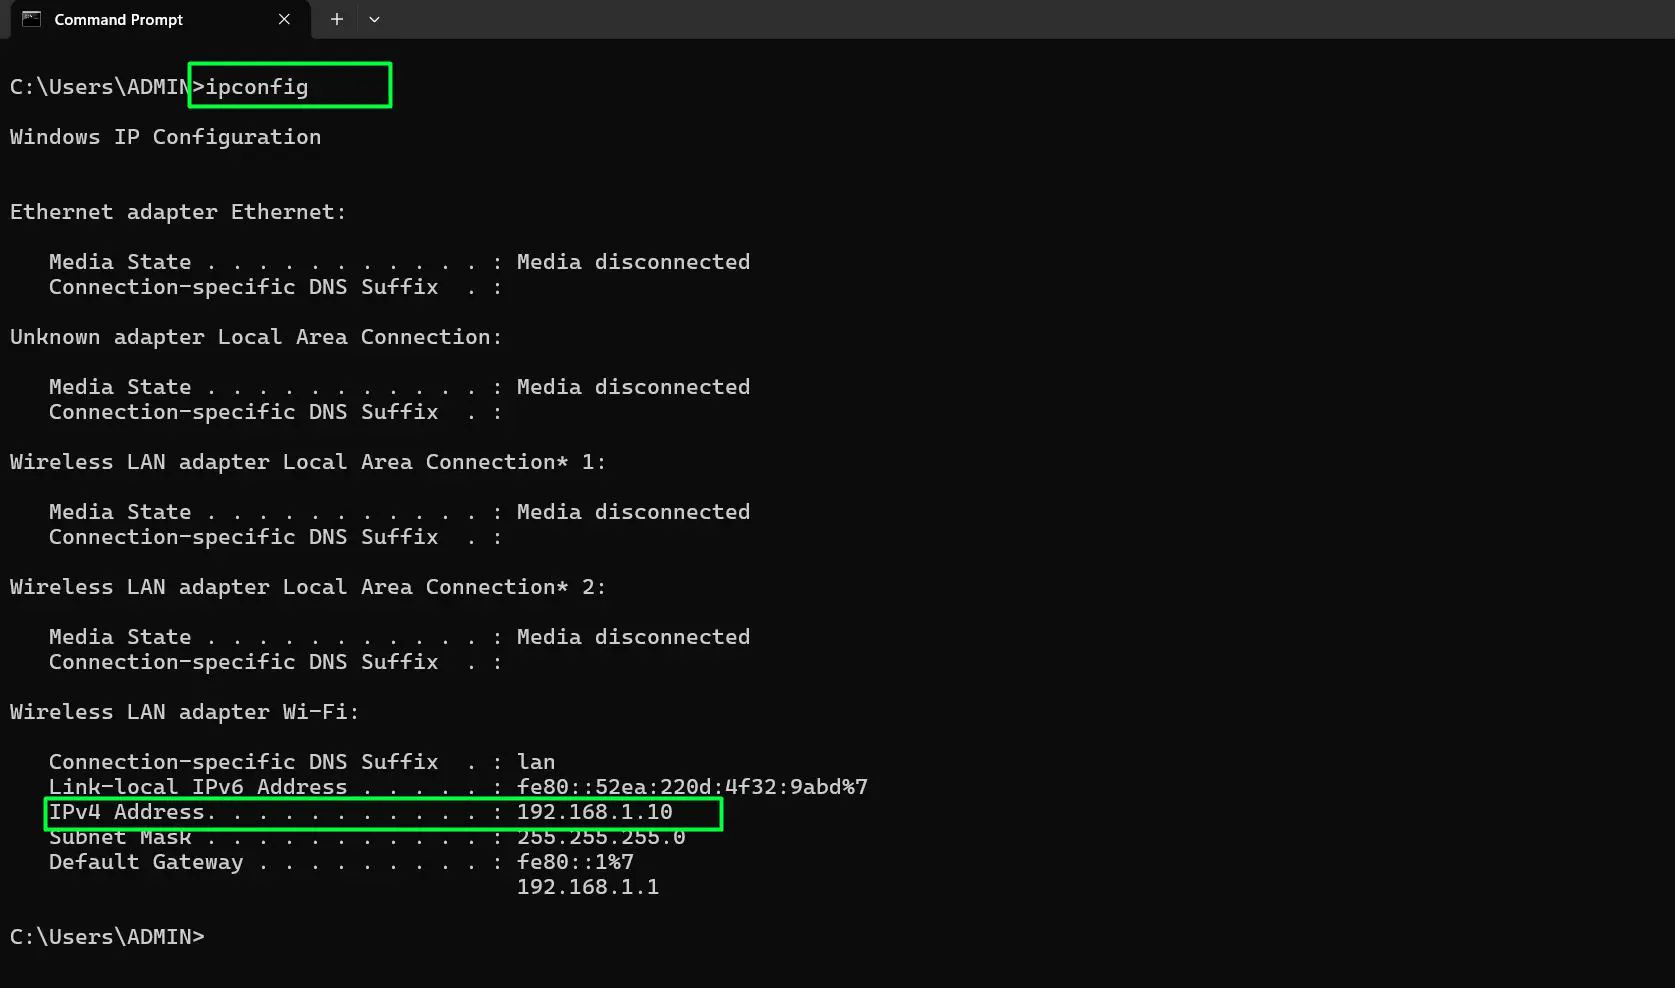
The ‘Default Gateway’ value shown here is the router’s IP address. That is the address needed when setting a static IP – the gateway field in the manual configuration should always match this value. For example, if the gateway is 192.168.1.1, then the static IP should be something in the 192.168.1.x range, like 192.168.1.150.
Taking note of these values takes less than a minute and can save a lot of headaches later. It is also worth knowing what subnet mask is currently in use – for most home networks, this is 255.255.255.0, which corresponds to a /24 prefix length in PowerShell commands.
Understanding the network’s addressing scheme before making changes is a habit that experienced network users always keep. It is similar to checking a map before starting a drive – skipping it is possible, but knowing the layout upfront makes everything go much smoother. Anyone who regularly deals with hardware and networking setups will confirm that this one step prevents more problems than almost anything else. And for those managing multiple devices, pairing this with the right network software and tools can make the entire process even more efficient.
Frequently Asked Questions
Will changing the IP address disconnect the internet?
Briefly, yes. When changing network settings, the connection resets for a few seconds. As long as the new IP address is valid and within the router’s subnet range, the connection will resume automatically.
What is the difference between a static and dynamic IP address?
A dynamic IP is assigned automatically by the router each time a device connects – it can change over time. A static IP is manually set and stays the same. Static IPs are useful for devices like home servers, printers, or network drives that need to be reliably reached at the same address.
How do the changes to know what IP address to use?
Check the router’s admin panel (usually at 192.168.1.1 or 192.168.0.1) to see the IP range it manages. Pick any address in that range that is not already assigned to another device. For example, if the router uses 192.168.1.1 to 192.168.1.254, any unused address like 192.168.1.150 would work.
Does changing the IP address on Windows 11 require a restart?
No restart is needed in most cases. The new IP settings take effect as soon as they are saved. The network adapter will briefly disconnect and reconnect, but the machine itself does not need to reboot.
Can the IPv6 address be changed the same way?
Yes. In the Settings method, after switching to ‘Manual’, there is also an ‘IPv6’ toggle that can be enabled to enter a static IPv6 address, prefix length, and gateway. The process is the same as IPv4.
What if the network stops working after changing the IP?
Go back to Settings and switch the IP assignment back to ‘Automatic (DHCP)’. This will let the router reassign a working address. Double-check that the static IP, subnet mask, and gateway values match the network’s actual configuration before trying again.