The best way to clean Windows 11 is to work through it systematically – junk files first, then startup bloat, storage clutter, performance settings, and security. This guide is straight to the point with every step clearly laid out so the PC comes out faster and cleaner by the end.
Key Takeaways
- Use Disk Cleanup and Storage Sense to remove junk files in minutes
- Clear temp files manually through the Run dialog for a deeper clean
- Disable high-impact startup apps to cut boot time significantly
- Uninstall unused apps from Settings to free up storage and background resources
- Install all pending Windows 11 updates to patch security vulnerabilities
- Run a full scan using Windows Security or Malwarebytes to catch hidden threats
Step-by-Step: How to Remove Junk Files on Windows 11
Junk files are the first thing to tackle. Temporary files, old update caches, and Recycle Bin contents quietly pile up and eat into storage without showing obvious symptoms until the drive gets seriously full.
Using Disk Cleanup
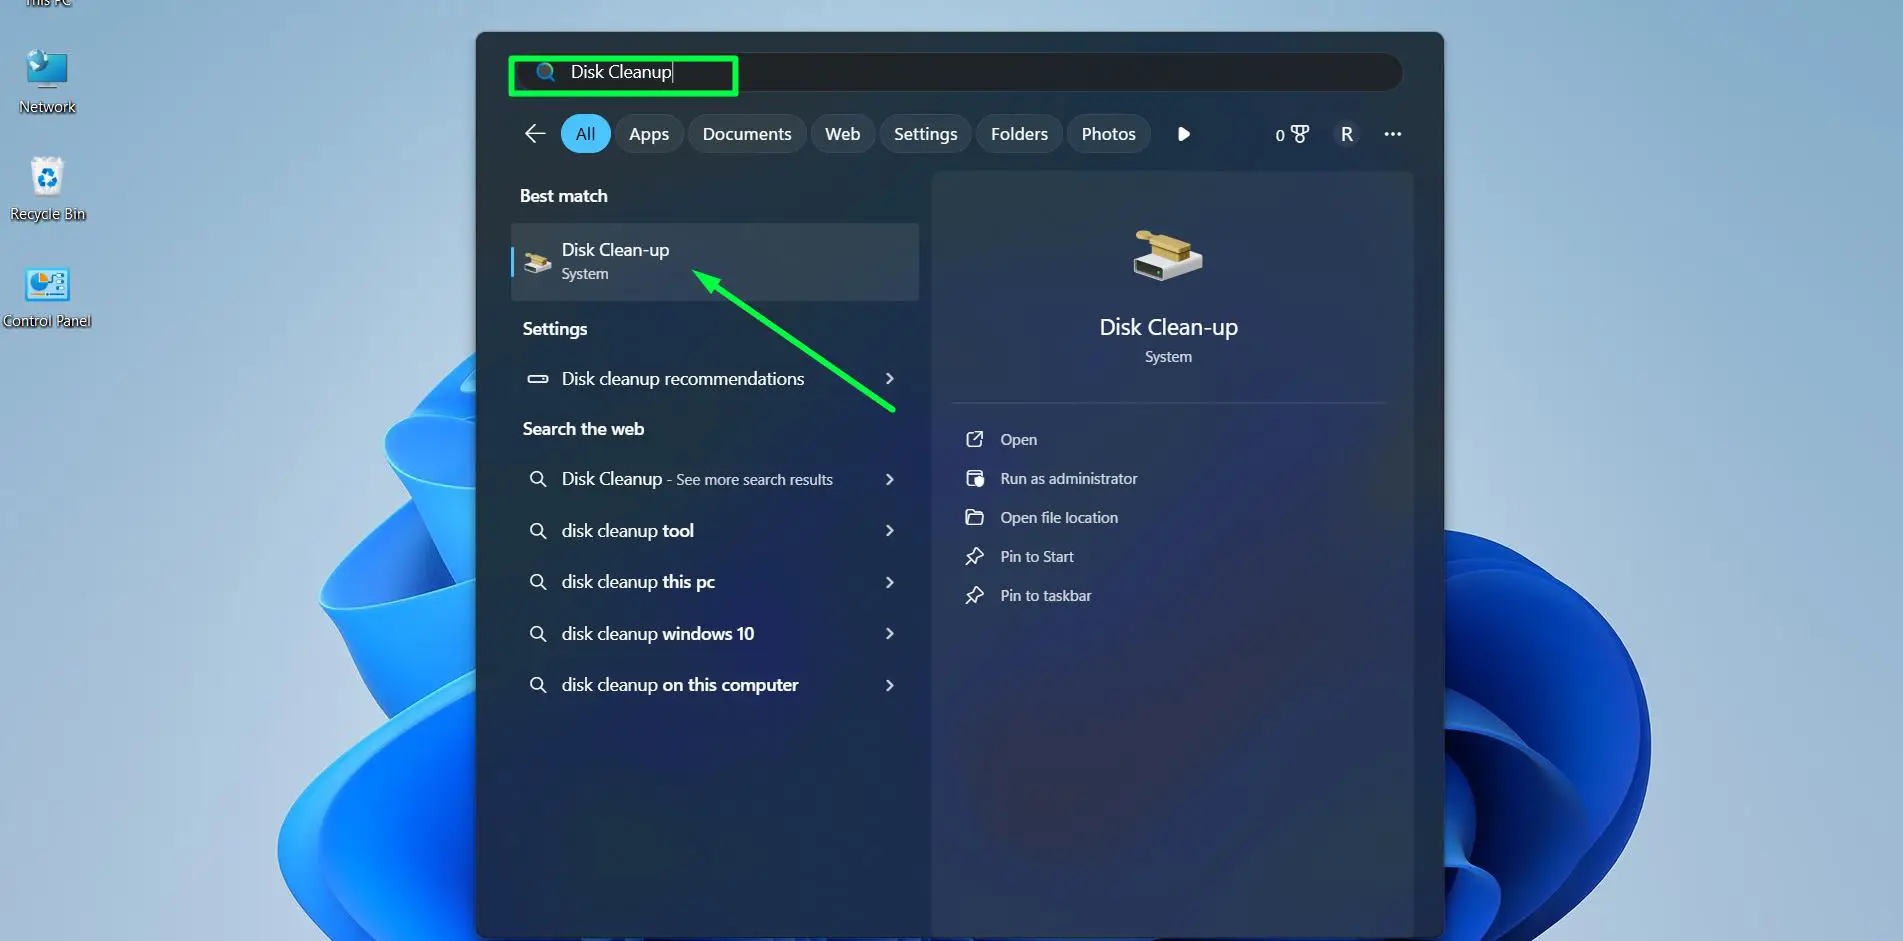
- Step 1: Press the Windows key, type ‘Disk Cleanup’, and open the app from the search results.
- Step 2: Select the C: drive and click OK.
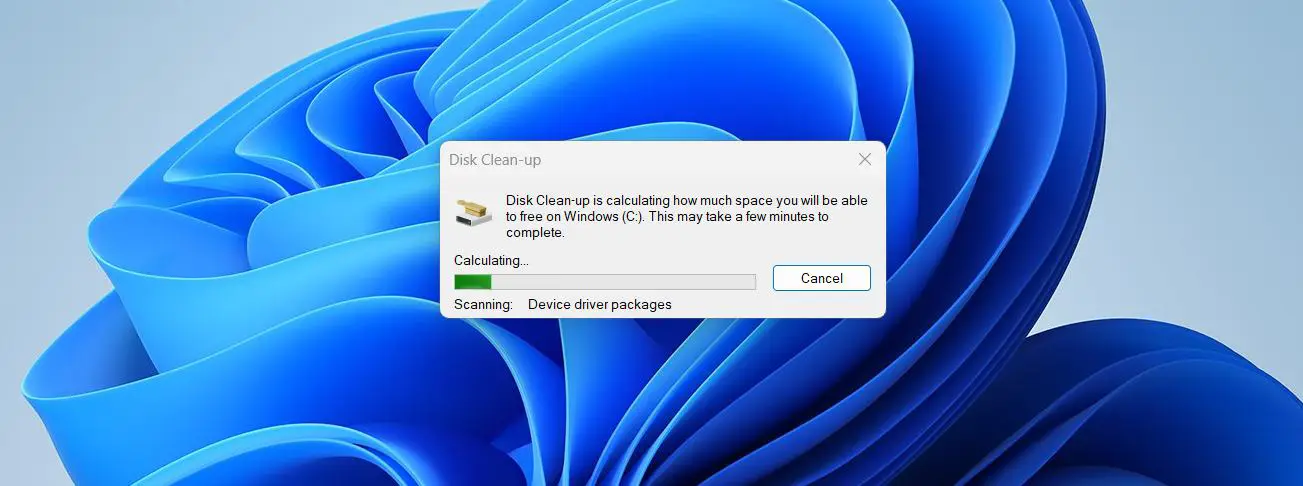
- Step 3: Wait for the tool to calculate available space. Once loaded, check the boxes next to Temporary Internet Files, Recycle Bin, Thumbnails, and Temporary Files.
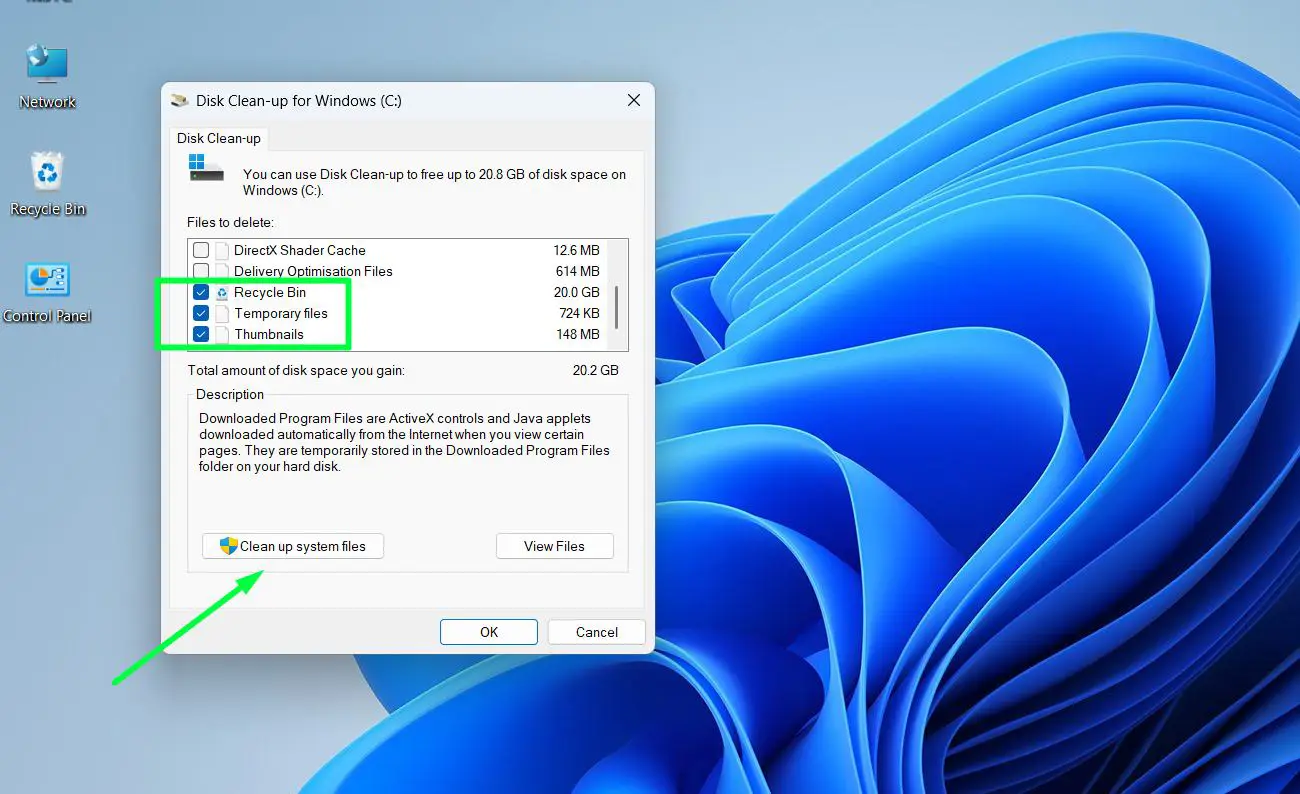
- Step 4: Click ‘Clean up system files’ for a deeper pass that includes Windows Update leftovers and old delivery optimization files.
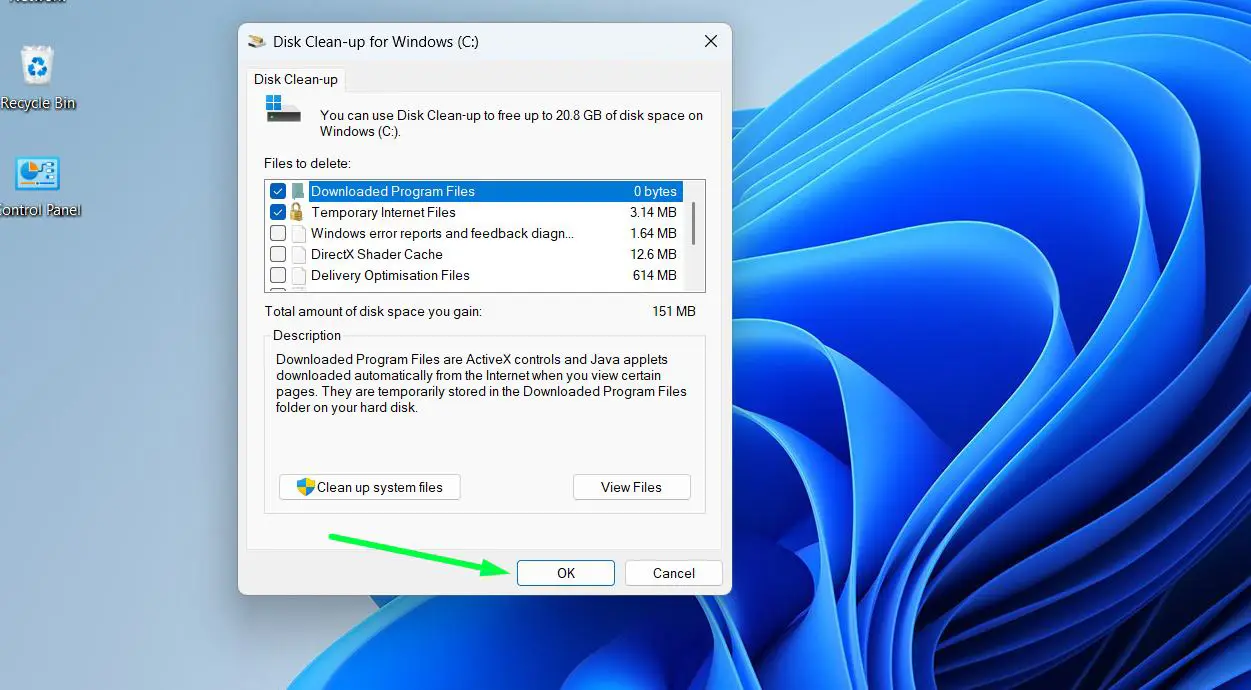
- Step 5: Click OK and then Delete Files to confirm.
Using Storage Sense on Windows 11
- Step 1: Open Settings by pressing Windows + I.
- Step 2: Go to System, then Storage.
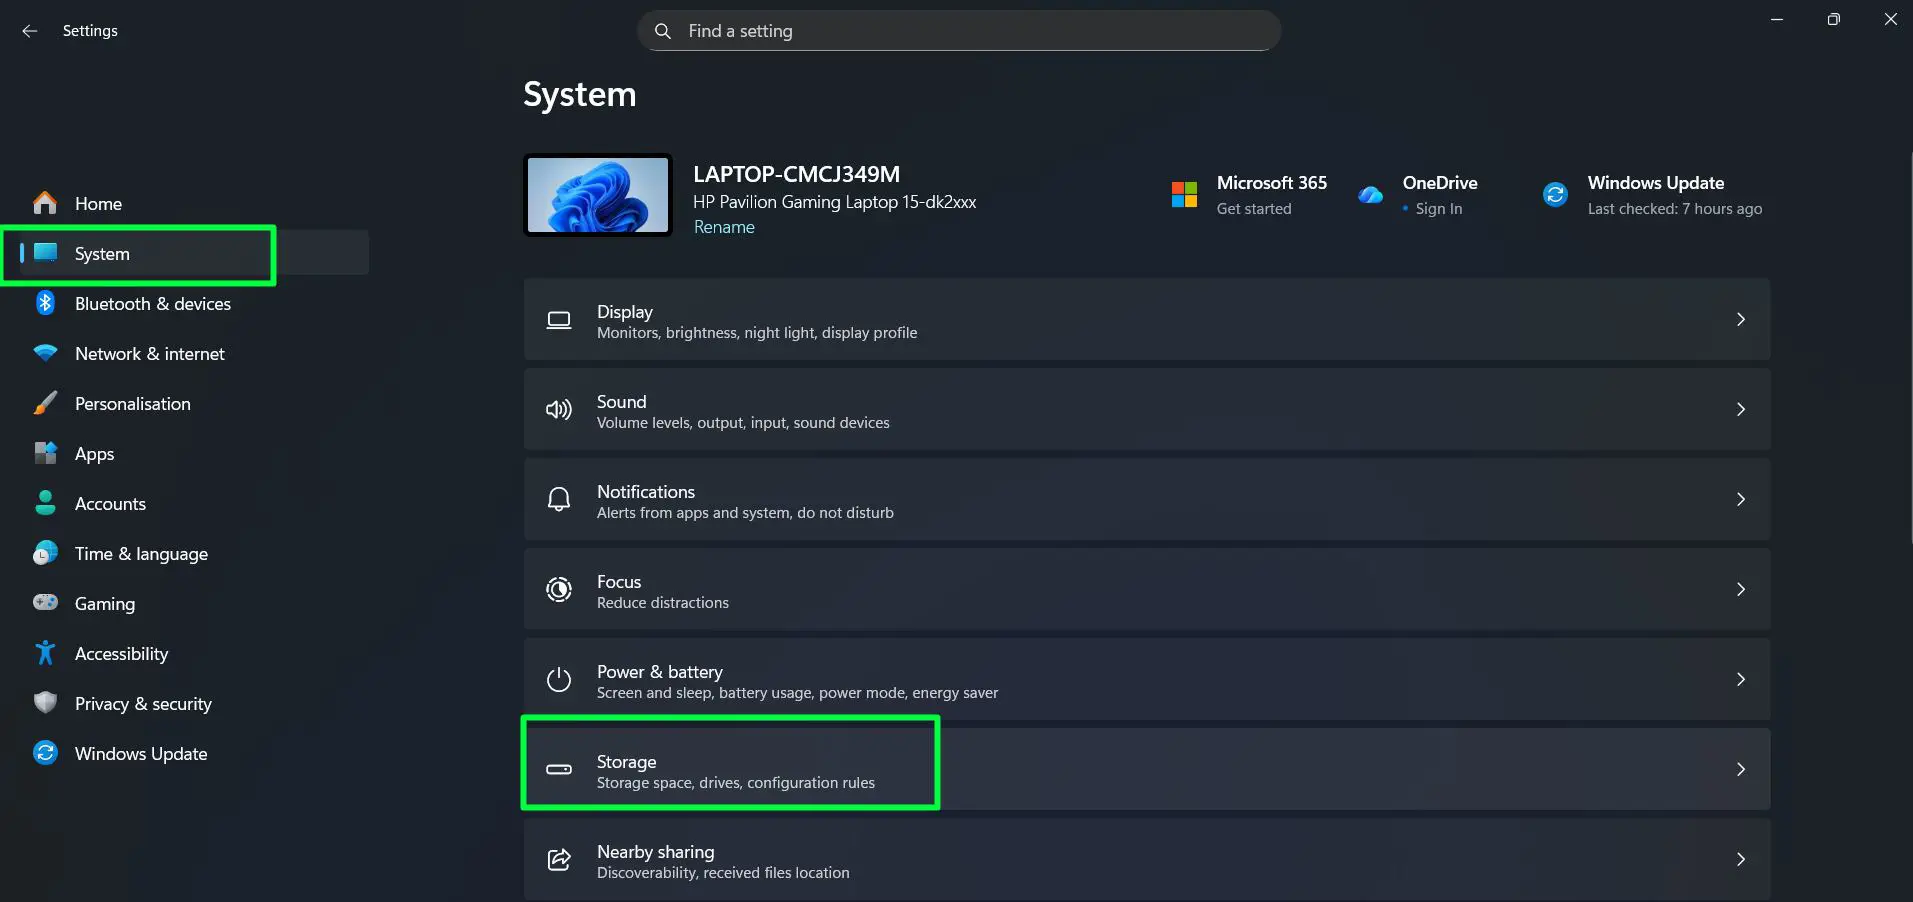
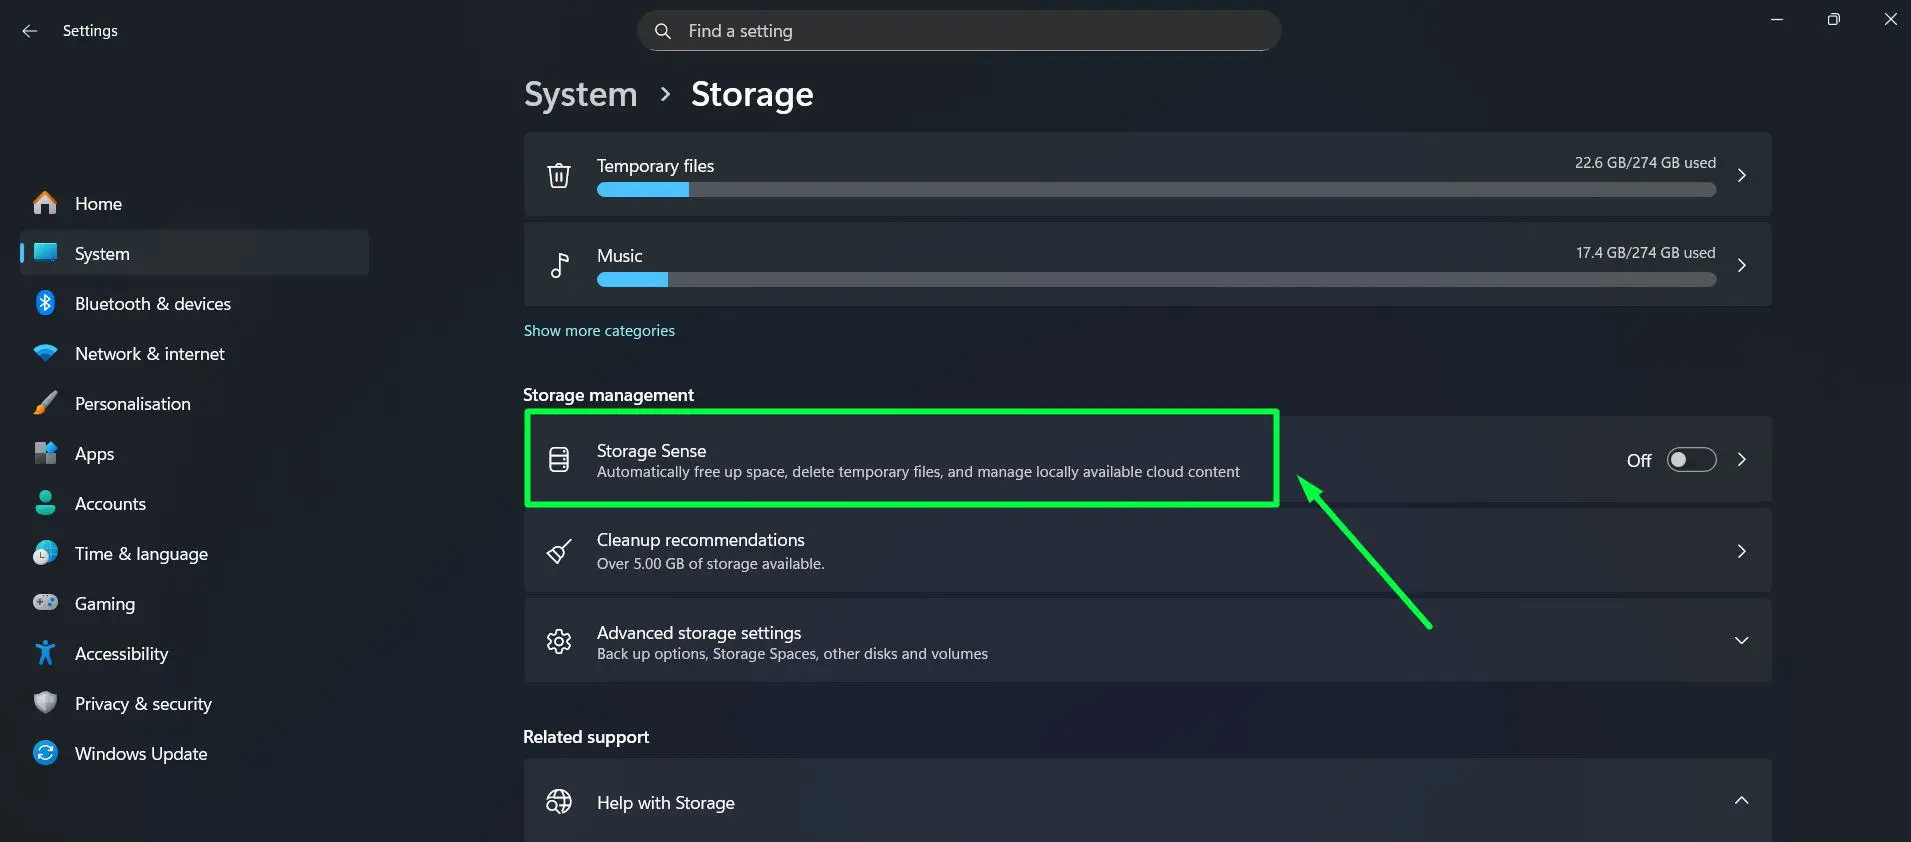
- Step 3: Under ‘Storage management’, click ‘Storage Sense’ to open its settings.
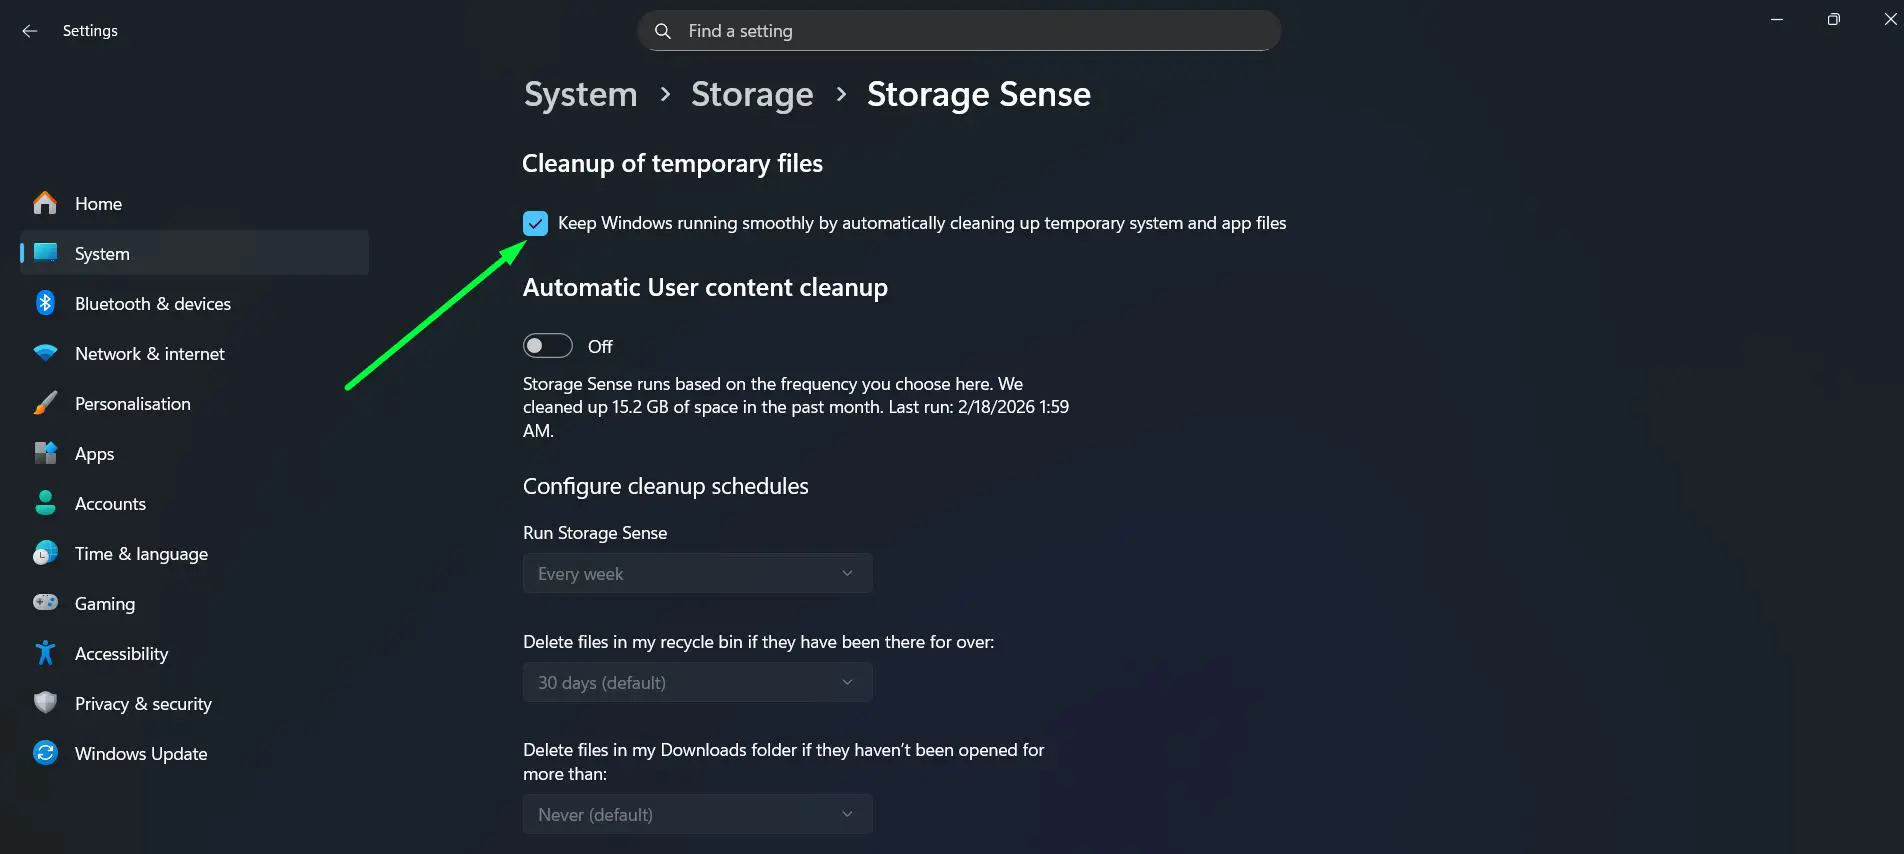
- Step 4: Check the box under ‘Cleanup of temporary files’ to keep Windows automatically cleaning temporary system and app files.
- Step 5: Under ‘Automatic User content cleanup’, toggle the switch On to enable scheduled cleanups.
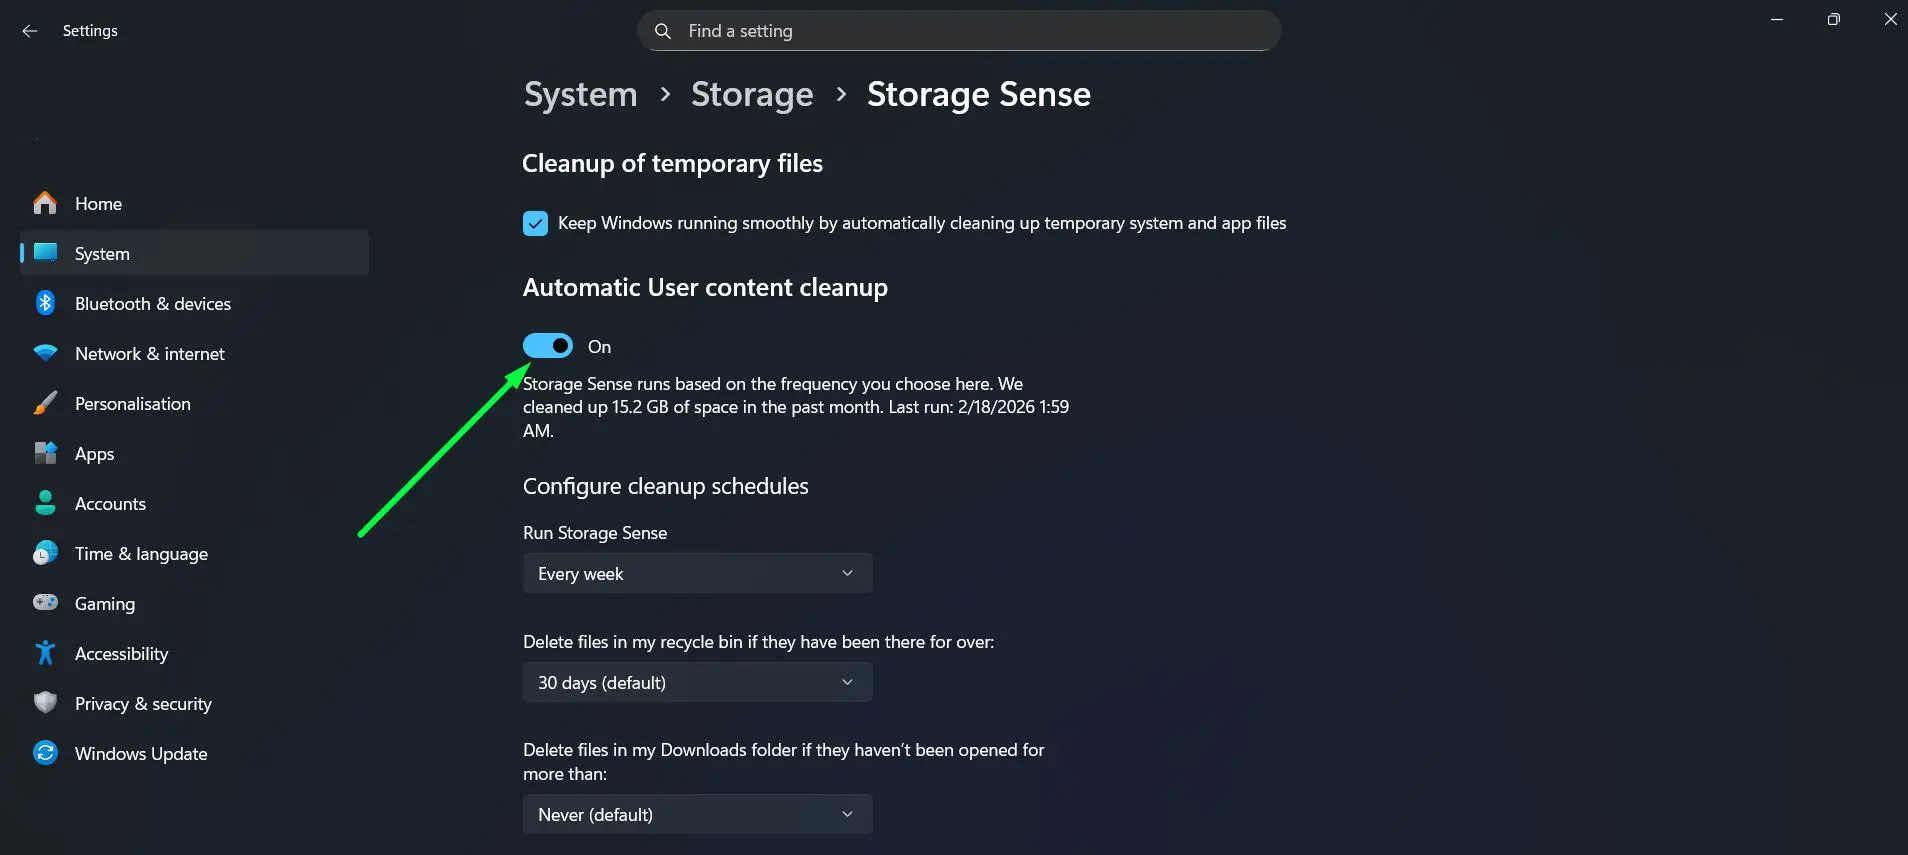
- Step 6: Under ‘Configure cleanup schedules’, set ‘Run Storage Sense’ to every week or every month depending on preference.
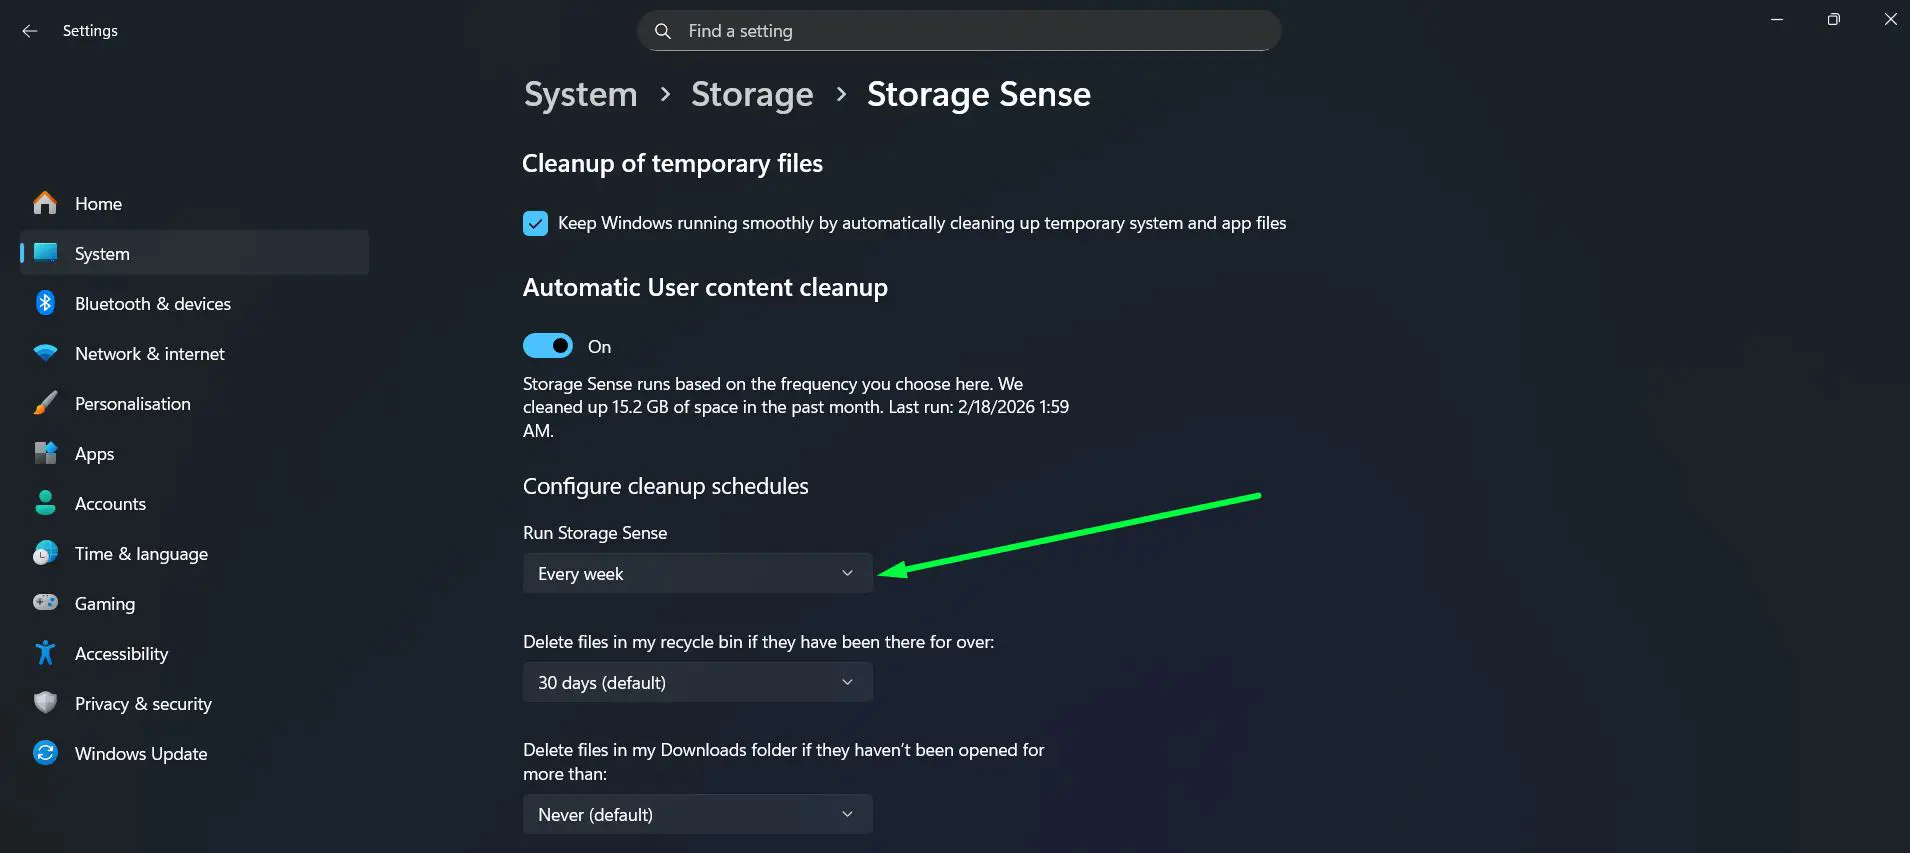
- Step 7: Set ‘Delete files in my recycle bin if they have been there for over’ to 30 days to automatically clear the bin on schedule.
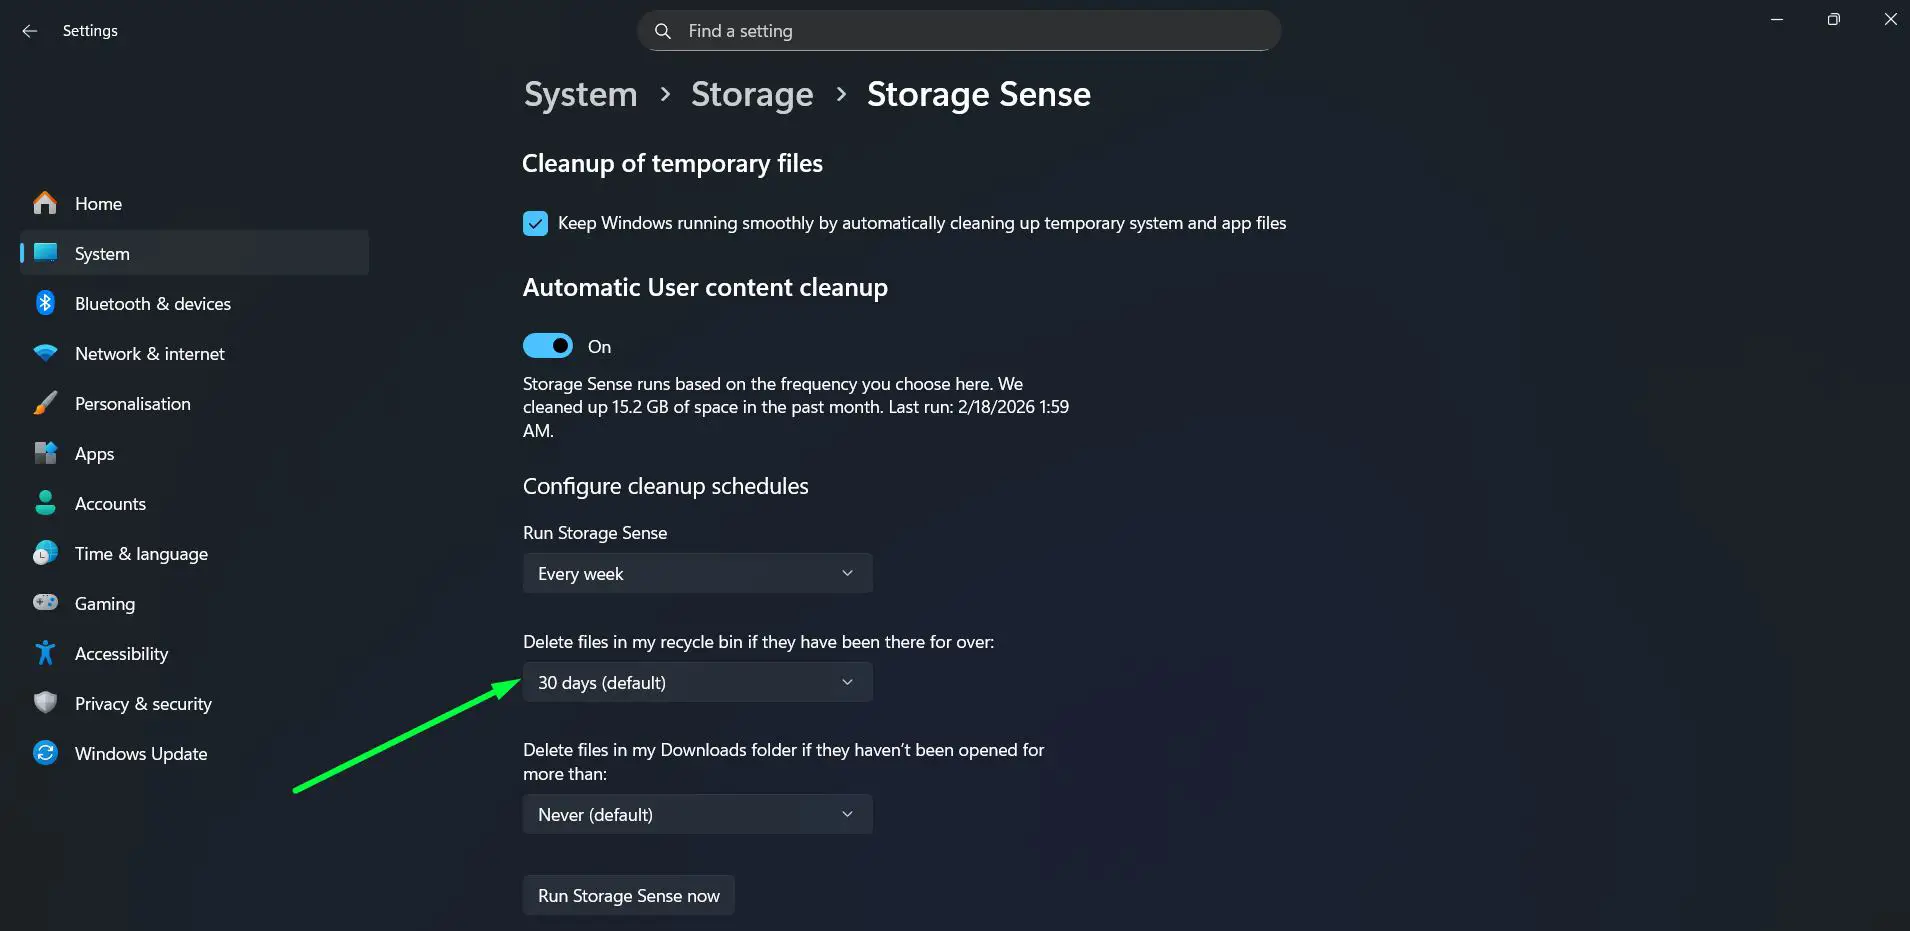
- Step 8: Optionally set ‘Delete files in my Downloads folder if they haven’t been opened for more than’ to a time period that fits the workflow – or leave it on Never to manage Downloads manually.
Storage Sense on Windows 11 also automatically manages locally available OneDrive cloud content, freeing up local space without permanently deleting any files.
Step-by-Step: How to Clear Temp Files Manually on Windows 11
Built-in tools do not always catch every temporary file. A manual clear through the Run dialog reaches folders that Disk Cleanup sometimes skips.
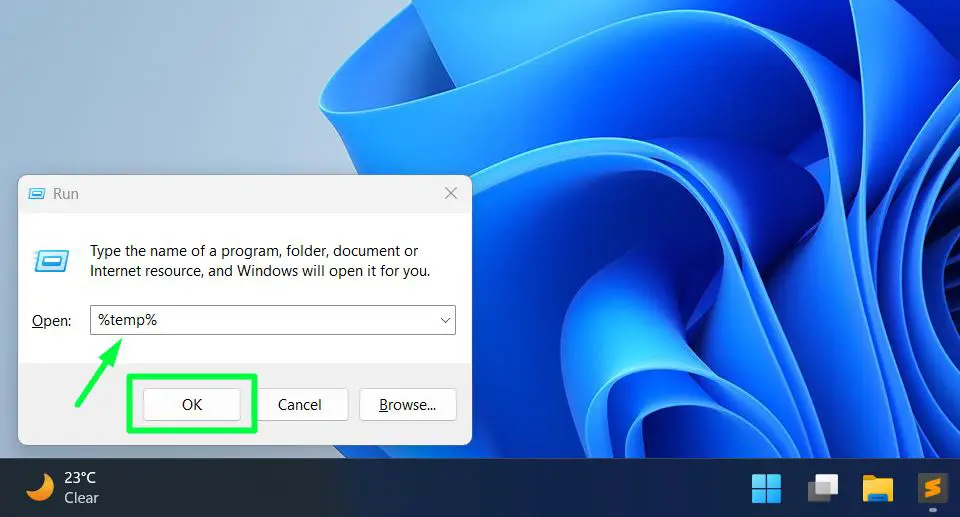
- Step 1: Press Windows + R to open the Run dialog.
- Step 2: Type ‘%temp%’ and press Enter. A folder full of temporary files opens.
- Step 3: Press Ctrl + A to select everything, then press Delete. Skip any files that show an ‘in use’ error – those are safe to leave.
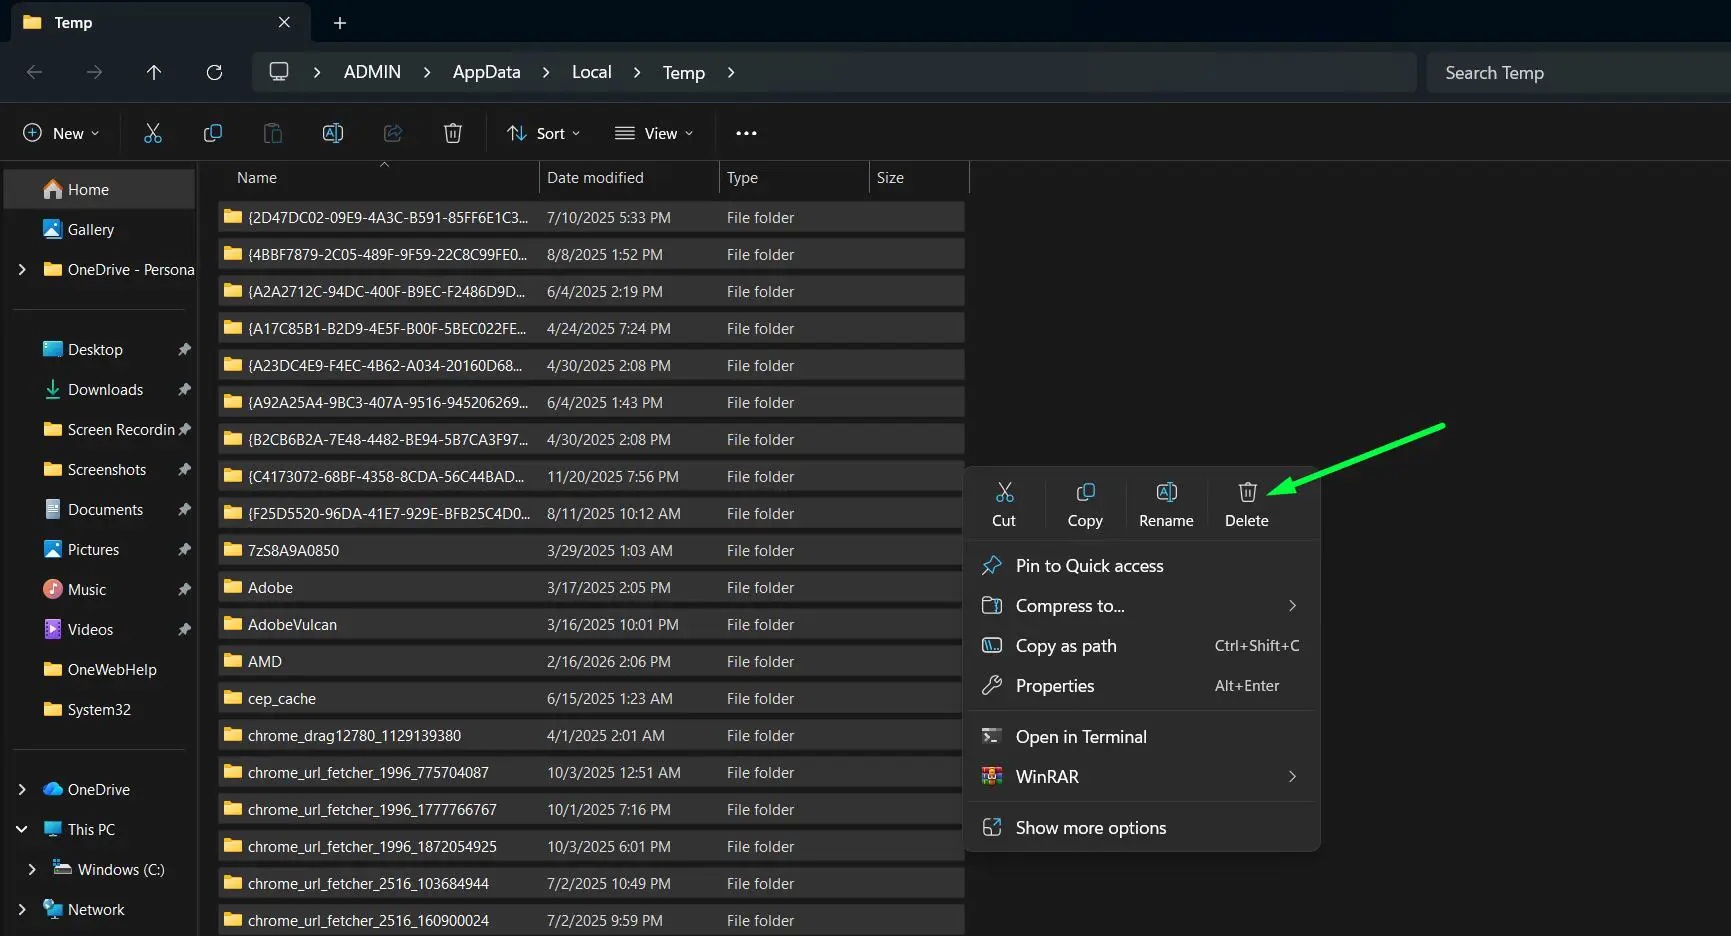
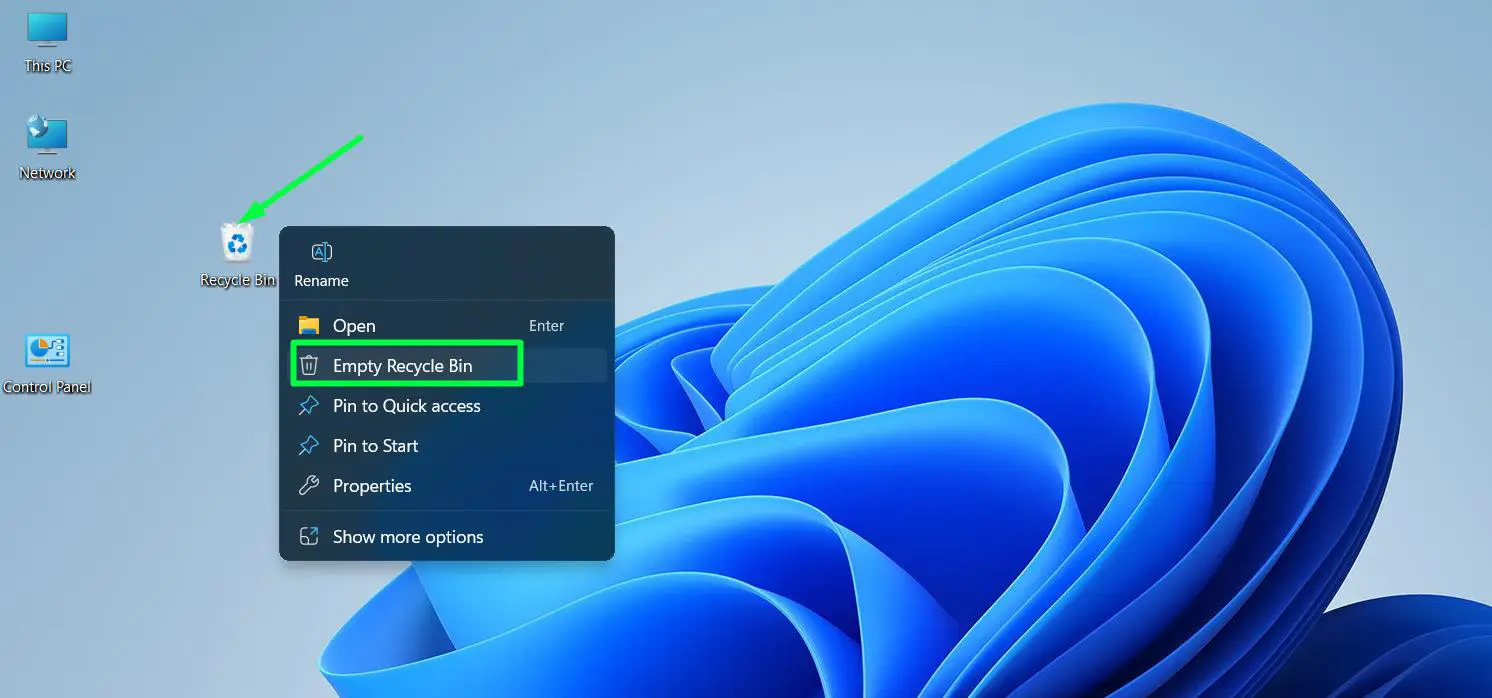
- Step 4: Right-click the Recycle Bin on the desktop and select ‘Empty Recycle Bin’ to finalize all deletions.
Pro-Tip: Windows 11 also has a dedicated Temp folder cleanup inside Settings. Go to System – Storage – Temporary Files for a visual breakdown of exactly what is taking up space and what is safe to delete, with checkboxes for each category.
Step-by-Step: How to Speed Up Windows 11 Performance
A sluggish Windows 11 PC is usually a software problem, not a hardware one. Startup bloat and unnecessary visual effects are the two biggest culprits – and both are easy to fix.
Disable Startup Apps
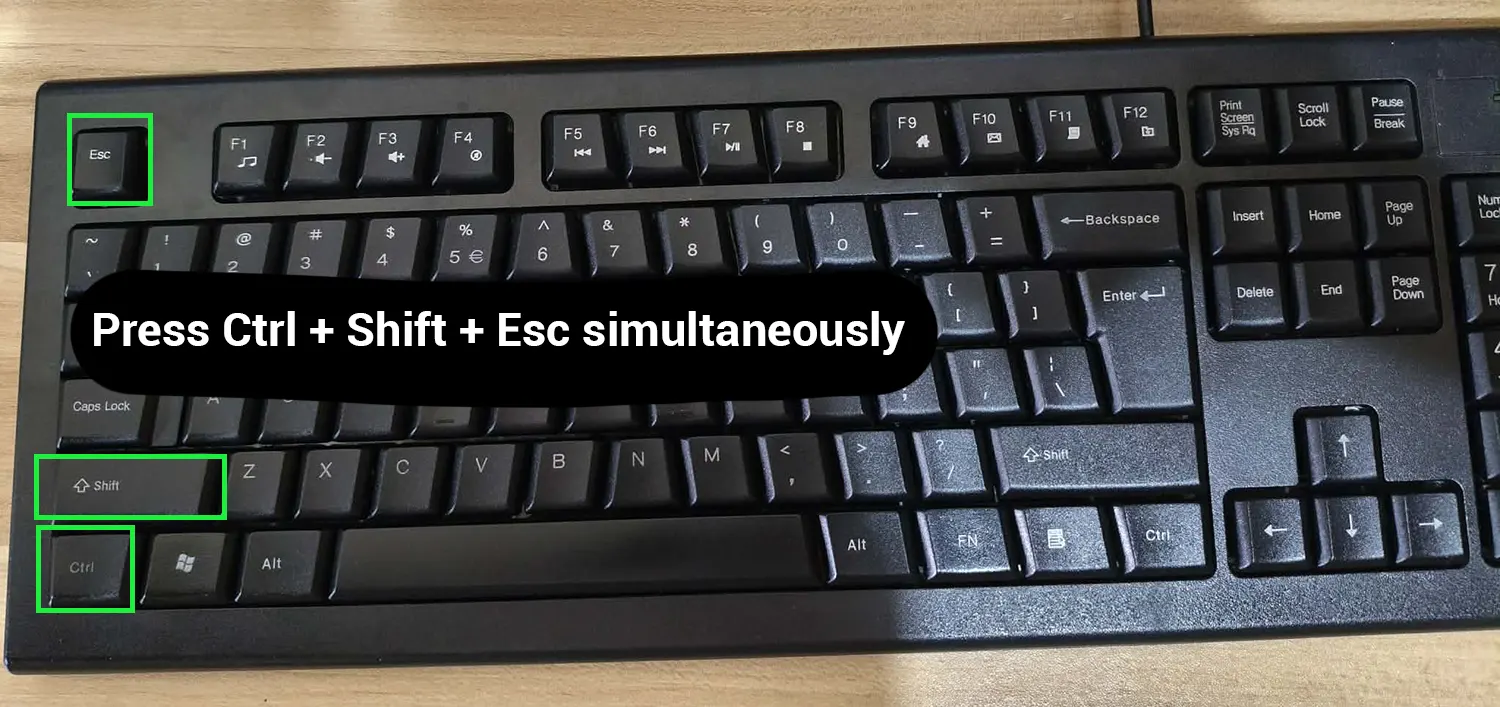
- Step 1: Press Ctrl + Shift + Esc to open Task Manager.
- Step 2: Click the ‘Startup apps’ tab from the left sidebar.
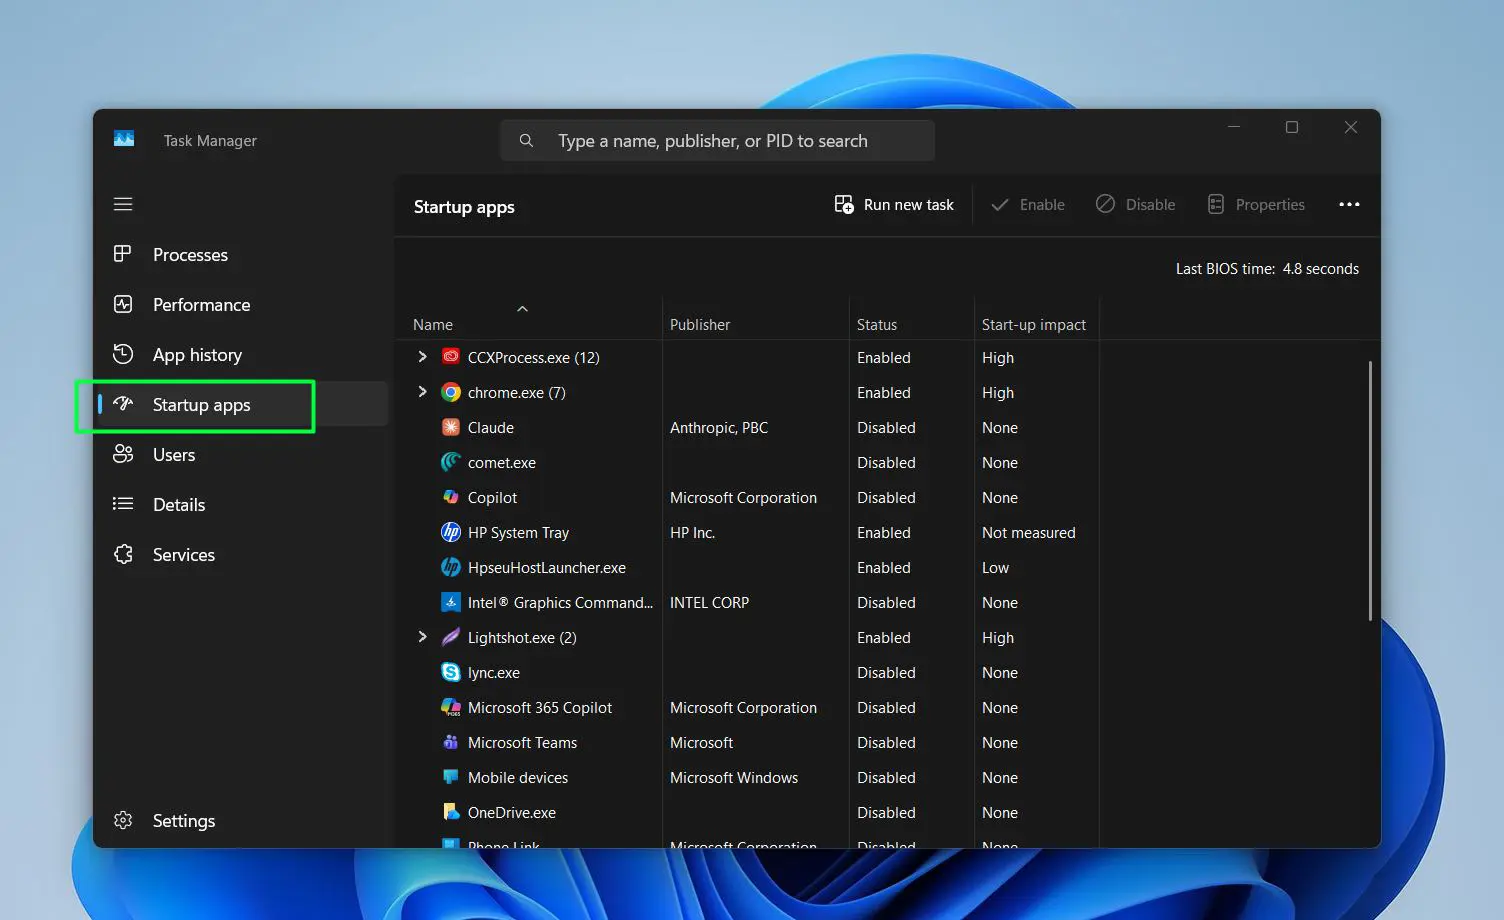
- Step 3: Look at the ‘Startup impact’ column. Items marked ‘High’ are slowing down boot time the most.
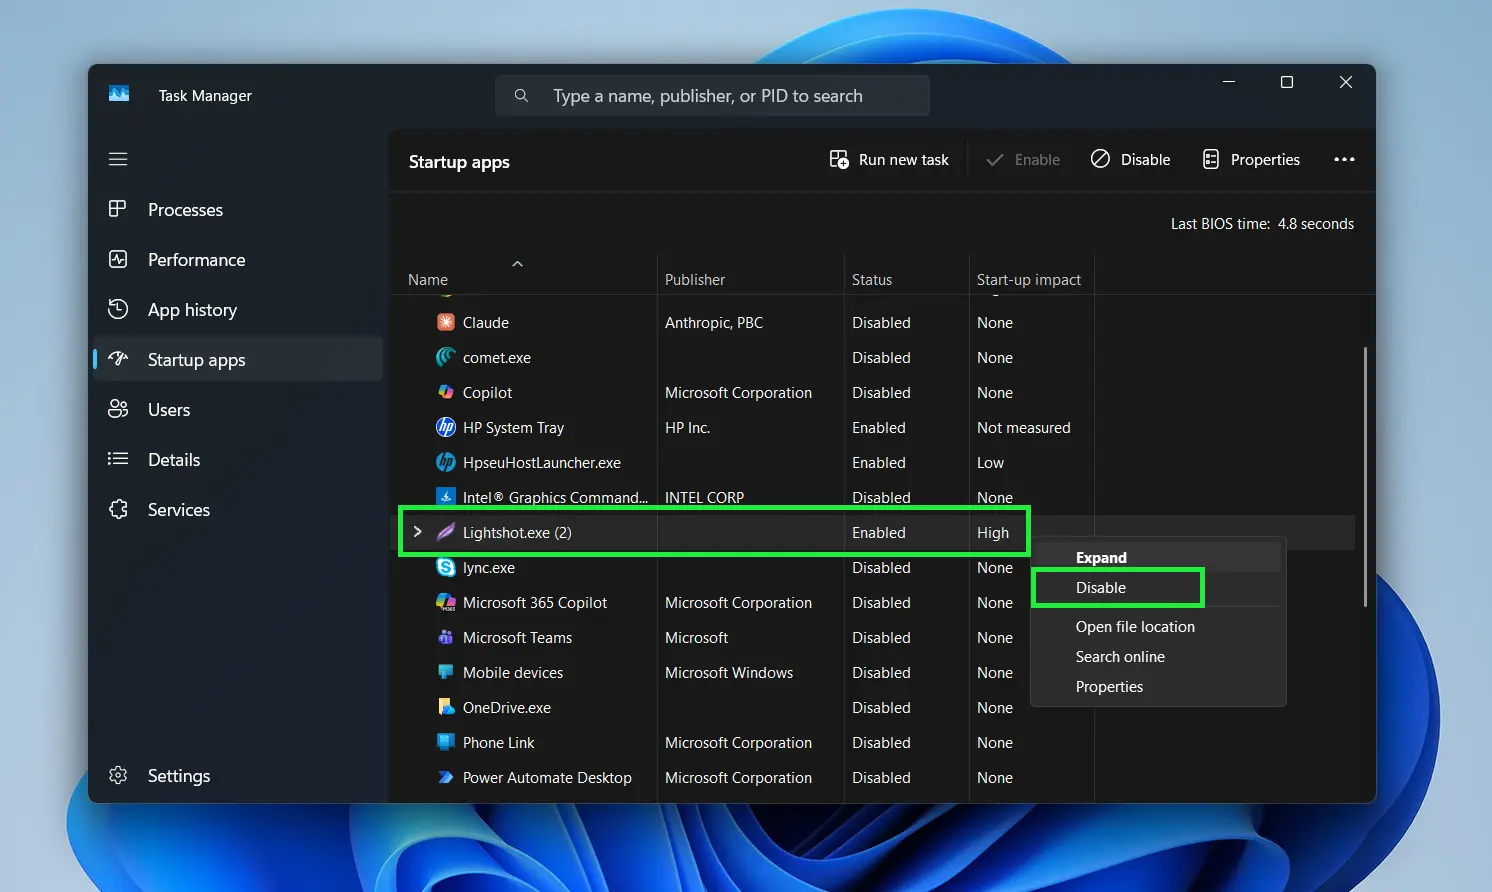
- Step 4: Right-click any app that does not need to launch at startup and select ‘Disable’.
Most people find that apps like Spotify, Teams, Discord, and manufacturer utilities are running at startup by default with no practical reason to be. Disabling these alone cuts boot time noticeably on most machines.
Adjust Visual Effects for Better Performance
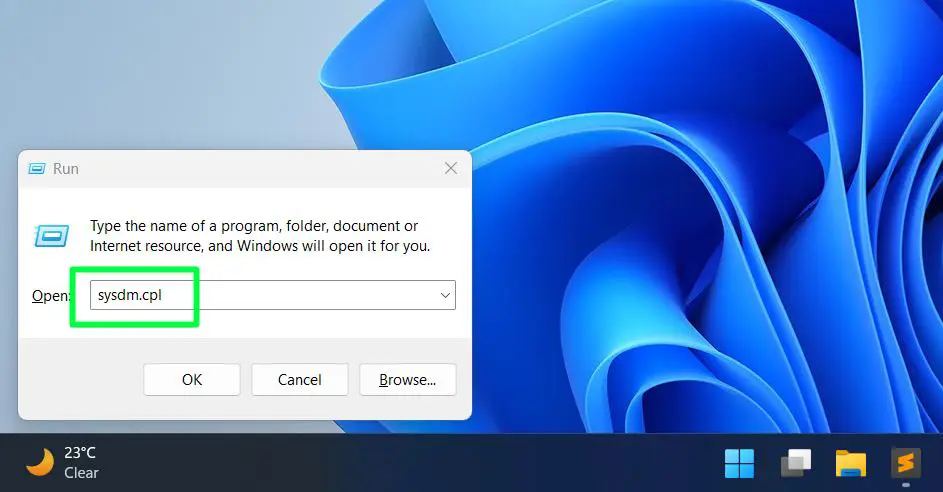
- Step 1: Press Windows + R, type ‘sysdm.cpl’, and press Enter.
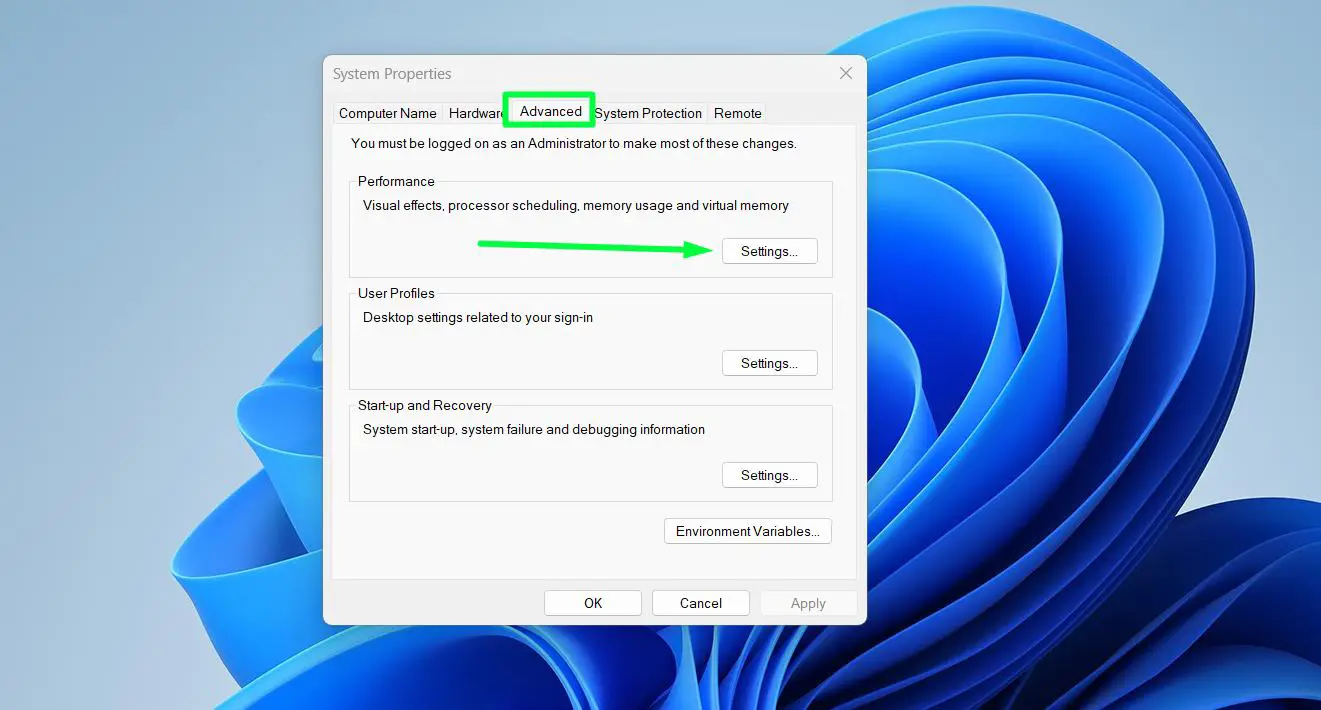
- Step 2: Click the Advanced tab, then click ‘Settings’ under Performance.
- Step 3: Select ‘Adjust for best performance’ to turn off all animations, or choose ‘Custom’ to keep a few while cutting the rest.
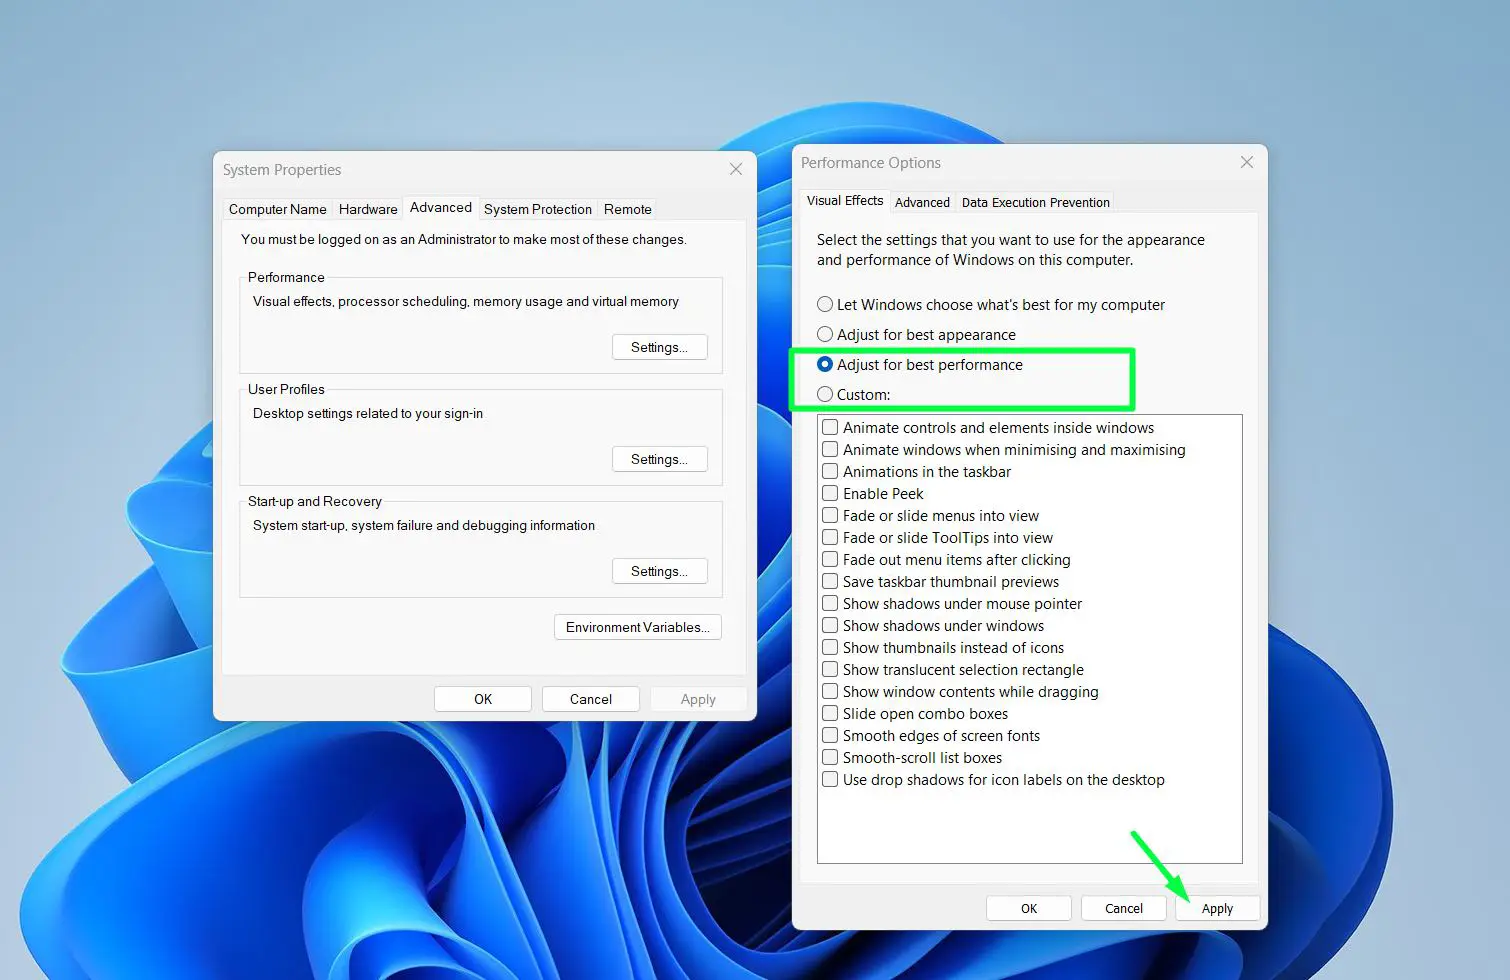
- Step 4: Click Apply, then OK.
Set the Power Plan to Balanced or High Performance
- Step 1: Press Windows + I to open Settings.
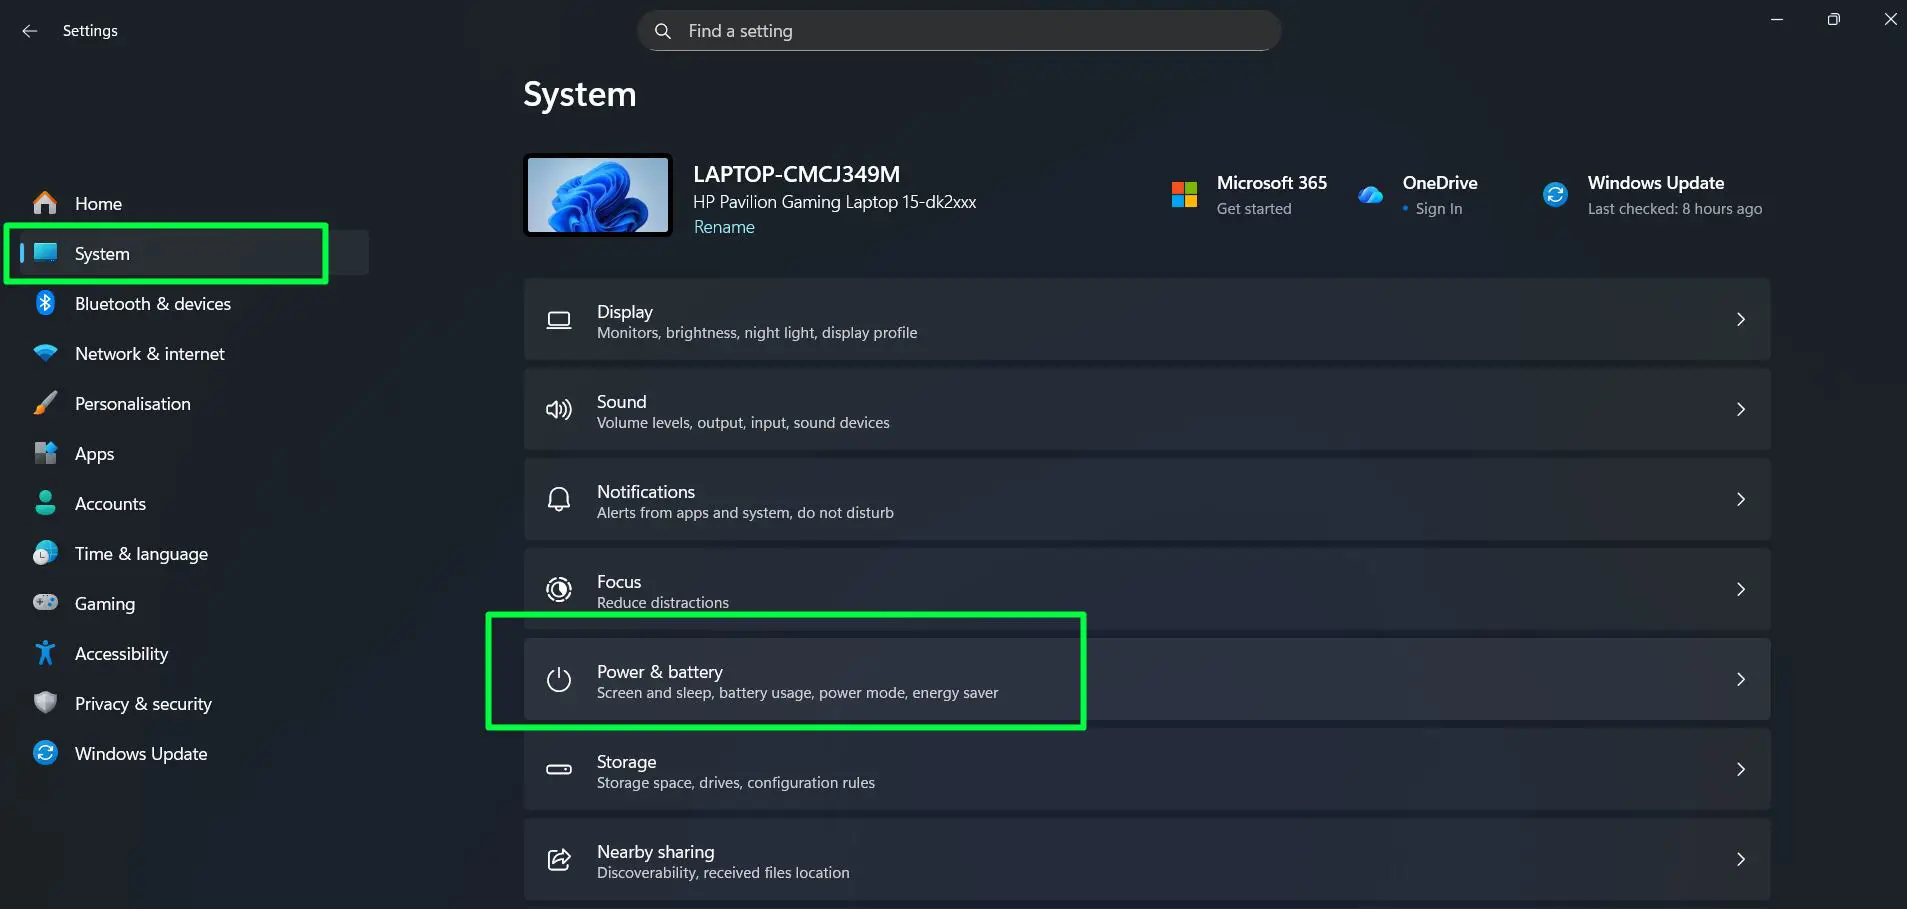
- Step 2: Go to System, then Power and battery.
- Step 3: Click on ‘Power Mode’ to expand it.
- Step 4: Under ‘Plugged in’, select ‘Best performance’ from the dropdown.
- Step 5: Under ‘On battery’, select ‘Balanced’ to preserve battery life when unplugged.
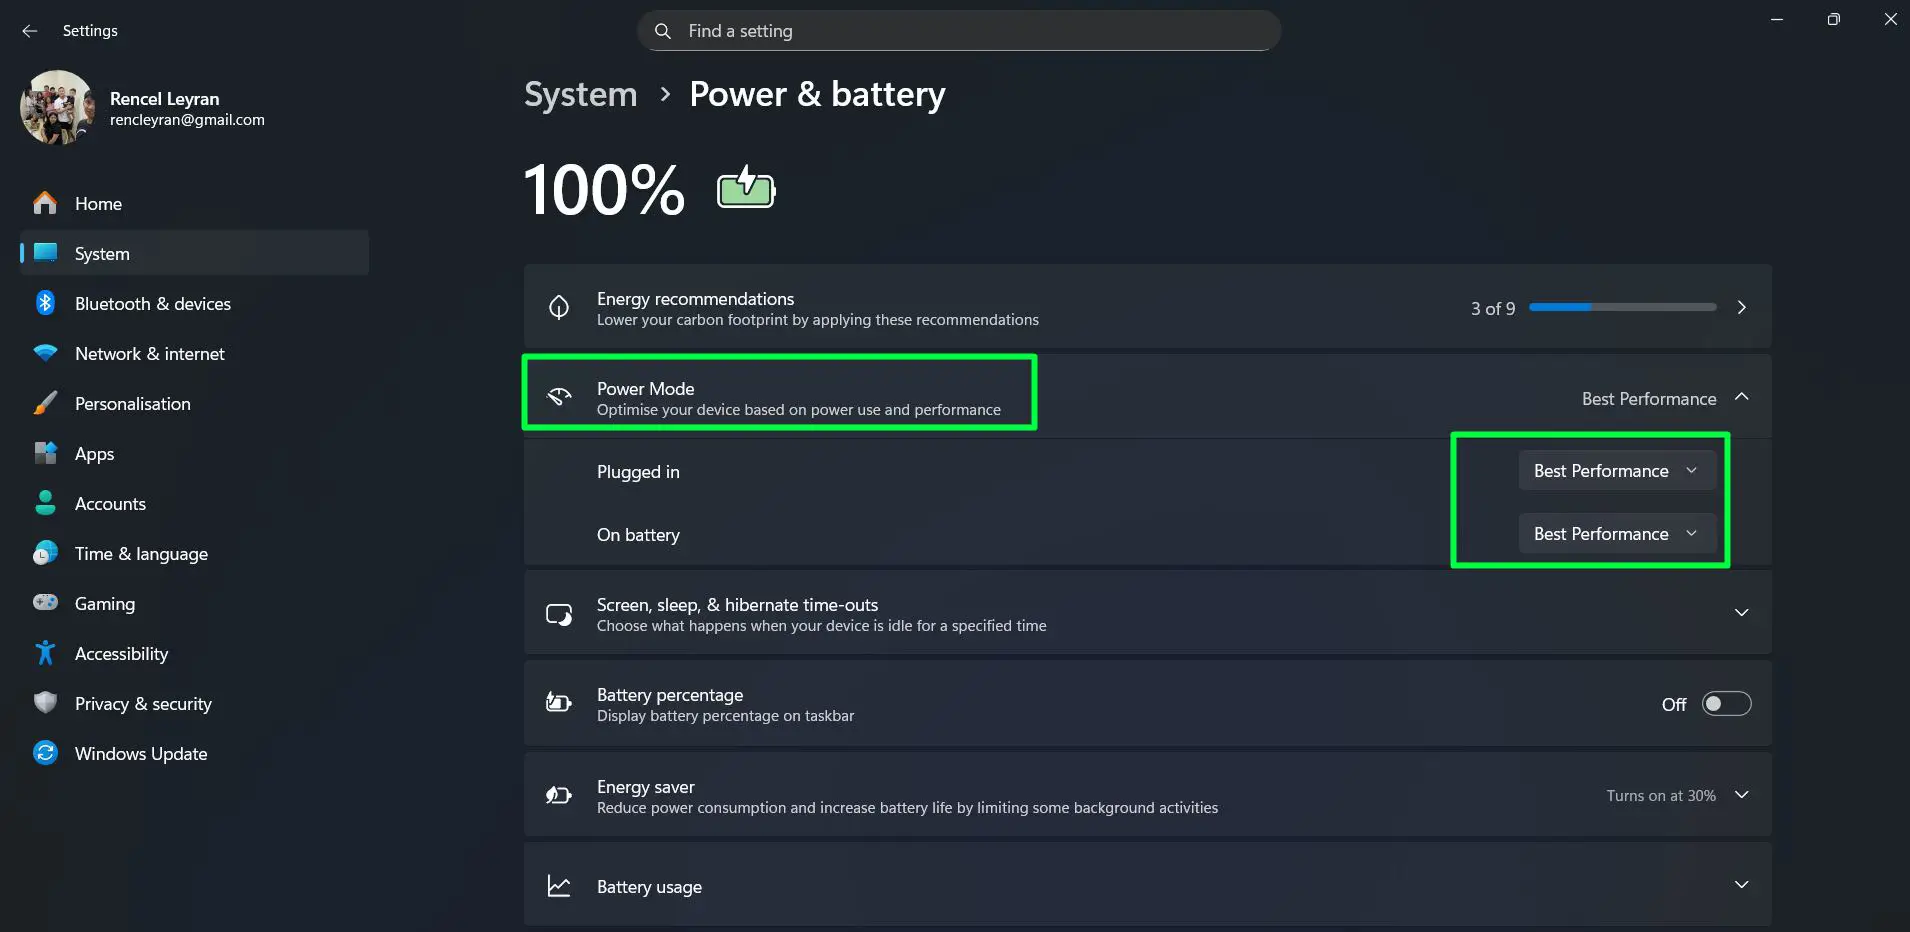
Setting ‘Plugged in’ to ‘Best performance’ ensures the processor runs at full capacity when connected to power. Leaving it on ‘Balanced’ or ‘Power saver’ while plugged in unnecessarily limits performance with no real benefit.
Step-by-Step: How to Uninstall Unused Apps on Windows 11
Every unused app takes up storage and potentially runs background processes that drain system resources. Clearing them out is one of the fastest wins in a full Windows 11 cleanup.
- Step 1: Press Windows + I to open Settings.
- Step 2: Go to Apps, then Installed apps.
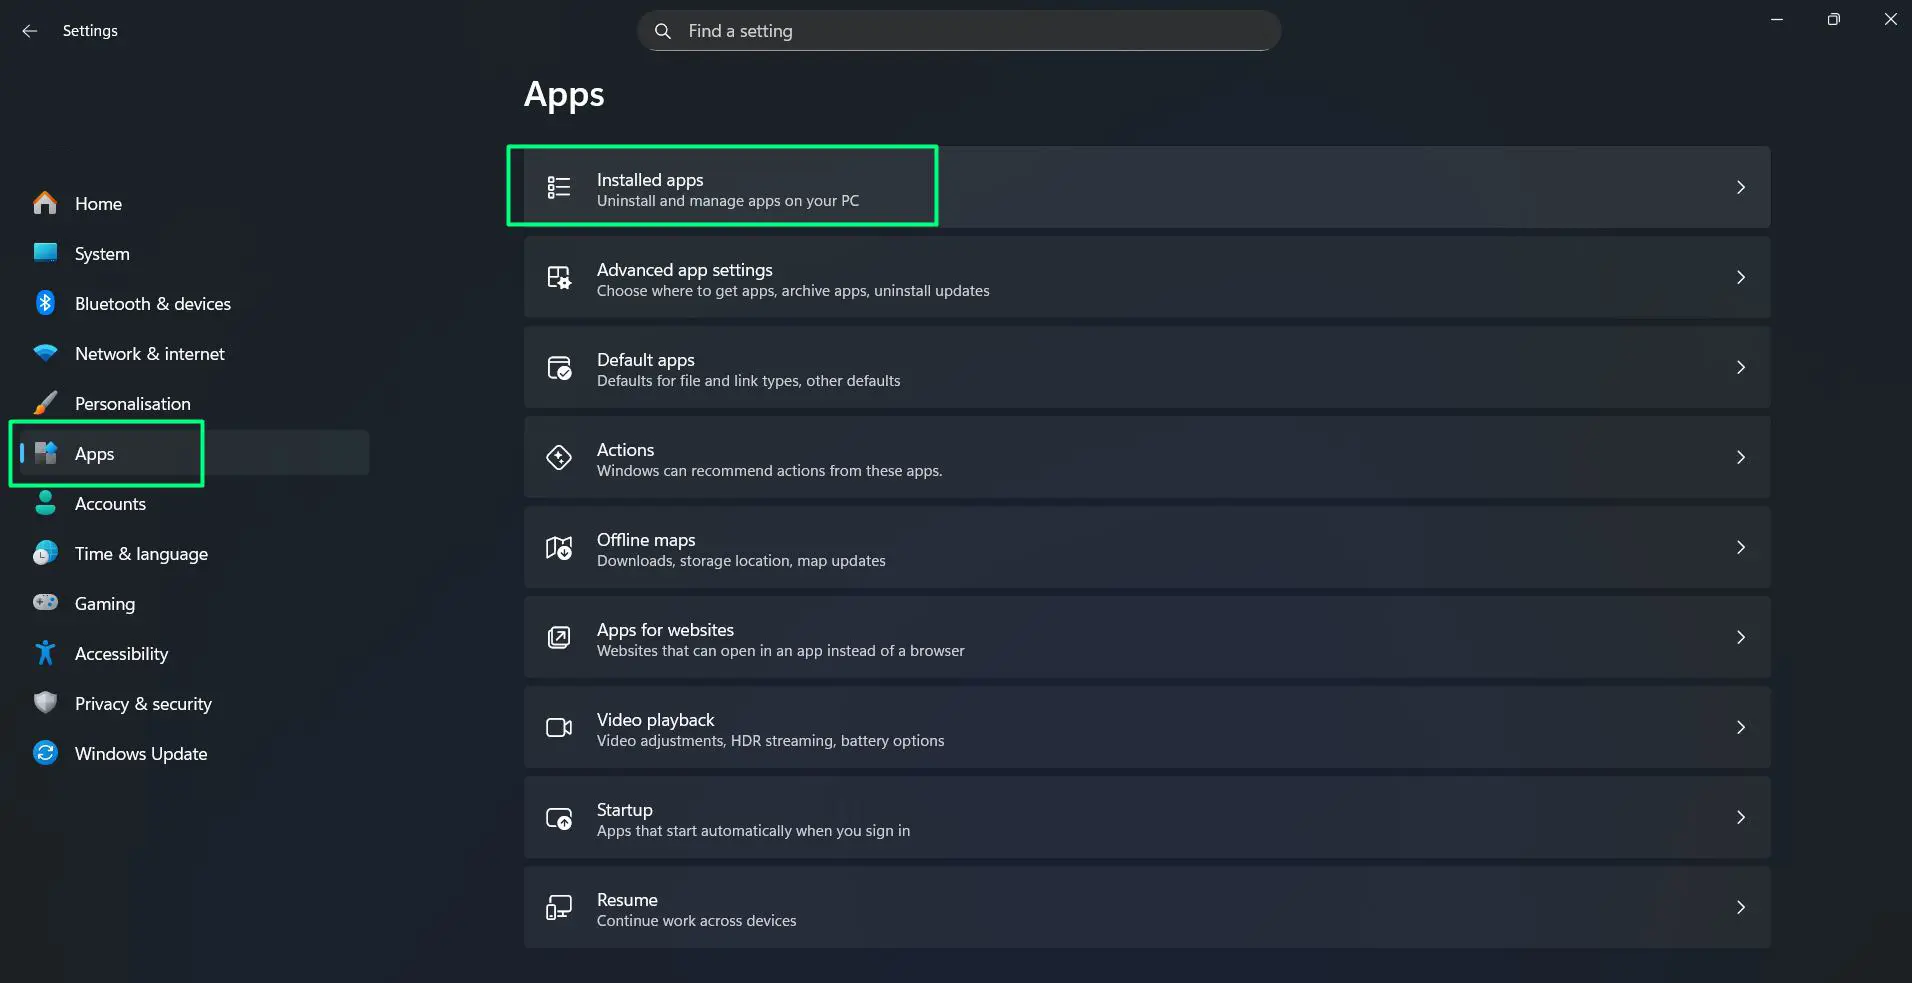
- Step 3: Click the ‘Sort by’ dropdown and choose ‘Size (Large to small)’ to see the biggest space users at the top.
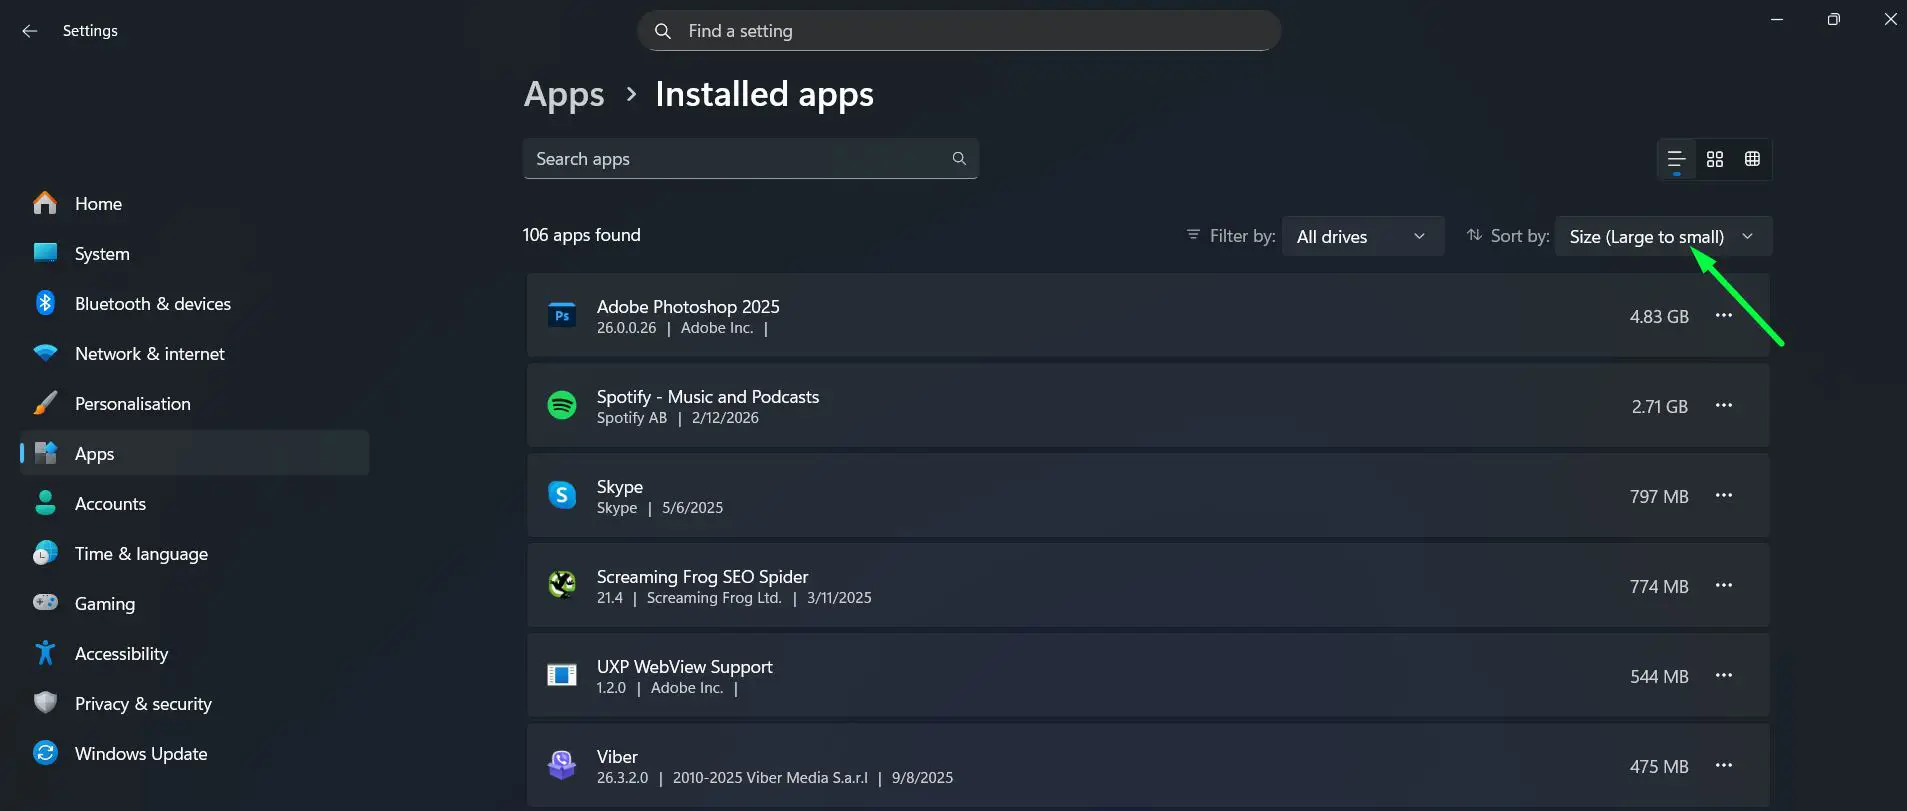
- Step 4: Click the three-dot menu next to any app that is no longer needed and select Uninstall.
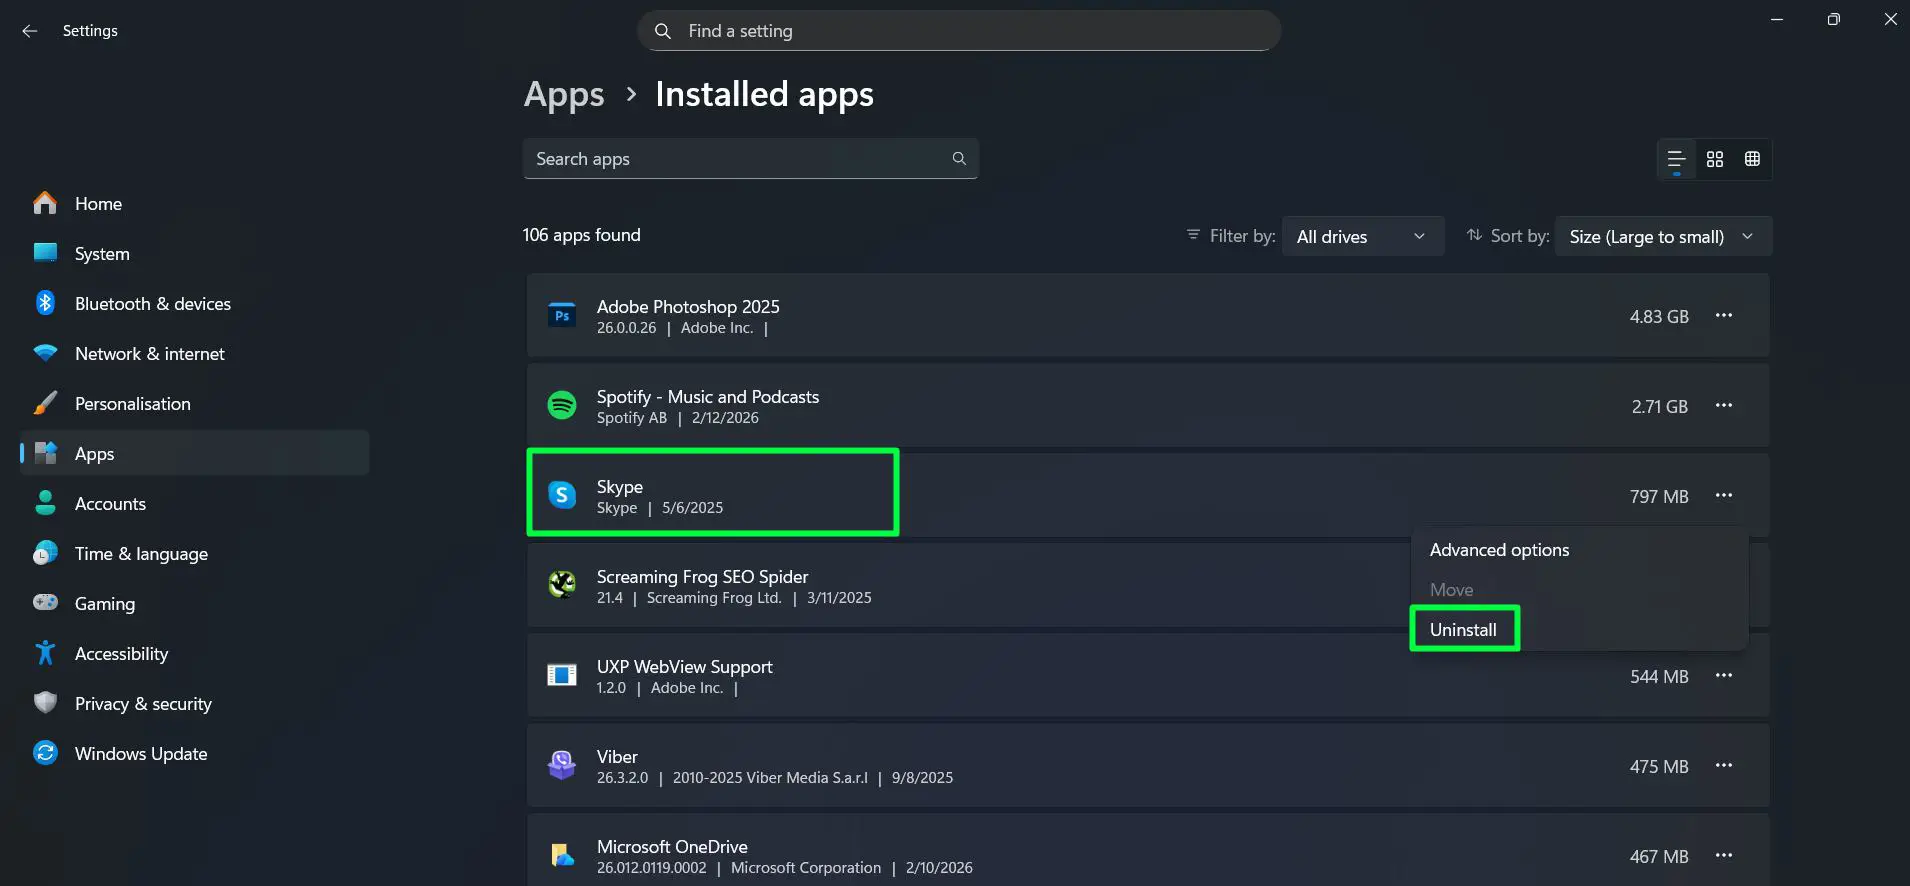
- Step 5: Follow the prompts to complete the removal.
- Step 6: Repeat for pre-installed bloatware – apps that came with the PC and serve no real purpose.
For a more thorough removal that cleans up leftover registry entries and residual files, a trusted third-party uninstaller like Revo Uninstaller handles the cleanup that standard Windows uninstalls leave behind. This is one of the software maintenance habits that keeps Windows 11 running lean over the long term.
Want to learn how to clear app cache and data? Check this guide here for easy steps!
Step-by-Step: How to Update Windows 11
Windows 11 updates patch real security vulnerabilities that get actively exploited. Staying current is not optional for a secure, well-functioning system. It also resolves performance bugs that Microsoft quietly fixes between major releases.
- Step 1: Press Windows + I to open Settings.
- Step 2: Click ‘Windows Update’ from the left sidebar.
- Step 3: Click ‘Check for updates’ and let Windows search.
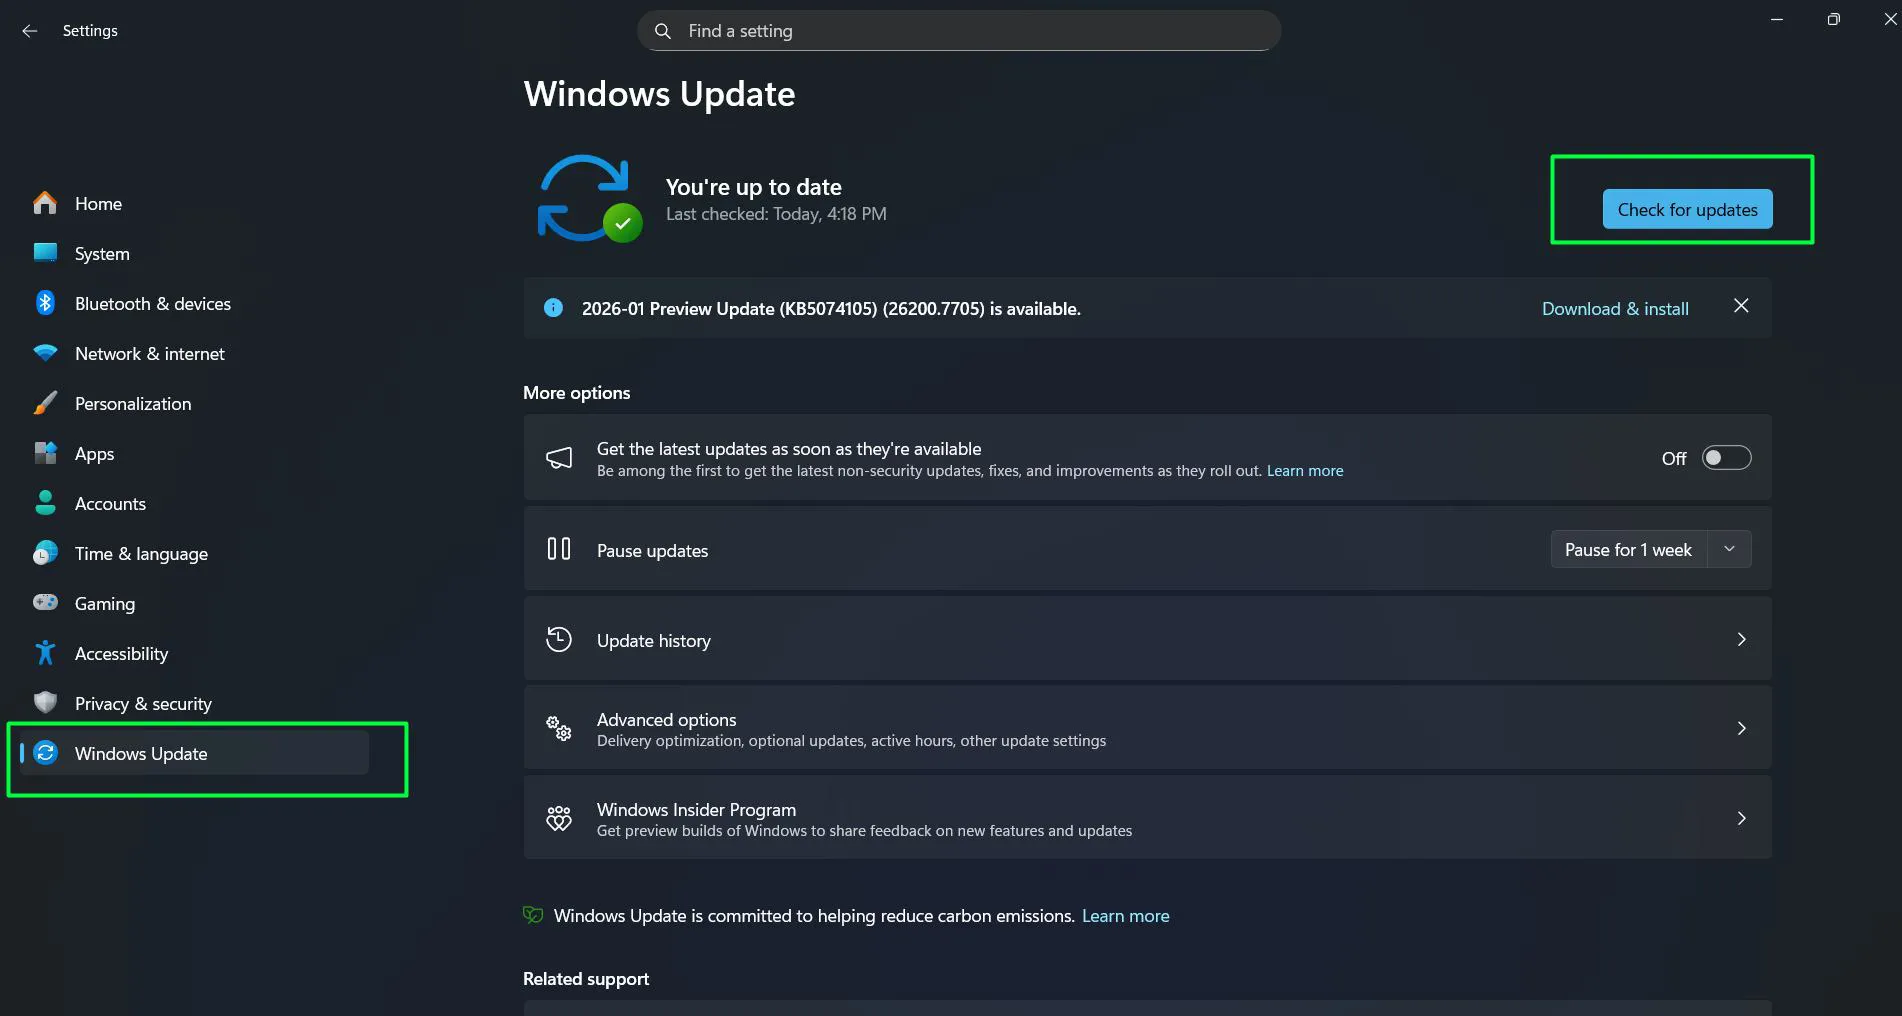
- Step 4: Install all available updates. If a restart is required, do it promptly – postponing indefinitely can leave the system in a partially updated state.
- Step 5: After restarting, check for updates again. Some updates only appear after prior ones are installed.
- Step 6: Under ‘Advanced options’, enable ‘Receive updates for other Microsoft products’ to keep Office and other Microsoft apps updated at the same time.
Driver updates matter too. Open Device Manager, right-click key components like the graphics adapter and network adapter, and select ‘Update driver’ to keep hardware running correctly alongside the OS. This is a step covered in detail across hardware maintenance guides and often overlooked in standard cleanup routines.
Want to update Windows security signatures manually? Check this guide here for easy steps!
Step-by-Step: How to Scan for Malware on Windows 11
Malware is one of the most common causes of a slow or unstable Windows 11 PC. Running a full scan as part of every cleanup catches threats that have been quietly consuming resources in the background.
Watch this tutorial on How to do Full Scan for Malware on Windows 11 – Step-by-Step Guide
Using Windows Security (Built-In)
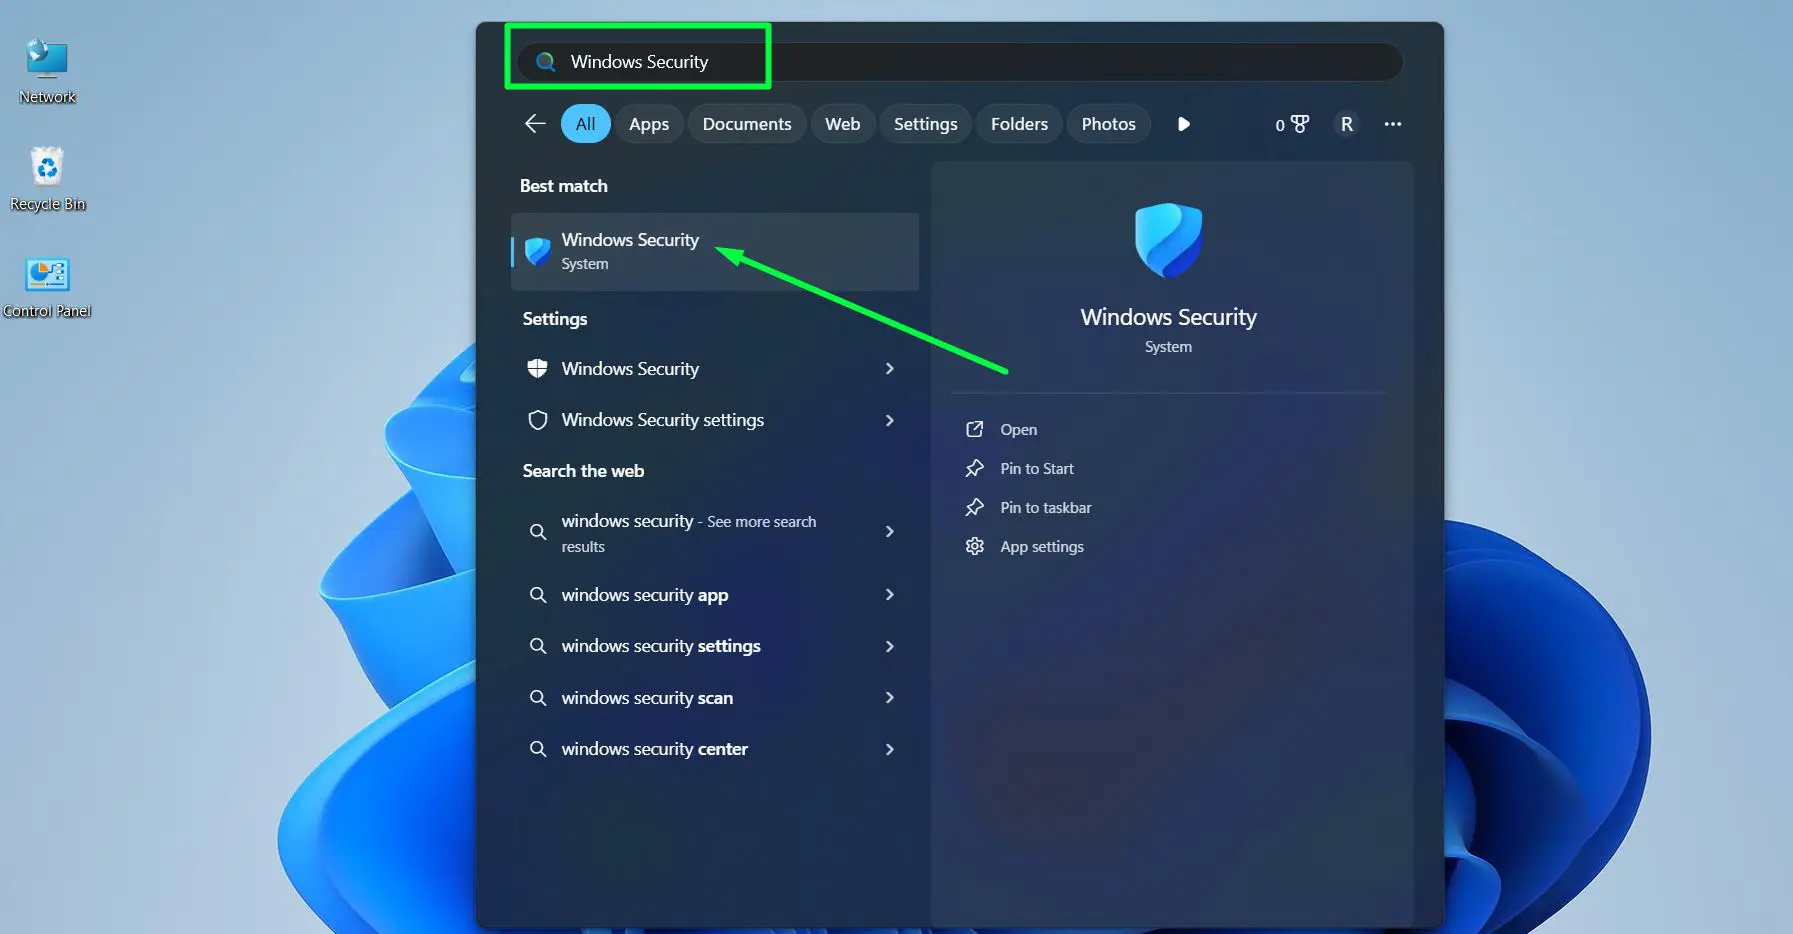
- Step 1: Press the Windows key and search for ‘Windows Security’, then open it.
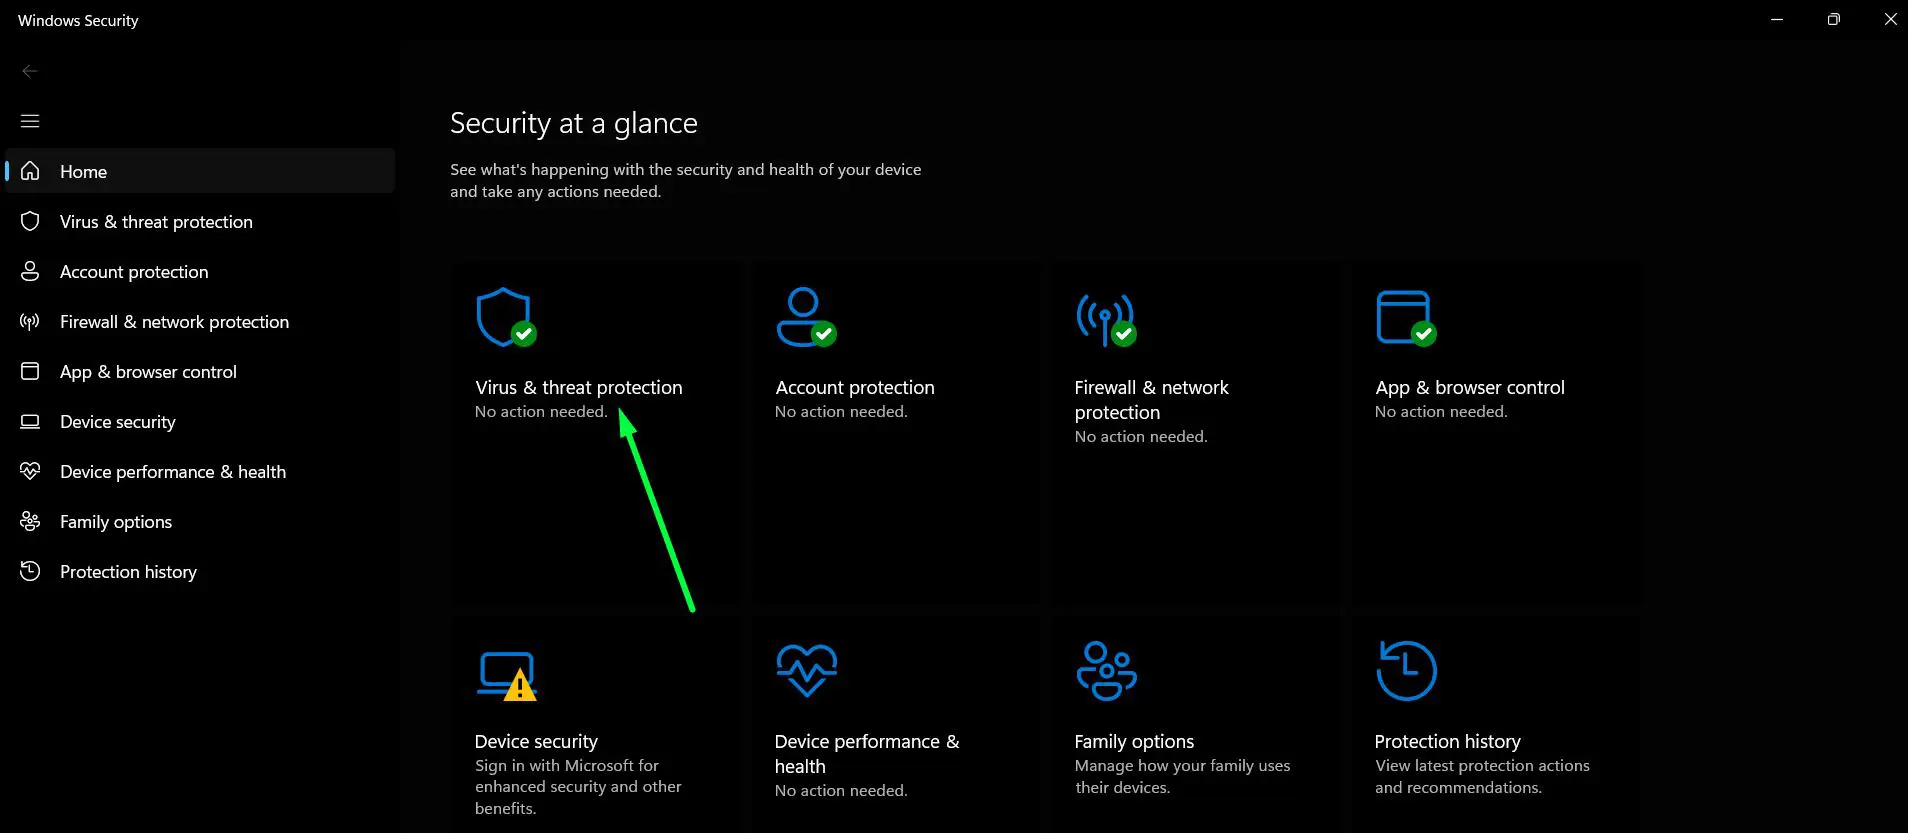
- Step 2: Click ‘Virus and threat protection’.
- Step 3: Click ‘Scan options’

- Step 4: Select ‘Full scan’ and Click ‘Scan now’. This can take 30 to 60 minutes depending on drive size – let it run completely.
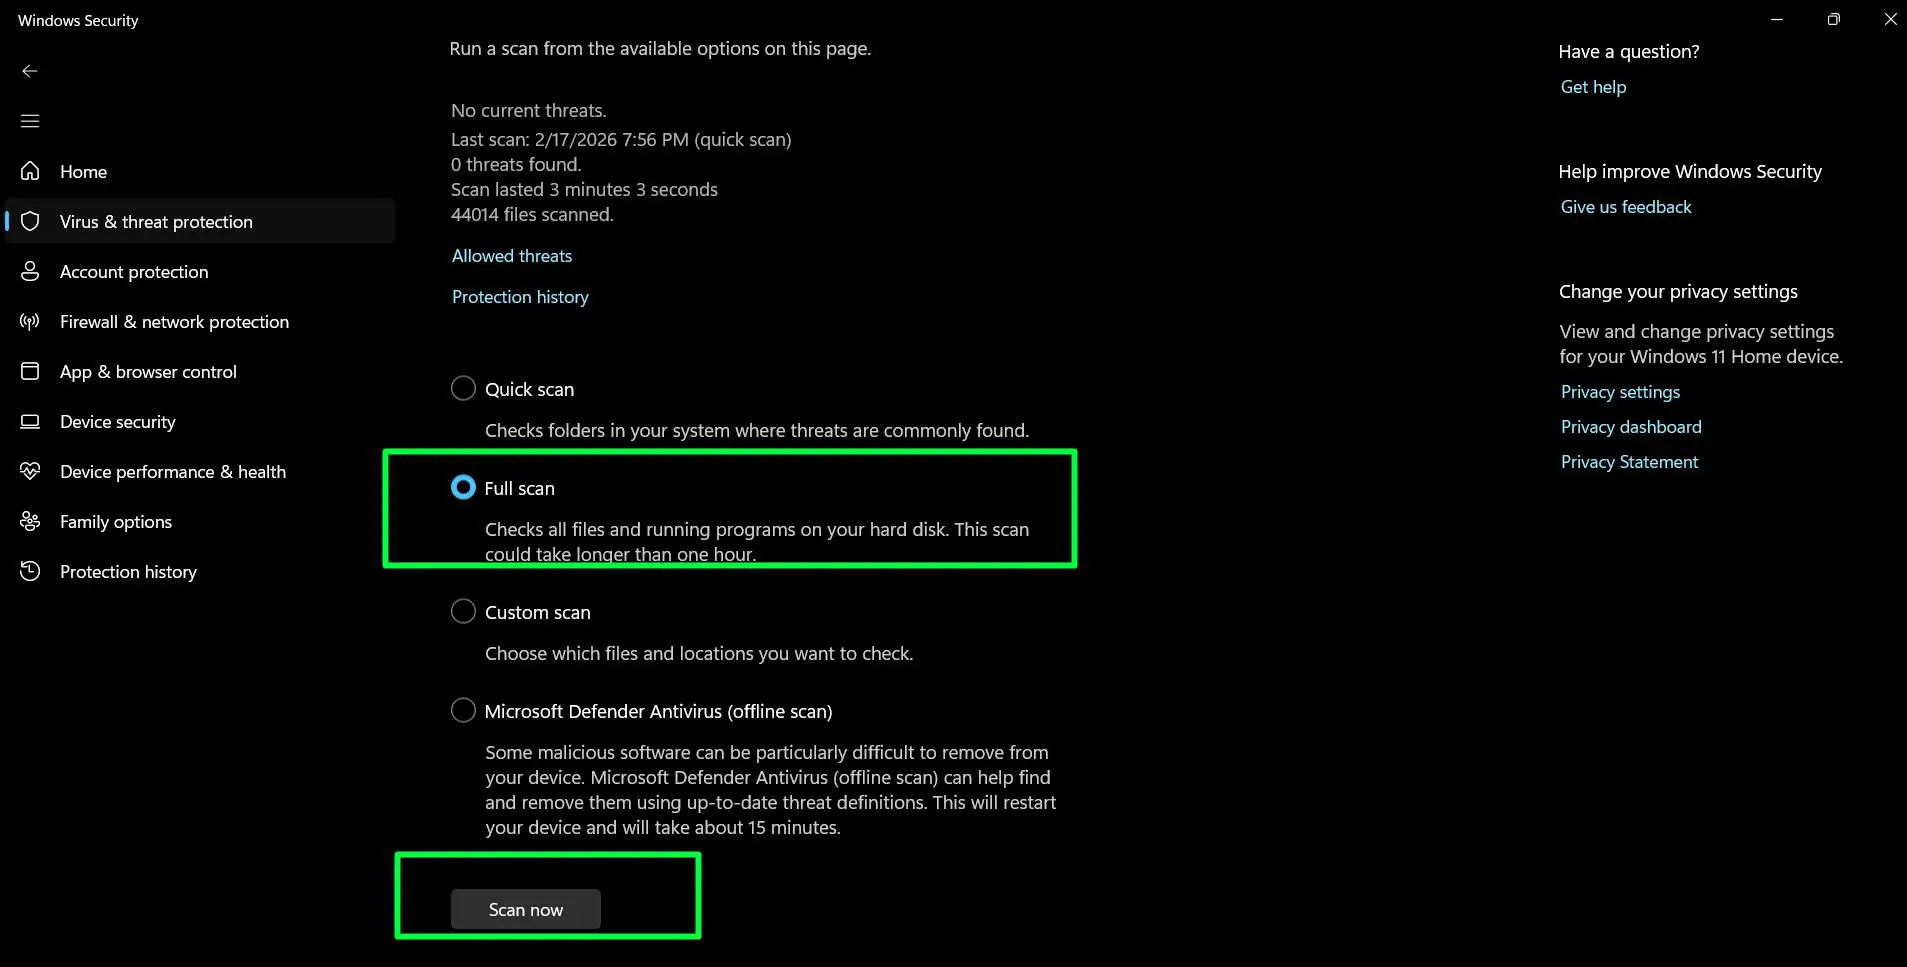
- Step 6: Review any threats found and follow the recommended actions.
Using Malwarebytes Free
- Step 1: Download Malwarebytes from malwarebytes.com.
- Step 2: Install and open the application.
- Step 3: Click ‘Scan’ to run a full threat scan.
- Step 4: Quarantine or remove any flagged items from the results.
Pro-Tip: Running both Windows Security and Malwarebytes covers significantly more ground than either tool alone. They detect different threat types and complement each other well. This two-tool approach is a standard recommendation for thorough Windows 11 malware protection.
Step-by-Step: How to Clean the Windows 11 Registry
Over time the registry collects orphaned entries from apps that have been uninstalled. While Windows 11 can function with these leftovers, cleaning them up reduces occasional errors and keeps the registry tidy.
- Step 1: Download CCleaner free edition from the official site at ccleaner.com.
- Step 2: Open CCleaner and navigate to the Registry section in the left sidebar.
- Step 3: Click ‘Scan for Issues’ and wait for the results.
- Step 4: Click ‘Fix selected issues’. When prompted to back up the registry, click Yes and save the backup file somewhere accessible.
- Step 5: Click ‘Fix all selected issues’ to complete the cleanup.
Always back up before touching the registry. The backup file can restore everything if something unexpected happens.
Tips for Keeping Windows 11 Clean Long-Term
- Set Storage Sense to run automatically every month so junk never builds up unnoticed
- Restart the PC at least once a week to clear memory and apply pending updates
- Only install software from trusted, official sources
- Review installed apps every few months and remove anything no longer in use
- Keep the Downloads folder and desktop tidy – too many files in these locations slows File Explorer
- Use a browser extension like uBlock Origin to reduce exposure to adware and malicious scripts
- Back up important files to an external drive or cloud storage before any major cleanup session
Common Problems and How to Fix Them
Windows 11 Still Slow After Cleanup
Check Task Manager’s Processes tab for any single process consuming high CPU or memory consistently. Also revisit the Startup apps list – some applications re-enable themselves after updates and need to be disabled again.
Disk Cleanup Freezes or Hangs
This happens on drives with a very large accumulated file count. Let it run in the background without interrupting it. If it completely freezes after several minutes, restart the PC and try again – it usually completes on the second attempt.
Windows 11 Update Failing or Stuck
Go to Settings – System – Troubleshoot – Other troubleshooters and run the Windows Update troubleshooter. It automatically detects and resolves the most common update failure causes. If the problem persists, clearing the SoftwareDistribution folder and restarting the Windows Update service resolves most stuck updates.
Storage Shows Full but Files Cannot Be Found
Check for a large hibernation file. Open Command Prompt as Administrator and run ‘powercfg /h off’ if hibernation is not needed – this removes the hiberfil.sys file which can be several gigabytes. Also run Disk Cleanup with ‘Clean up system files’ to address the WinSxS folder, which Windows manages but can grow very large over time.
Malware Found but Will Not Remove
Some malware actively protects itself while Windows is running. Boot into Safe Mode by holding Shift while clicking Restart, then going to Troubleshoot – Advanced options – Startup Settings – Restart. From Safe Mode, run the antivirus scan again – threats that resist removal in normal mode are usually removable from Safe Mode.
Frequently Asked Questions
How often should Windows 11 be cleaned?
A light monthly cleanup covering temp files and Windows updates keeps things running well day to day. A deeper cleanup – startup programs, installed apps, full malware scan, and registry – is worth doing every three to six months depending on how intensively the PC is used.
Is it safe to delete temp files on Windows 11?
Yes, completely safe. Temp files are created by Windows and applications for short-term use and are no longer needed once the relevant process finishes. The only ones to skip are files that show an ‘in use’ error, which means an active process still has them open.
Does cleaning Windows 11 actually improve speed?
Yes, often quite noticeably. Disabling startup apps alone can cut boot time significantly. Freeing up storage on a near-full drive directly improves read and write performance. Combined, these steps produce real, measurable improvements on most Windows 11 systems.
What is the best free tool to clean Windows 11?
Windows 11 comes with solid built-in tools – Disk Cleanup, Storage Sense, and Windows Security – that handle most cleanup needs without any third-party software. For malware scanning, Malwarebytes free edition is widely trusted. For registry cleanup, CCleaner free edition is a reliable option used by millions of Windows users.
Should the Windows 11 registry be cleaned?
It is not essential for most users and carries some risk with unreliable tools. Built-in Windows cleanup covers the most impactful maintenance. If registry cleaning is done, use a reputable tool like CCleaner and always create a backup before making any changes.
Can cleaning Windows 11 cause data loss?
Standard cleanup steps do not touch personal files. Deleting temp files, clearing junk, and uninstalling apps leaves documents, photos, and personal data completely intact. That said, backing up important files to an external drive or cloud storage before any major cleanup session is always a smart habit.