Opening zip files in Windows 11 is a straightforward process that most users need to perform regularly. Whether files are compressed for email attachments, downloads, or storage purposes, knowing how to extract them quickly saves time and frustration. This guide covers three reliable methods to open zip files, from the built-in Windows tool to third-party applications like WinRAR and 7-Zip.
Quick Summary Table
- Built-in Windows Tool: Free, no installation required, perfect for basic zip files
- WinRAR: Powerful compression tool with advanced features, supports multiple formats
- 7-Zip: Free, open-source alternative with excellent compression ratios
- Best for Beginners: Windows built-in extractor (File Explorer method)
- Best for Power Users: WinRAR or 7-Zip for advanced compression needs
Method 1: Using Windows 11 Built-in Zip Extractor
Windows 11 comes with a native zip file handler that requires no additional software installation. This method works perfectly for standard zip files and provides the quickest solution for most situations.
Extract Using File Explorer
- Step 1: Locate the zip file in File Explorer by navigating to the folder where the compressed file is saved
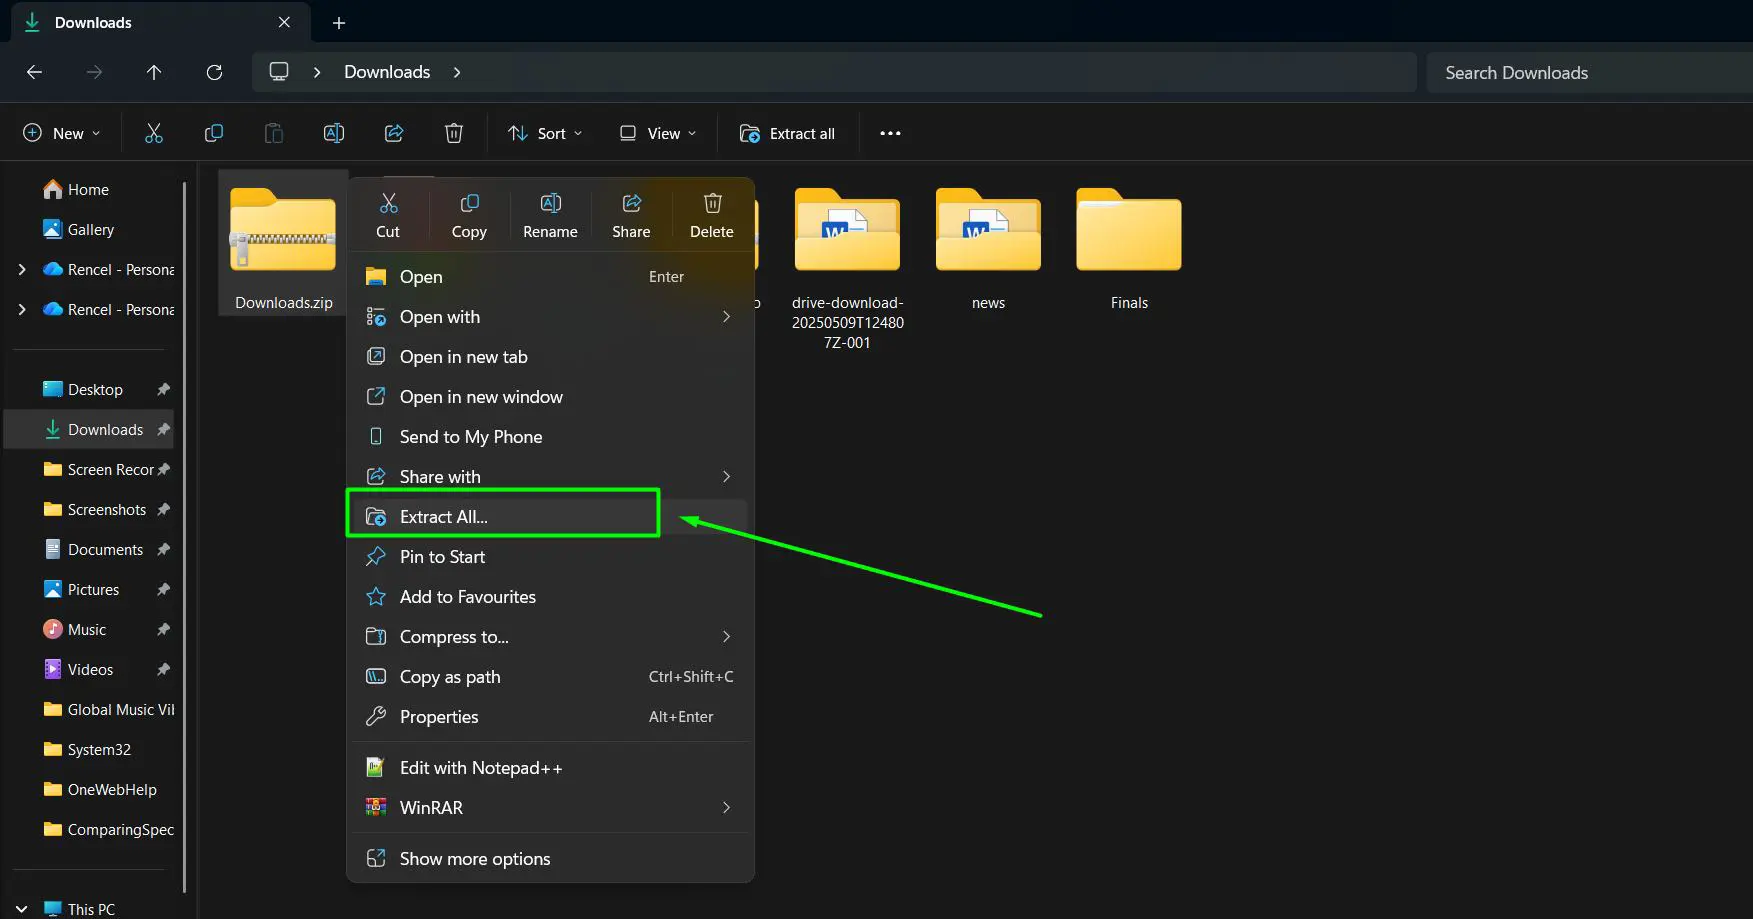
- Step 2: Right-click on the zip file to open the context menu
- Step 3: Select ‘Extract All’ from the menu options that appear
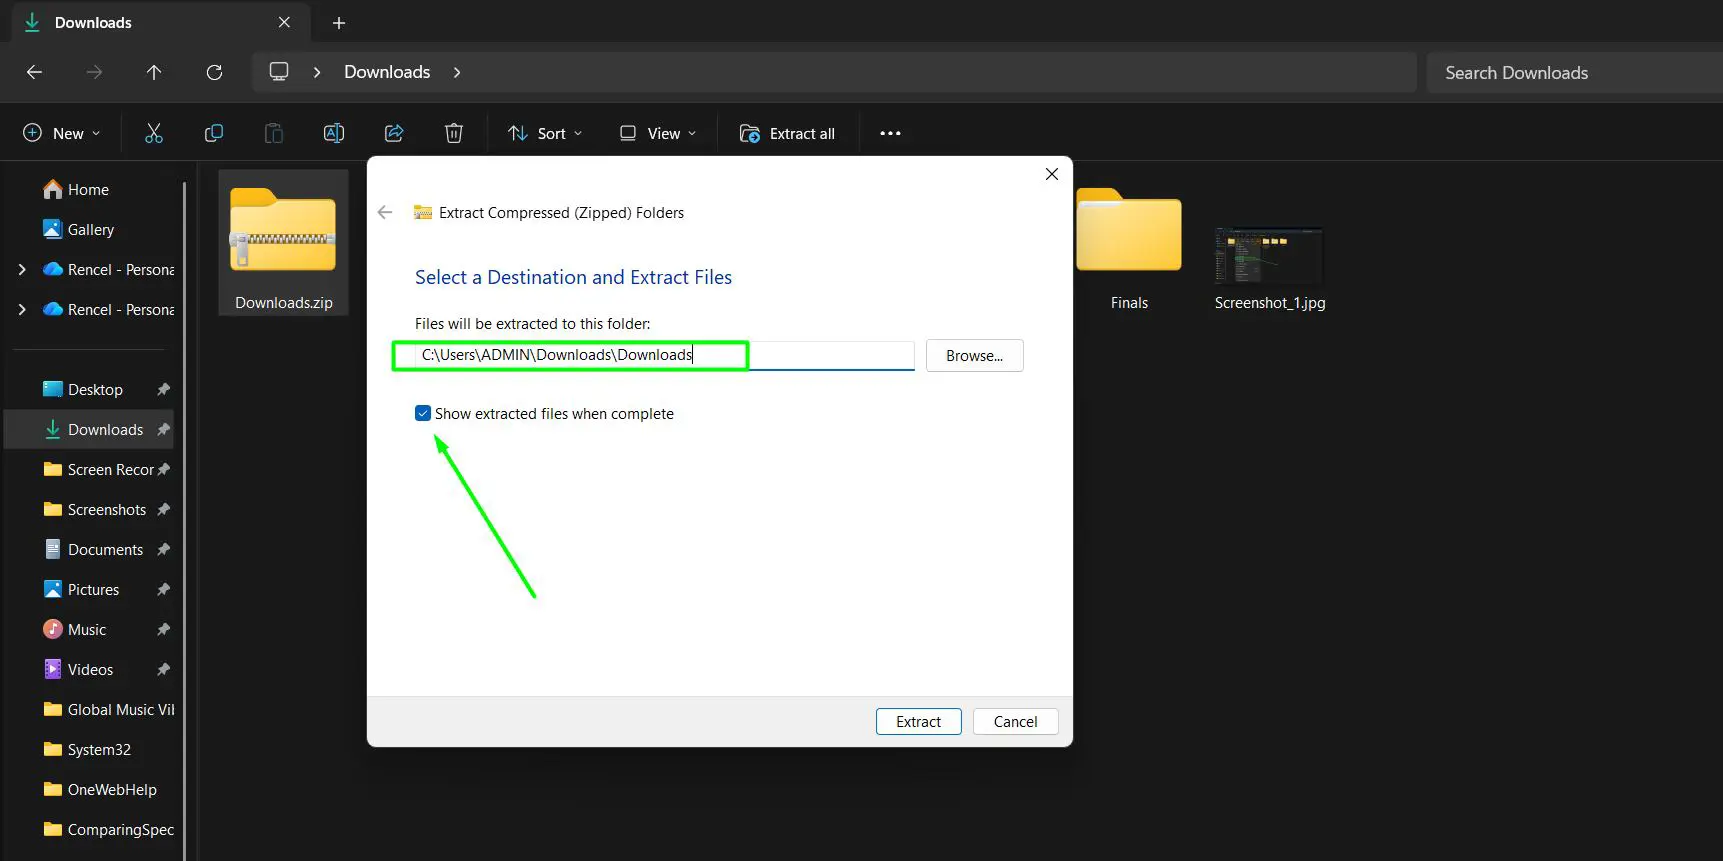
- Step 4: Choose the destination folder where files should be extracted (Windows suggests the current folder by default)
- Step 5: Check the ‘Show extracted files when complete’ box if immediate access to the files is needed
- Step 6: Click the ‘Extract’ button to begin the extraction process. The extraction process typically takes just a few seconds, depending on the file size.
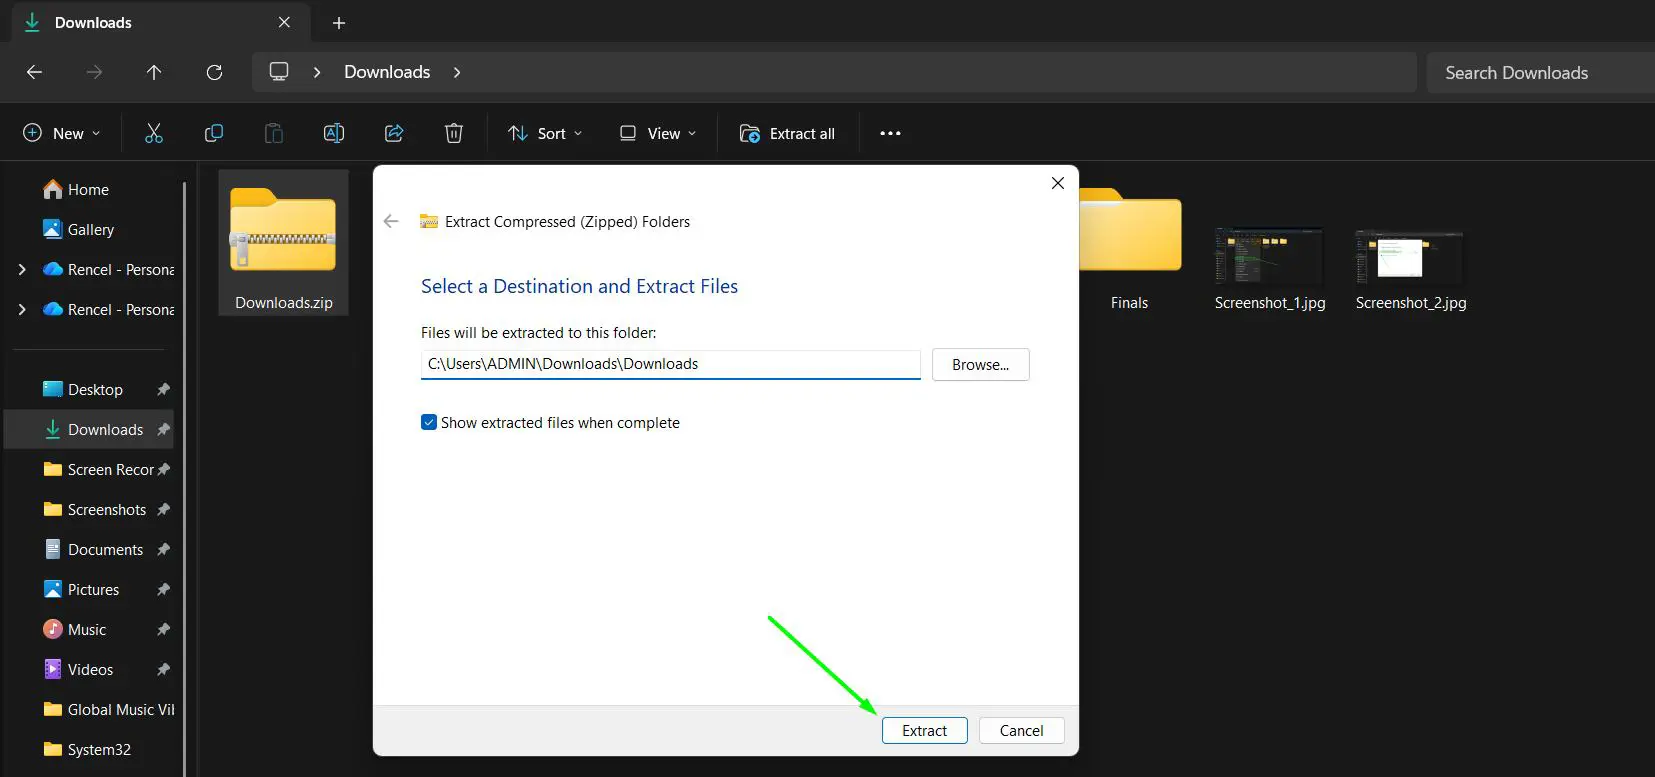
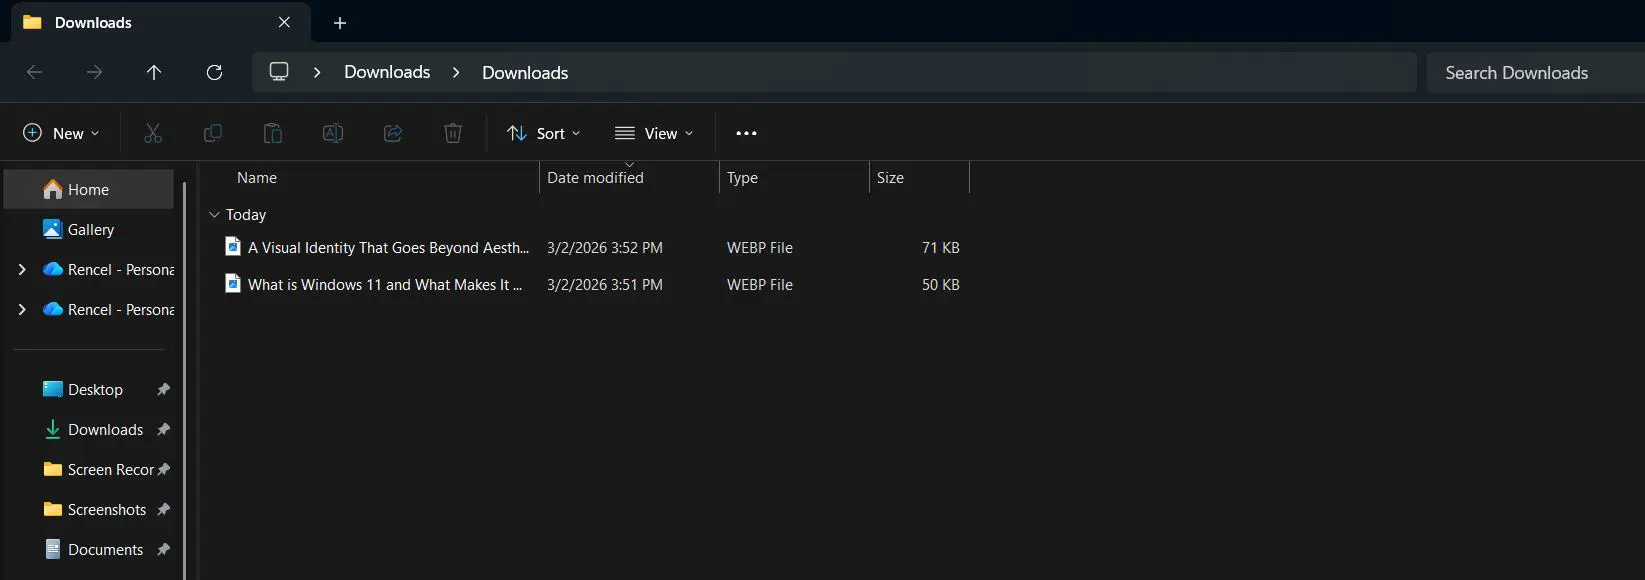
- Step 7: Once complete, a new folder containing all the extracted files appears in the chosen location.
Quick Extract Method
- Step 1: Right-click on the zip file in File Explorer
- Step 2: Hover over ‘Extract All’ and select the quick extraction option
- Step 3: Files automatically extract to a folder with the same name as the zip file in the current directory
Pro Tip: Double-clicking a zip file in Windows 11 opens it like a regular folder, allowing files to be viewed without extraction. This feature is useful for quickly checking contents before deciding to extract everything.
Want to see file extensions in Windows? Check this guide
Method 2: Using WinRAR
WinRAR is one of the most popular compression tools available for Windows 11, offering advanced features and support for multiple archive formats beyond standard zip files. The software integrates seamlessly with Windows File Explorer after installation.
Installing WinRAR
- Step 1: Visit the official WinRAR website and download the Windows 11 compatible version
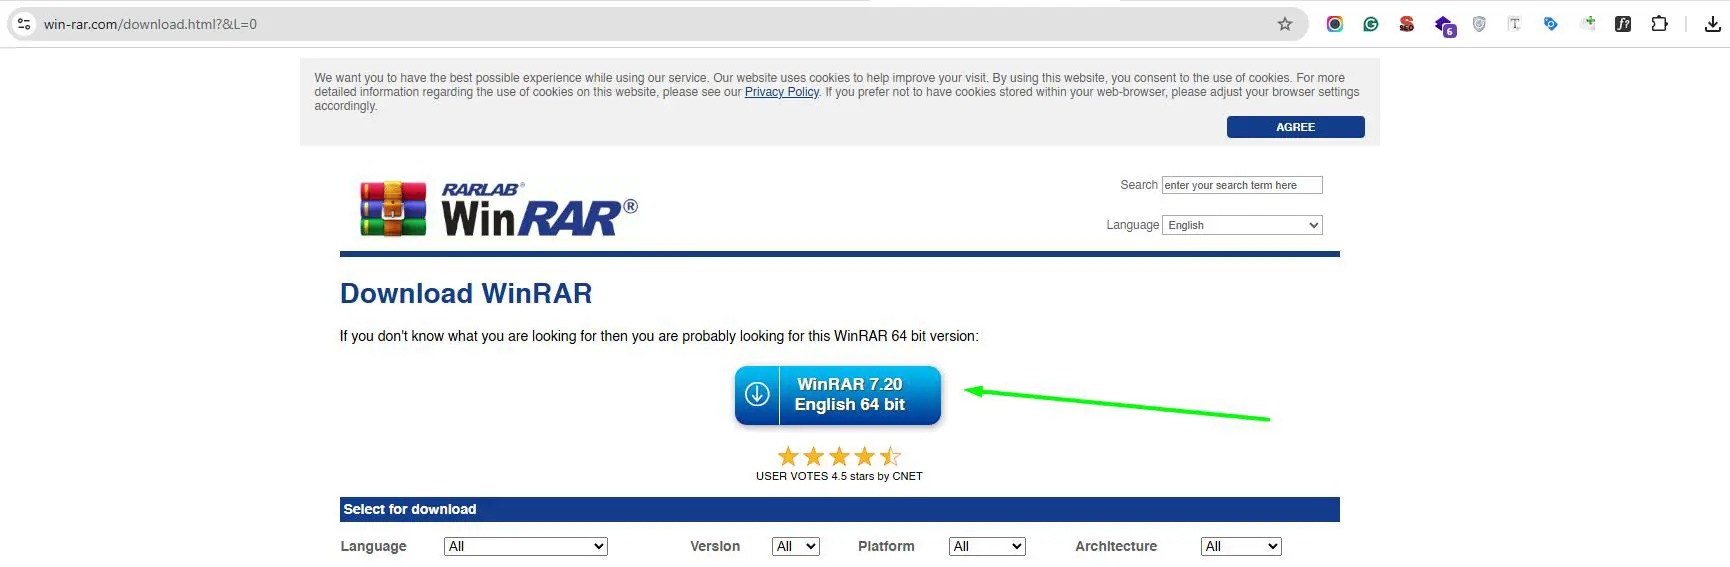
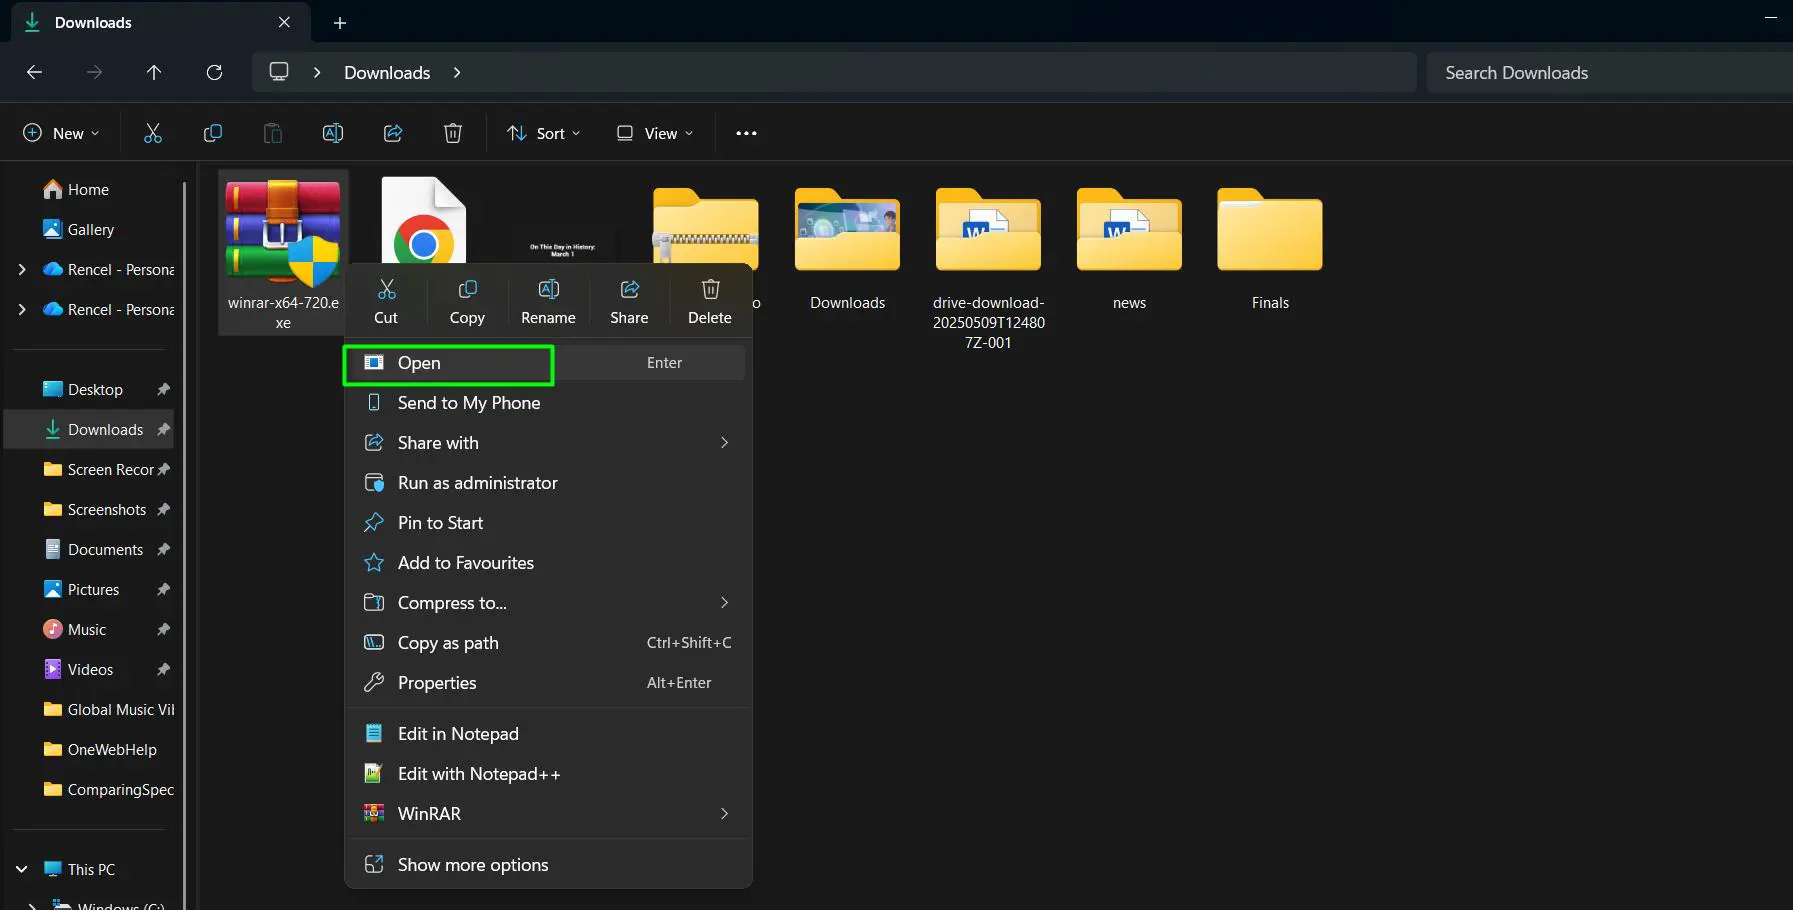
- Step 2: Run the downloaded installer file
- Step 3: Follow the installation wizard, selecting default settings for typical usage
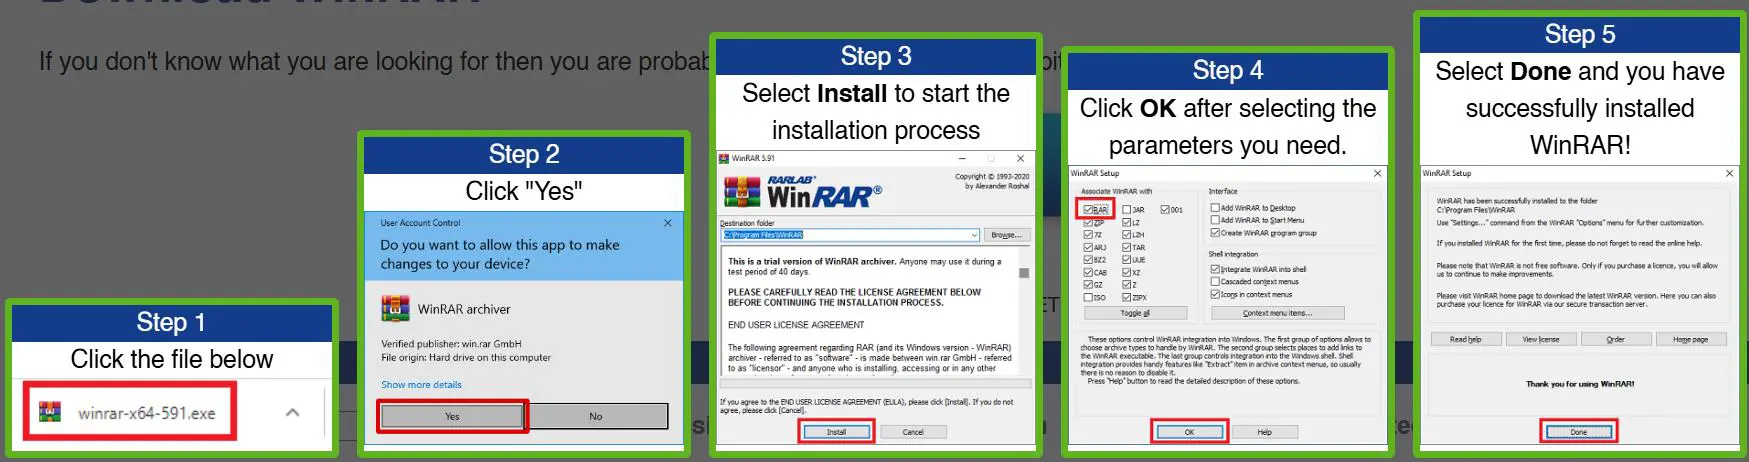
- Step 4: Choose which file types WinRAR should associate with during installation (zip, rar, 7z, etc.)
- Step 5: Complete the installation
Extracting Zip Files with WinRAR
- Step 1: Right-click on the zip file in File Explorer to open the context menu
- Step 2: Hover over ‘WinRAR’ to expand the submenu with extraction options
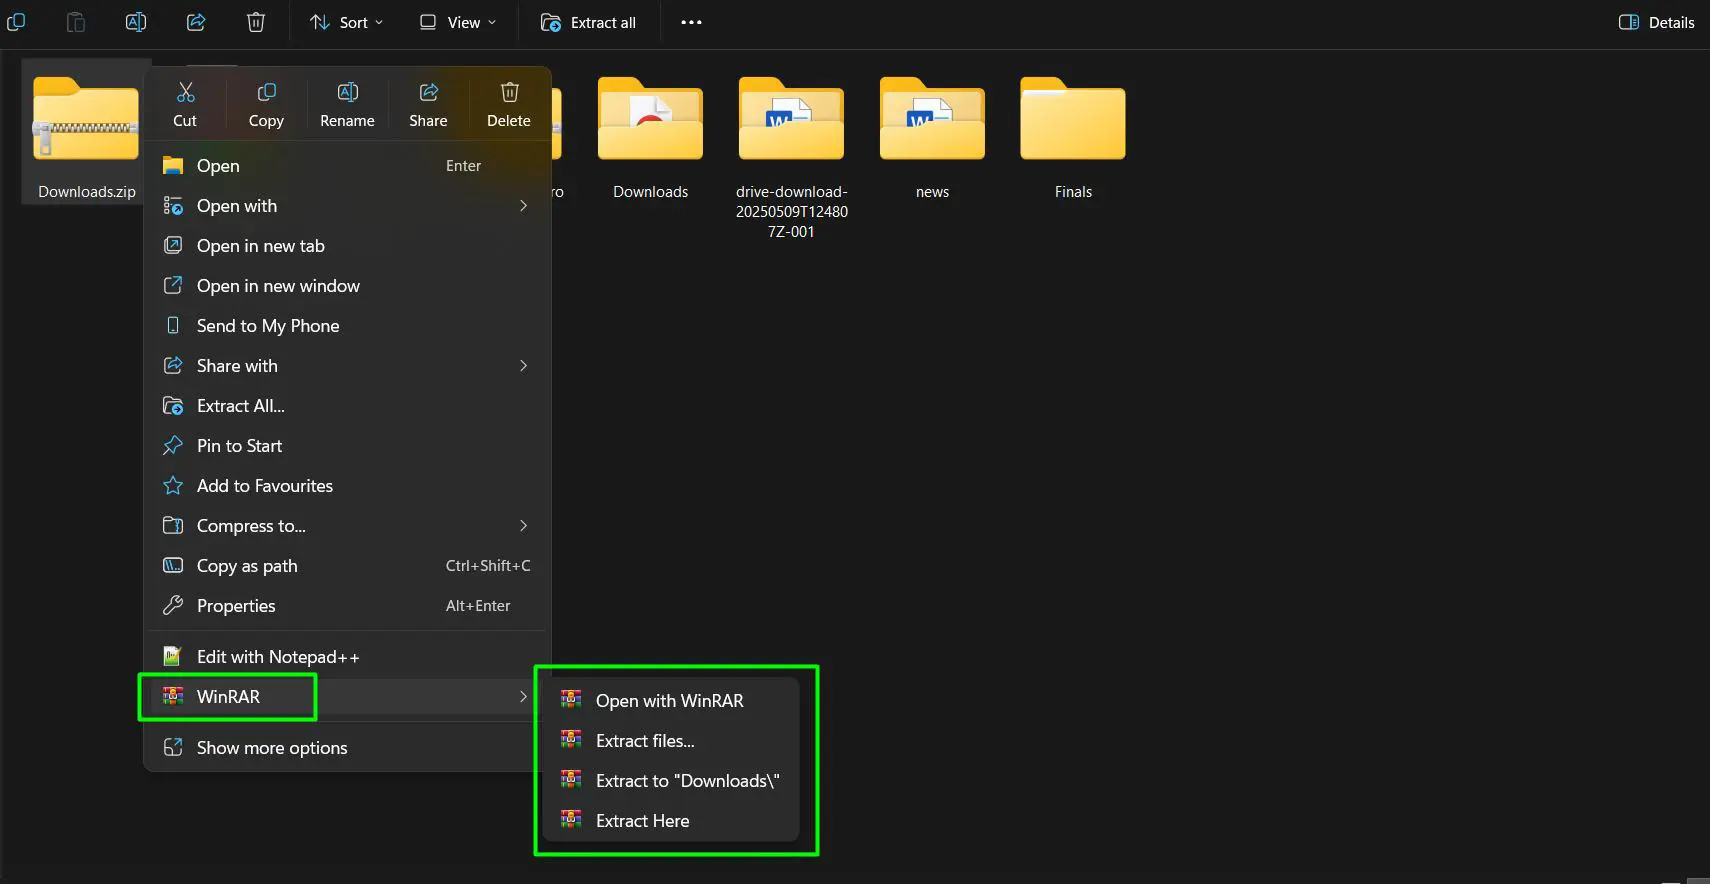
- Step 3: Choose one of the following extraction methods:
- ‘Extract Here’ – Extracts all files directly to the current folder
- ‘Extract to [filename]’ – Automatically creates a new folder named after the zip file and extracts contents there
- ‘Extract files…’ – Opens a dialog box to choose a specific destination folder and set advanced extraction options
- Step 4: If using ‘Extract files…’, select the desired destination path in the dialog window
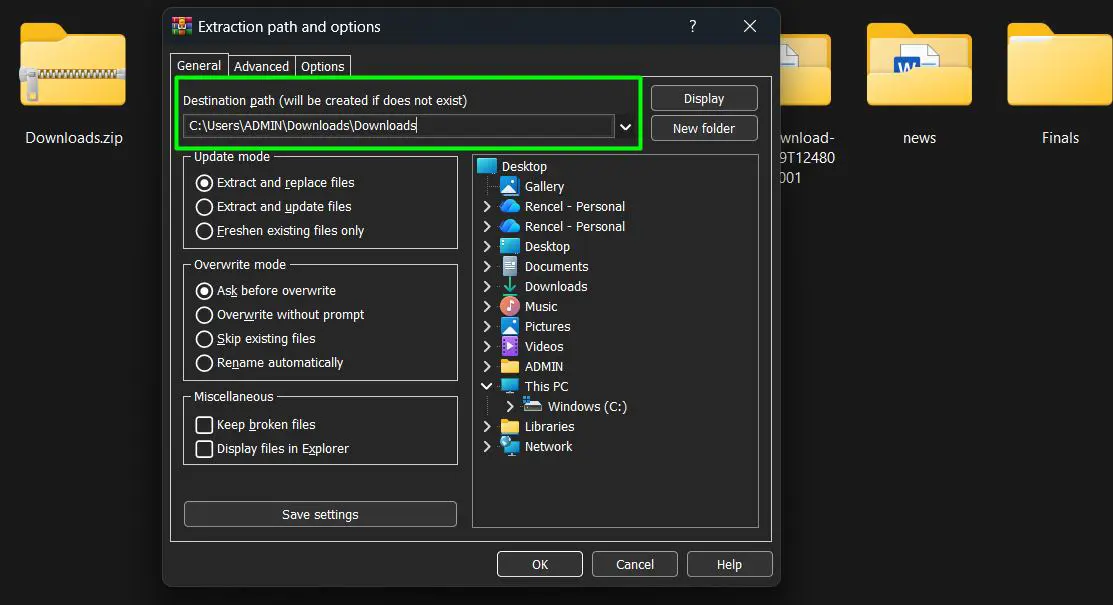
- Step 5: Click ‘OK’ to begin the extraction process
WinRAR provides additional options such as password protection handling, repair of damaged archives, and conversion between different compression formats. The software operates faster than Windows built-in tools for large archives.
Pro Tip: WinRAR’s ‘Extract to [filename]’ option automatically creates a subfolder named after the zip file and extracts all contents there, preventing file clutter in the current directory – especially helpful when dealing with archives containing multiple files.
Having trouble using File Explorer? Check this guide on File Explorer in Windows
Method 3: Using 7-Zip
7-Zip is a free, open-source file archiver that offers excellent compression ratios and supports numerous formats. Many users prefer 7-Zip as a lightweight alternative to commercial software, and it handles zip files efficiently on Windows 11.
Installing 7-Zip
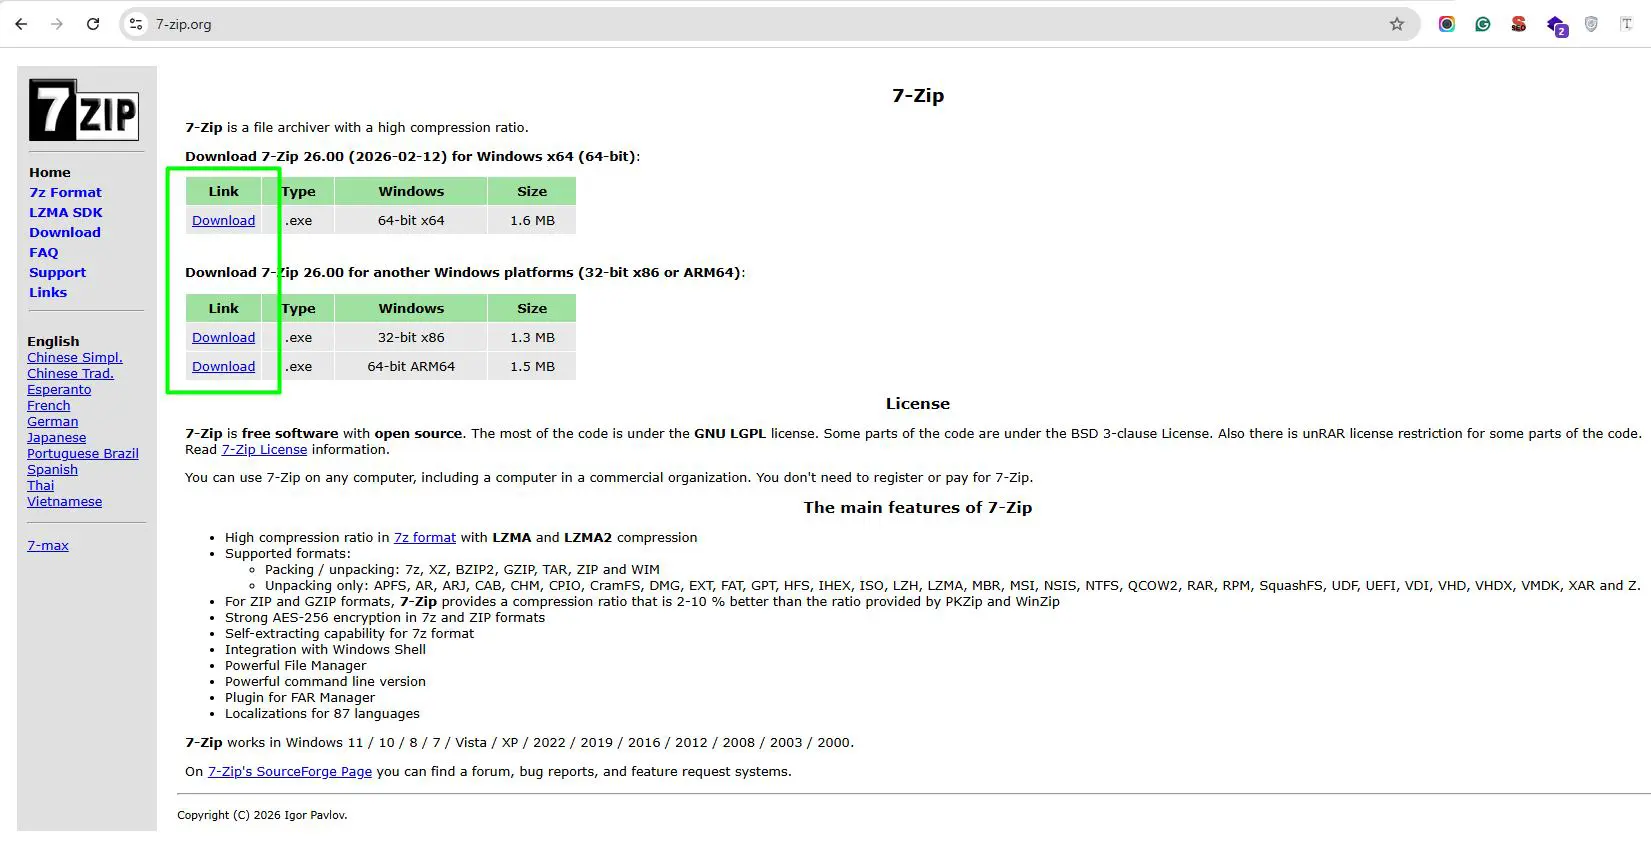
- Step 1: Download 7-Zip from the official website, ensuring the correct version (32-bit or 64-bit) matches the Windows 11 system
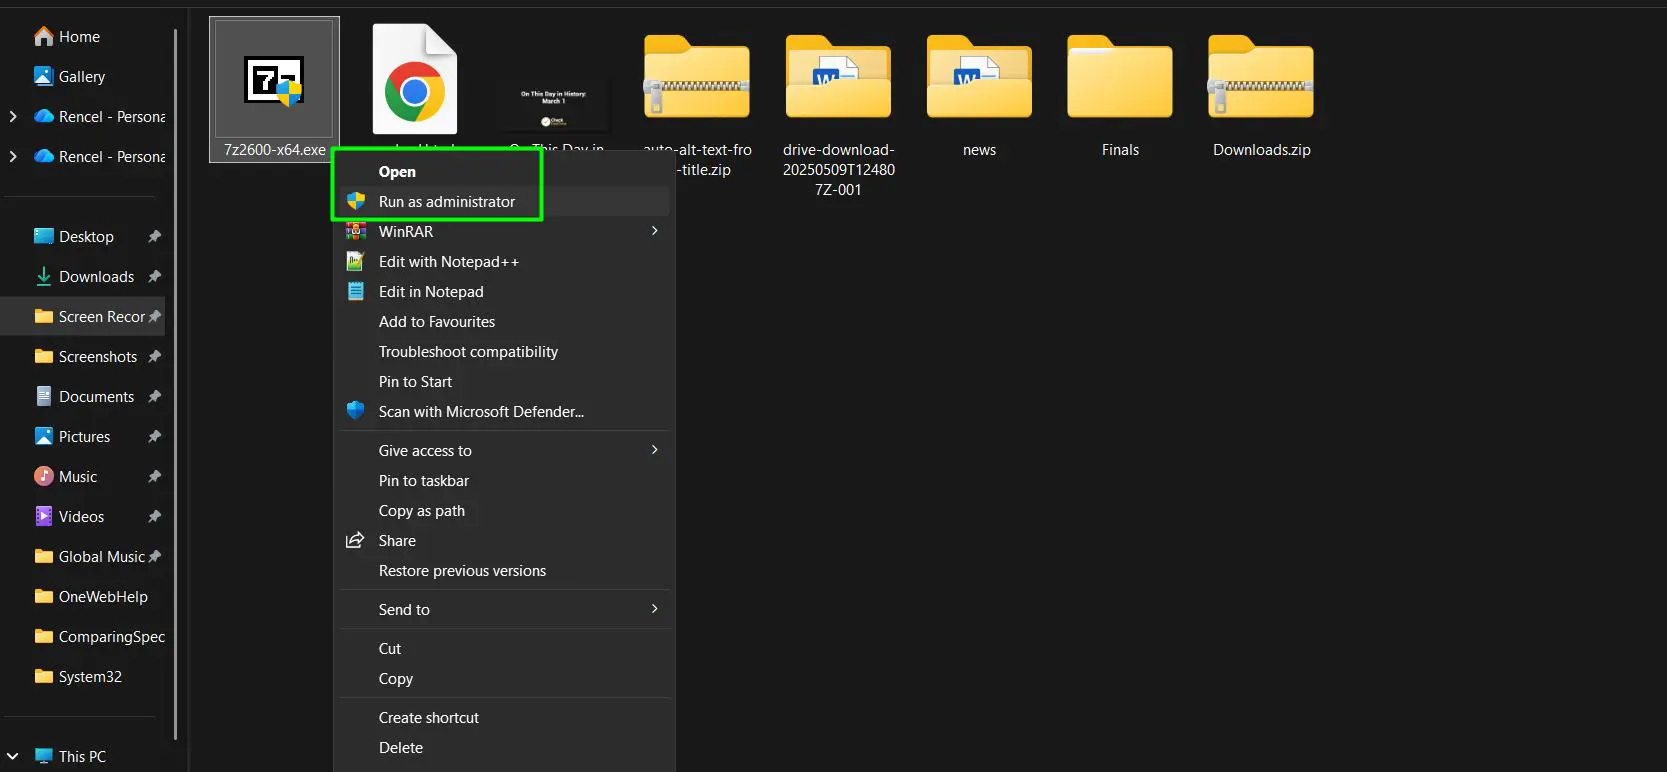
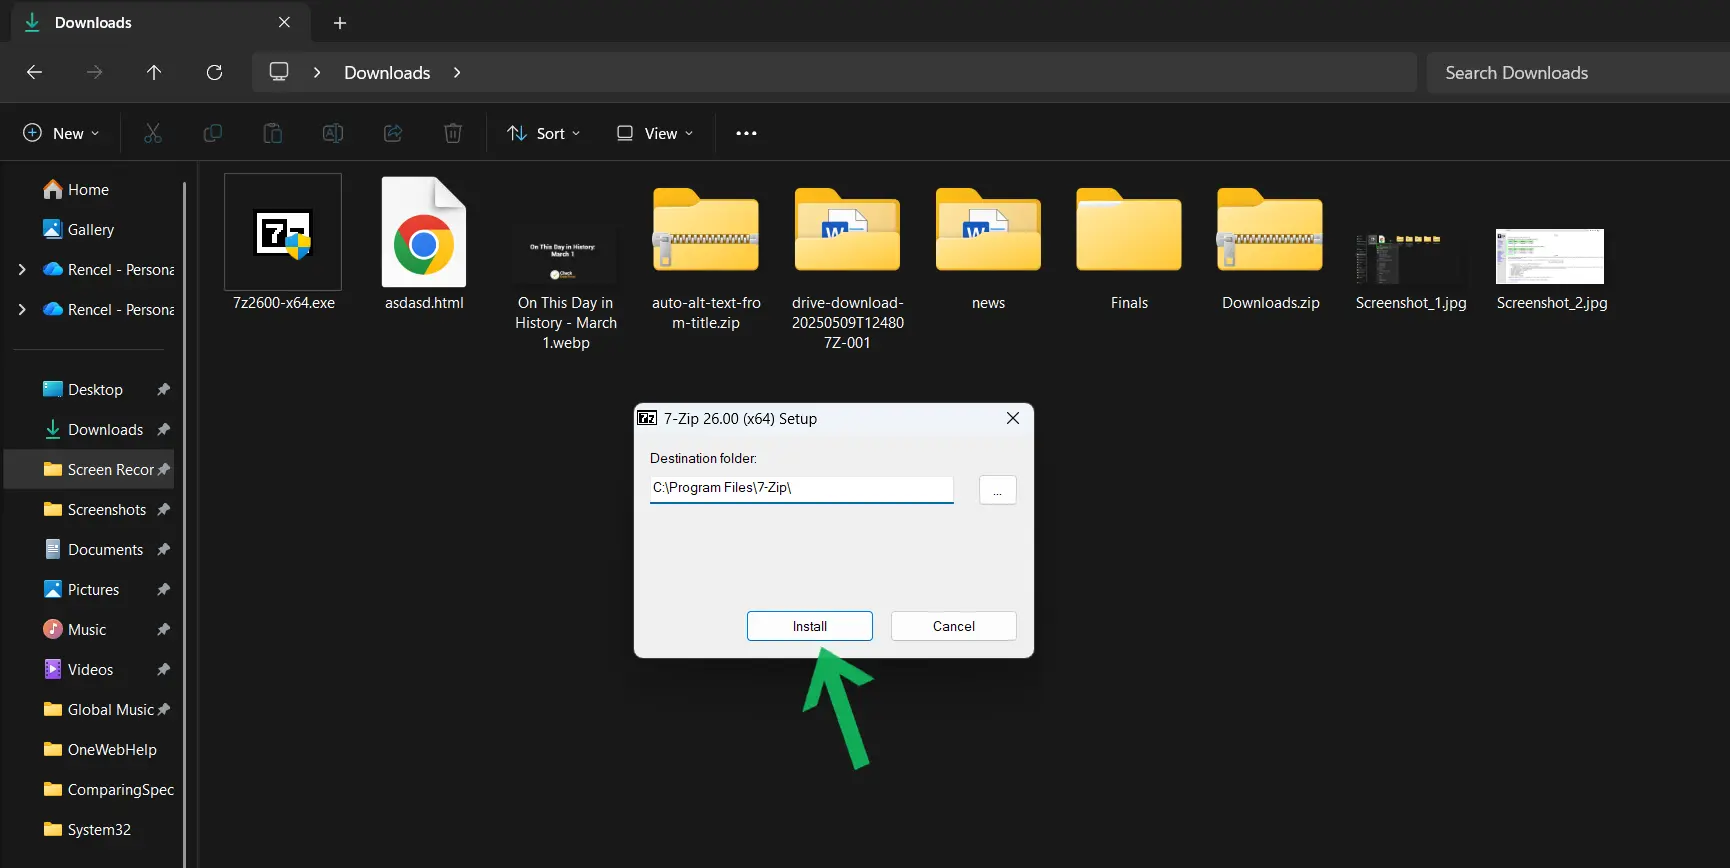
- Step 2: Run the installer and select the installation directory
- Step 3: Complete the installation process by clicking ‘Install’
- Step 4: The program automatically integrates with Windows File Explorer context menus
Extracting Files with 7-Zip
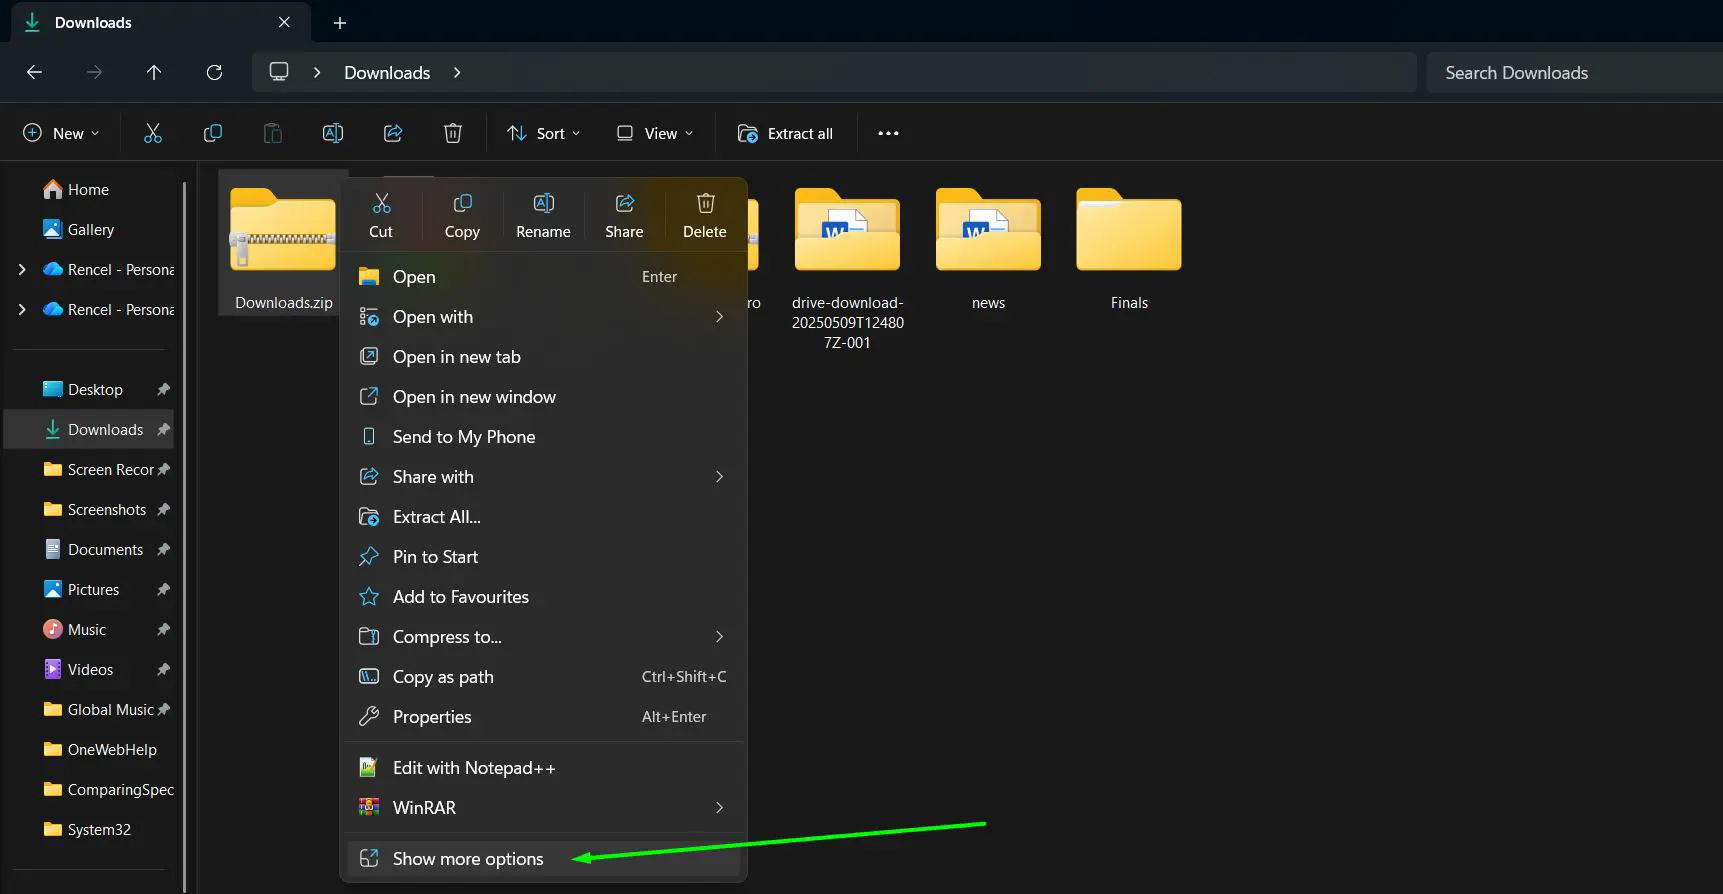
- Step 1: Right-click on the zip file in File Explorer
- Step 2: Click ‘Show more options’ to access the full context menu (or press Shift + F10)
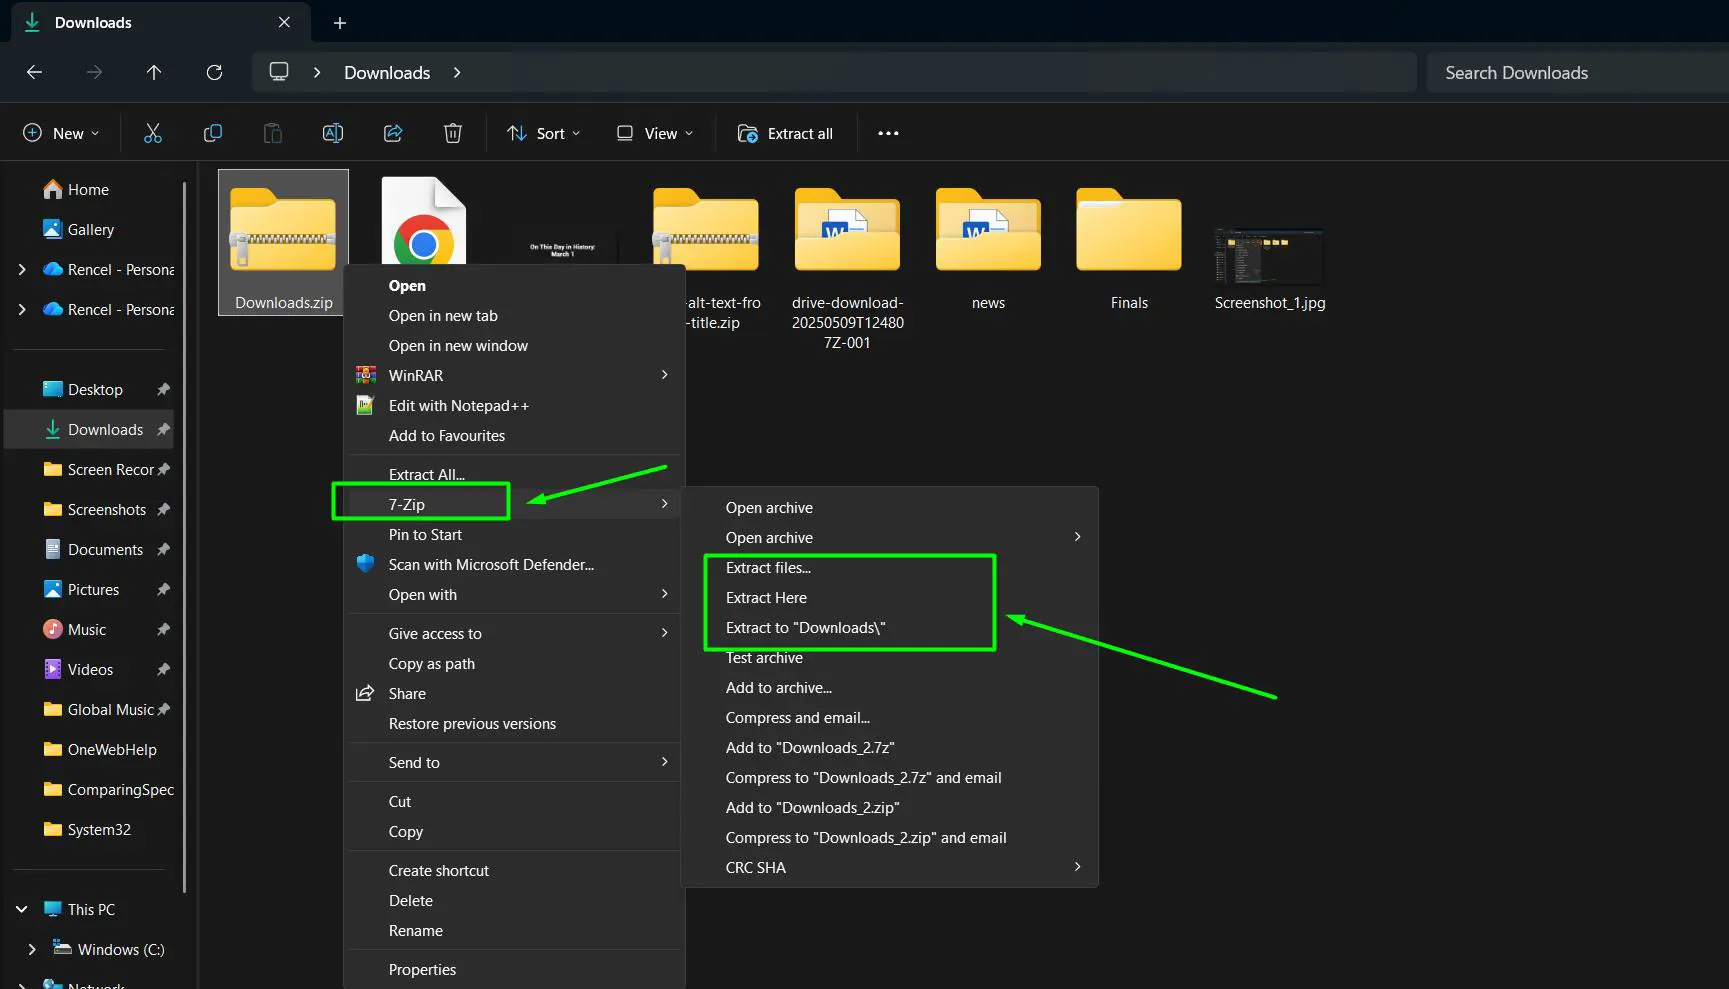
- Step 3: Navigate to the ‘7-Zip’ submenu in the context menu
- Step 4: Choose one of the following extraction methods:
- ‘Extract Here’ – Extracts all files directly to the current folder
- ‘Extract to [filename]’ – Automatically creates a new folder named after the zip file and extracts contents there
- ‘Extract files…’ – Opens a dialog box to choose a specific destination folder and configure advanced extraction setting
- Step 5: If using ‘Extract files…’, specify the destination path and any additional extraction settings in the dialog window
- Step 6: Click ‘OK’ to complete the extraction process
7-Zip stands out for its high compression ratio and fast processing speed. The software also provides file manager functionality, allowing users to browse archive contents without extraction.
Tips for Working with Zip Files
- Check File Size Before Extraction: Ensure sufficient disk space exists in the destination folder, especially for large archives
- Scan for Viruses: Always run antivirus scans on downloaded zip files before extraction to protect system security
- Use Preview Features: Double-click zip files in Windows 11 to preview contents before committing to full extraction
- Organize Extraction Folders: Create dedicated folders for extracted files to maintain organized file management
- Keep Archives After Extraction: Retain original zip files as backups until confirming all extracted files work correctly
- Handle Password-Protected Files: Keep passwords secure and readily available when dealing with encrypted archives
- Update Compression Tools: Regularly update WinRAR or 7-Zip to access the latest features and security patches
Common Problems and Solutions
Zip File Won’t Open or Extract
This issue typically occurs when the zip file is corrupted during download or transfer. Download the file again from the source, ensuring a stable internet connection. If the problem persists, try using different extraction tools like WinRAR or 7-Zip, as they sometimes handle damaged archives better than Windows built-in tools.
Access Denied Error During Extraction
Permission issues cause this error, especially when extracting to protected system folders. Move the zip file to a user folder like Documents or Desktop before extraction. Right-click the file, select Properties, and check the ‘Unblock’ box in the General tab if available.
Extracted Files Are Missing or Incomplete
Incomplete downloads or corrupted archives lead to missing files after extraction. Verify the zip file size matches what the source indicates. Re-download the archive if sizes don’t match. Antivirus software sometimes quarantines suspicious files during extraction – check quarantine folders if files appear missing.
Cannot Find Extract All Option
File association issues can hide the Extract All option. Right-click the zip file, select ‘Open with,’ and choose ‘Windows Explorer’ as the default program. This restores proper zip file handling in Windows 11.
Extraction Takes Too Long
Large archives naturally require more processing time, but exceptionally slow extraction might indicate disk issues or insufficient system resources. Close unnecessary programs to free up memory. Consider using WinRAR or 7-Zip, which often process large files faster than the built-in Windows tool.
Frequently Asked Questions
Can Windows 11 open zip files without additional software?
Yes, Windows 11 includes built-in zip file support through File Explorer. Users can extract zip files directly without installing third-party software by using the ‘Extract All’ option or by double-clicking to browse contents.
What is the difference between WinRAR and 7-Zip?
WinRAR is commercial software with a trial period, offering a polished interface and excellent support for RAR format. 7-Zip is completely free and open-source, providing better compression ratios for its native 7z format. Both handle zip files effectively on Windows 11.
How do I open password-protected zip files?
Windows 11 built-in extractor prompts for passwords when opening protected zip files. WinRAR and 7-Zip also request passwords during extraction. Enter the correct password when prompted to access the encrypted contents.
Why does double-clicking a zip file open it like a folder?
Windows 11 treats zip files as compressed folders, allowing users to browse contents without extraction. This feature lets users preview files, copy individual items, or check archive contents before deciding to extract everything.
Can I extract only specific files from a zip archive?
Yes, double-click the zip file to open it as a folder, then drag and drop individual files to another location. Alternatively, use WinRAR or 7-Zip to select specific files during the extraction process through their advanced extraction dialogs.
Are there size limits for zip files in Windows 11?
Standard zip format theoretically supports files up to 4GB individually and archives up to 4GB total. ZIP64 extensions remove these limits, and Windows 11 handles both formats. WinRAR and 7-Zip support even larger archives with their native formats.
What should I do if a zip file says it’s corrupted?
Try re-downloading the file first, as incomplete downloads cause corruption. WinRAR includes a repair feature specifically for damaged archives. If repair fails, contact the file source for a fresh copy of the archive.
How do I create zip files in Windows 11?
Right-click the files or folders to compress, select ‘Compress to ZIP file’ from the context menu, and Windows 11 creates a new zip archive in the same location. WinRAR and 7-Zip offer additional compression options and formats.