Nothing kills a productive afternoon faster than a Windows 11 update that triggers a boot loop or a flickering screen. The biggest mistake most users make is assuming Windows creates these “undo” points automatically, but the OS often keeps System Protection toggled “Off” by default to save disk space. You need to manually verify that protection is enabled for your boot drive before you even think about tweaking the registry or installing major software packages.
Having a manual snapshot ready means you can roll back system files and registry settings without losing your personal documents. If you’ve ever been stuck in a recovery environment with no available images to restore, you know that five minutes of setup now prevents hours of troubleshooting later.
Key Takeaways
- A restore point saves the current state of system files and settings.
- System Protection must be enabled before creating a restore point.
- Restore points do not affect personal files – only system settings and installed programs.
- It takes less than two minutes to create one manually.
- Always create a restore point before reinstalling drivers or making major system changes.
How to Create a Restore Point in Windows 11
Follow the steps below carefully. The process is straightforward but requires enabling System Protection first if it has not been done already.
Step 1: Open System Properties
- Step 1: Press the Windows key + S to open the search bar, or click the Windows Start icon.
- Step 2: Type ‘Create a restore point’ in the search field.
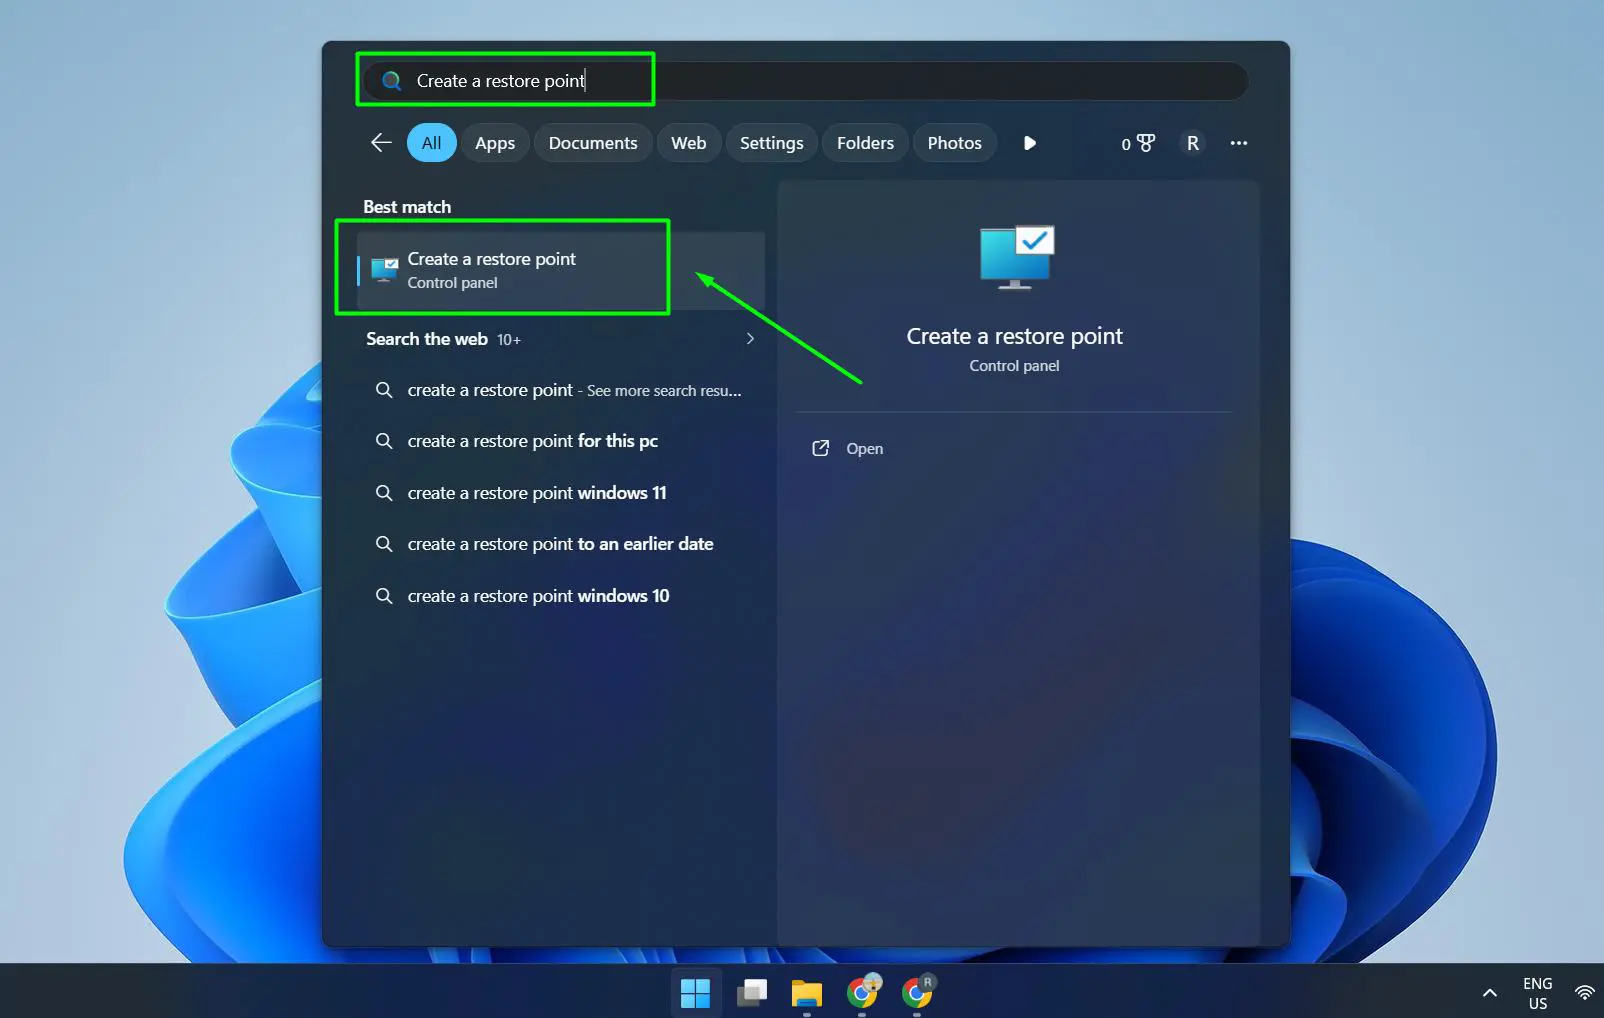
- Step 3: Click on the result that says ‘Create a restore point’ – it opens System Properties directly to the System Protection tab.
Step 2: Enable System Protection (If Not Already On)
- Step 1: In the System Protection tab, look at the Protection Settings section.
- Step 2: Find the main drive (usually labeled as C: (System)).
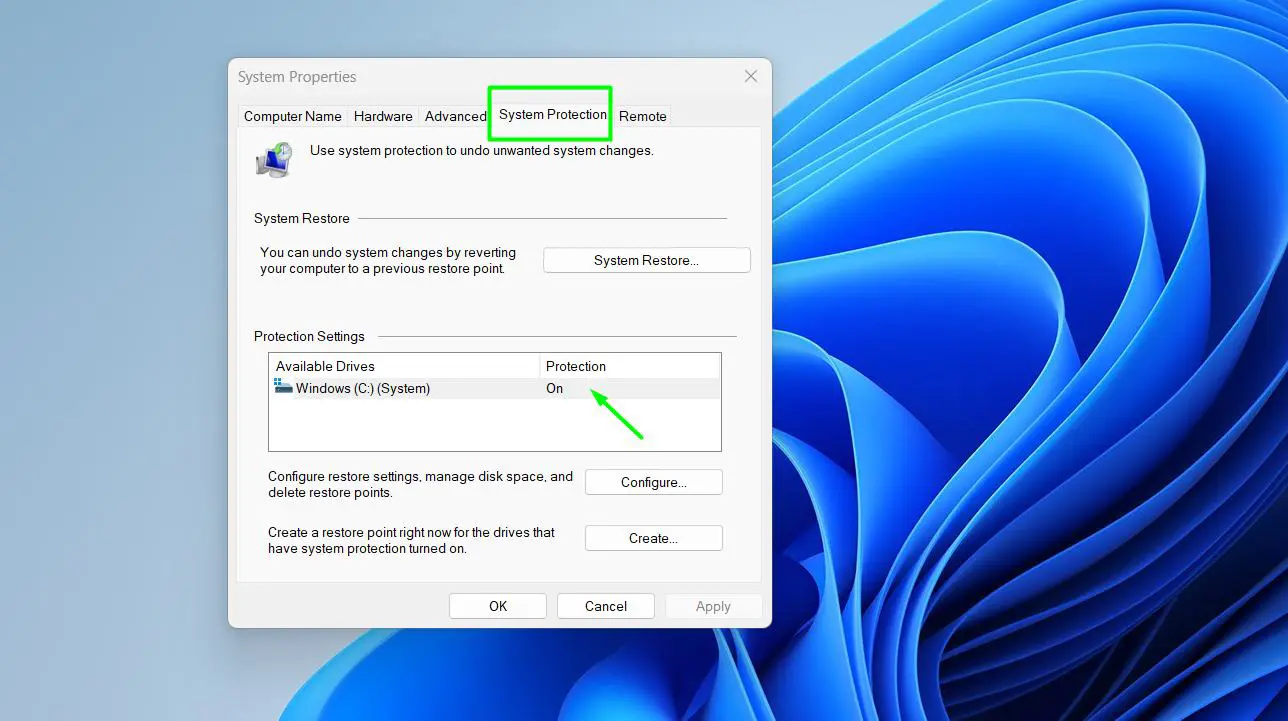
- Step 3: If the Protection column shows ‘Off’, click on the drive to select it, then click Configure.
- Step 4: Select ‘Turn on system protection’.
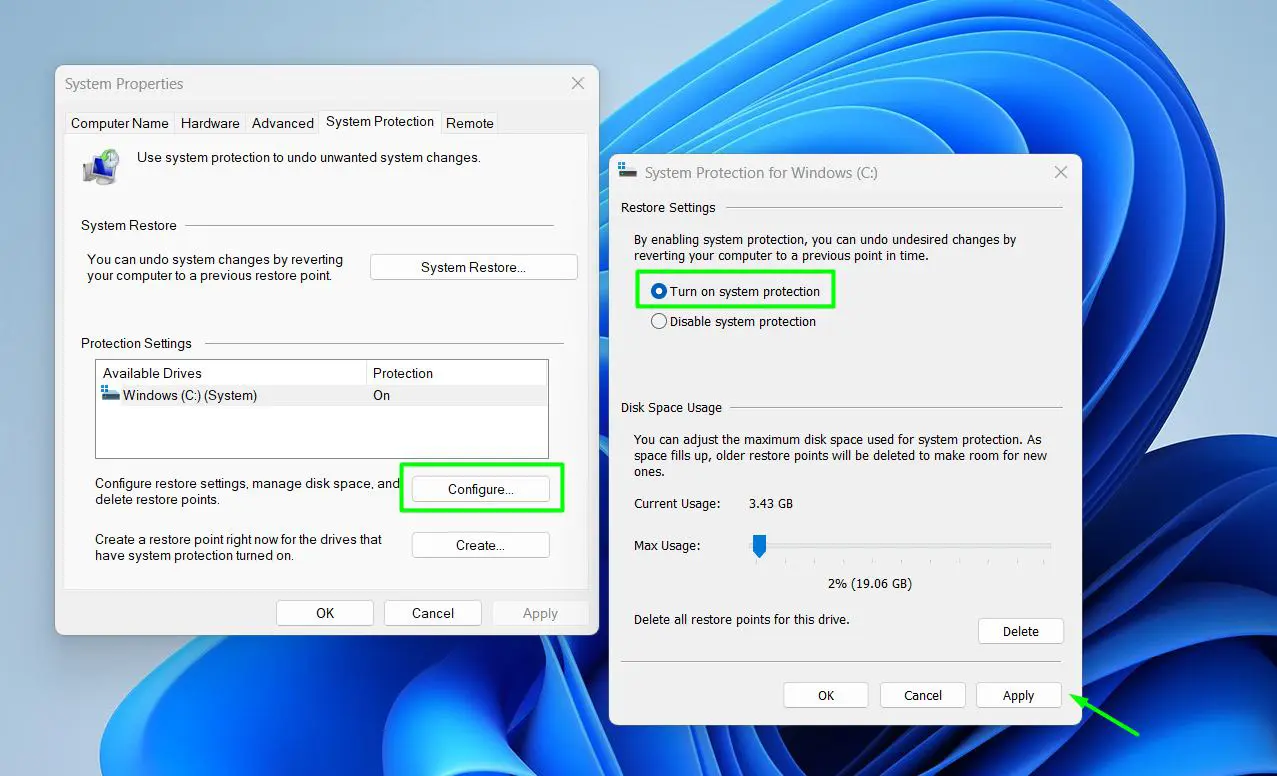
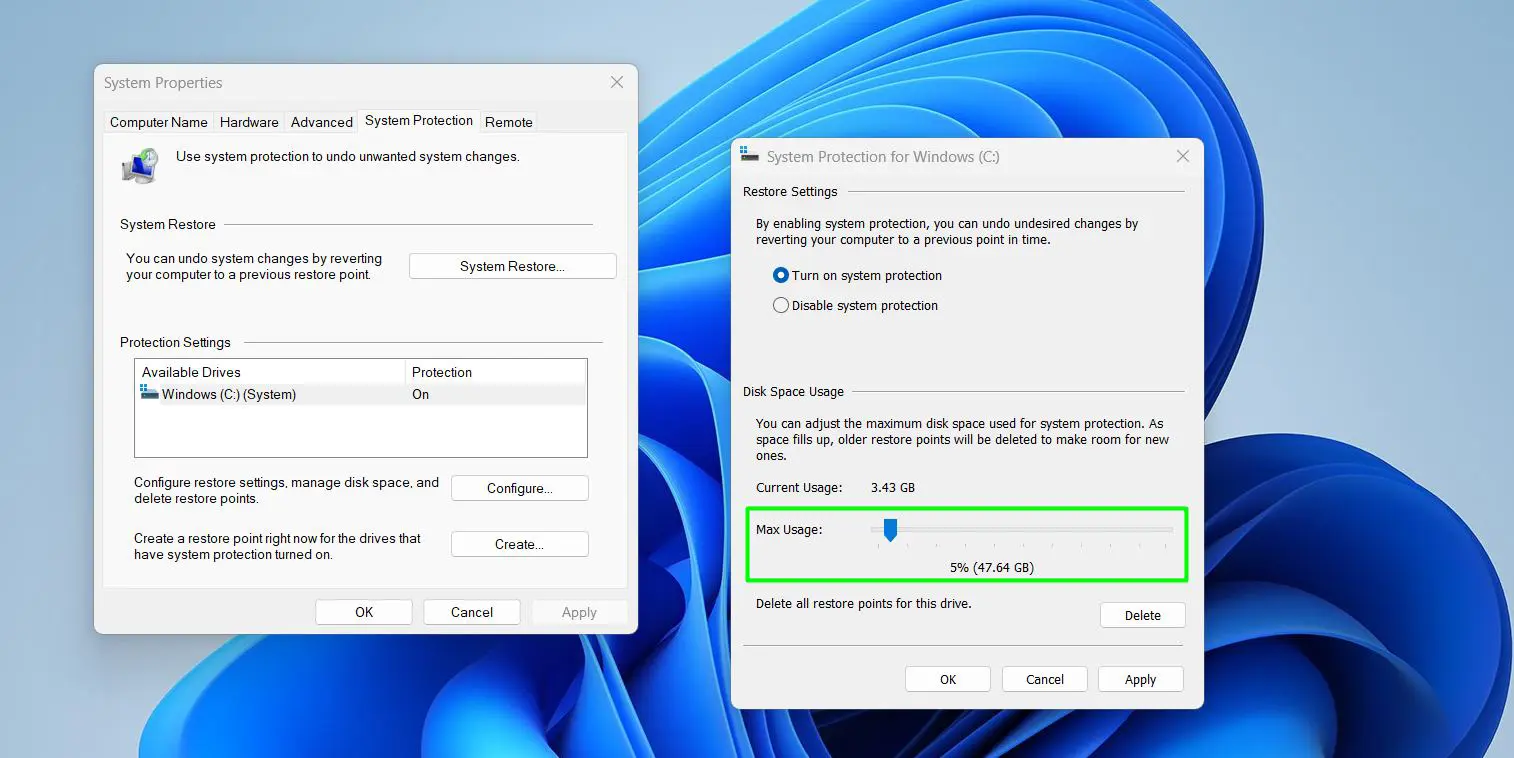
- Step 5: Adjust the disk space usage slider – around 5-10% of the drive is usually enough.
- Step 6: Click Apply, then OK.
Pro-Tip: If System Protection is turned off, the ‘Create’ button will be greyed out and unusable. Always confirm it is enabled on the C: drive before trying to create a restore point.
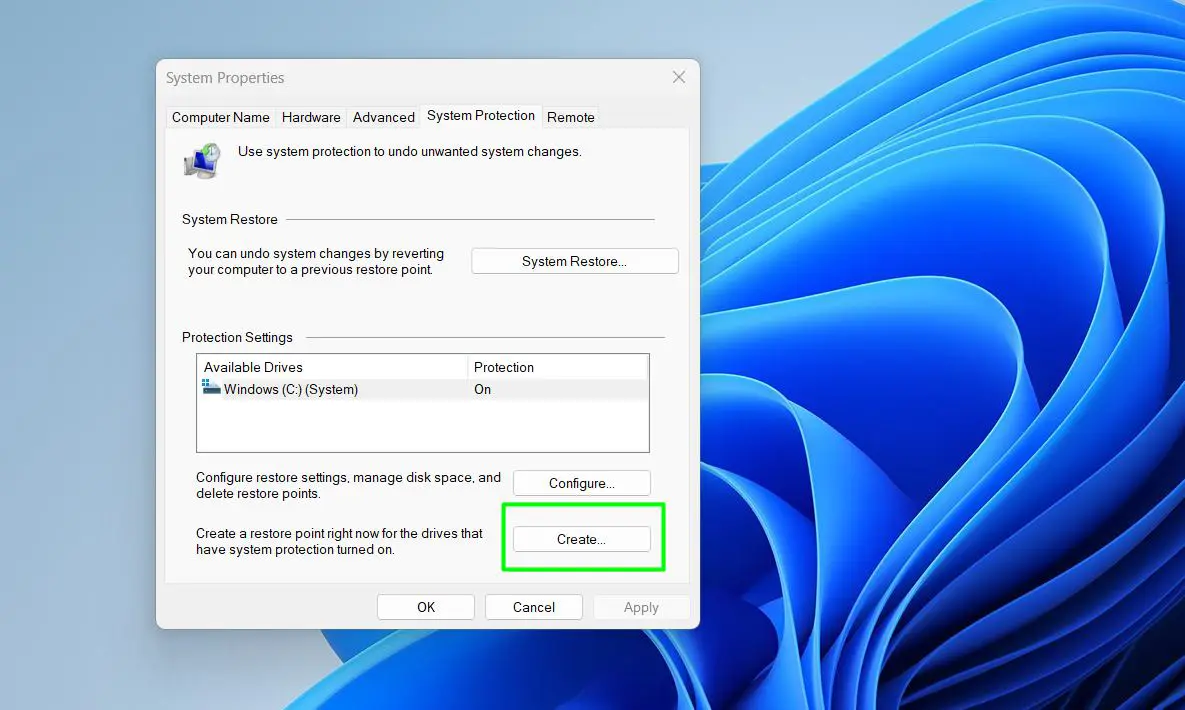
Step 3: Create the Restore Point
- Step 1: Back in the System Protection tab, click the Create button near the bottom of the window.
- Step 2: A small dialog box will appear asking for a description. Type something recognizable – for example, ‘Before driver update’ or ‘Before new software install’.
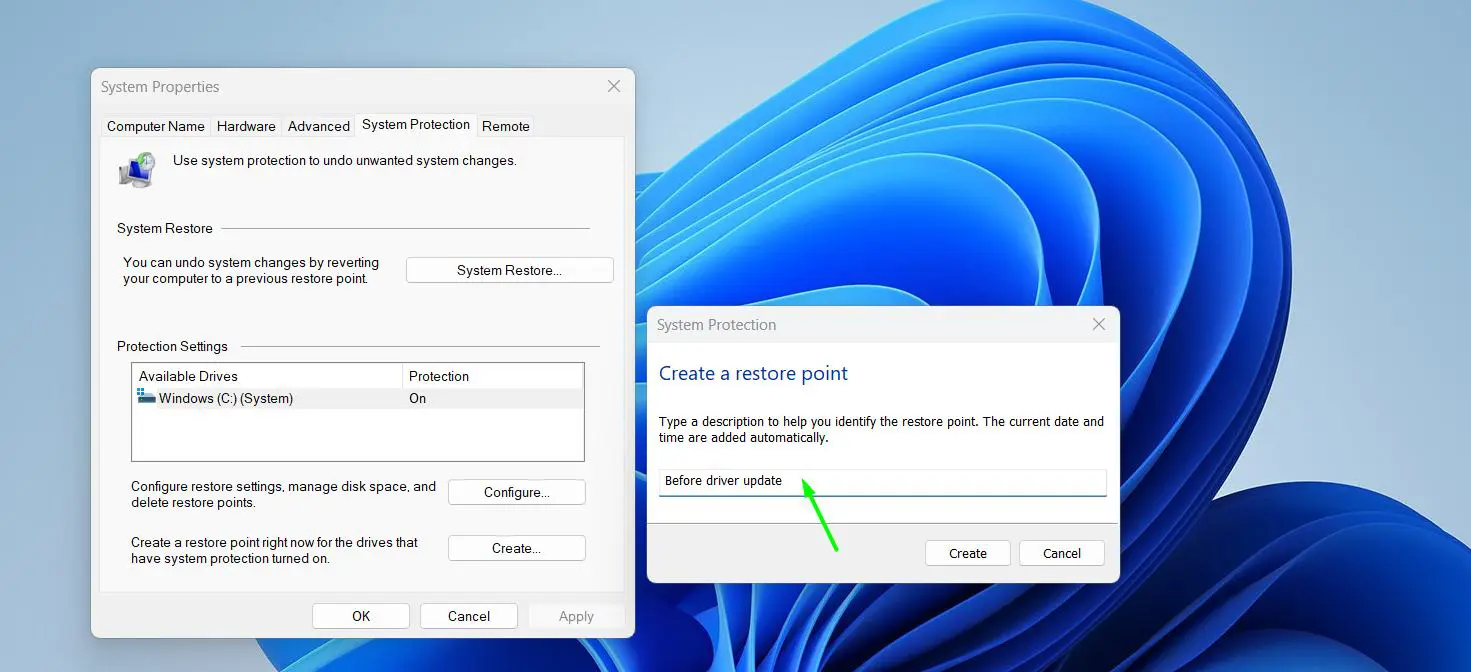
- Step 3: Click Create.
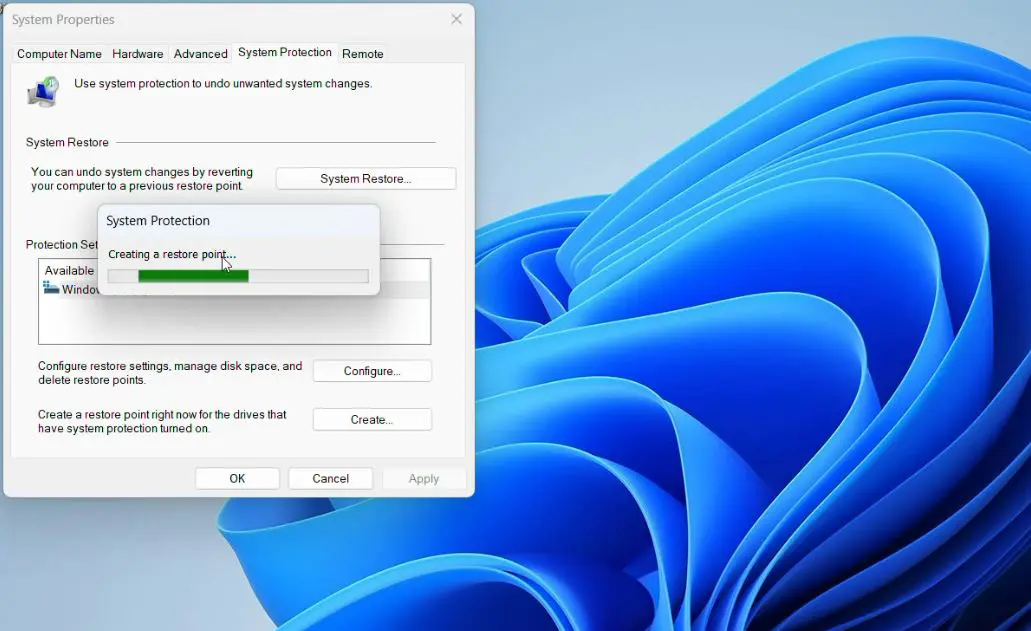
- Step 4: Wait for Windows to finish. A progress bar will appear – this usually takes 30 seconds to a minute.
- Step 5: Once complete, a message will say ‘The restore point was created successfully.’
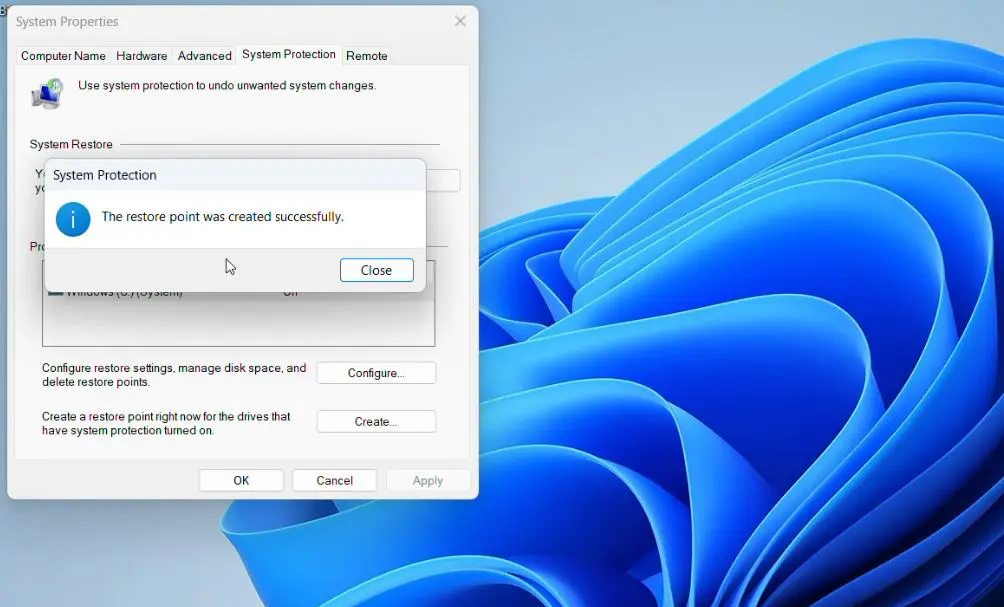
- Step 6: Click Close.
That is it. The restore point is now saved and ready to use if anything goes wrong later.
How to Create a Restore Point Using Command Prompt
For those comfortable with the command line, this method is faster and skips the GUI entirely. It is especially useful for power users or when running scripts before system changes.
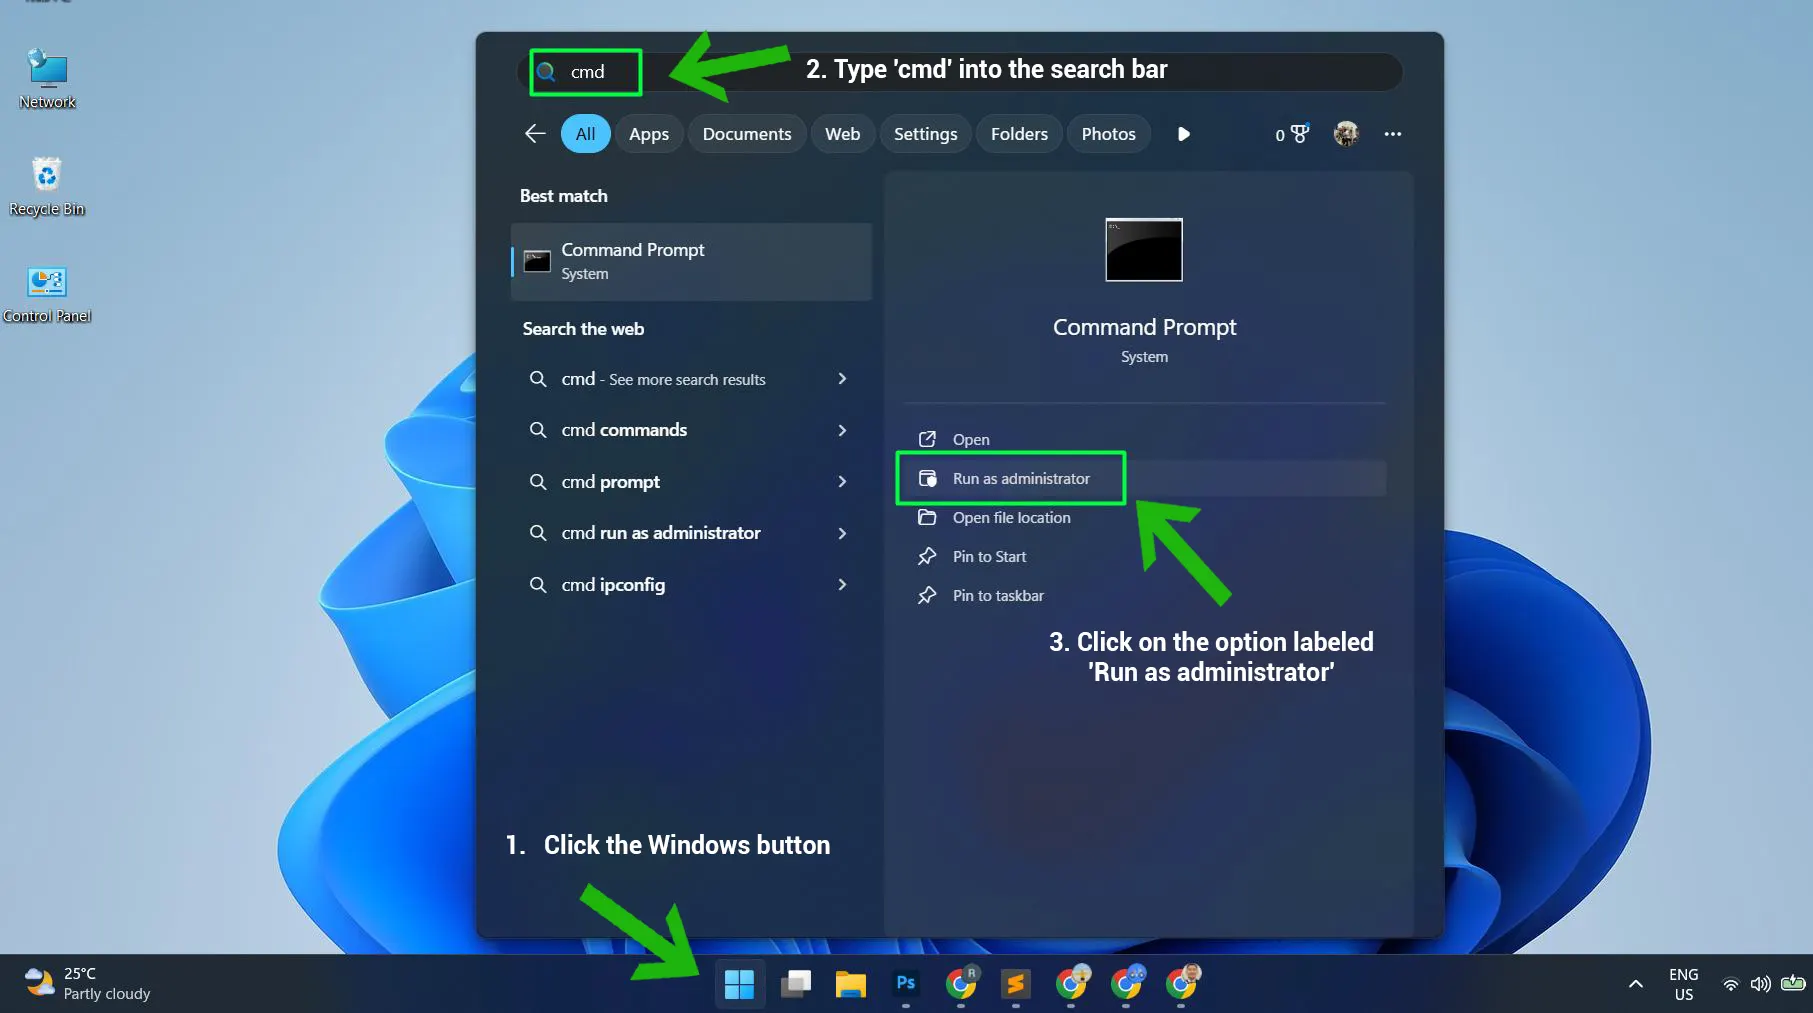
- Step 1: Open Command Prompt as an administrator. The quickest way is to search ‘cmd’ in the Start menu, right-click it, and choose ‘Run as administrator’. More details on this are available in the guide on how to run CMD as administrator.
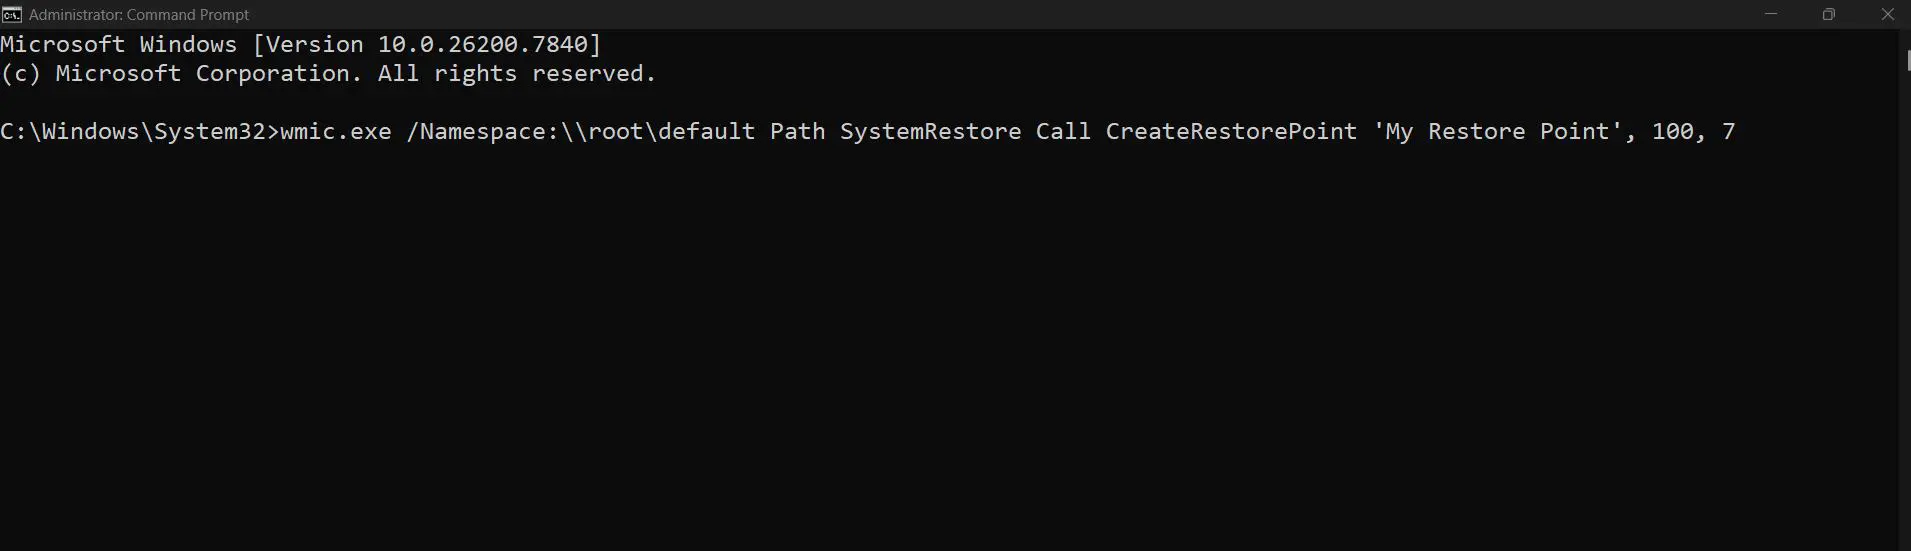
- Step 2: Type the following command and press Enter:
wmic.exe /Namespace:\\root\default Path SystemRestore Call CreateRestorePoint ‘My Restore Point’, 100, 7
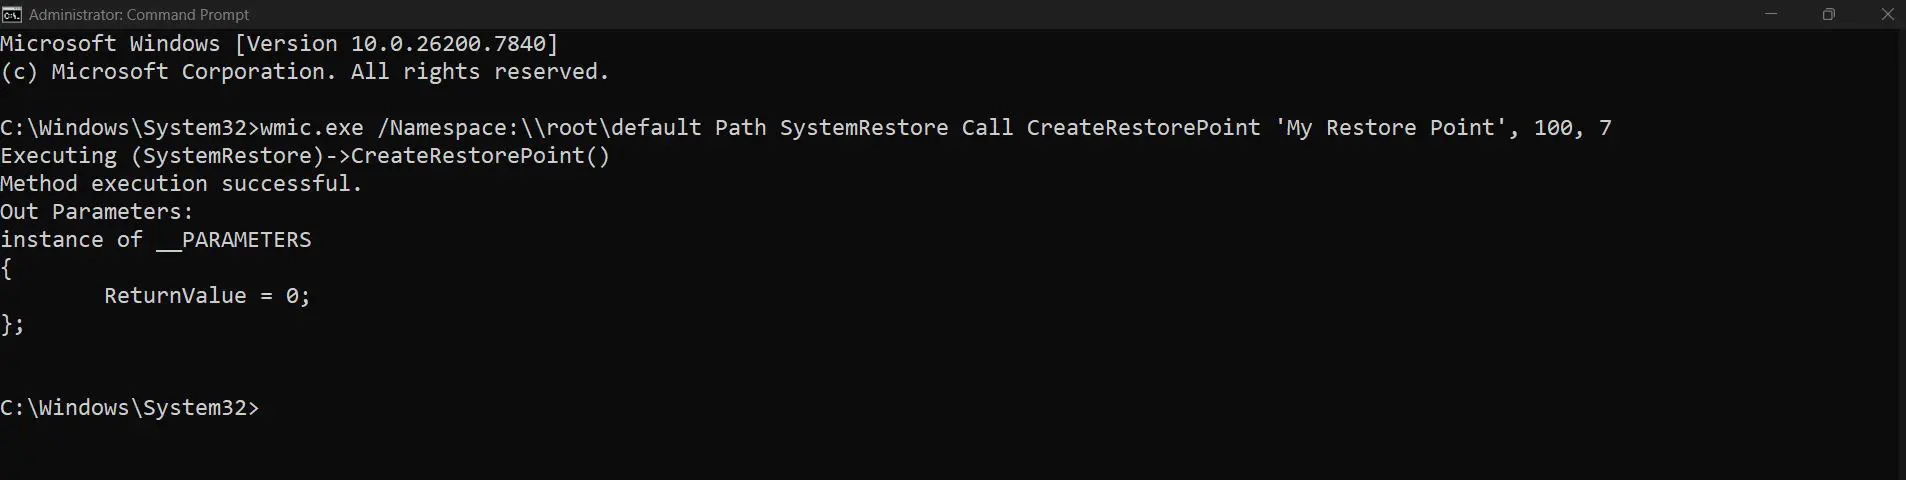
- Step 3: Wait for the command to execute. A return value of 0 means success.
Pro-Tip: Replace ‘My Restore Point’ in the command with a specific label – something meaningful like ‘Pre-Update Backup’. This makes it much easier to identify the correct restore point later when multiple ones exist.
How to Create a Restore Point Using PowerShell
- Step 1: Right-click the Start button and select ‘Terminal (Admin)’.

- Step 2: Enter this command:
Checkpoint-Computer -Description ‘Before System Change’ -RestorePointType ‘MODIFY_SETTINGS’
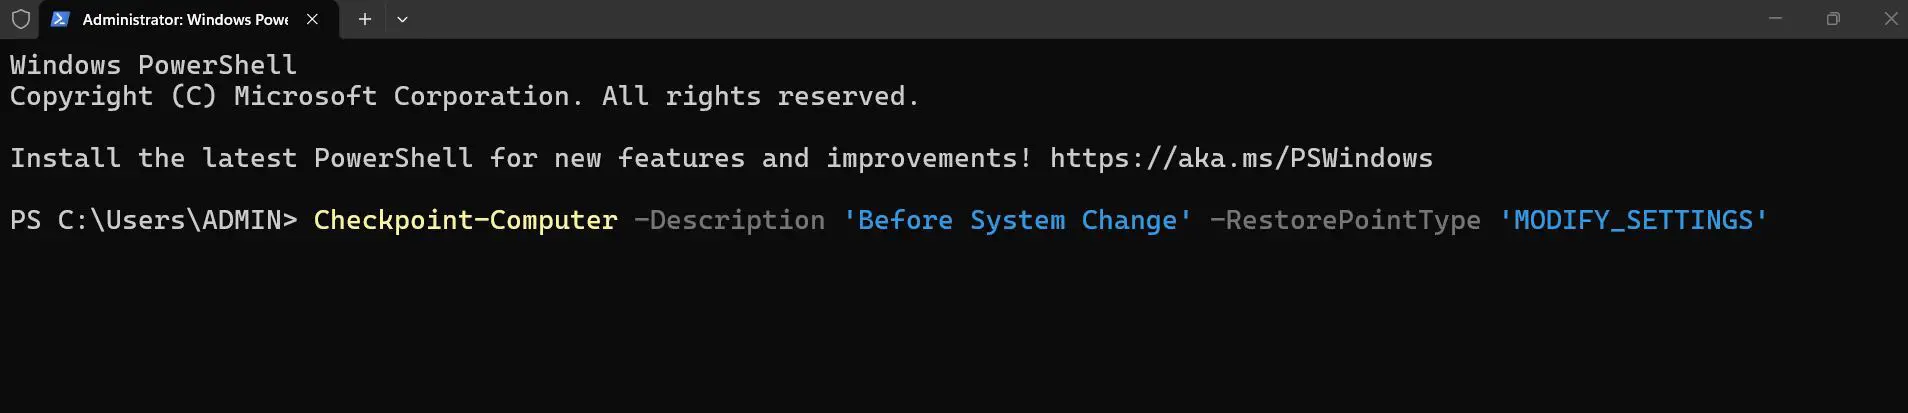
- Step 3: Press Enter and wait. No output means it succeeded silently – that is normal behavior for this command.
Tips for Using Restore Points Effectively
- Always create a restore point before updating printer drivers or any hardware-related software.
- Create one before installing programs that make deep system changes, like antivirus tools or system utilities.
- Label restore points clearly with the date and reason – generic names like ‘Restore Point 1’ make it confusing when multiple points exist.
- Windows automatically creates restore points before major updates, but manual ones are more reliable for specific actions.
- Check available disk space regularly. If the allocated space for System Protection fills up, older restore points get deleted automatically.
- Restore points do not back up personal files. For full file backups, use Windows Backup or an external drive.
Common Problems with Creating Restore Points
The ‘Create’ Button Is Greyed Out
This happens when System Protection is disabled for the selected drive. Go back to System Properties, select the C: drive, click Configure, and turn on system protection. The button will become clickable once protection is enabled.
Restore Point Creation Fails or Gets Stuck
This usually happens due to limited disk space. Open File Explorer, right-click the C: drive, go to Properties, and check available space. Clearing app cache or temporary files can help free up space. The guide on clearing app cache data covers how to do this efficiently.
System Protection Option Is Missing
In some cases, Windows 11 Home or certain OEM installations may have System Protection hidden or disabled via Group Policy. Open the Registry Editor (regedit), navigate to HKEY_LOCAL_MACHINE\SOFTWARE\Policies\Microsoft\Windows NT\SystemRestore, and check if DisableConfig or DisableSR is set to 1. Changing these values to 0 should restore access.
The Restore Point Was Not Listed After Creation
This can occur if the restore point creation failed silently. Go back to System Properties and click System Restore to view the list of existing restore points. If the newly created one is missing, try creating it again and ensure there is enough disk space allocated to System Protection.
Frequently Asked Questions
What does a restore point do in Windows 11?
A restore point captures a snapshot of the system’s current state – including registry settings, system files, and installed programs. If something goes wrong after a change, the system can be rolled back to that saved state without affecting personal files.
Does creating a restore point delete personal files?
No. Restore points only affect system settings, registry entries, and installed programs. Documents, photos, videos, and other personal files are not touched when using a restore point to roll back the system.
How much disk space does a restore point use?
It depends on the size of the system and how much has changed. Typically, each restore point uses between 100 MB and a few GB. The allocated disk space for System Protection can be adjusted in the Configure settings – setting 5-10% of the drive is usually sufficient.
How often should restore points be created?
Create one before any significant system change – installing drivers, running major updates, adding new software, or modifying system settings. Windows also creates them automatically before Windows Updates, but manual creation before specific actions is always recommended.
Can a restore point fix a virus or malware infection?
Not reliably. Some types of malware embed themselves into system restore points or survive a rollback. A restore point is useful for undoing software conflicts or bad driver installs, but not a substitute for proper antivirus tools when dealing with infections.
Why is System Protection turned off by default on some Windows 11 PCs?
On some systems – especially those with limited storage like budget laptops or devices with small SSDs – Windows 11 disables System Protection by default to save disk space. It needs to be enabled manually before restore points can be created.
How many restore points can Windows 11 store?
Windows 11 does not limit the number of restore points by count. Instead, it manages them based on the allocated disk space. Once the space fills up, the oldest restore points are automatically deleted to make room for newer ones.
Can restore points be created on a schedule automatically?
Windows 11 creates them automatically before major updates, but there is no built-in scheduler for daily or weekly automatic restore points. Task Scheduler can be used to run the PowerShell command (Checkpoint-Computer) on a custom schedule if automatic creation is preferred.
Does a restore point work if Windows 11 cannot boot?
Yes, but it requires accessing System Restore through the Windows Recovery Environment (WinRE). Boot into WinRE by holding Shift while clicking Restart, then go to Troubleshoot – Advanced options – System Restore, and select the appropriate restore point from there.
Will a restore point undo Windows 11 updates?
It can revert some update-related changes, but it is not a guaranteed rollback for all Windows Updates. For fully reverting a major Windows Update, using the built-in ‘Go back’ option under Settings – System – Recovery is more reliable than a restore point.