Knowing how to switch between desktops in Windows 11 can seriously change the way work gets done. Virtual desktops let users separate tasks – keep work apps on one desktop, personal stuff on another, and creative projects on a third. No more cluttered taskbars or endless Alt+Tab hunting. Windows 11 makes this feature more polished than ever, and once the habit kicks in, it becomes second nature.
Quick Summary
- Keyboard Shortcut: Press Windows + Ctrl + Left/Right Arrow to switch between desktops instantly.
- Task View: Click the Task View button on the taskbar or press Windows + Tab to see and switch all virtual desktops.
- Create a New Desktop: Open Task View and click ‘New desktop’ at the top.
- Move Apps Between Desktops: Right-click an open window in Task View and select ‘Move to’.
- Close a Desktop: Hover over a desktop thumbnail in Task View and click the X.
How to Switch Between Desktops in Windows 11
There are several ways to switch between virtual desktops in Windows 11. The fastest method is using keyboard shortcuts, but the Task View interface is better for visual navigation. Both approaches are covered below.
Method 1: Use Keyboard Shortcuts to Switch Desktops
This is the quickest way – no mouse needed. It works instantly no matter what app is open.
- Step 1: Make sure at least two virtual desktops are already created (see the section below on how to create one).
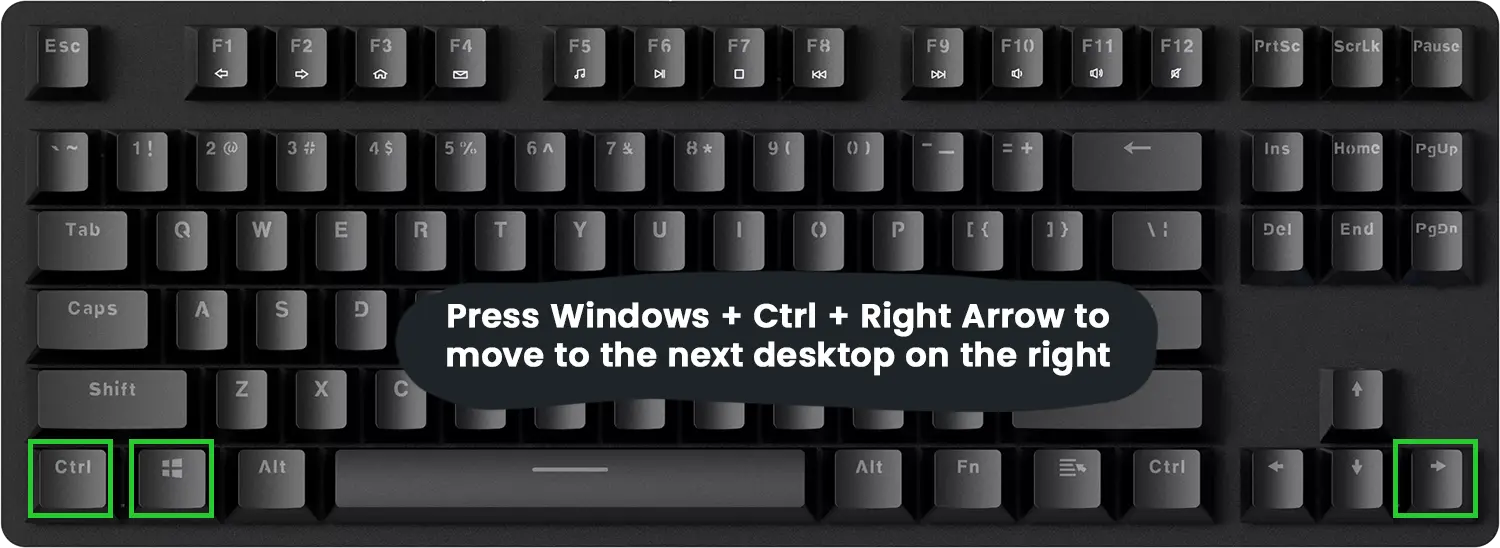
- Step 2: Press Windows + Ctrl + Right Arrow to move to the next desktop on the right.
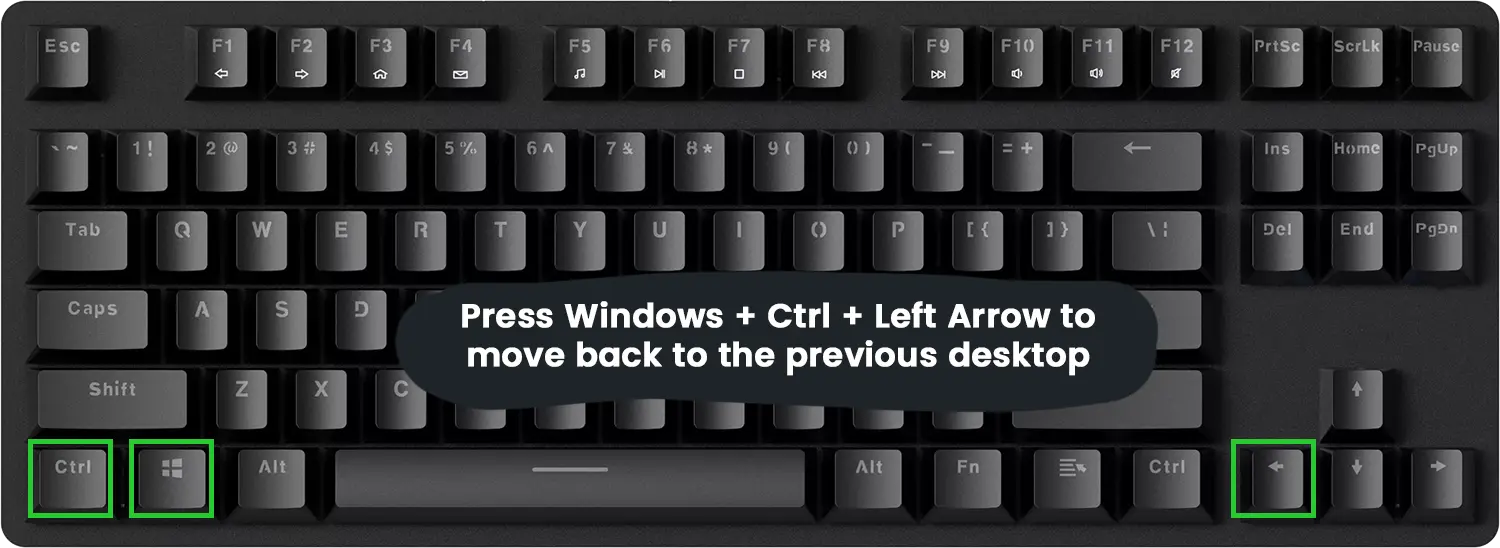
- Step 3: Press Windows + Ctrl + Left Arrow to move back to the previous desktop.
That is all there is to it. The screen slides smoothly to the next desktop, and any open apps on that desktop become active immediately.
Method 2: Switch Desktops Using Task View
Task View gives a visual overview of all virtual desktops and the apps running on each one. This works best when managing several desktops at once.
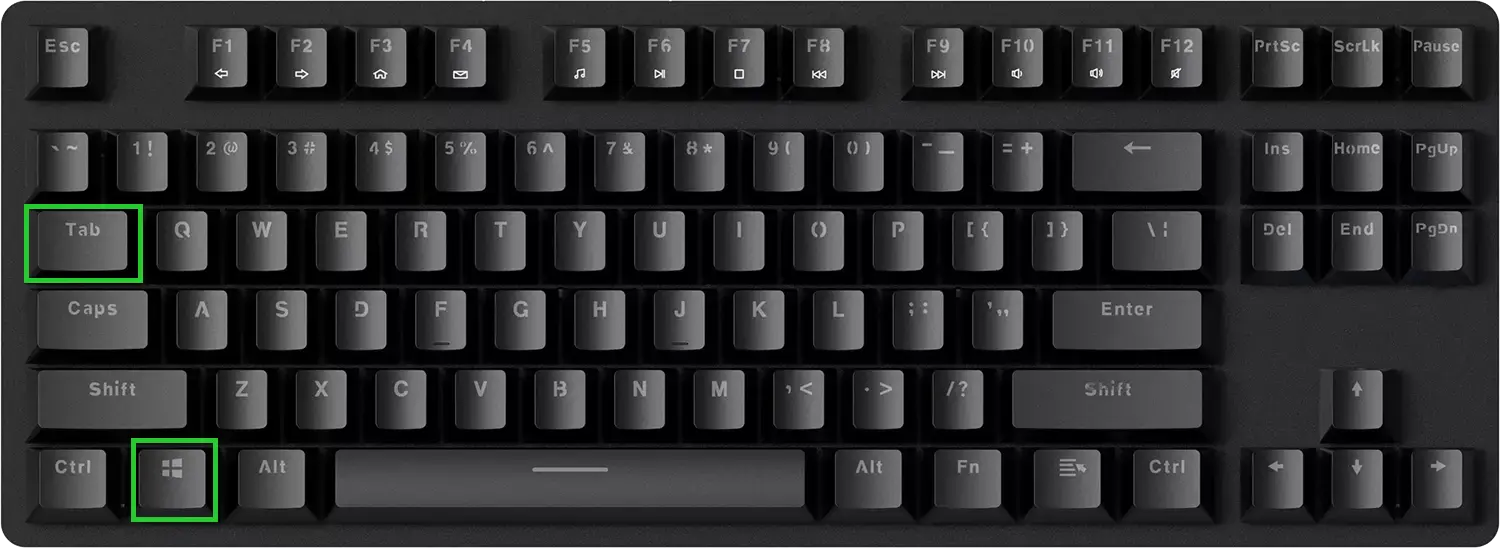
- Step 1: Click the Task View button on the taskbar – it looks like two overlapping rectangles. Alternatively, press Windows + Tab on the keyboard.
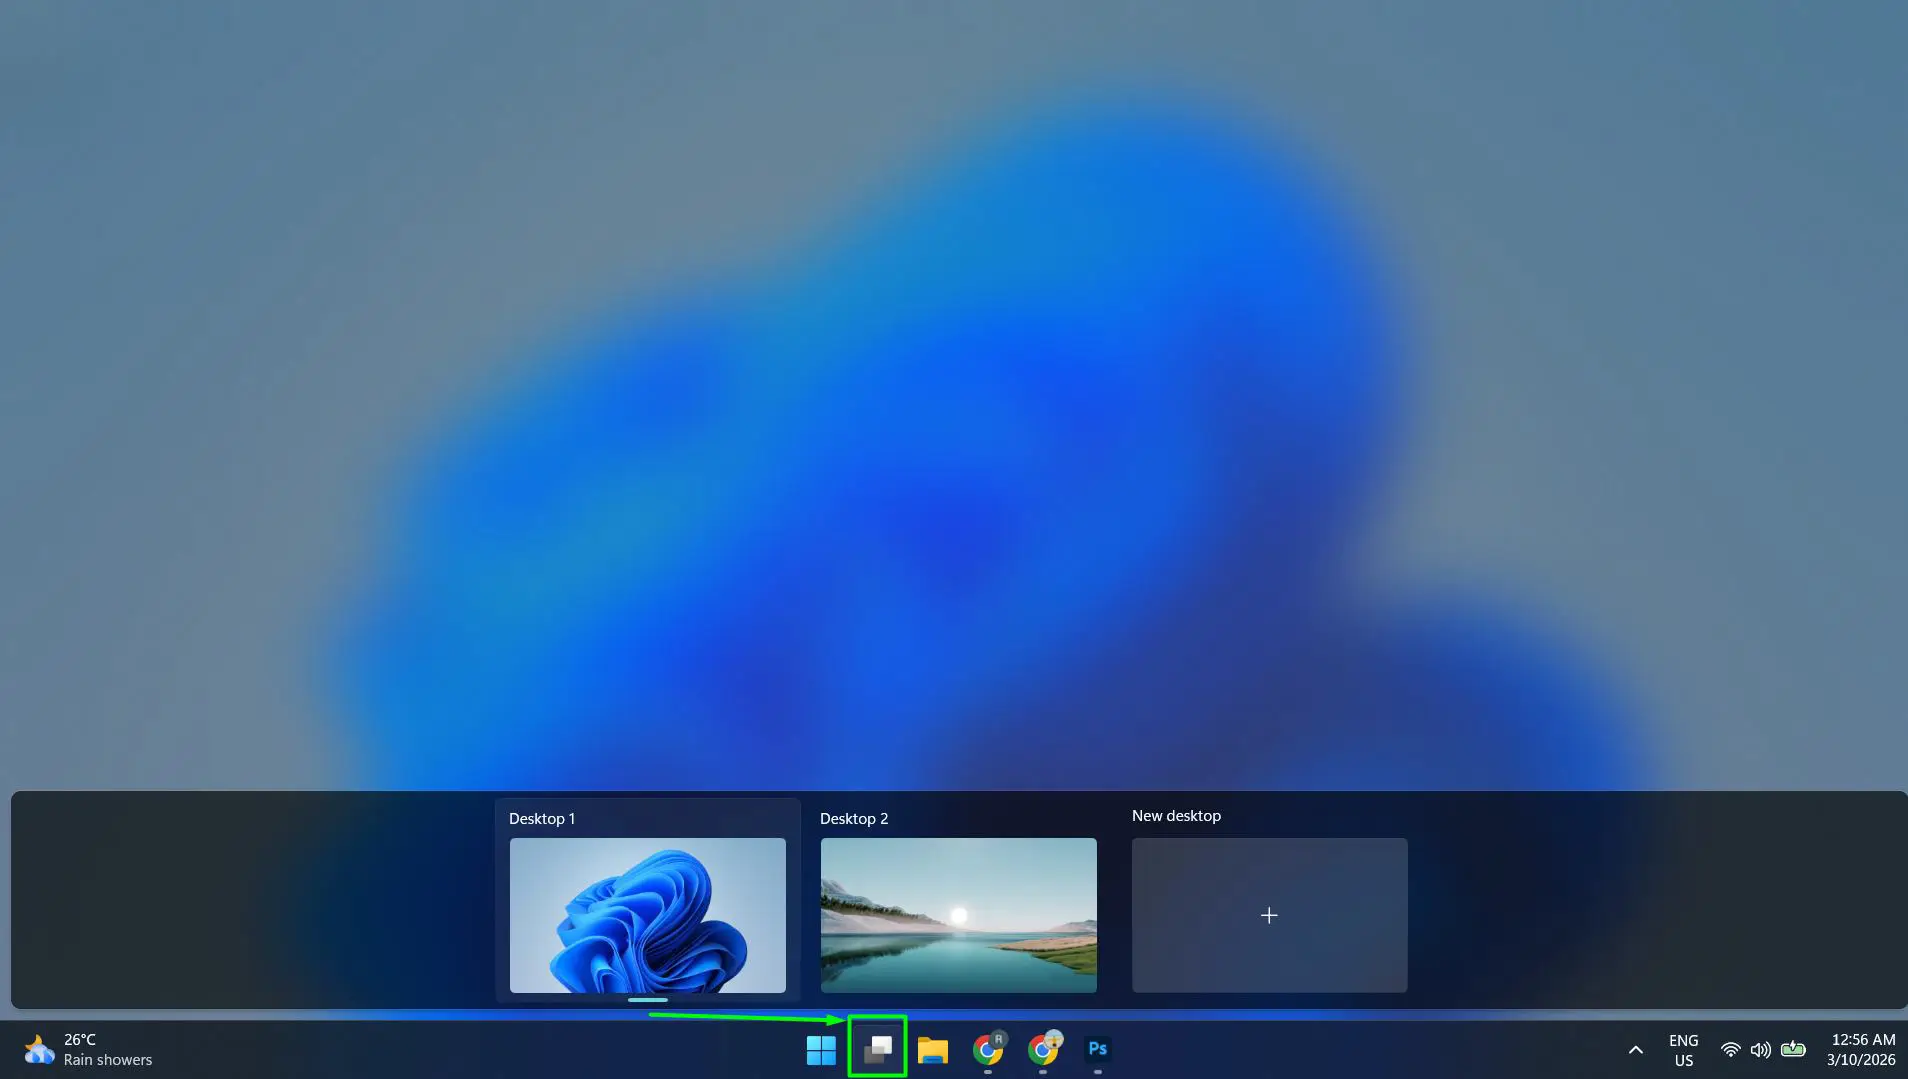
- Step 2: All virtual desktops appear as thumbnails along the top of the screen.
- Step 3: Click on the desktop to switch to it. The screen closes Task View and jumps directly to that desktop.

If the Task View button is not visible on the taskbar, right-click the taskbar, select Taskbar settings, and toggle on Task View.
Pro Tip: Hover over each desktop thumbnail in Task View to preview the open windows on that desktop before clicking. This makes it easy to find the right workspace without guessing.
Method 3: Swipe to Switch Desktops on a Touchscreen
For touchscreen devices or laptops with precision touchpads, switching desktops can be done with gestures.
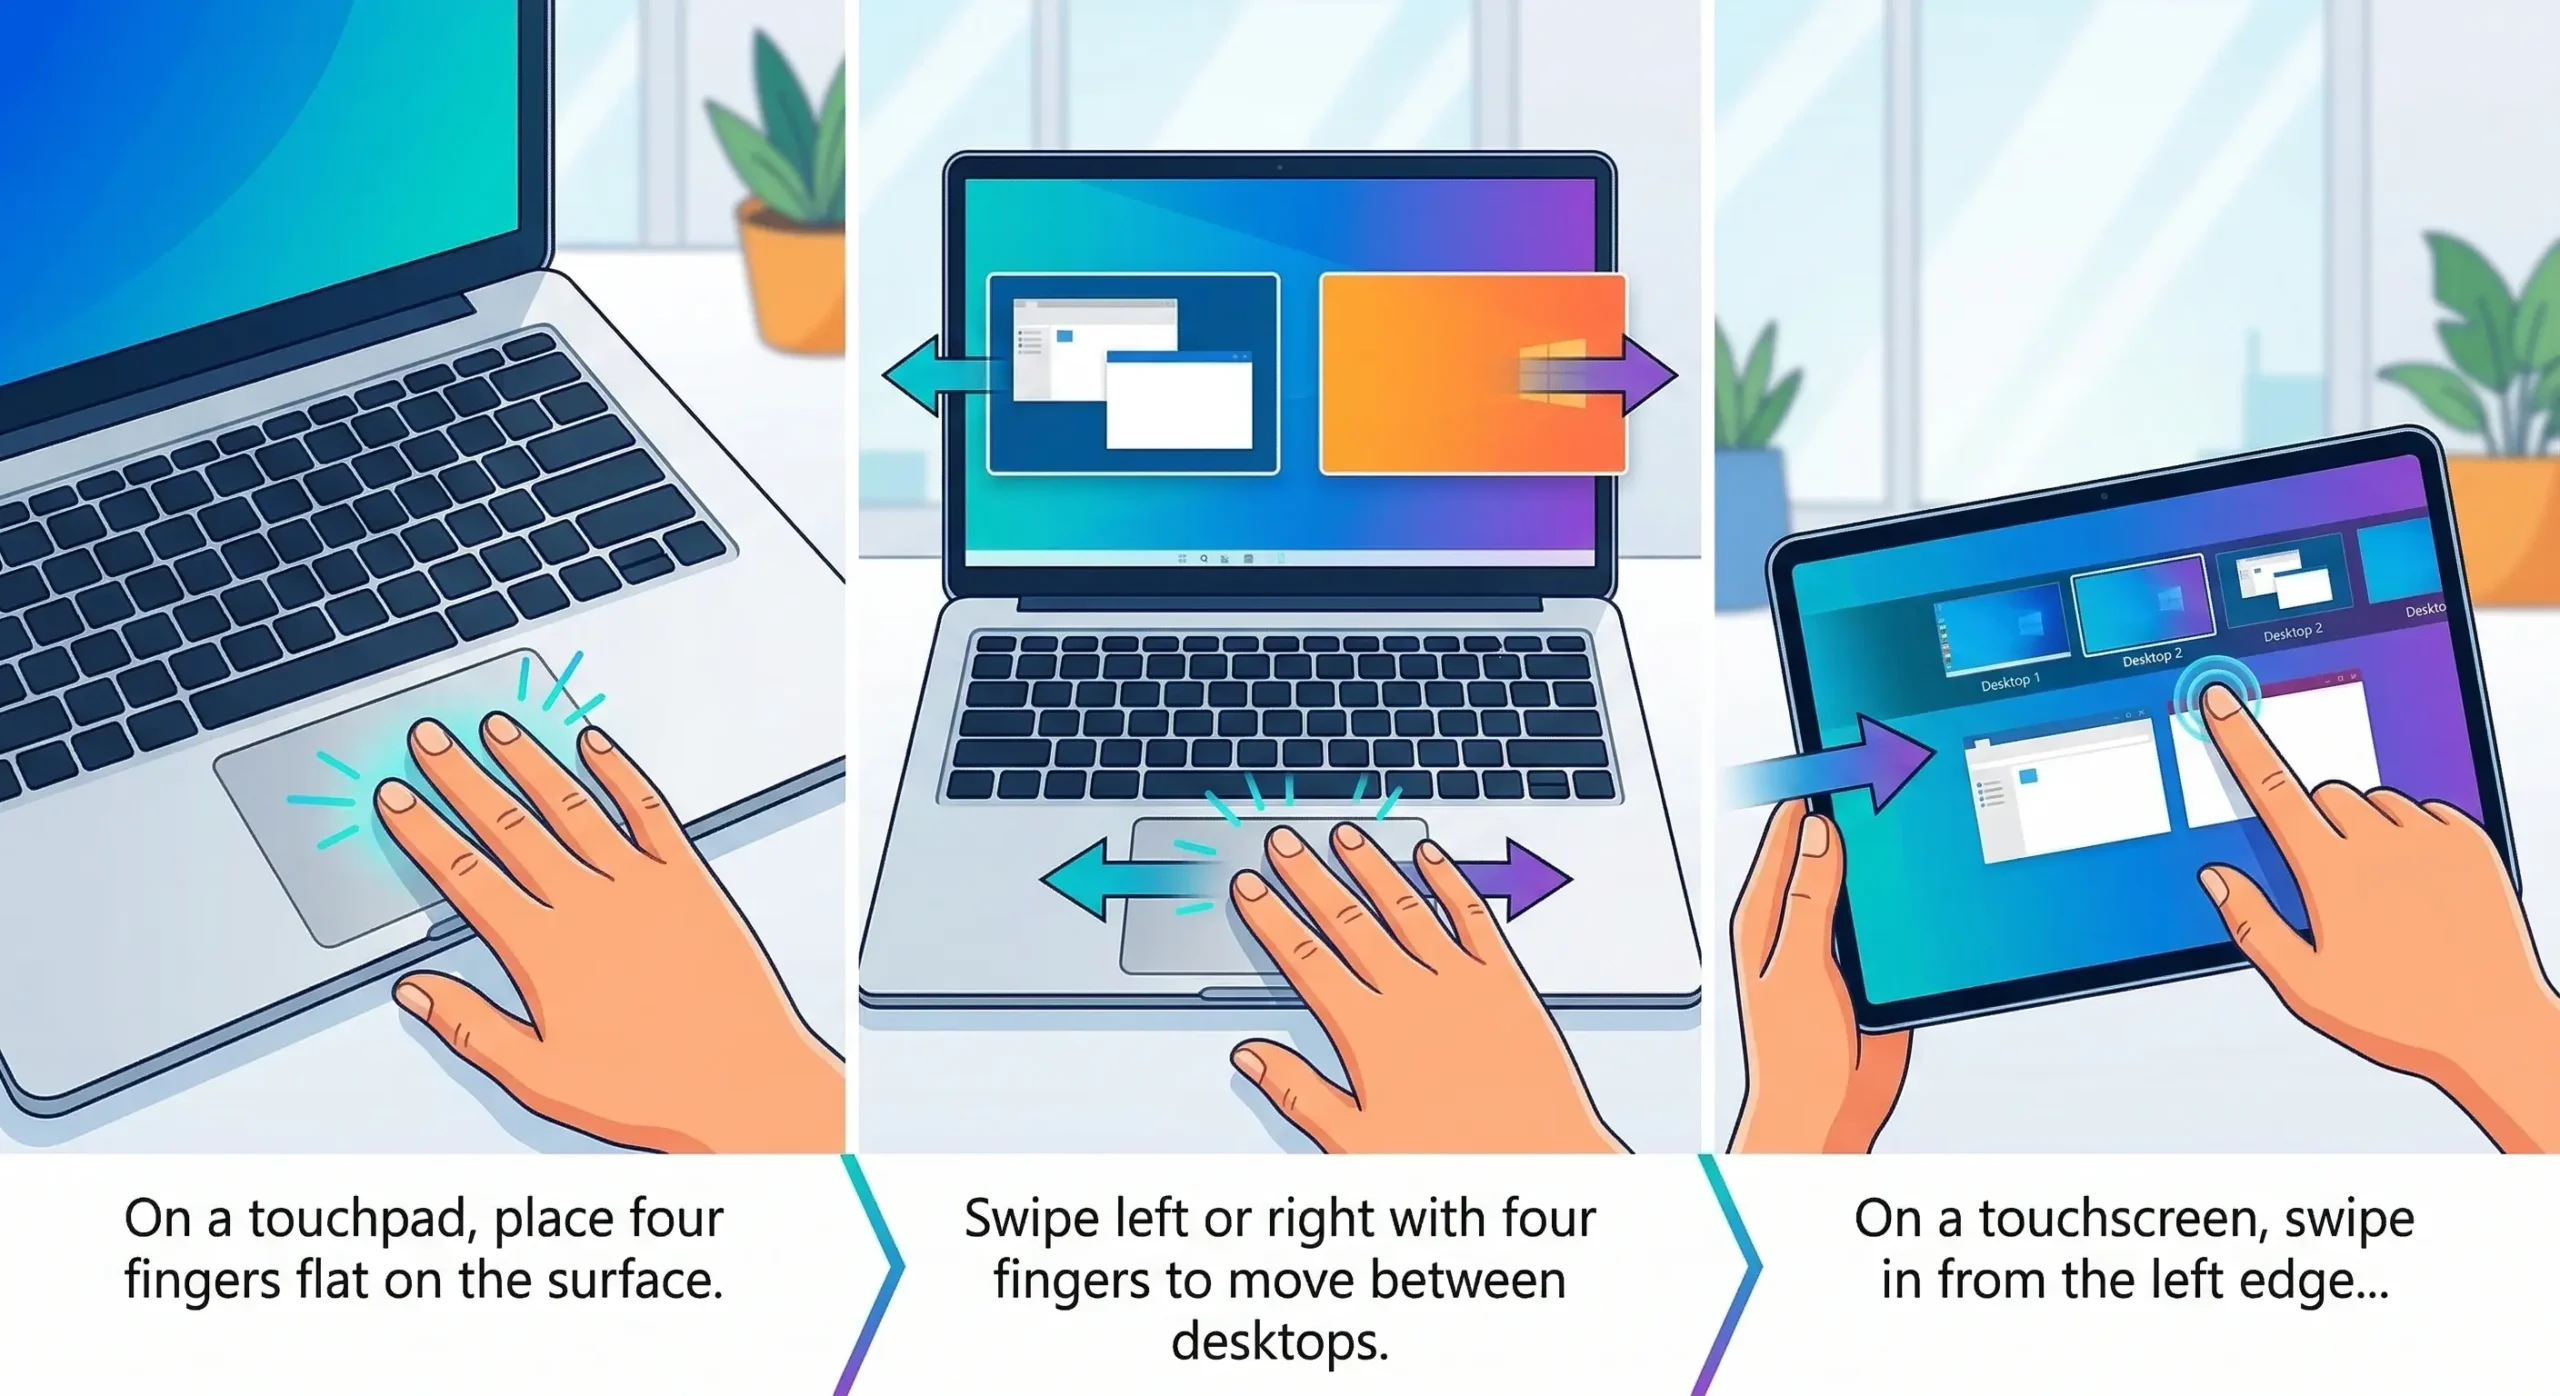
- Step 1: On a touchpad, place four fingers flat on the surface.
- Step 2: Swipe left or right with four fingers to move between desktops.
- Step 3: On a touchscreen, swipe in from the left edge of the screen to open Task View, then tap a desktop.
To adjust or enable touchpad gestures, go to Settings > Bluetooth and devices > Touchpad and make sure four-finger swipe is configured for desktop switching. If the display feels off after switching, checking the display brightness settings can help make sure everything looks right on the new desktop.
How to Create a New Virtual Desktop in Windows 11
Before switching desktops, there needs to be more than one. Here is how to set one up.
- Step 1: Press Windows + Tab or click the Task View button on the taskbar.
- Step 2: At the top of the screen, click ‘New desktop’ (it shows a + icon).
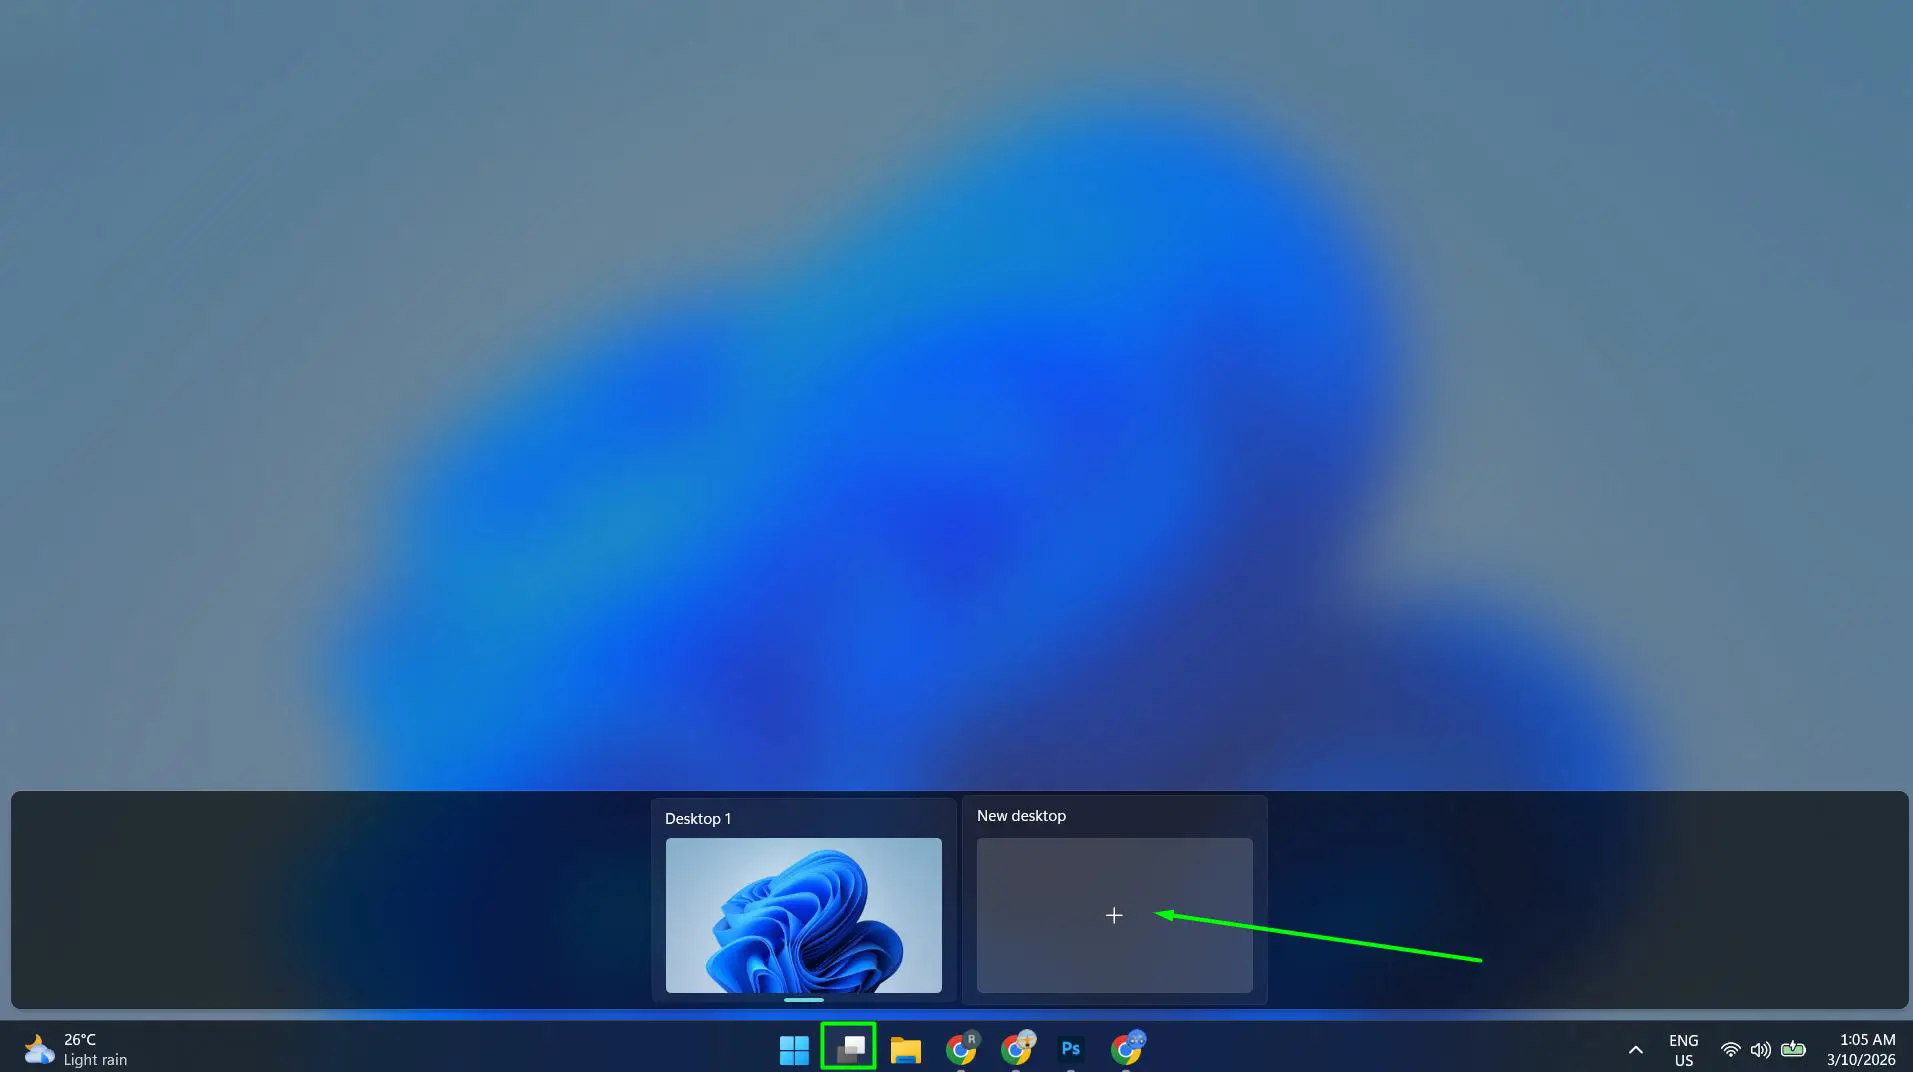
- Step 3: A new empty desktop appears as a thumbnail. Click on it to switch to it immediately.
Windows 11 supports up to 36 virtual desktops at once, though most people find that 2 to 4 is the sweet spot for staying organized without getting lost.
How to Move Apps Between Virtual Desktops
Sometimes an app ends up on the wrong desktop. Moving it is simple.
- Step 1: Open Task View by pressing Windows + Tab.
- Step 2: Hover over the desktop that contains the app to preview its open windows.
- Step 3: Right-click the app window in the preview.
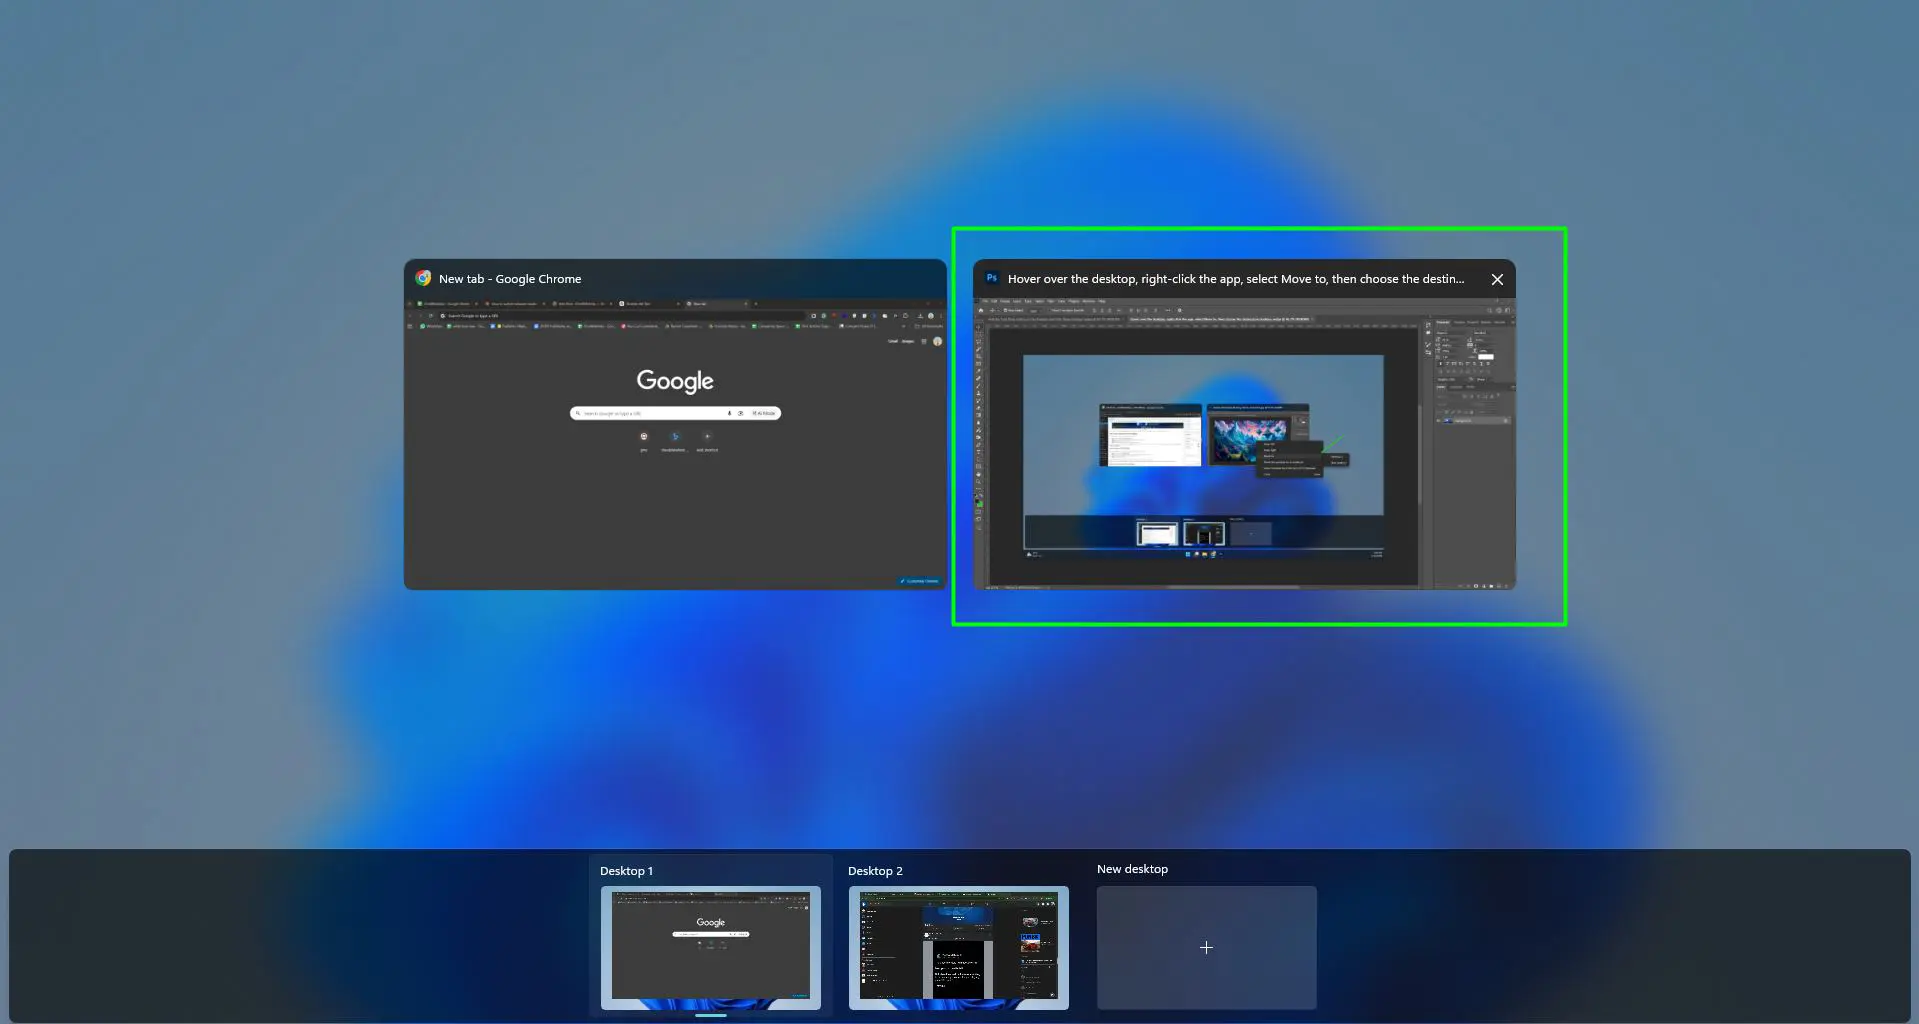
- Step 4: Select ‘Move to’ and choose the destination desktop from the list.
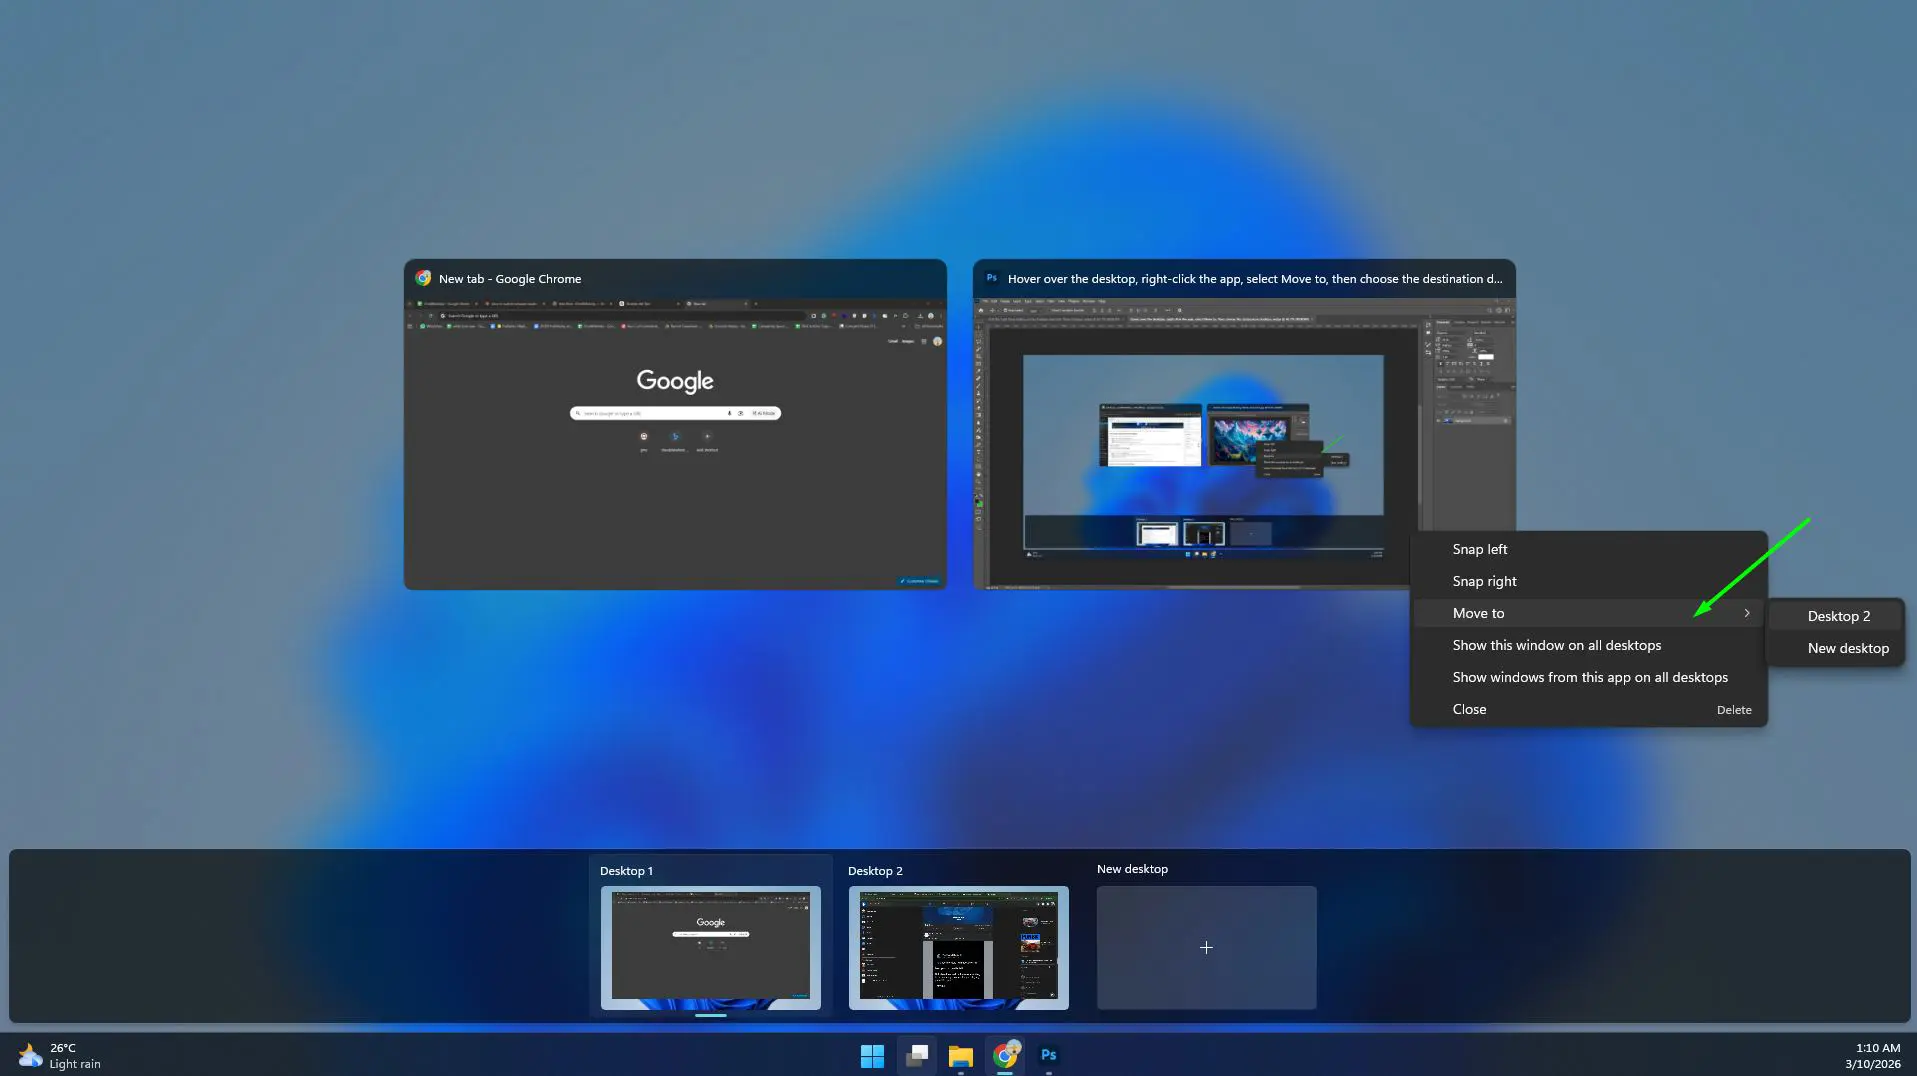
There is also an option to show a specific app on all desktops – great for things like a music player or calendar that should always be visible. Just right-click the app and choose ‘Show this window on all desktops’.
How to Rename Virtual Desktops
Keeping desktops labeled makes switching faster, especially when there are three or more active.
- Step 1: Open Task View with Windows + Tab.
- Step 2: Click once on the name below a desktop thumbnail (it usually says ‘Desktop 1’, ‘Desktop 2’, etc.).
- Step 3: Type a new name – like ‘Work’, ‘Personal’, or ‘Research’.

- Step 4: Press Enter to save the name.
The name appears on the taskbar thumbnail when hovering, making it easy to identify the right desktop at a glance.
Pro Tip: Renaming desktops is especially useful for people who record their screen for tutorials or presentations – it keeps the workflow clear and organized during recording.
How to Close or Delete a Virtual Desktop
- Step 1: Press Windows + Tab to open Task View.
- Step 2: Hover over the desktop thumbnail to delete.
- Step 3: Click the X that appears in the top-right corner of the thumbnail.
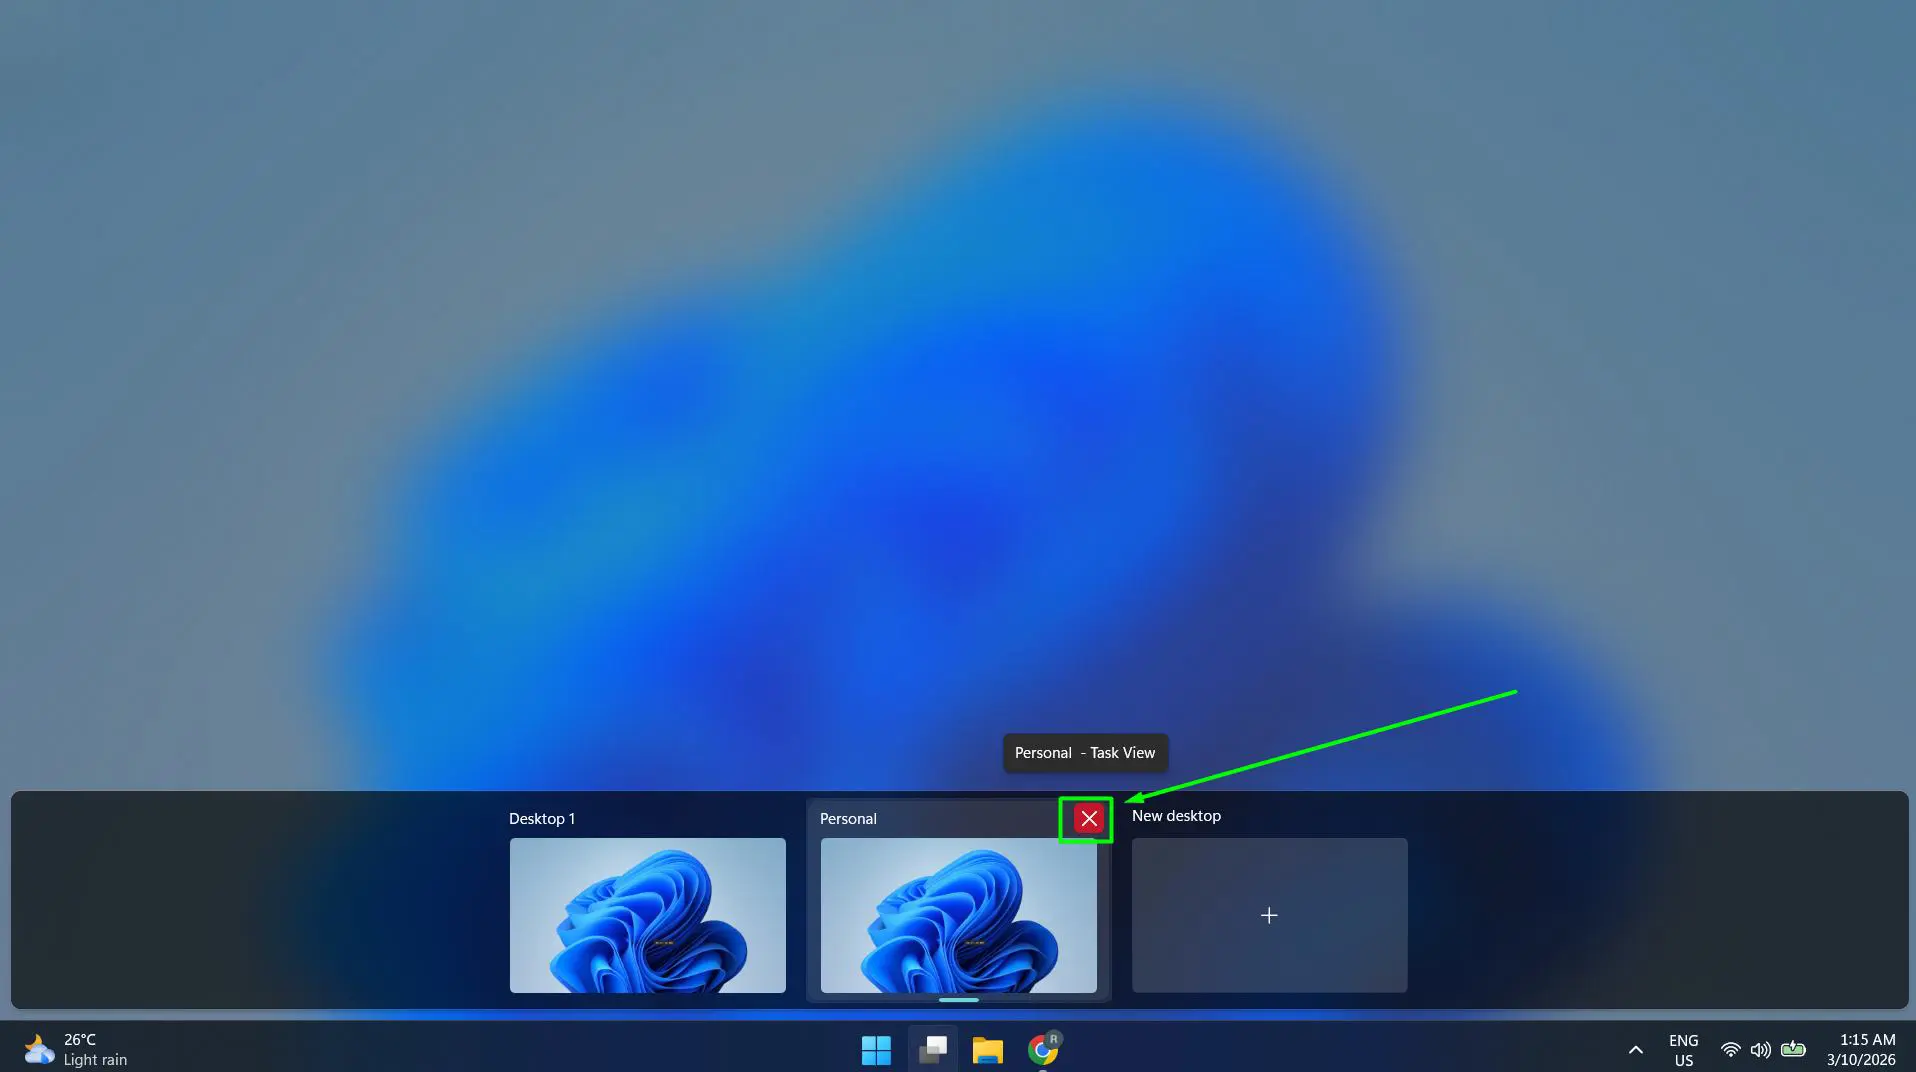
Any open apps on a deleted desktop do not close – they automatically move to the adjacent desktop. Nothing gets lost.
Tips for Using Virtual Desktops More Effectively
- Use Windows + Ctrl + D to create a new desktop instantly without opening Task View.
- Use Windows + Ctrl + F4 to close the current desktop without opening Task View.
- Assign specific wallpapers to each desktop via Settings > Personalization > Background – right-click a wallpaper and choose ‘Set for desktop’ to visually distinguish each workspace.
- Keep communication tools (like email or messaging apps) on a separate desktop to avoid distractions while focused on deep work.
- If the taskbar seems unresponsive when switching desktops, adjusting power and sleep settings may help prevent the system from throttling performance in the background.
Common Problems When Switching Desktops in Windows 11
Task View Button Is Not Showing on the Taskbar
Right-click the taskbar and select Taskbar settings. Under ‘Taskbar items’, toggle Task View to On. The button should appear immediately.
Keyboard Shortcut Is Not Working
Make sure there are at least two virtual desktops created first – the shortcut only works when multiple desktops exist. Also check if any third-party apps are intercepting the Windows + Ctrl + Arrow shortcut and reassign if needed.
Apps Are Showing on All Desktops Instead of Just One
Open Task View, right-click the app window, and select ‘Show this window only on this desktop’ to restrict it to one workspace.
Virtual Desktops Not Saving After Restart
This is expected behavior in Windows 11 – virtual desktops and their layouts do not persist after a full shutdown or restart. Sleep mode and hibernate preserve them. For a persistent multi-workspace setup, consider using sleep or hibernate instead of shutting down completely.
Touchpad Gestures Not Working for Desktop Switching
Go to Settings > Bluetooth and devices > Touchpad > Advanced gestures and confirm that the four-finger swipe is set to ‘Switch desktops’. Also make sure the touchpad driver is up to date.
Frequently Asked Questions
How do you switch between desktops in Windows 11 with a keyboard?
Press Windows + Ctrl + Right Arrow to move to the next desktop, or Windows + Ctrl + Left Arrow to go back to the previous one. This is the fastest method and works from any app or window.
What is the Task View button in Windows 11?
Task View is the feature that shows all open windows and virtual desktops in a single overview. It is accessible by clicking the two-rectangle icon on the taskbar or pressing Windows + Tab. From there, users can switch, create, rename, or close virtual desktops.
Can you have different wallpapers on each virtual desktop in Windows 11?
Yes. Right-click any image in the Photos app or File Explorer and choose ‘Set as desktop background’, then select which desktop to apply it to. This helps visually distinguish each workspace at a glance.
Do virtual desktops stay after restarting Windows 11?
No. Virtual desktops are session-based and do not survive a full shutdown or restart. They are preserved during sleep or hibernate. If keeping multiple desktops set up is important, avoid full shutdowns and use sleep mode instead.
How many virtual desktops can Windows 11 have?
Windows 11 supports up to 36 virtual desktops at the same time. In practice, 2 to 5 desktops covers most use cases without making navigation confusing.
How do you move an open window to a different desktop in Windows 11?
Open Task View with Windows + Tab, hover over the desktop containing the window, right-click the window thumbnail, choose ‘Move to’, and select the target desktop. The window moves without closing or losing any unsaved work.
Is there a way to switch desktops without using the keyboard or mouse?
Yes – on touchscreen devices, swiping in from the left edge opens Task View where a desktop can be tapped. On laptops with precision touchpads, a four-finger left or right swipe switches desktops directly without touching any key or clicking anything.
Can the same app appear on all virtual desktops?
Yes. In Task View, right-click an app window and select ‘Show this window on all desktops’. This is useful for tools like clocks, music players, or note-taking apps that should always be visible regardless of which desktop is active.
How do you delete a virtual desktop in Windows 11?
Open Task View, hover over the desktop thumbnail, and click the X in the corner. Any open apps on that desktop move to the next available desktop automatically – nothing closes or disappears.
What is the shortcut to create a new desktop in Windows 11?
Press Windows + Ctrl + D to create a new virtual desktop instantly. Windows switches to the new empty desktop right away. Use Windows + Ctrl + F4 to close the current desktop without going into Task View.