Key Takeaways
- By default, Windows 11 hides file extensions like .jpg, .pdf, and .exe from view.
- The fastest way to show file extensions is through File Explorer’s View menu.
- You can also enable file extensions through Folder Options or the Windows Registry.
- Seeing file extensions helps identify file types and spot potentially dangerous files.
- The setting applies system-wide once changed – no need to repeat it per folder.
Knowing how to show file extensions in Windows 11 is one of those small tweaks that makes a big difference. By default, Windows hides extensions like .docx, .mp4, or .exe – which can make it tricky to tell exactly what type of file something is. Whether sorting through downloads, managing documents, or just trying to stay organized, revealing those extensions gives a much clearer picture of what’s on the system. Here are three reliable methods to get it done.
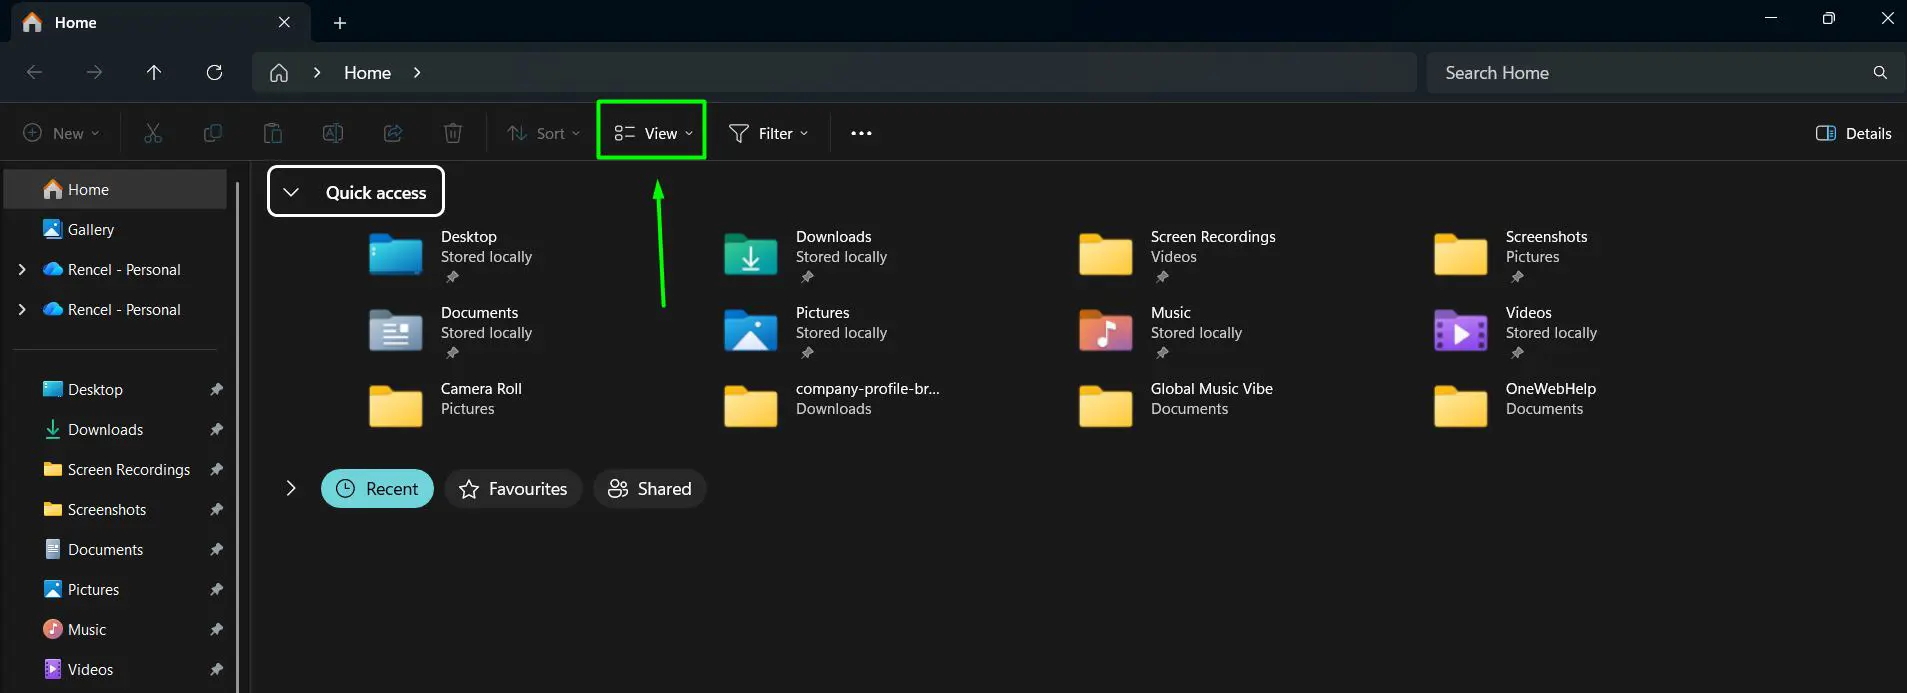
How to Show File Extensions in Windows 11 Using File Explorer
This is the quickest method and the one most people prefer. It takes less than a minute and requires no digging through settings menus.
- Step 1: Open File Explorer by pressing the Windows key + E on the keyboard, or by clicking the folder icon in the taskbar.

- Step 2: Click the View tab in the top menu bar of File Explorer.
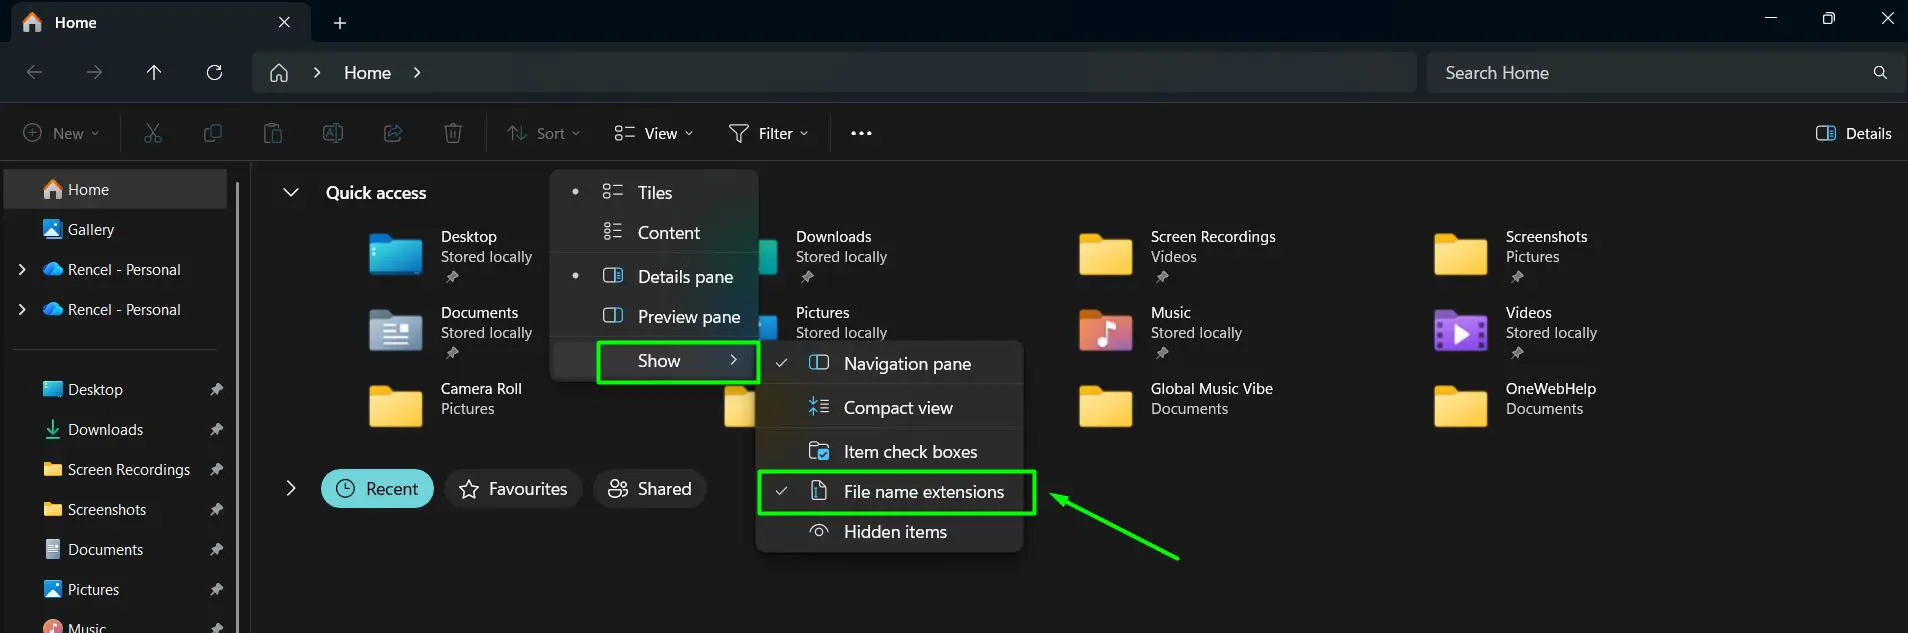
- Step 3: Hover over Show in the dropdown menu.
- Step 4: Click File name extensions from the submenu. A checkmark will appear next to it once enabled.
That’s it. File extensions will now appear for all files across every folder. This works best when quick access to File Explorer is already available, since it skips all the deeper settings panels entirely.
Pro-Tip: After enabling file extensions, check the Downloads folder by visiting the Downloads folder settings to make sure newly downloaded files are easy to identify. Seeing extensions like .exe or .zip on unknown files helps avoid accidentally opening something harmful.
How to Show File Extensions via Folder Options
This method uses the classic Folder Options window. It’s especially useful if the View menu approach didn’t apply the change as expected, or for those who prefer using the traditional Windows settings path.
- Step 1: Open File Explorer using the Windows key + E shortcut.
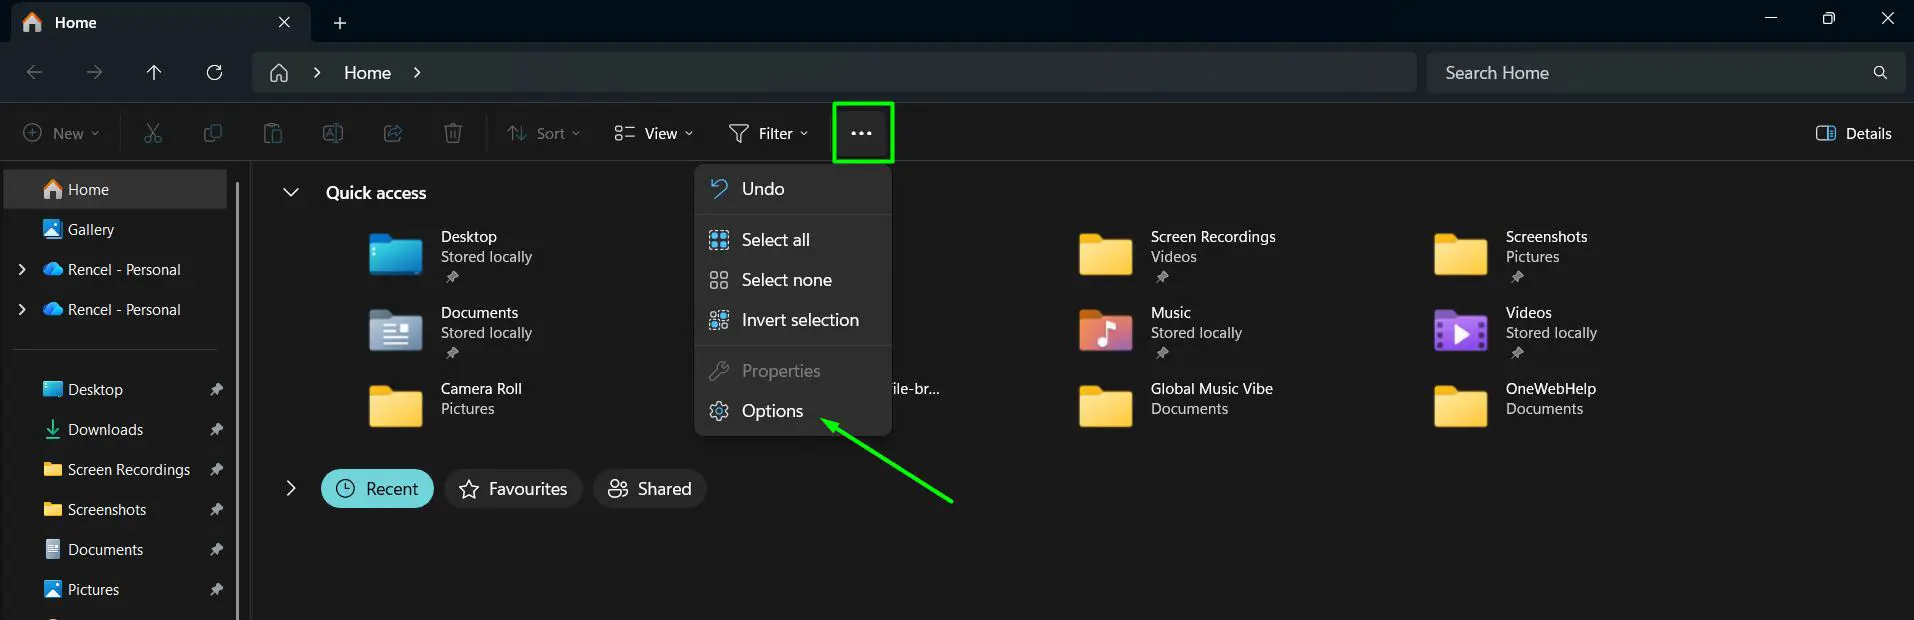
- Step 2: Click the three-dot menu icon (ellipsis) in the top toolbar and select Options. This opens the Folder Options dialog.
- Step 3: Click the View tab inside the Folder Options window.
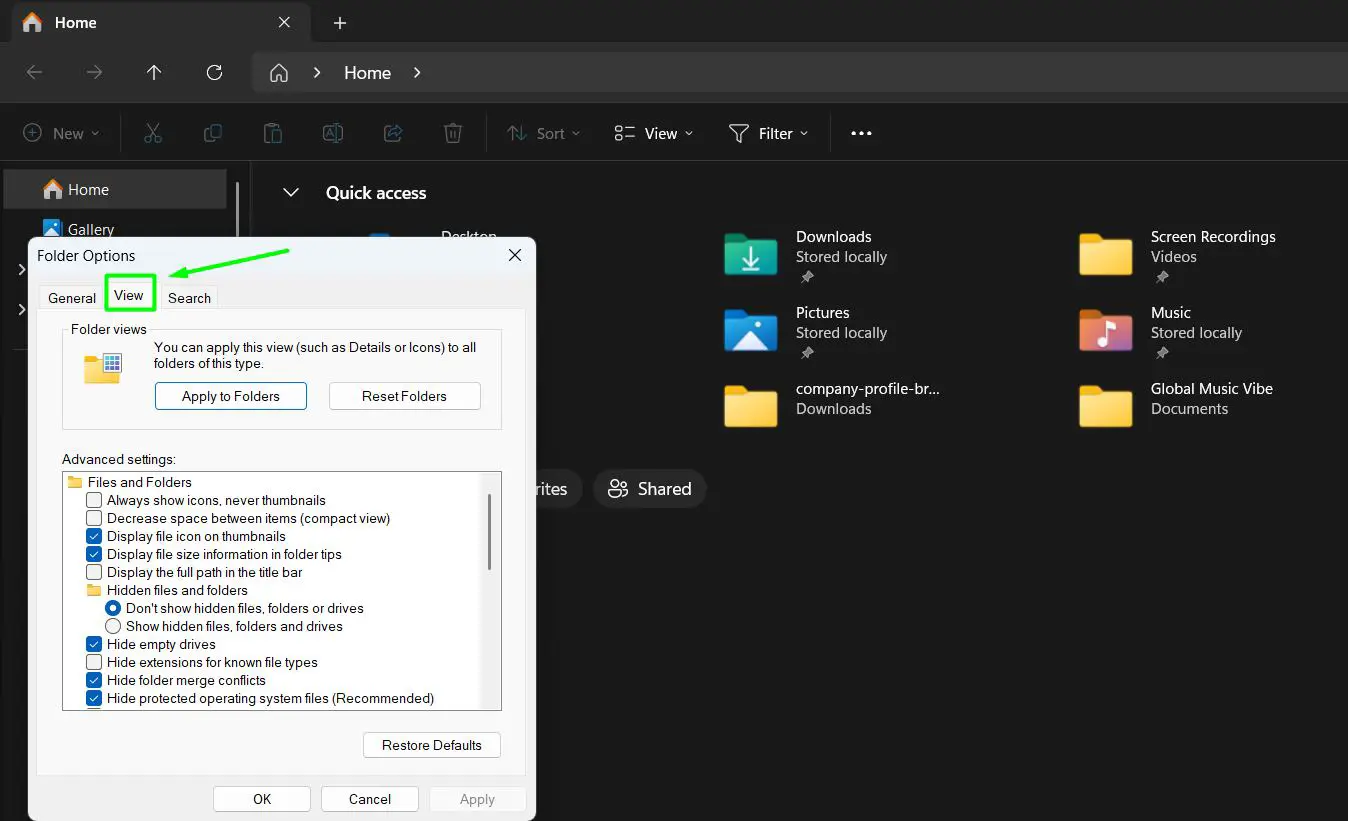
- Step 4: In the ‘Advanced settings’ list, scroll down and find the option labeled ‘Hide extensions for known file types’.
- Step 5: Uncheck that box by clicking on it.
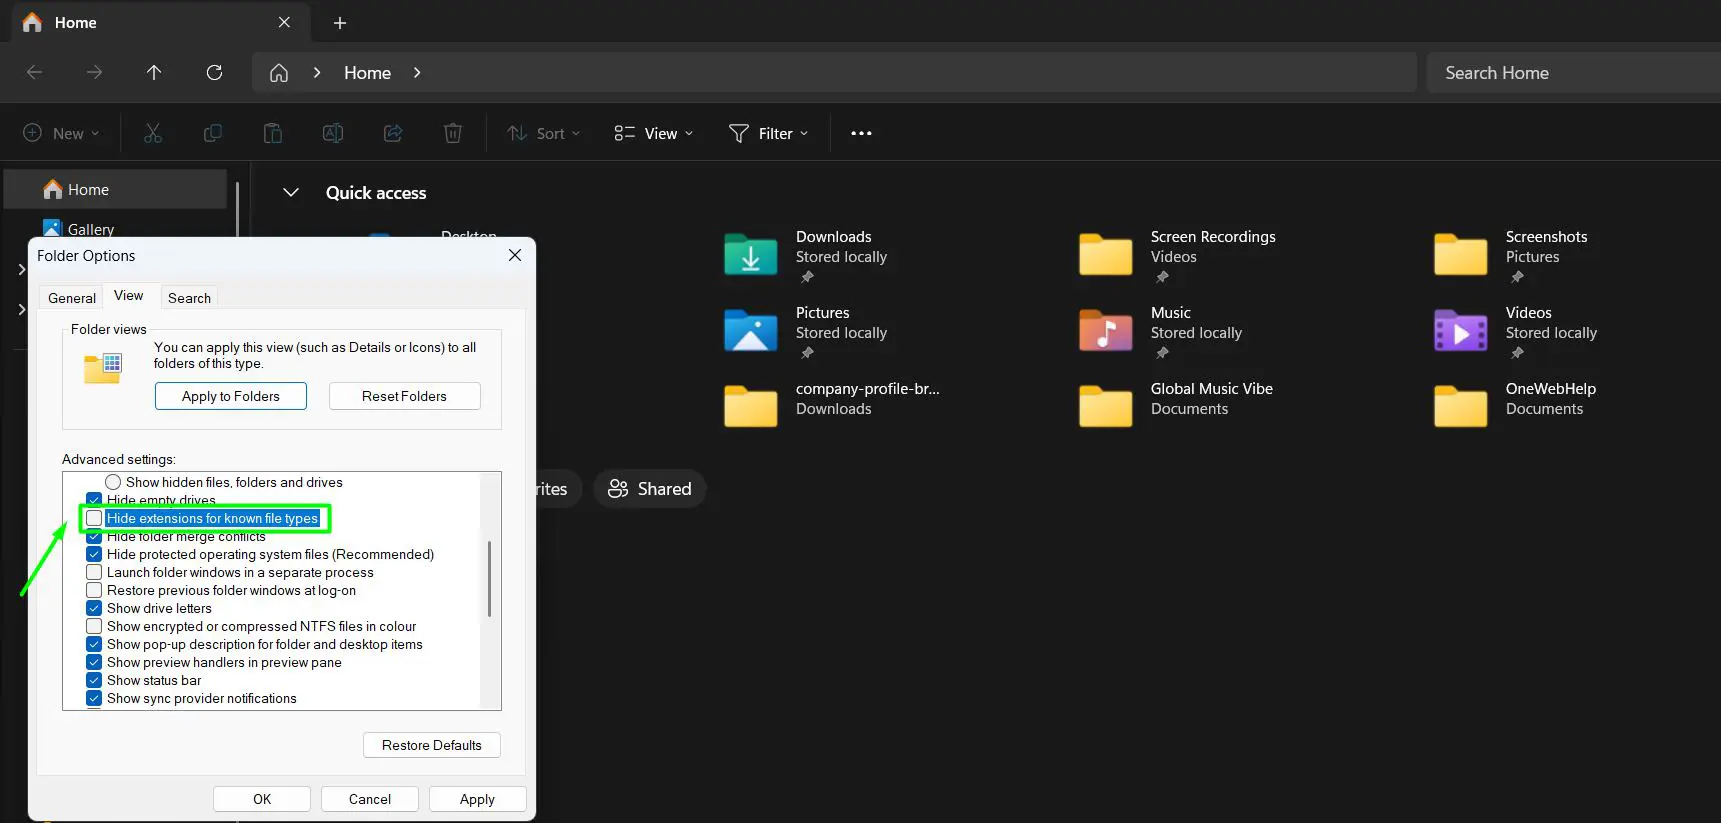
- Step 6: Click Apply, then click OK to save the changes.
Most people find this method helpful when they want to make sure the setting is confirmed and saved through an official dialog rather than a quick toggle. The key is making sure the checkbox is unchecked – it can be easy to miss if scrolling quickly through the list.
How to Show File Extensions Using the Registry Editor
This method is for more advanced users who are comfortable working inside the Windows Registry. It produces the same result as the other two methods, but gives direct control over the underlying Windows setting.
- Step 1: Press Windows key + R to open the Run dialog. Type regedit and press Enter.
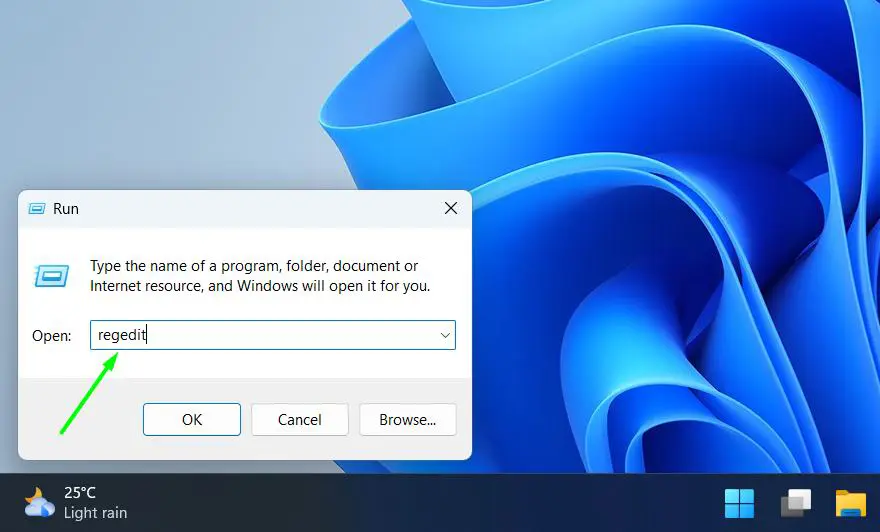
- Step 2: If prompted by User Account Control, click Yes to allow the Registry Editor to open.
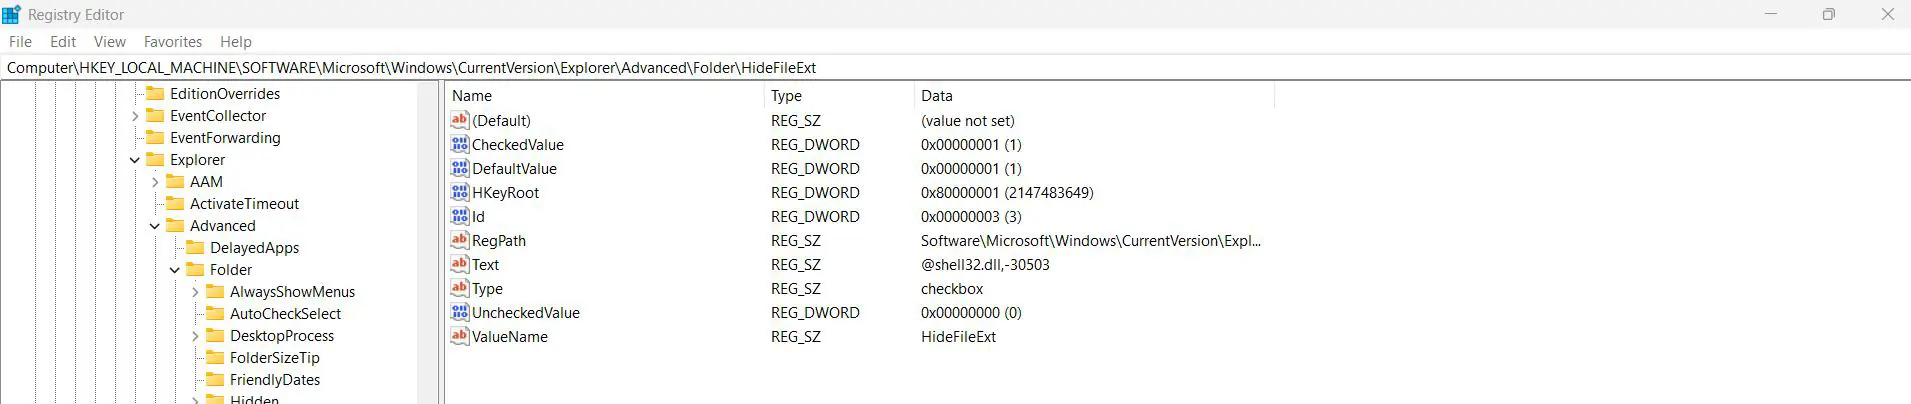
- Step 3: In the Registry Editor, navigate to the following path:
HKEY_LOCAL_MACHINE\SOFTWARE\Microsoft\Windows\CurrentVersion\Explorer\Advanced\Folder\HideFileExt
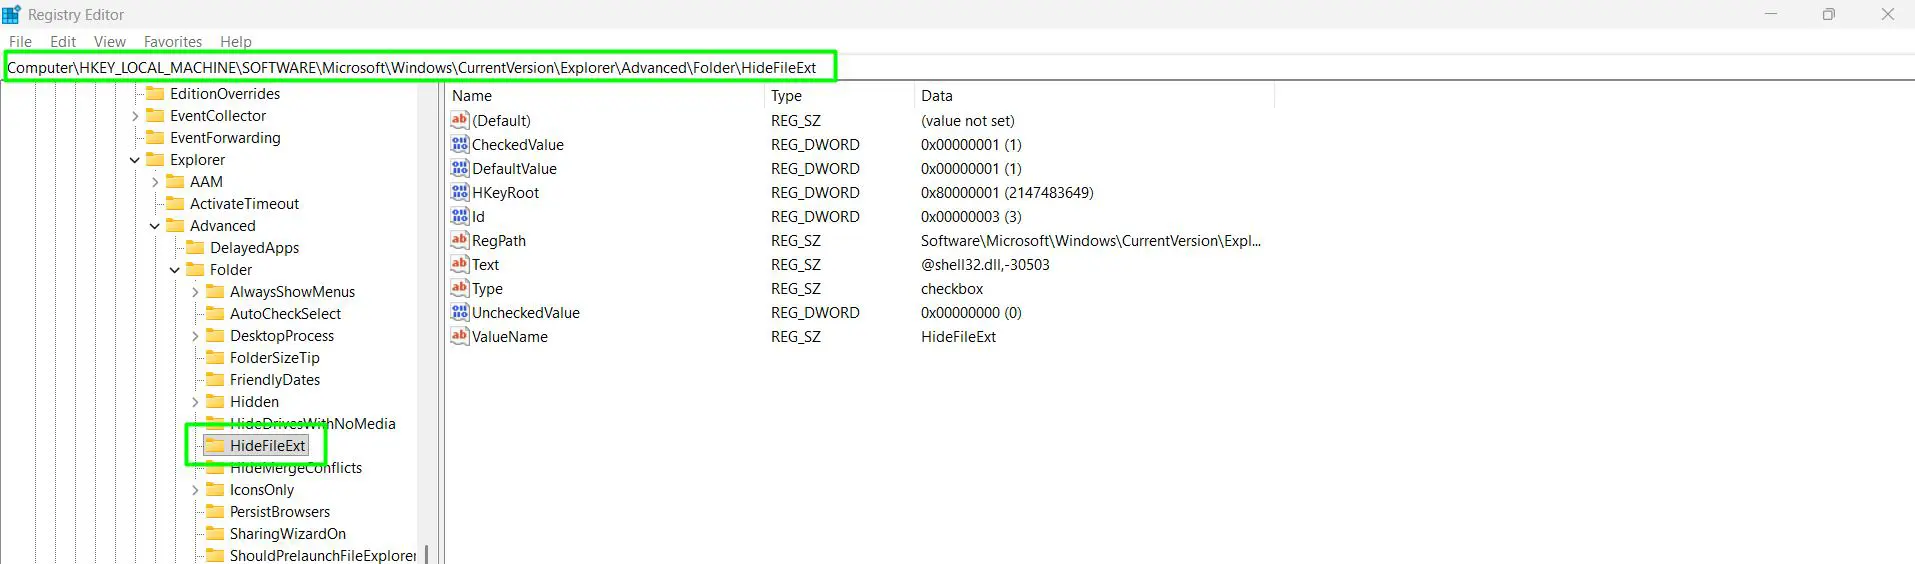
- Step 4: In the right panel, find the entry named CheckedValue (REG_DWORD). This controls what value hides extensions – by default it is set to 1.
- Step 5: Find the entry named UncheckedValue (REG_DWORD). This is the value that shows extensions – it should already be set to 0.
- Step 6: To force extensions to always show, double-click DefaultValue and change the value data from 1 to 0, then click OK.
- Step 7: Close the Registry Editor and restart File Explorer or the computer for the change to take full effect.
Before editing the registry, it’s always a smart habit to create a restore point first. That way, if anything goes wrong, the system can be rolled back quickly without any lasting damage.
Pro-Tip: The Registry method is particularly handy for IT professionals or anyone managing multiple machines, as the same registry key can be modified across devices using scripts or group policy – saving time on bulk configurations.
Tips for Working With File Extensions in Windows 11
- Once file extensions are visible, renaming a file will also show the extension. Be careful not to accidentally delete or change the extension part during renaming, or the file may stop opening correctly.
- If a file has a double extension like ‘document.pdf.exe’, that is a major red flag. Legitimate files almost never use double extensions – it is a common trick used by malicious software.
- Some file types like .lnk (shortcuts) may still display differently even with extensions turned on, but most common formats will show clearly.
- File extensions are case-insensitive in Windows 11 – so .JPG and .jpg are treated the same way.
- If managing files regularly, pairing visible extensions with an understanding of how to open ZIP files in Windows makes the whole workflow smoother.
Common Problems When Showing File Extensions in Windows 11
File extensions are not showing after enabling the setting
If file extensions still don’t appear after following the steps, try restarting File Explorer. Right-click the taskbar, select Task Manager, find Windows Explorer in the list, right-click it, and choose Restart. This refreshes the display without needing a full reboot.
The ‘File name extensions’ option is greyed out
This can happen if the system is managed by an organization or if group policy settings are restricting the option. In that case, a system administrator would need to adjust the policy before the change can be made locally.
Extension changed and the file no longer opens
If a file extension was accidentally changed during renaming, simply rename the file again and restore the original extension. For example, if ‘photo.jpg’ was accidentally renamed to ‘photo’, add ‘.jpg’ back to the end of the filename. Windows will recognize it again immediately.
Frequently Asked Questions
Why does Windows 11 hide file extensions by default?
Microsoft designed Windows to hide file extensions by default to make the interface look cleaner and less technical for everyday users. The idea is that most people don’t need to see extensions to open or use files. However, this default setting can be changed anytime through File Explorer or Folder Options.
Is it safe to show file extensions in Windows 11?
Yes, showing file extensions is completely safe and actually recommended for security purposes. It helps users identify suspicious files, especially those disguised as safe formats. Seeing the real extension of every file makes it easier to avoid opening harmful executables.
Will showing file extensions affect how my files work?
No. Enabling the display of file extensions is purely a visual change. It does not alter or modify the files themselves in any way. All files will continue to work exactly as before.
Can file extensions be shown for just one folder?
No. The setting to show or hide file extensions is a system-wide setting in Windows 11. It applies to all folders at once and cannot be limited to a single directory.
How do you change a file extension in Windows 11?
First, make sure file extensions are visible using one of the methods above. Then right-click the file, select Rename, and manually change the extension part of the filename. Windows will warn that changing the extension could make the file unusable – confirm the change only if certain about the new format.
What are the most common file extensions in Windows 11?
Some of the most common file extensions seen in Windows 11 include .exe (programs), .docx (Word documents), .xlsx (Excel spreadsheets), .pdf (PDF files), .jpg and .png (images), .mp4 (videos), .mp3 (audio), and .zip (compressed folders).
Why can’t the file extension option be toggled in File Explorer?
If the option appears locked or unavailable, it may be controlled by a group policy from an employer or institution. This is common on work computers. The setting can sometimes be changed through the Registry Editor if admin access is available, though checking with an IT administrator first is advisable.
Do file extensions matter for security in Windows 11?
Absolutely. Knowing the actual extension of a file is one of the easiest ways to stay safer online. Attackers often disguise malicious files with misleading icons – for example, making an .exe file look like a .pdf. With extensions visible, it becomes much easier to spot these tricks before opening something dangerous.
Does showing file extensions slow down Windows 11?
No, there is no performance impact. Displaying file extensions is a display preference only. It has zero effect on system speed, File Explorer performance, or resource usage.
Can file extensions be hidden again after enabling them?
Yes. Simply follow the same steps and reverse the change – either uncheck ‘File name extensions’ in the View menu, re-check ‘Hide extensions for known file types’ in Folder Options, or set the HideFileExt registry value back to 1. The setting can be toggled on and off freely at any time.