Adjusting display scaling settings in Windows 11 helps make text, apps, and other items easier to read on your screen. The default scaling might feel too small or too large depending on your monitor size and resolution. This guide walks through the exact steps to change these settings and get your display looking just right.
Why Display Scaling Matters
Modern monitors come in various sizes with different resolutions. A 4K monitor might make everything look tiny without proper scaling, while a lower resolution display might need adjustments for clarity. Windows 11 handles this through percentage-based scaling that resizes interface elements while maintaining sharpness.
Most people find that the recommended scaling value works well, but personal preference and vision needs often require customization. The scaling affects everything from application windows to system text and icons.
How to Adjust Display Scaling Settings
The process takes just a few clicks through the Settings app. Here’s the straightforward method:
- Right-click anywhere on your desktop and select ‘Display settings’ from the context menu

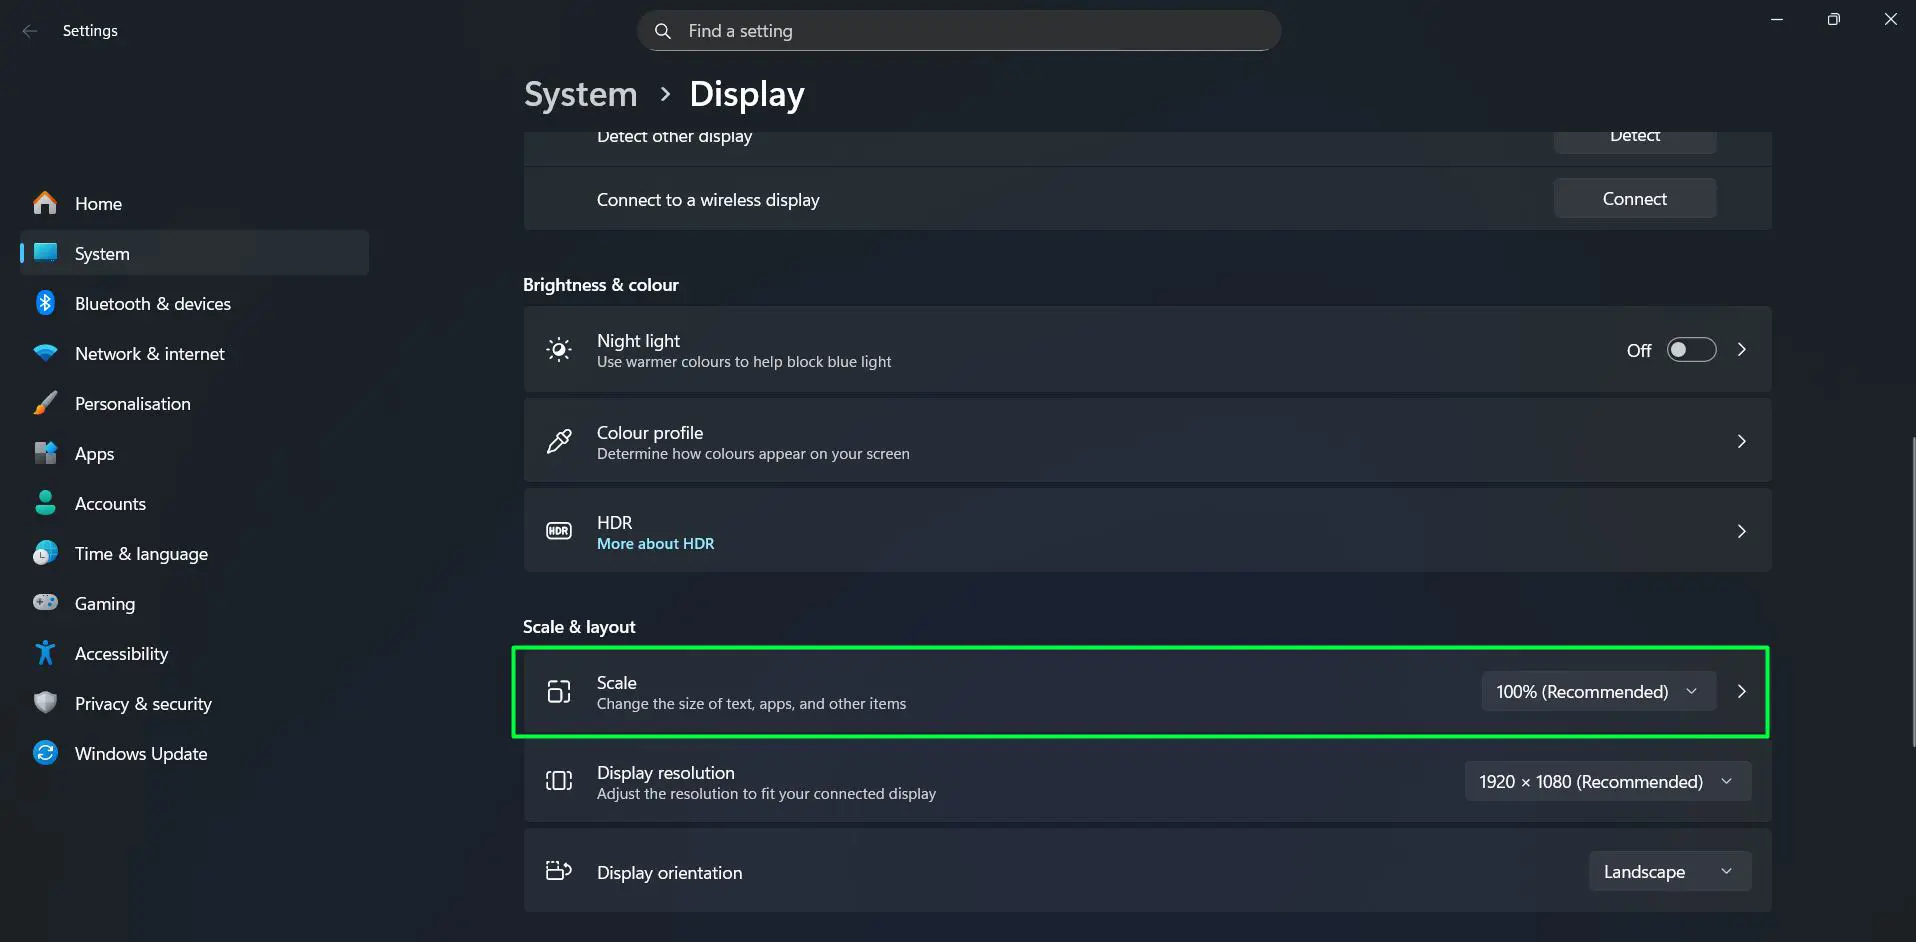
- Locate the ‘Scale’ section under ‘Scale & layout’
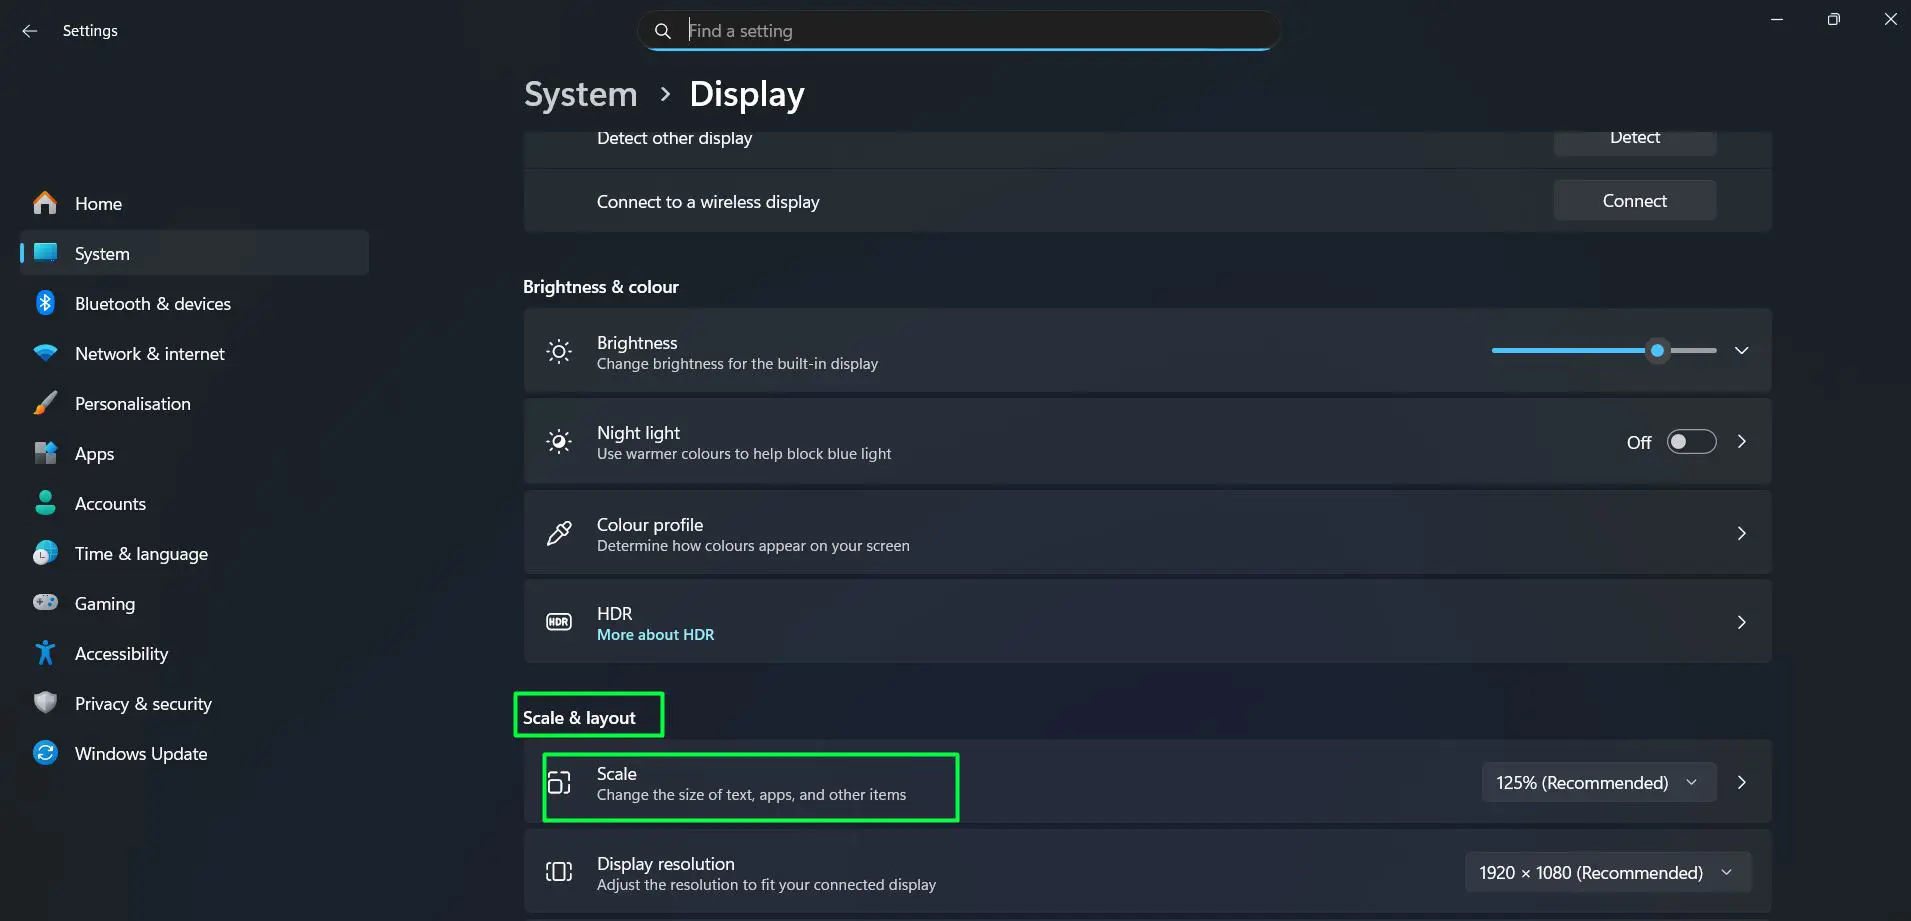
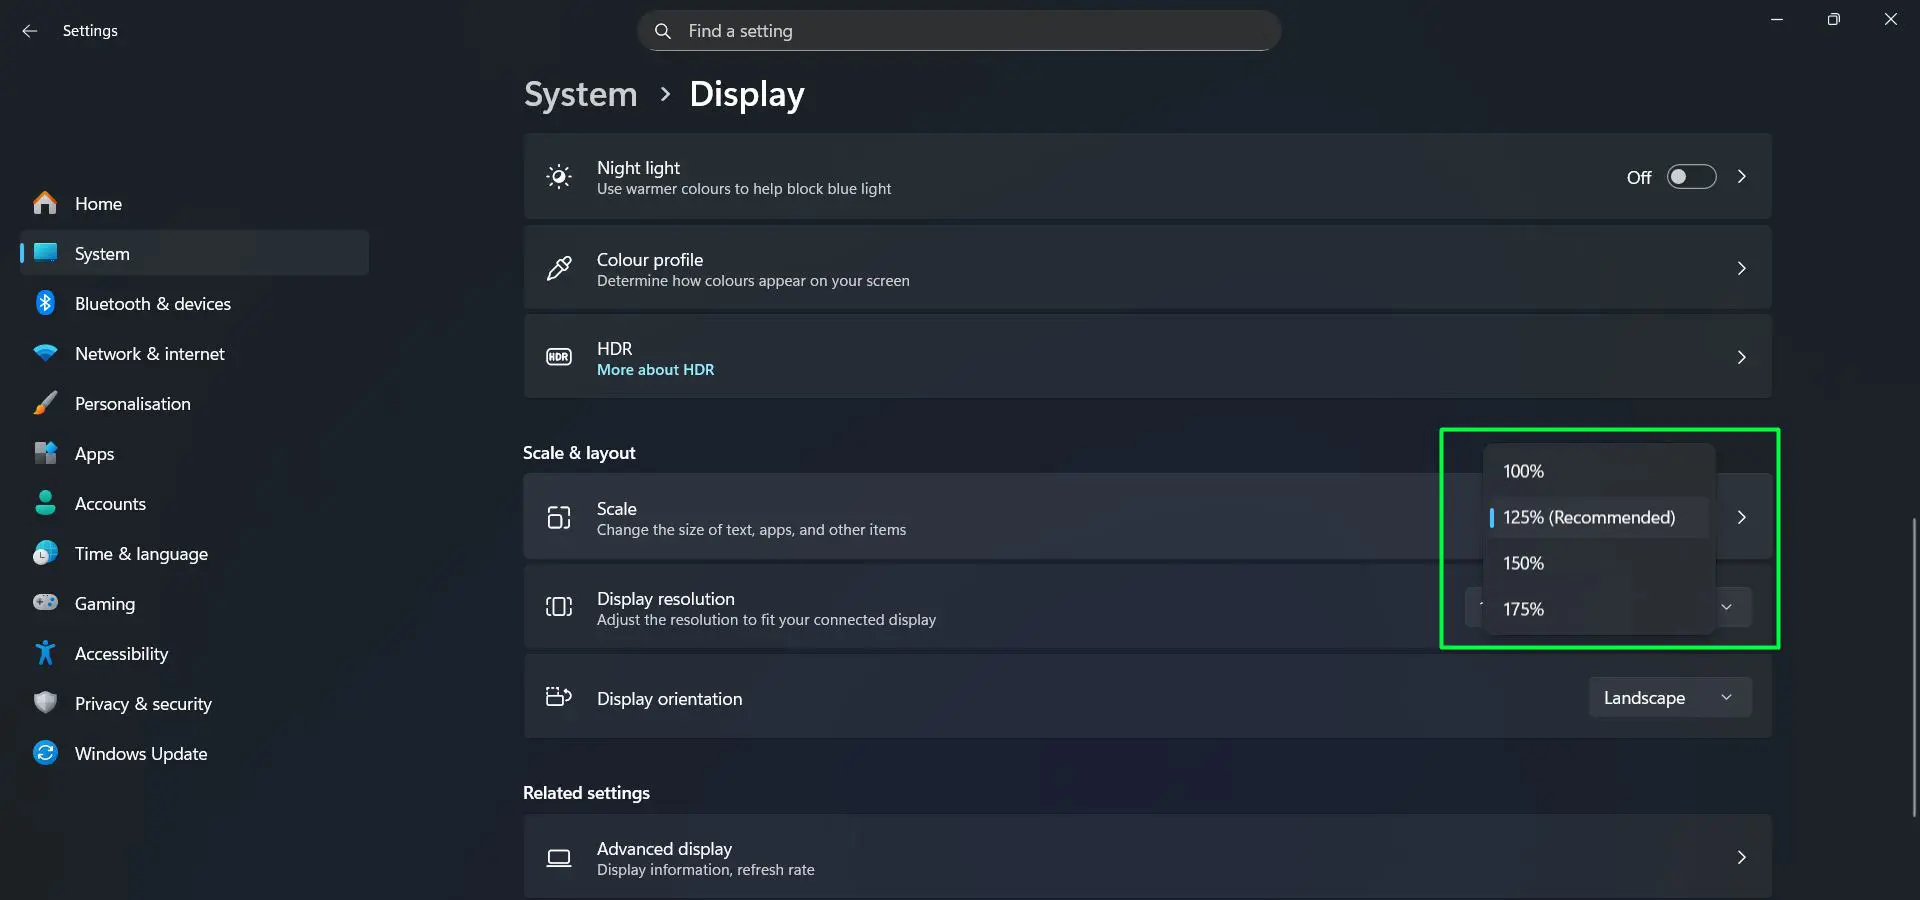
- Click the dropdown menu next to ‘Scale’ (it shows a percentage value)
- Select your preferred scaling percentage from the available options (typically 100%, 125%, 150%, or 175%)
- Windows applies the change immediately to most applications
Watch this: Adjusting Display Scaling Settings on Windows 11 – Easy Guide
Some older applications might require a sign-out or restart to display correctly with the new scaling. The system usually notifies about this if needed.
Understanding Scaling Percentages
Each percentage represents how much larger elements appear compared to the base 100% size. Here’s what to expect:
At 100% scaling, everything displays at its native size. This works best for smaller monitors or those who prefer maximum screen space. The 125% option provides a slight boost in readability without sacrificing too much workspace. Moving to 150% makes a noticeable difference, especially helpful for larger monitors or users who sit farther from the screen.
Higher percentages like 175% significantly increase element sizes. These settings suit users with vision needs or those using very high-resolution displays where 100% scaling makes text uncomfortably small.
Adjusting Scaling for Multiple Monitors
Systems with multiple displays can use different scaling for each monitor. This flexibility helps when mixing monitor sizes or resolutions:
- Open Display settings
- Scroll to the top where monitor representations appear
- Click on the monitor you want to adjust
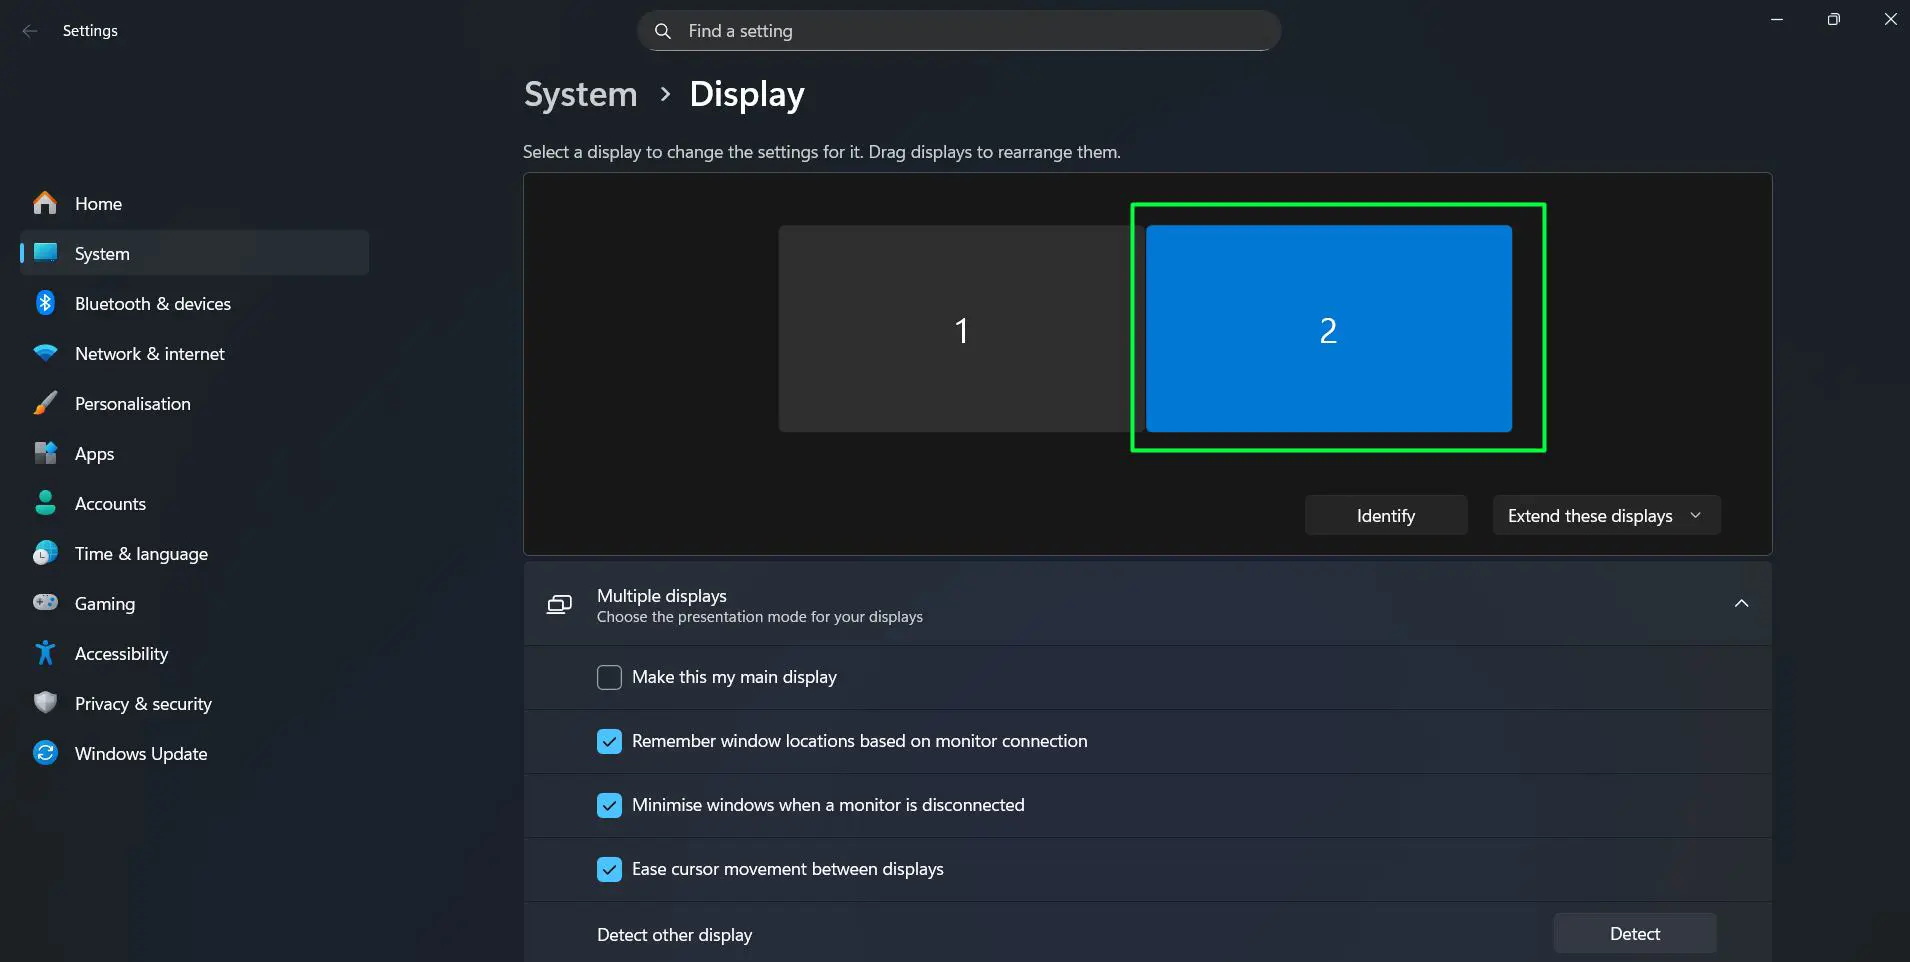
- Change the ‘Scale’ setting for that specific display
- Repeat for additional monitors as needed
The key is to set each monitor independently. A 27-inch 4K monitor might need 150% scaling while a 24-inch 1080p display works better at 100%. Windows remembers these settings for each connected display.
What Happens After Changing Scaling
Most modern applications adjust instantly when scaling changes. The windows might resize slightly, and text becomes larger or smaller based on the new percentage. System elements like the taskbar, Start menu, and File Explorer update immediately.
Legacy applications sometimes appear blurry after scaling changes. This happens because they don’t support modern scaling methods. Windows includes compatibility settings to help, but results vary by application.
Browser content doesn’t change with display scaling since browsers have separate zoom controls. The browser interface (tabs, menus, buttons) respects the system scaling, but webpage content remains at its set zoom level.
Tips for Optimal Display Scaling
Getting the right scaling involves more than just picking a percentage. These practical tips help achieve the best visual experience:
Start with the recommended setting that Windows suggests for your display. This value considers your screen size and resolution to provide balanced clarity and usability. Test it for a day or two before making changes, as eyes often need time to adjust.
When text feels slightly small but the overall interface size looks good, use the text-only scaling in Accessibility settings instead of bumping up display scaling. This approach maintains proper spacing and layout while making text more readable.
For dual monitor setups with different screen sizes, don’t hesitate to use different scaling values. A larger 4K monitor and smaller 1080p display often need different percentages to look consistent in actual size, even though the numbers differ.
Avoid changing scaling too frequently. Applications remember window sizes based on scaling, and constant changes can cause windows to open at awkward sizes. Pick a setting and stick with it for consistent behavior.
Pro-Tip: After changing display scaling, check commonly used applications to ensure they render correctly. Some apps need to be closed and reopened to display properly at the new scaling. Legacy software might look blurry, but this usually improves after a full system restart rather than just signing out and back in.
When to Choose Higher Scaling
Higher percentages suit specific situations beyond just preference. Large monitors placed at typical desk distances often benefit from 150% or higher scaling because physical size doesn’t always match comfortable viewing size.
Users who experience eye strain with smaller text should prioritize comfort over maximizing screen space. The 150% to 175% range often hits the sweet spot for readability without making interfaces feel cramped.
High-resolution displays like 4K screens almost always need scaling above 100%. Running a 4K monitor at native 100% scaling makes everything tiny and defeats the purpose of having extra pixels.
When to Choose Lower Scaling
Some workflows benefit from keeping scaling at 100% or 125%. Photo editing, video production, and graphic design work often need maximum screen real estate to see projects clearly.
Smaller monitors in the 21-24 inch range at 1080p resolution typically work well at 100% scaling. Going higher on these displays can make windows and dialog boxes feel oversized relative to available space.
Users with excellent vision who sit close to their monitors might prefer lower scaling to fit more content on screen simultaneously. This approach maximizes productivity for multitasking scenarios.
Changing Text Size Separately
Windows 11 offers text-only scaling without affecting other interface elements:
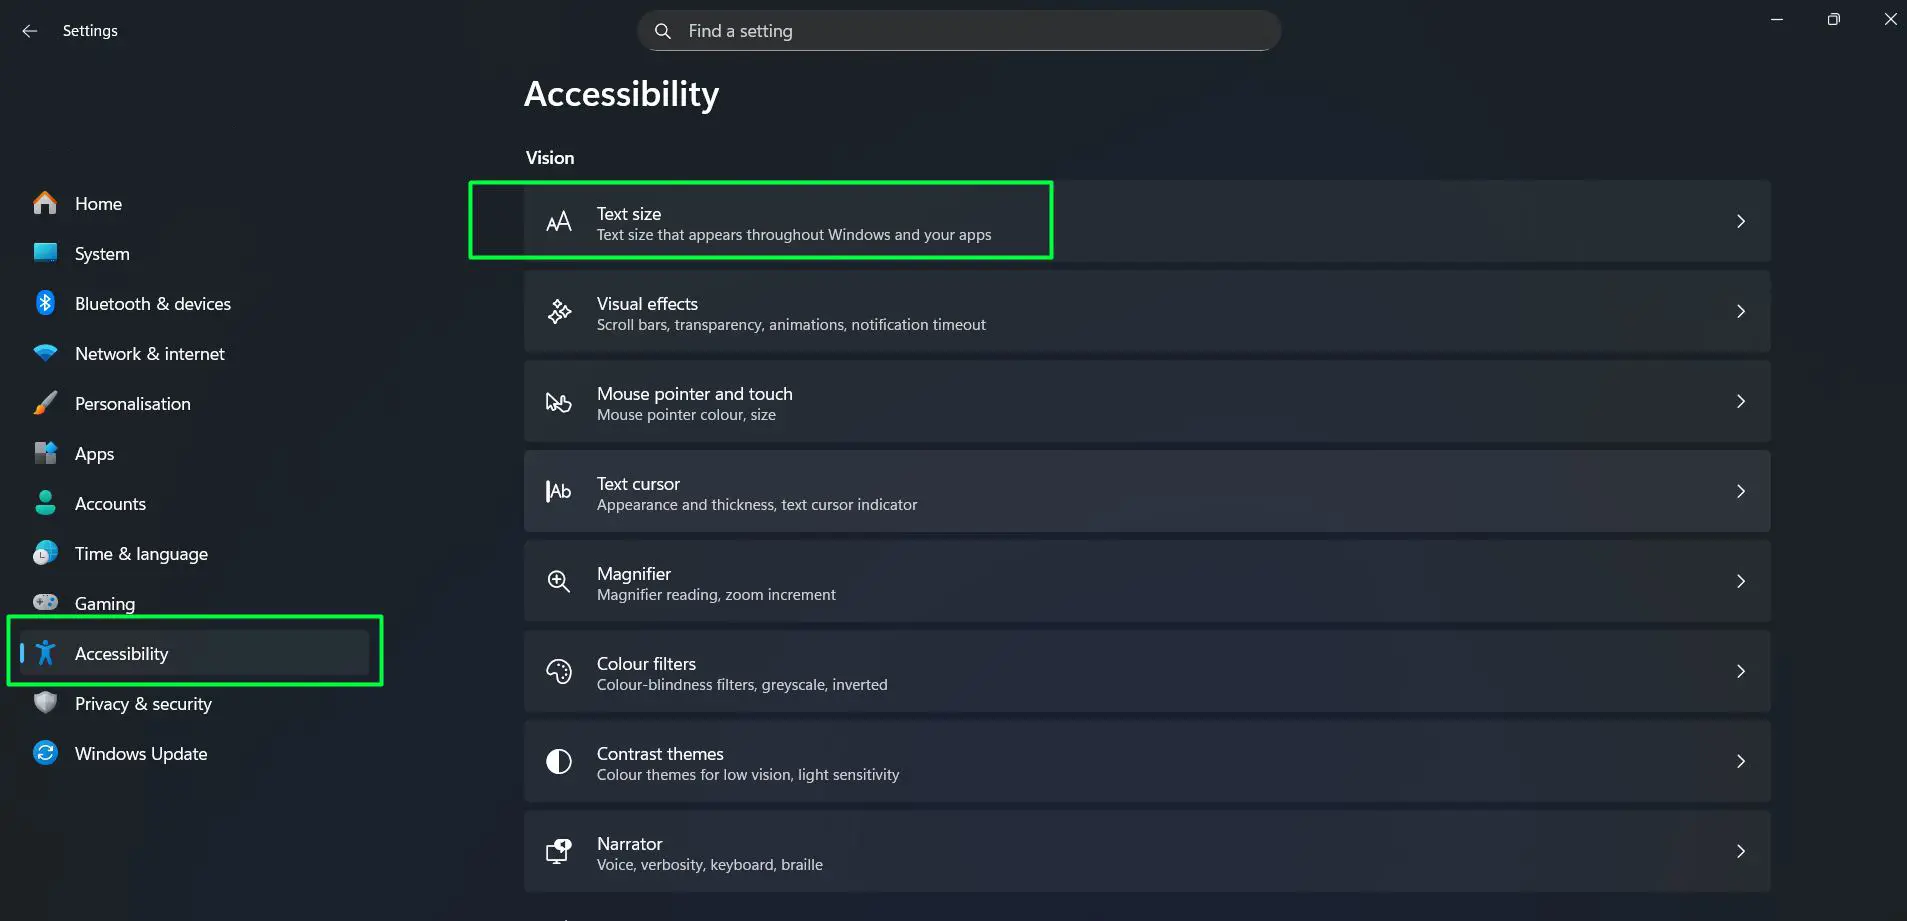
- Go to Settings and select ‘Accessibility’ from the sidebar
- Click on ‘Text size’ under the Vision section
- Drag the slider to adjust text size (100% to 225%)
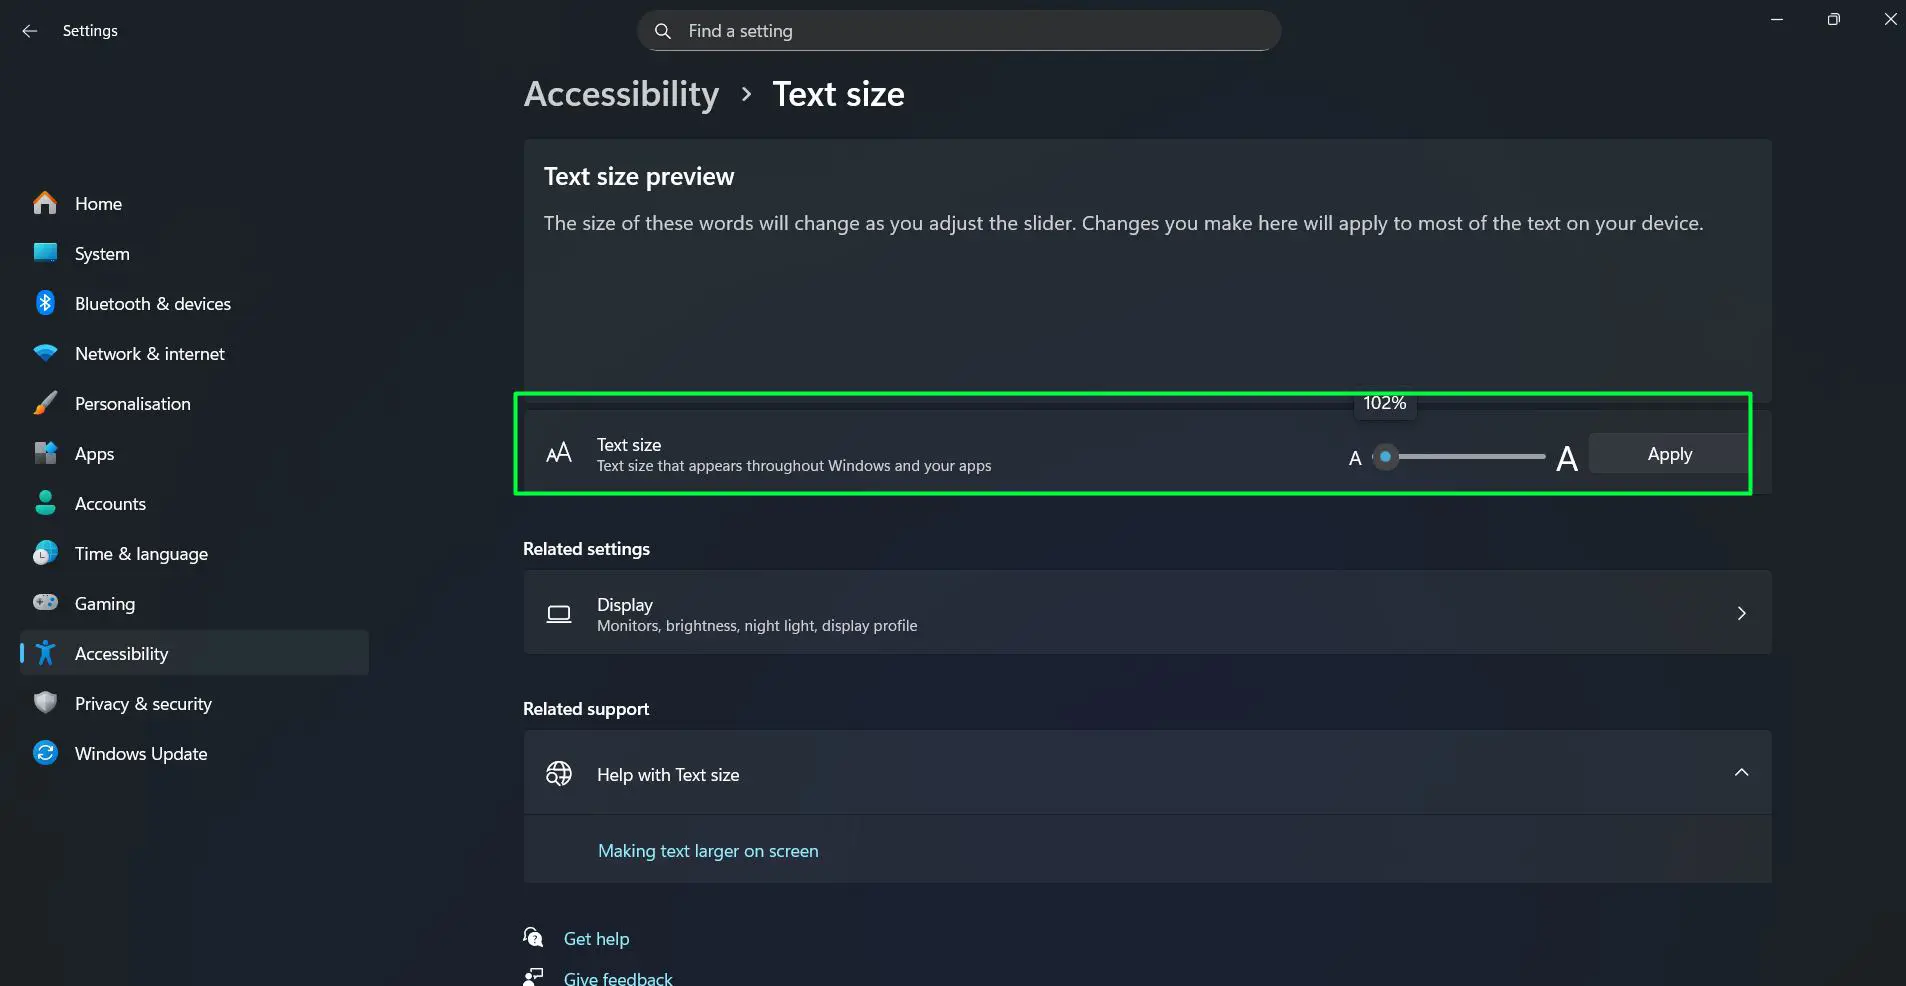
- Click ‘Apply’ to confirm the change
This method enlarges text throughout Windows and many applications without changing icon sizes, window dimensions, or other visual elements. It’s particularly useful when display scaling looks good overall but text feels too small.
Pro-Tip: Text-only scaling from Accessibility settings works independently from display scaling. For the clearest results, adjust display scaling first to get the overall interface size right, then use text size adjustment only if needed. Combining high display scaling with maxed-out text scaling can make interfaces cramped and difficult to use.
Resolution vs. Scaling
Display resolution and scaling work together but serve different purposes. Resolution determines how many pixels your screen uses, while scaling changes how large things appear at that resolution.
Lowering resolution makes everything bigger but reduces sharpness. Keeping native resolution with increased scaling maintains clarity while improving readability. Most people find that the recommended resolution with adjusted scaling provides better results than changing resolution.
For monitors, native resolution typically delivers the sharpest image. The recommended scaling percentage at native resolution usually offers the best visual experience.
Quick Access Method
A faster way to reach display settings exists for frequent adjustments:
- Click the Start button and select ‘Settings’ (or press Windows key + I)

- Click ‘System’ in the left sidebar (usually selected by default)
- Select ‘Display’ from the options

- Access all scaling options directly
This keyboard shortcut saves time compared to navigating through desktop menus. The Settings app opens directly, putting display options just two clicks away.
Related Windows Customization
Display scaling is just one aspect of personalizing Windows 11. For more customization options, explore additional Windows guides covering various system settings. Understanding other display and system configurations helps create a comfortable computing environment.
Hardware choices also impact display quality. Learn more about hardware considerations when setting up monitors and display configurations.
Frequently Asked Questions
Does changing display scaling affect performance?
Display scaling has minimal impact on system performance. Modern Windows 11 handles scaling efficiently, and most users won’t notice any difference in speed or responsiveness. The main effect is visual, not computational.
Why do some apps look blurry after changing scaling?
Blurry applications usually don’t support modern scaling methods. These older programs use fixed pixel dimensions that Windows stretches to match the scaling percentage, causing blur. Right-clicking the app, selecting Properties, going to the Compatibility tab, and adjusting high DPI settings sometimes helps.
Can different user accounts have different scaling settings?
No, display scaling applies system-wide to all user accounts on the computer. However, each user can change accessibility settings like text size independently, which affects only their account.
What’s the best scaling percentage for a 4K monitor?
Most 4K monitors work best at 150% scaling, though this varies by screen size. A 27-inch 4K display typically suits 150%, while a 32-inch 4K monitor might work well at 125%. The recommended value Windows suggests usually provides a good starting point.
Will scaling reset after Windows updates?
Display scaling settings persist through most Windows updates. Major feature updates occasionally reset some display settings, but scaling typically remains unchanged. Checking settings after significant updates ensures everything stays configured correctly.
How does scaling affect screenshots?
Screenshots capture the actual pixel resolution regardless of scaling settings. A 1920×1080 display produces 1920×1080 screenshots even at 150% scaling. The scaling only affects how content appears on screen, not the underlying pixel data captured in screenshots.