Battery draining too fast on a Windows 11 laptop is one of the most common complaints from everyday users. The good news is that Windows 11 comes packed with built-in tools and settings that make it straightforward to squeeze more hours out of every charge. This guide covers exactly how to extend battery life effectively in Windows 11 – no complicated steps, just practical changes that make a real difference.
Key Takeaways
- Enable Energy Saver mode to automatically limit background activity and reduce power draw
- Lowering screen brightness is one of the fastest ways to gain extra battery time
- Adjusting power and sleep settings reduces idle power consumption significantly
- Disabling background apps and startup programs keeps unnecessary processes from draining charge
- Using the Energy Recommendations tool in Windows 11 Settings provides a personalized checklist
- Managing GPU power settings helps especially during light tasks like browsing or document editing
Step-by-Step Guide to Extend Battery Life in Windows 11
Step 1: Enable Energy Saver Mode
Energy Saver is Windows 11’s built-in feature designed to reduce power consumption when the battery drops below a set threshold. It limits background activity, syncing, and push notifications automatically.
- Step 1: Open Settings by pressing Windows + I
- Step 2: Go to System then select Power and battery
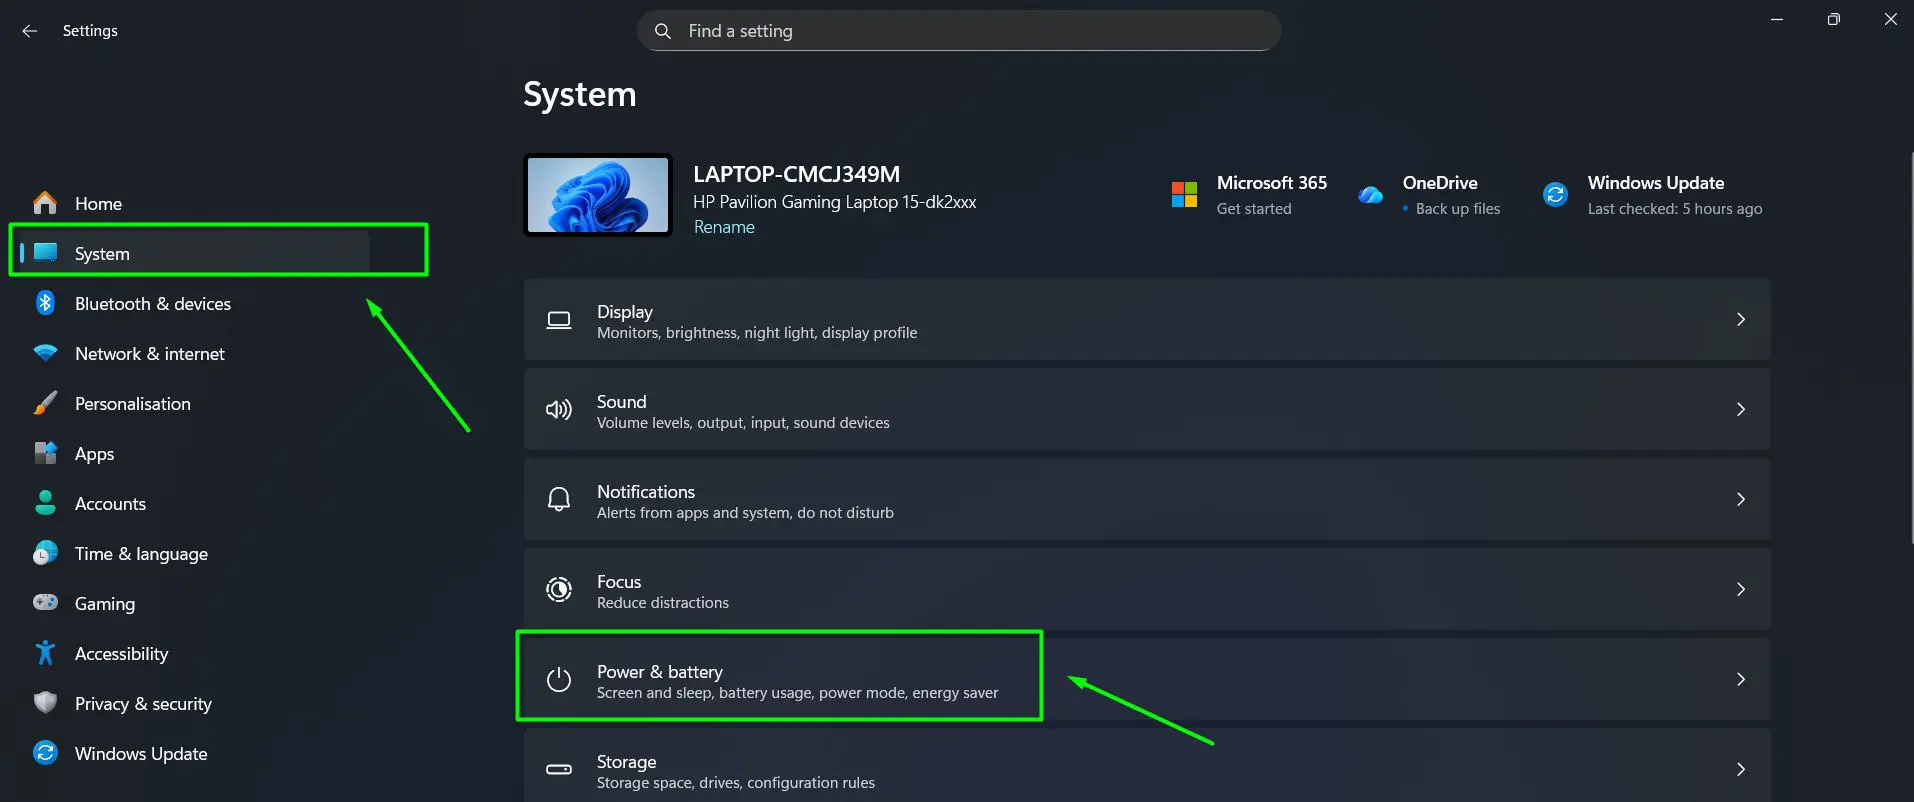
- Step 3: Scroll down to the Energy saver section and click to expand it
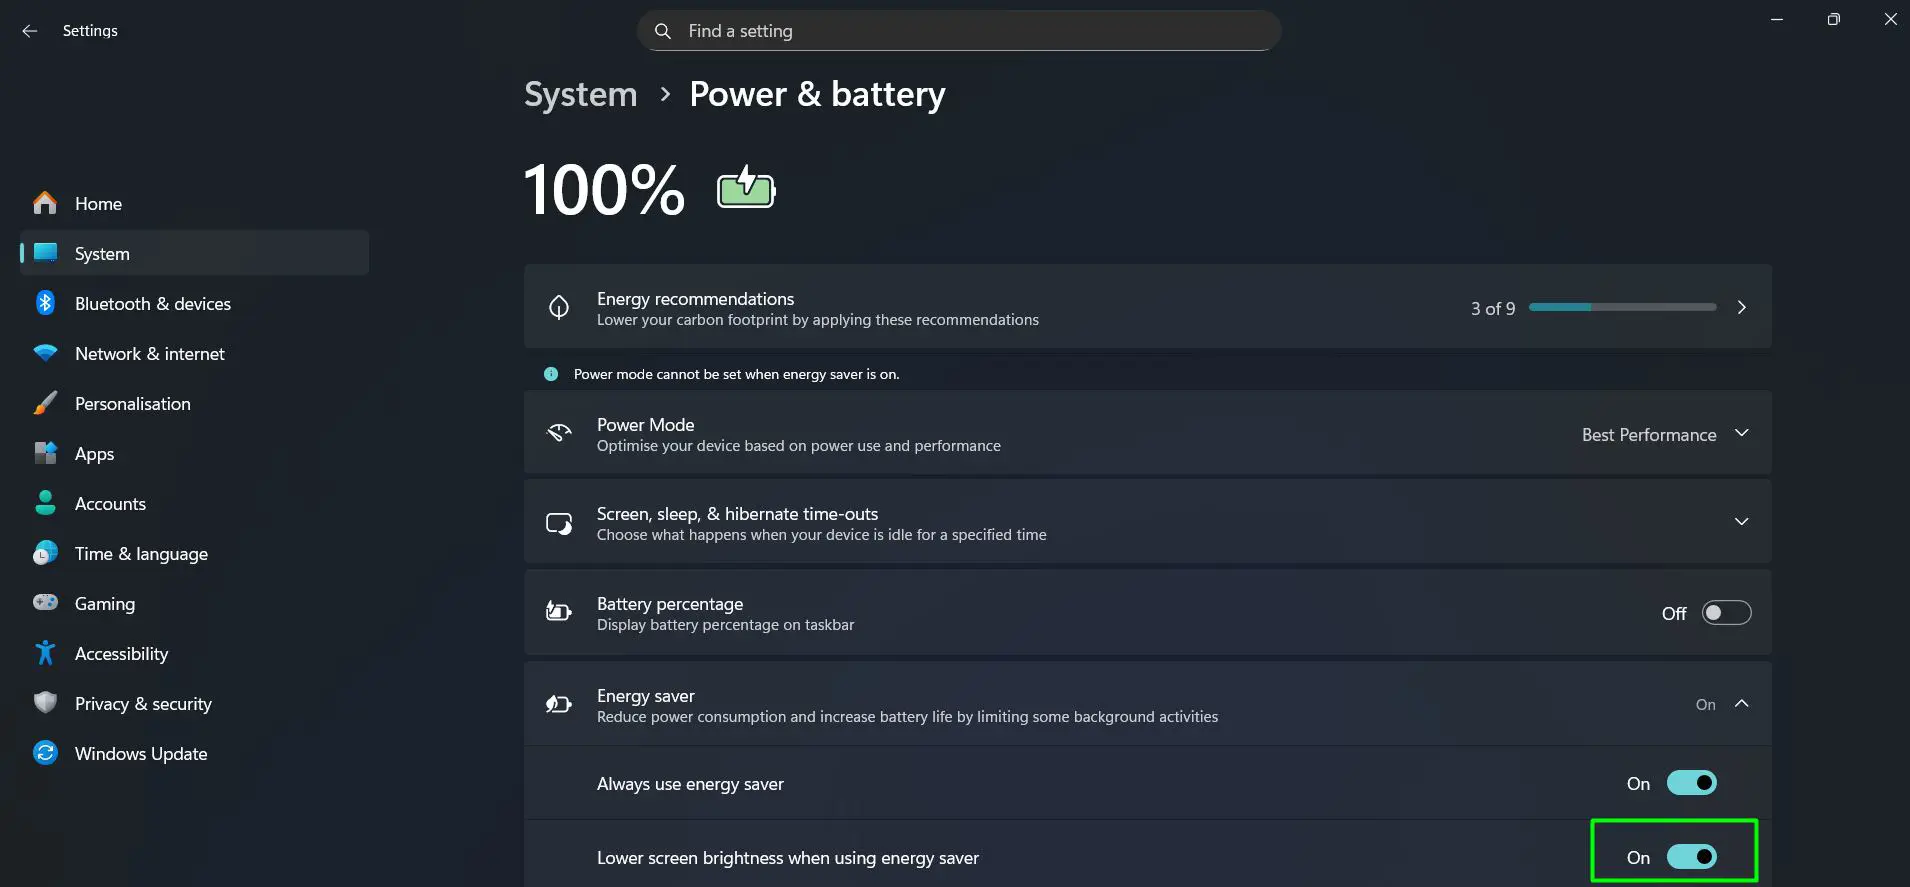
- Step 4: Toggle Always use energy saver to On to enable it right away, or use the dropdown under Turn energy saver on automatically when battery level is at to set a threshold – 30% is the default and works well for most users
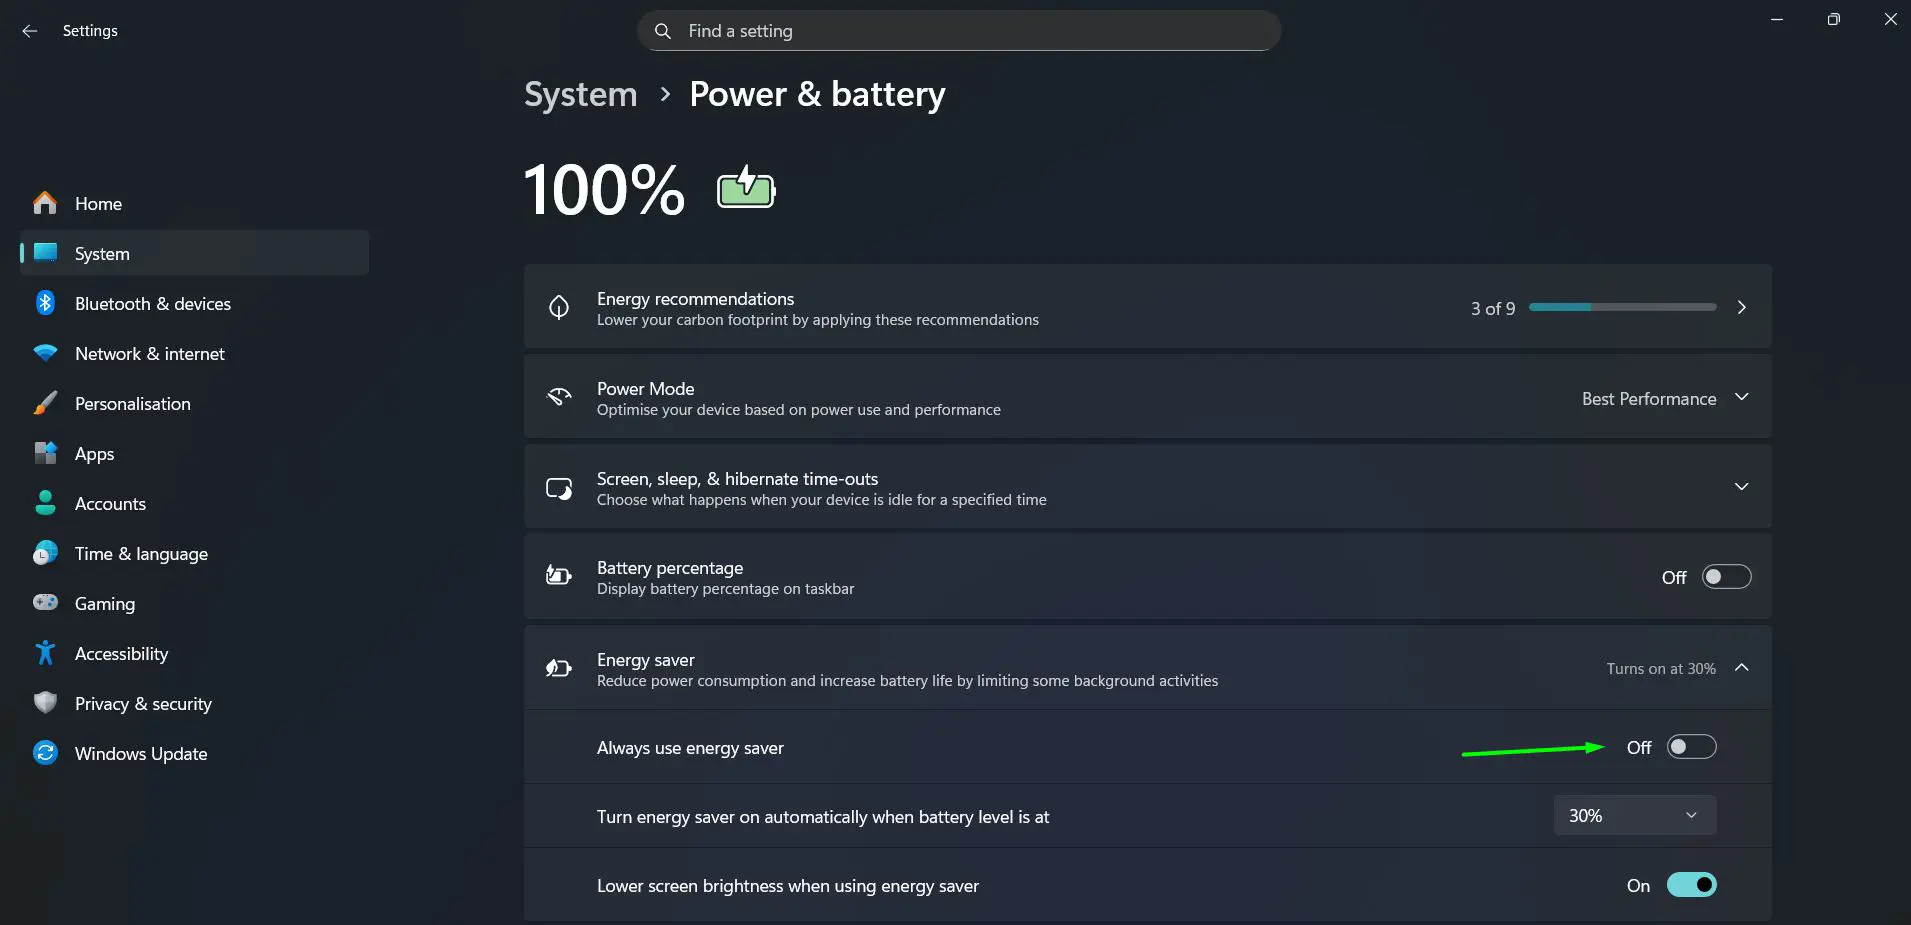
- Step 5: Make sure Lower screen brightness when using energy saver is toggled On for extra savings
Most people find that keeping the automatic threshold at 30% gives a solid buffer without making the laptop feel sluggish too early. This can also be quickly toggled from Quick Settings (Windows + A) by clicking the Energy saver button.
Step 2: Lower Screen Brightness
The display is one of the biggest consumers of battery power. Reducing brightness even slightly – from 100% down to 60-70% – can noticeably extend battery life, especially in indoor environments.
- Step 1: Click the Wi-Fi, sound, or battery icon area in the bottom-right of the taskbar to open Quick Settings, or press Windows + A
- Step 2: Drag the brightness slider (sun icon) to a lower level – around 50-70% works well indoors

- Step 3: Alternatively, go to Settings > System > Display and adjust the brightness slider there for more precise control
For more control over display settings, check out this guide on adjusting display brightness settings in Windows to fine-tune how the screen behaves on battery versus plugged in.
Pro-Tip: Enable Adaptive brightness in Display settings if the laptop has an ambient light sensor. This automatically adjusts brightness based on surrounding light, so there’s no need to keep adjusting it manually throughout the day.
Step 3: Adjust Power and Sleep Settings
Windows 11 lets users fine-tune how quickly the screen turns off and when the laptop goes to sleep. Keeping a laptop awake when it’s just sitting idle wastes a surprising amount of battery.
- Step 1: Open Settings > System > Power and battery
- Step 2: Click Screen, sleep, and hibernate time-outs to expand it
- Step 3: Under the On battery section, set Turn my screen off after to 2 or 3 minutes
- Step 4: Set Make my device sleep after to 5 or 10 minutes on battery

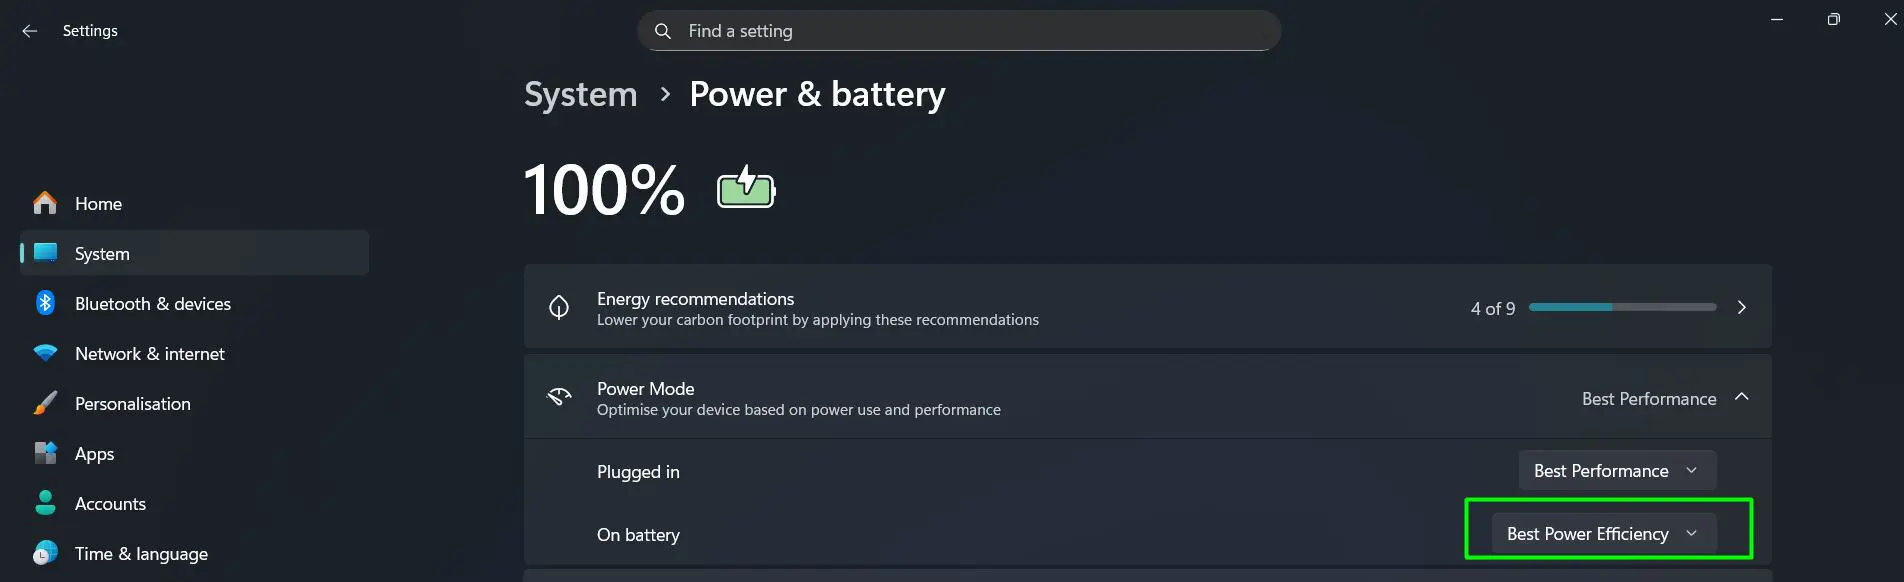
- Step 5: Scroll up to Power Mode, click the On battery dropdown, and change it from Best Performance to Best Power Efficiency
This guide on changing power and sleep settings in Windows walks through all the available options in detail. Also, for users dealing with the screen staying on longer than expected, reviewing screen timeout settings in Windows is worth the extra few minutes.
Step 4: Disable Background Apps
Many apps continue running in the background even when they’re not actively open. These processes use CPU cycles and network resources that quietly chip away at battery life.
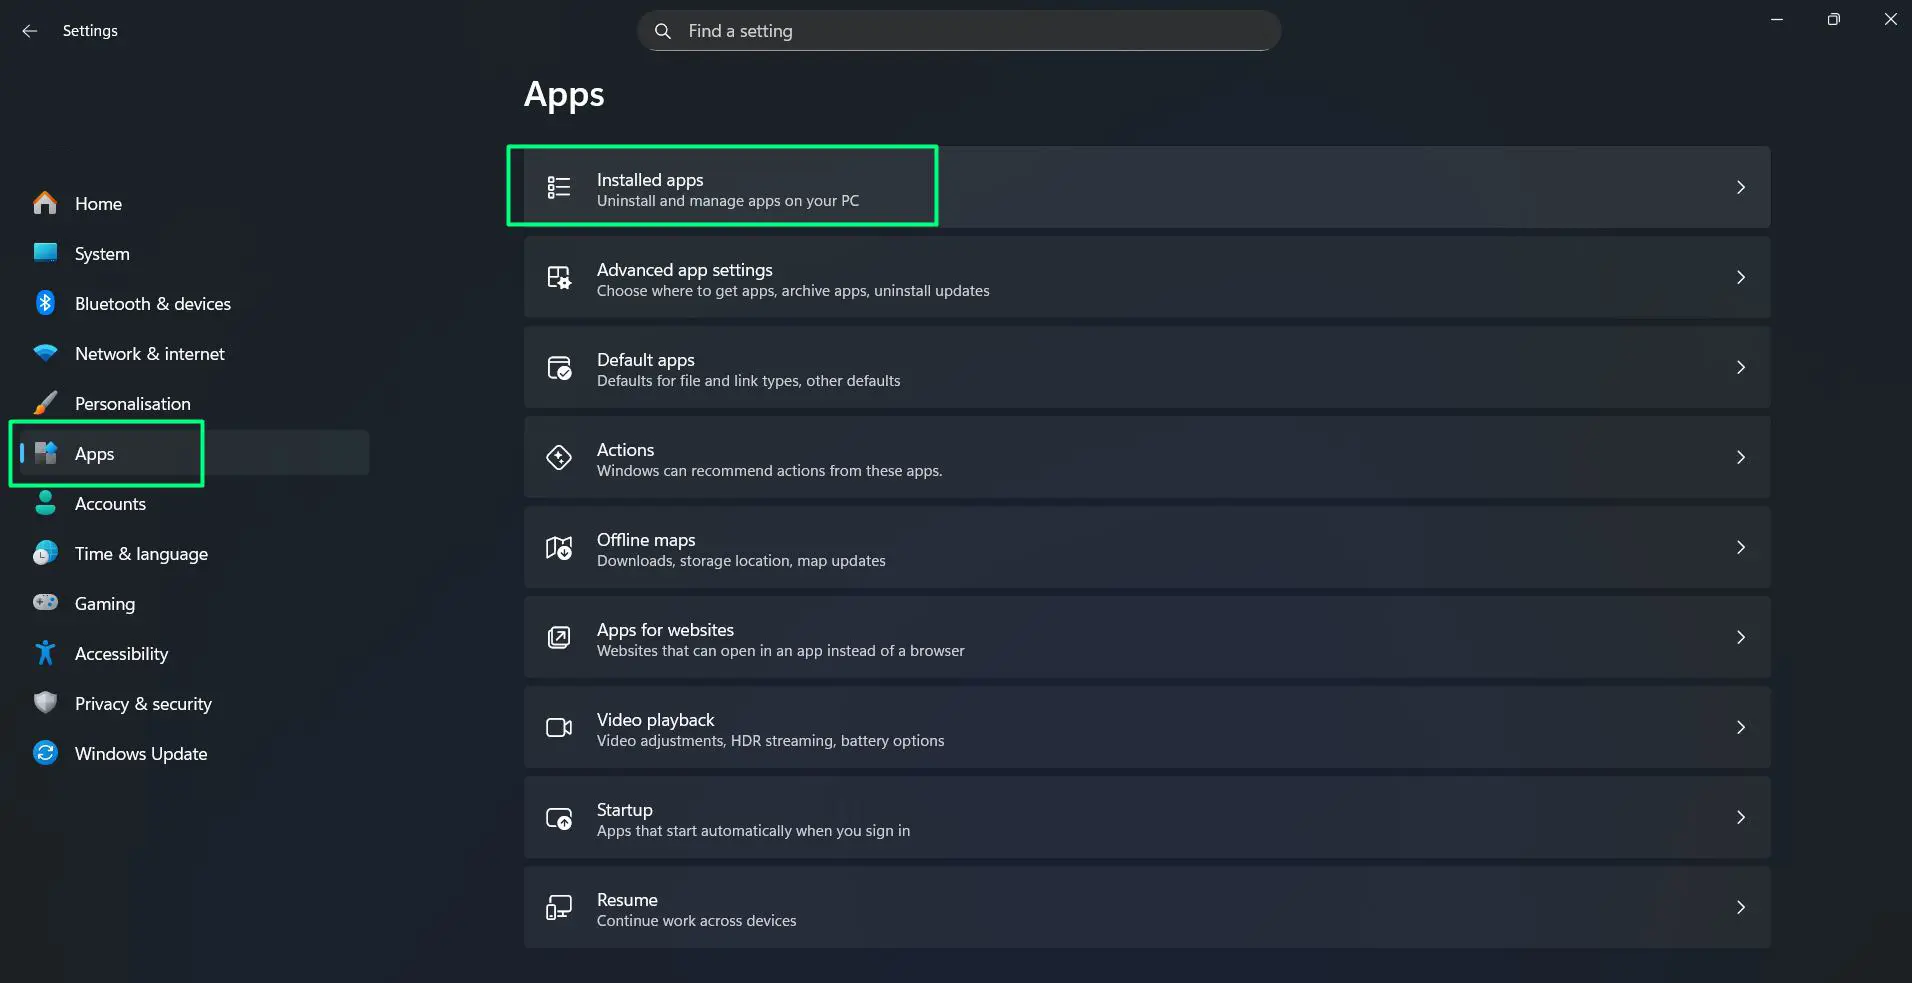
- Step 1: Open Settings > Apps > Installed apps
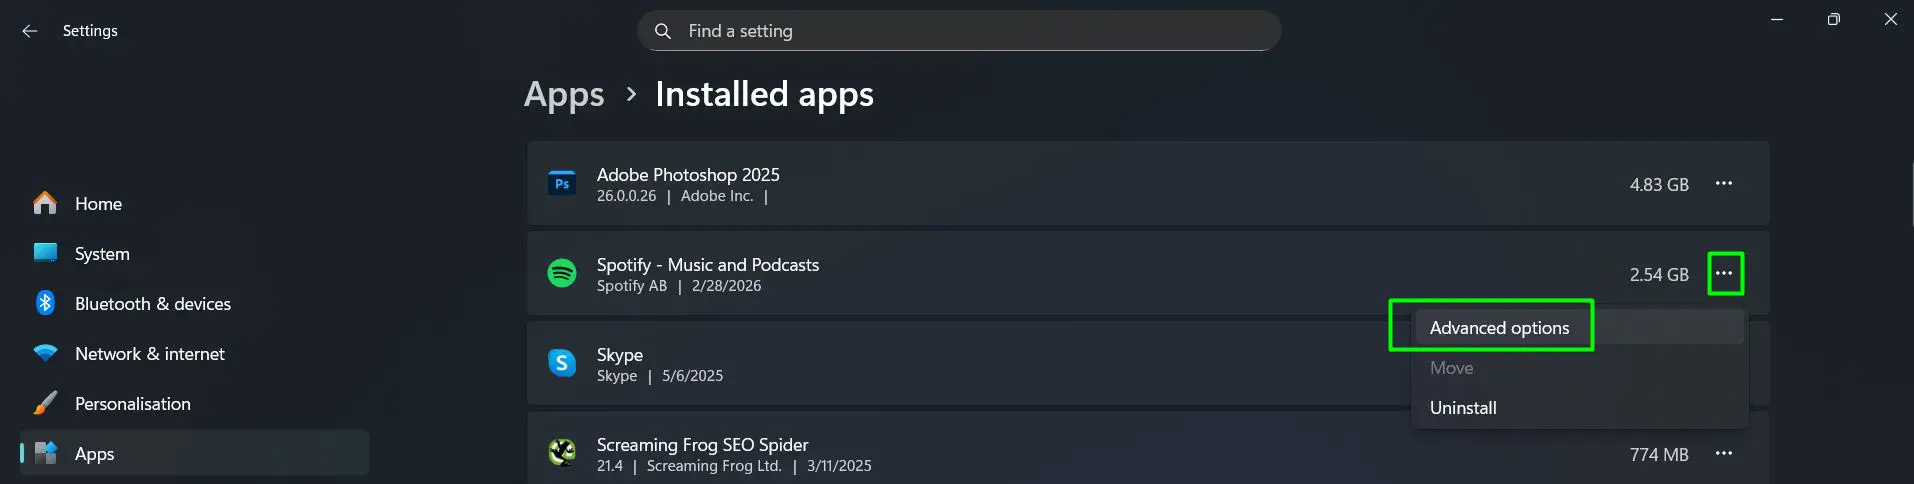
- Step 2: Click the three-dot menu next to an app and select Advanced options
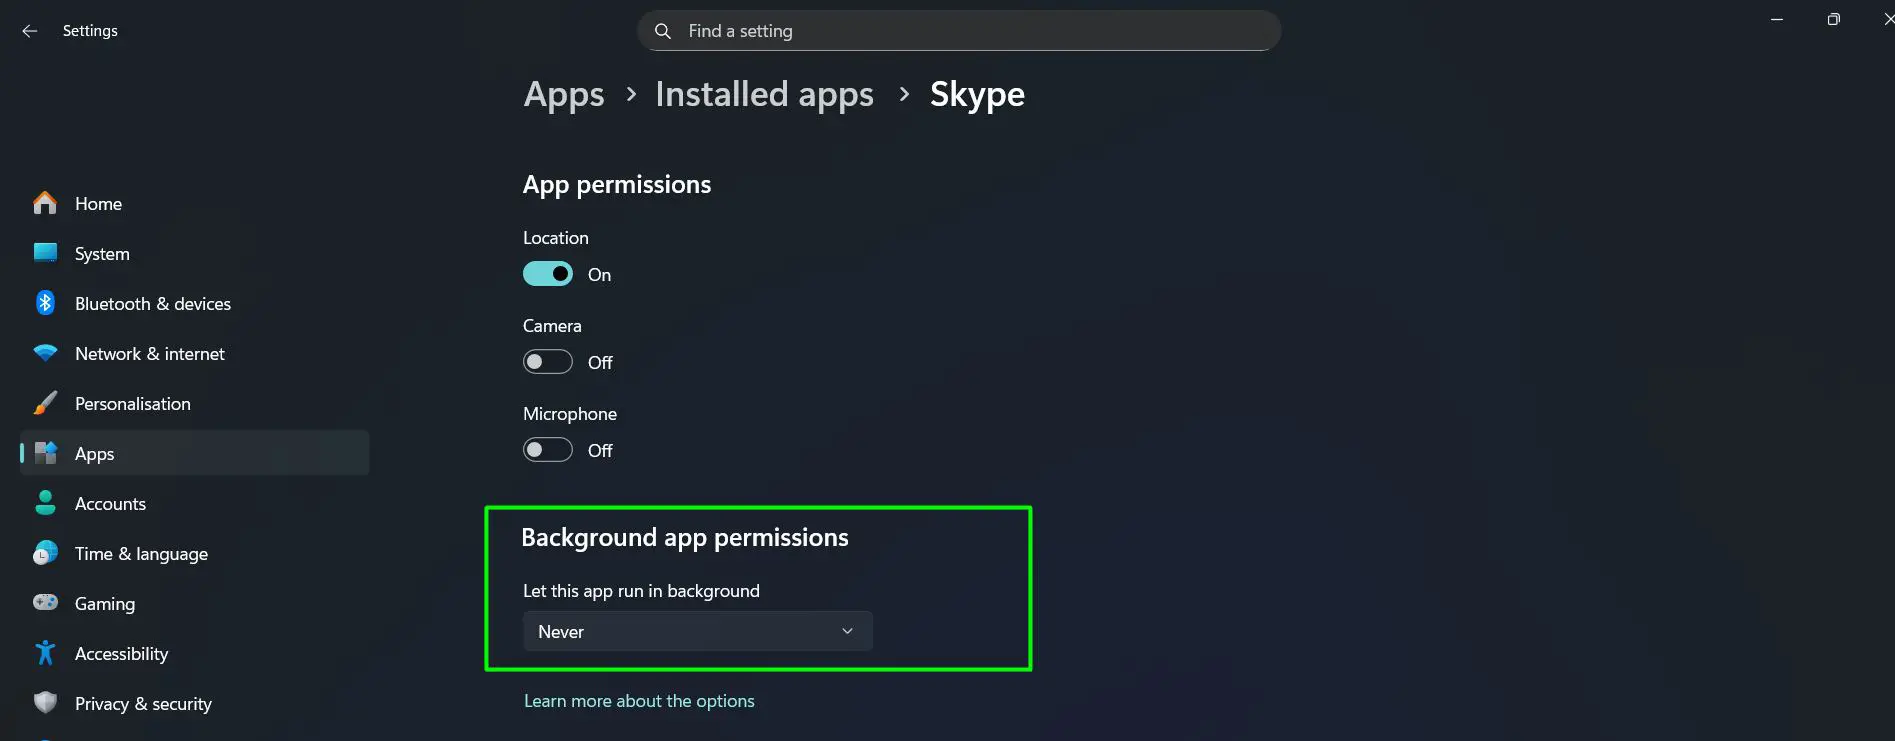
- Step 3: Scroll down to Background app permissions
- Step 4: Click the dropdown under Let this app run in background – options shown are Always, Power optimised (recommended), and Never
- Step 5: Select Never for apps that don’t need background access, or keep Power optimised as a middle-ground option
- Step 6: Repeat for other installed apps as needed
Apps like news readers, weather widgets, and social media clients are common culprits. Disabling them from running in the background reduces unnecessary drain without affecting how the apps work when opened normally.
Step 5: Manage Startup Programs
Startup programs launch automatically every time the laptop boots up. Even after they’re done loading, some continue running processes in the background. Trimming this list directly reduces the load on the system from the moment it starts.
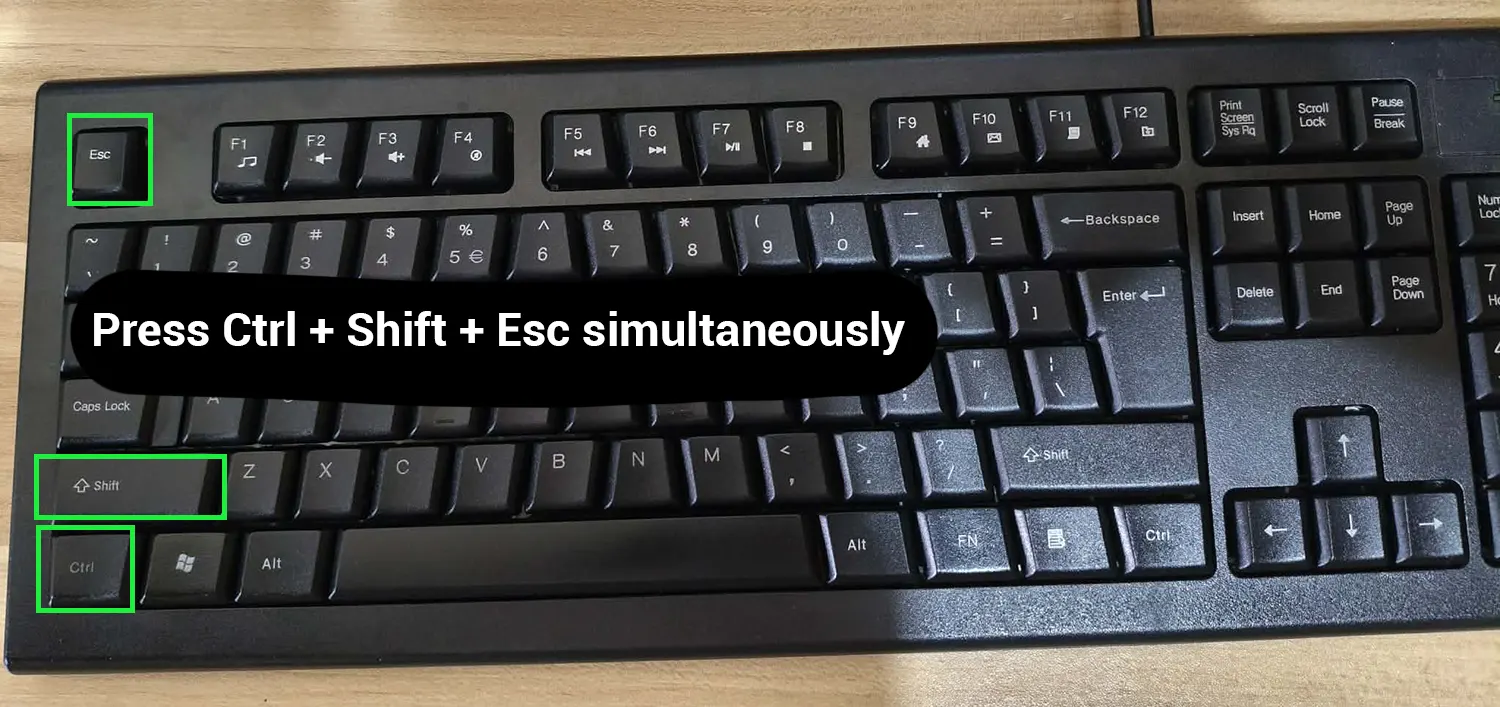
- Step 1: Press Ctrl + Shift + Esc to open Task Manager
- Step 2: Click Startup apps from the left sidebar
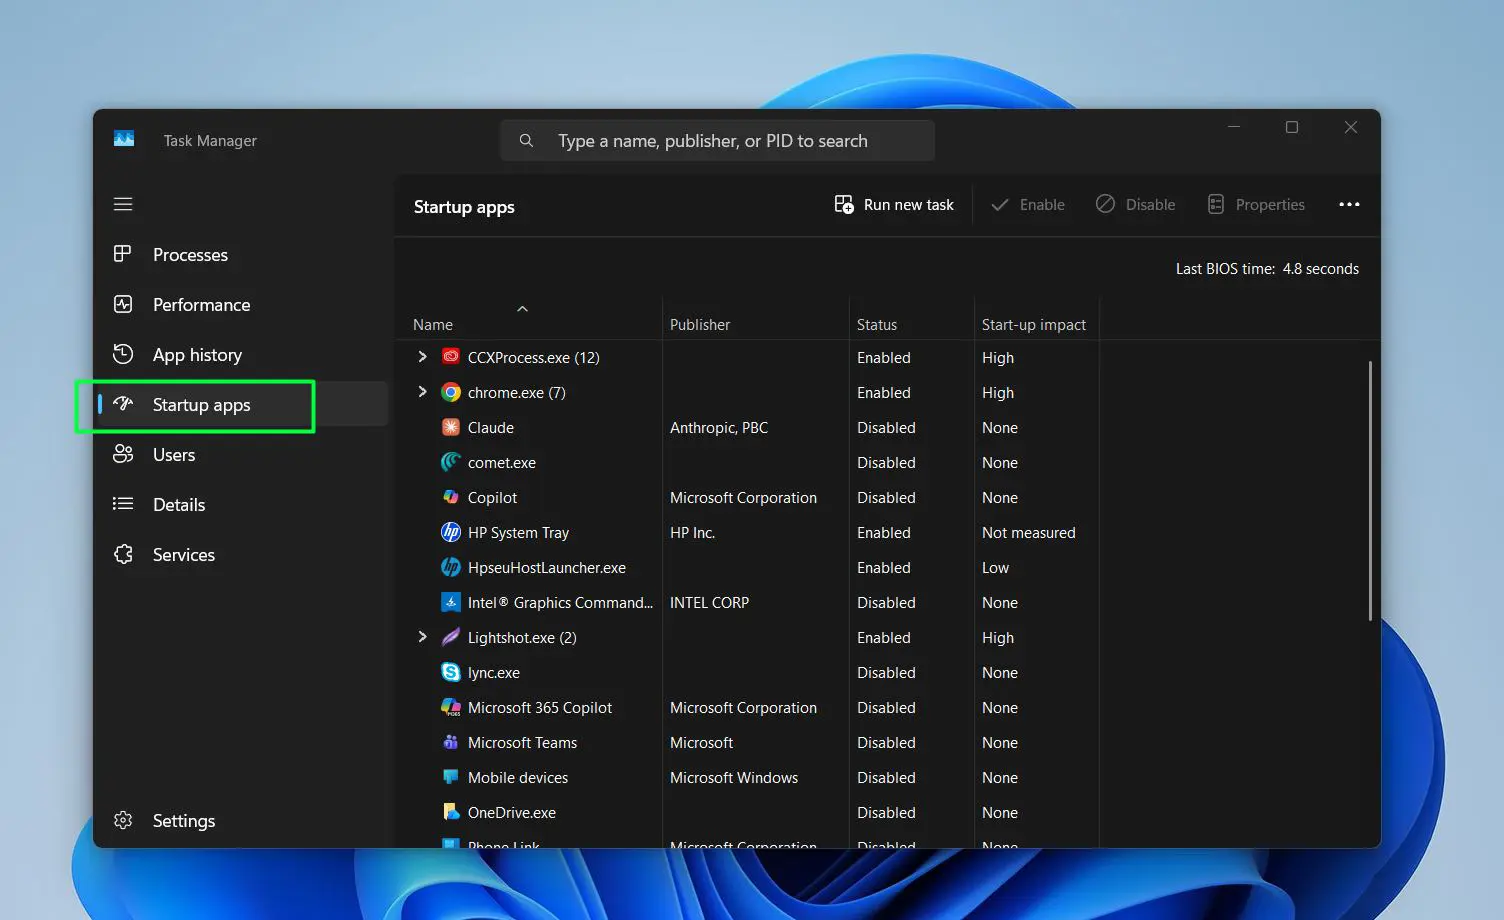
- Step 3: Review the list – look at the Status column (Enabled/Disabled) and Start-up impact column
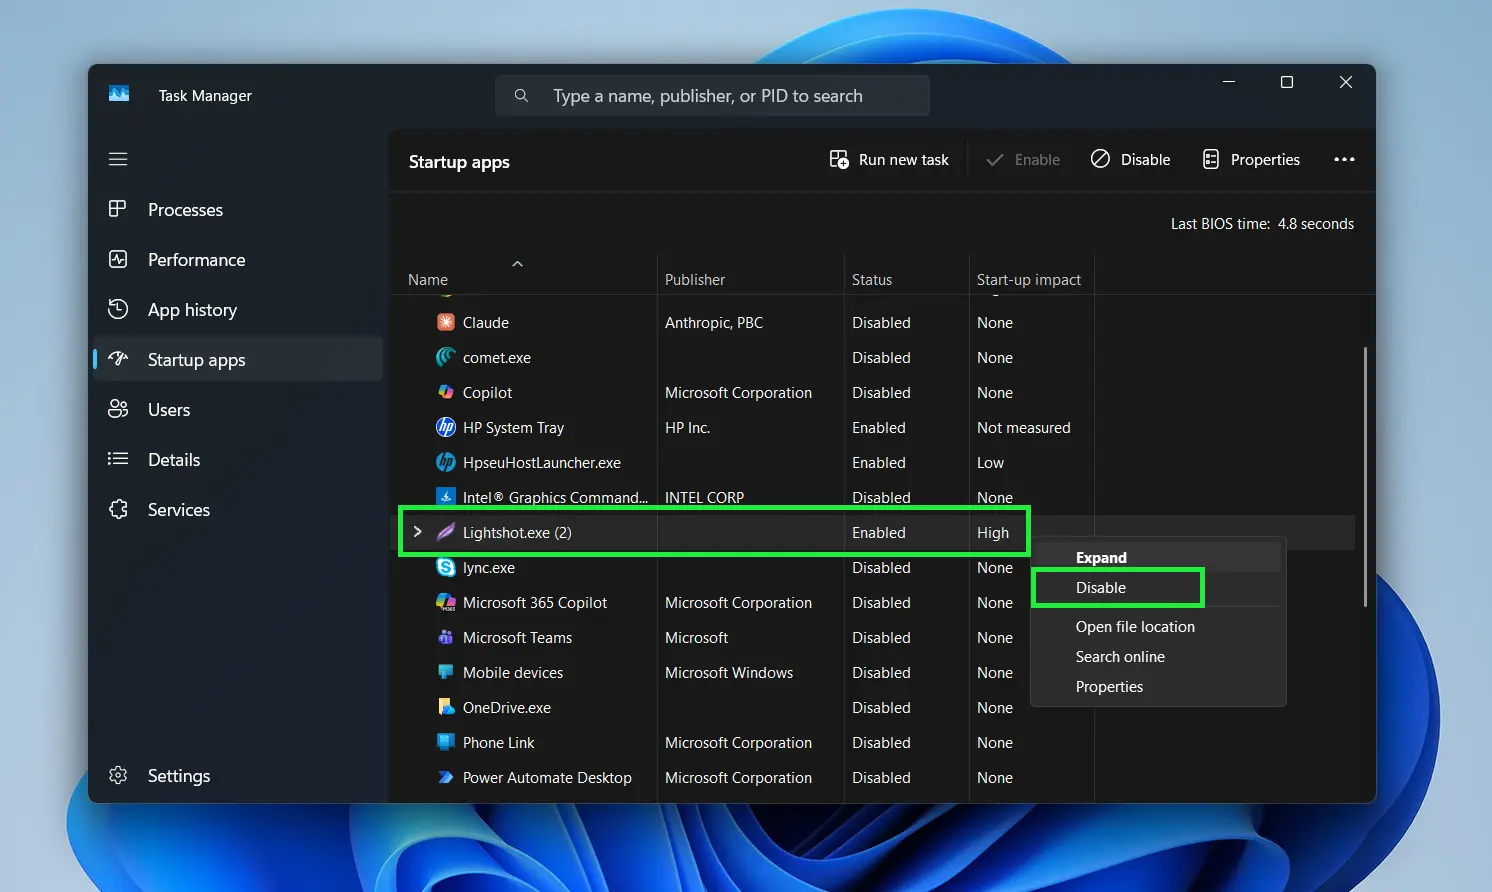
- Step 4: Right-click any app that is Enabled and shows a startup impact, then select Disable from the context menu
This works best when focusing on apps that aren’t needed immediately after boot, like software updaters, communication tools, or media players.
Step 6: Adjust Display Refresh Rate
Higher refresh rates (like 144Hz) make motion look smoother, but they also consume noticeably more power. Dropping to 60Hz on battery is a simple swap that extends usage time.
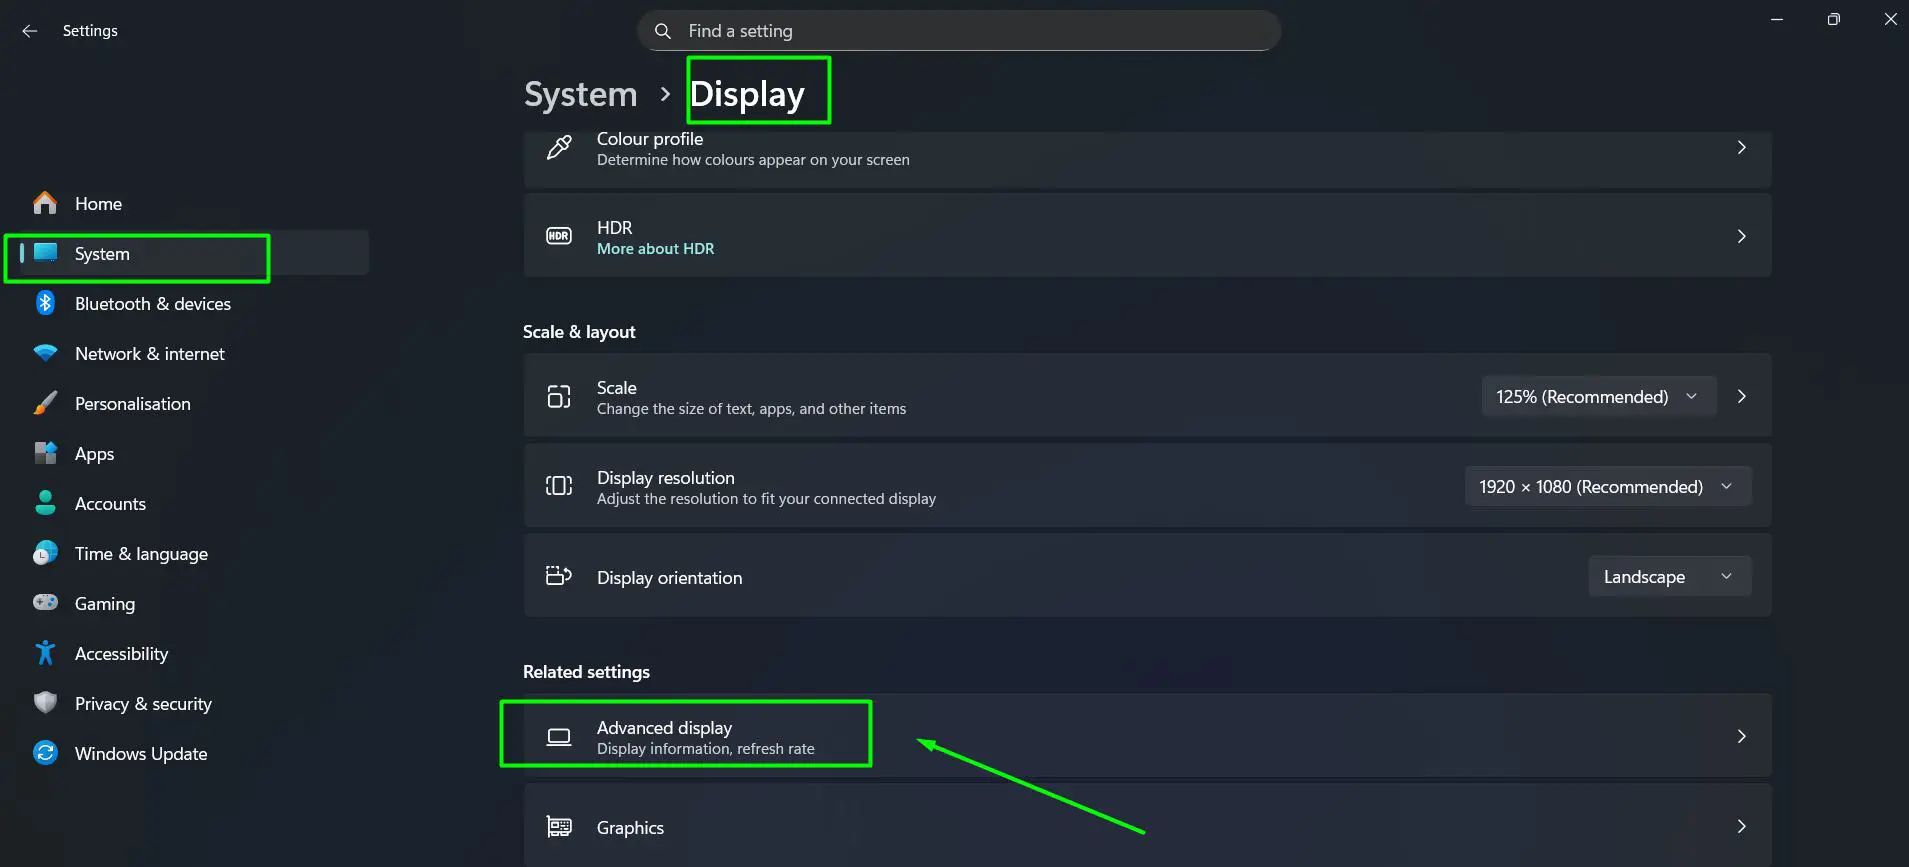
- Step 1: Go to Settings > System > Display then scroll down and click Advanced display
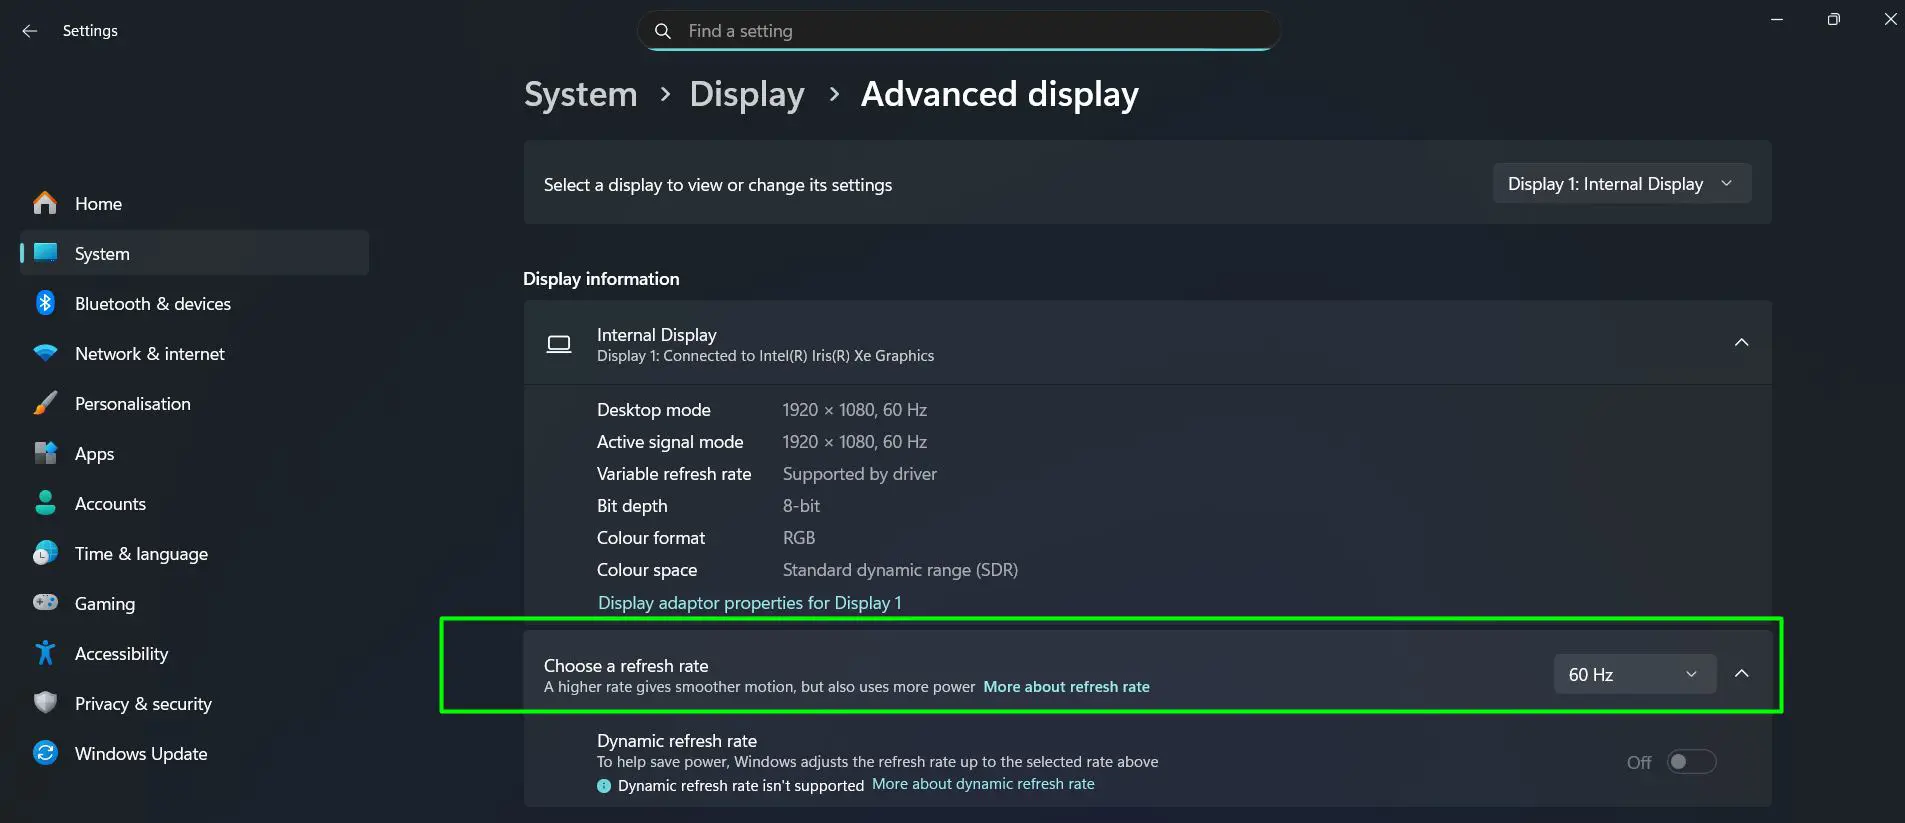
- Step 2: Under Choose a refresh rate, click the dropdown – available options shown are 144 Hz and 60 Hz
- Step 3: Select 60 Hz when on battery to reduce power draw
For a deeper look at this setting, the guide on adjusting screen refresh rate on Windows explains how to switch between rates depending on what’s needed.
Step 7: Manage GPU Power Settings
For laptops with dedicated graphics cards, the GPU can consume a significant chunk of battery even during everyday tasks. Switching to the integrated GPU for light work makes a real difference.
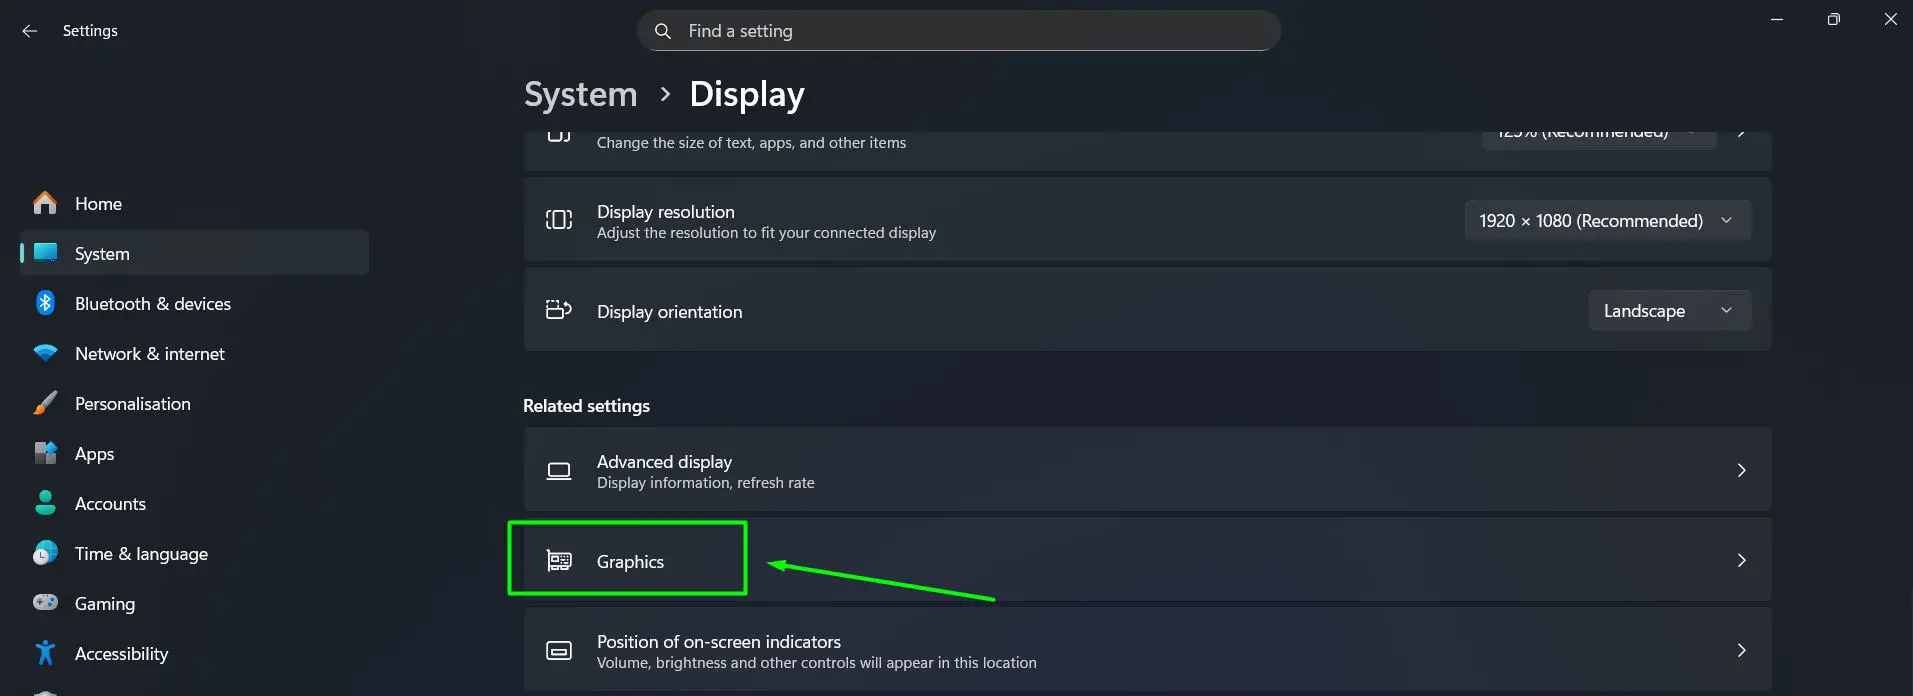
- Step 1: Go to Settings > System > Display then scroll down and click Graphics
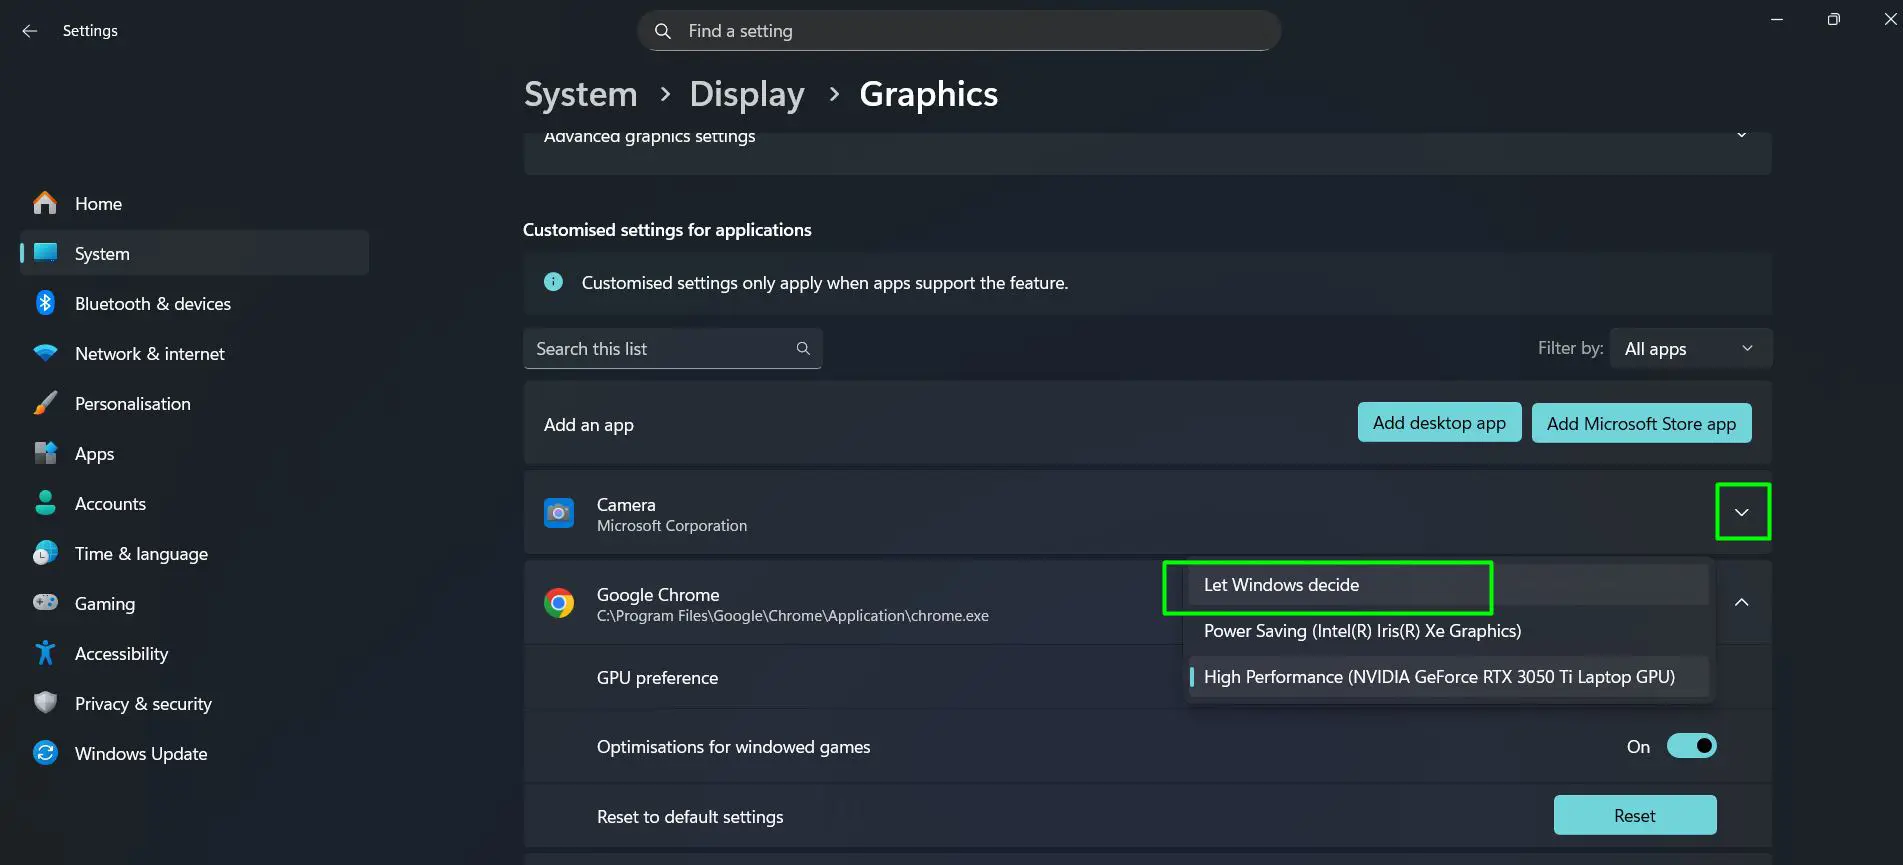
- Step 2: The list shows all apps with GPU preferences – click an app to expand it
- Step 3: Click the GPU preference dropdown – options are Let Windows decide (Power saving), Power Saving (uses integrated GPU like Intel Iris Xe), and High Performance (uses dedicated GPU like NVIDIA GeForce)
- Step 4: Set everyday apps like browsers and media players to Power Saving or Let Windows decide (Power saving)
- Step 5: Reserve High Performance only for apps that genuinely need it, like video editors or games
The guide on managing power settings for GPU covers this in more detail for users with NVIDIA or AMD cards.
Pro-Tip: On laptops with NVIDIA graphics, using the NVIDIA Control Panel to set the preferred graphics processor to ‘Integrated graphics’ globally saves significant battery during normal use. Switch back to ‘Auto-select’ when gaming or editing.
Step 8: Use Windows 11 Energy Recommendations
Windows 11 introduced an Energy Recommendations page that provides a personalized list of suggested changes to improve battery life. This is one of the easiest starting points.
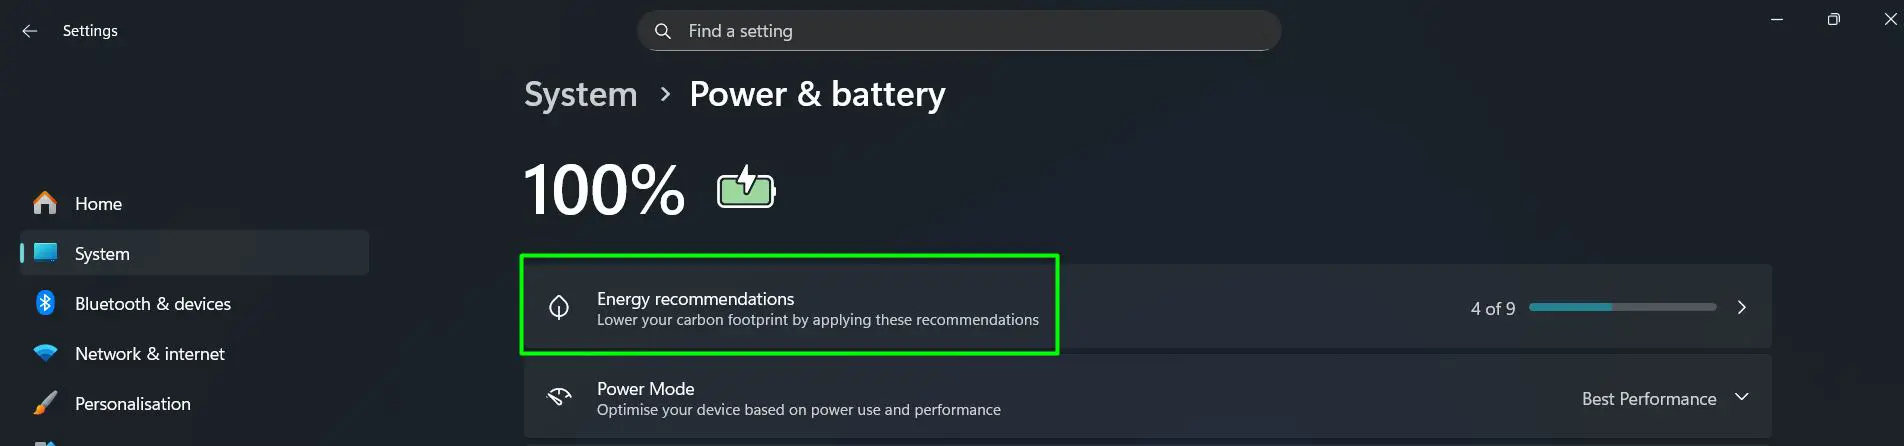
- Step 1: Open Settings > System > Power and battery
- Step 2: Click Energy recommendations
- Step 3: Review each suggestion and click Apply for the ones that suit the usage style
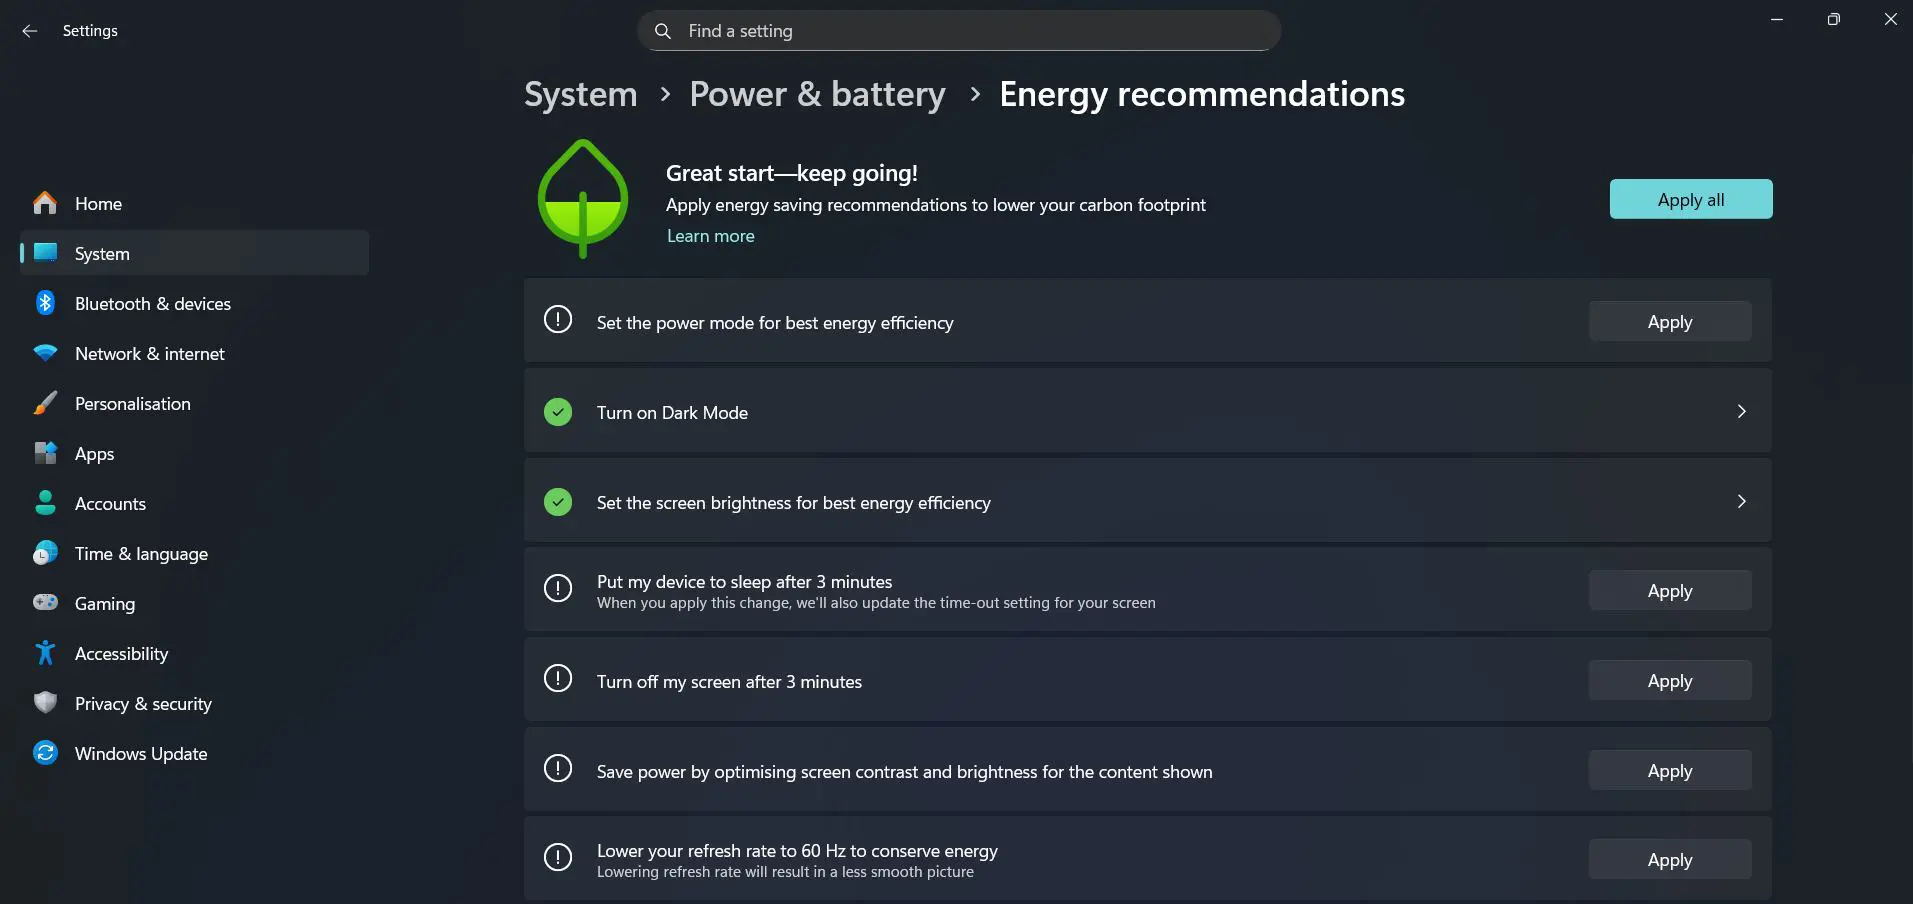
Windows typically suggests things like adjusting sleep timers, reducing brightness, and enabling Battery Saver – all collected in one place.
Step 9: Keep Windows and Drivers Updated
Outdated drivers can cause components to draw more power than necessary. Keeping Windows and hardware drivers current ensures the system runs efficiently.
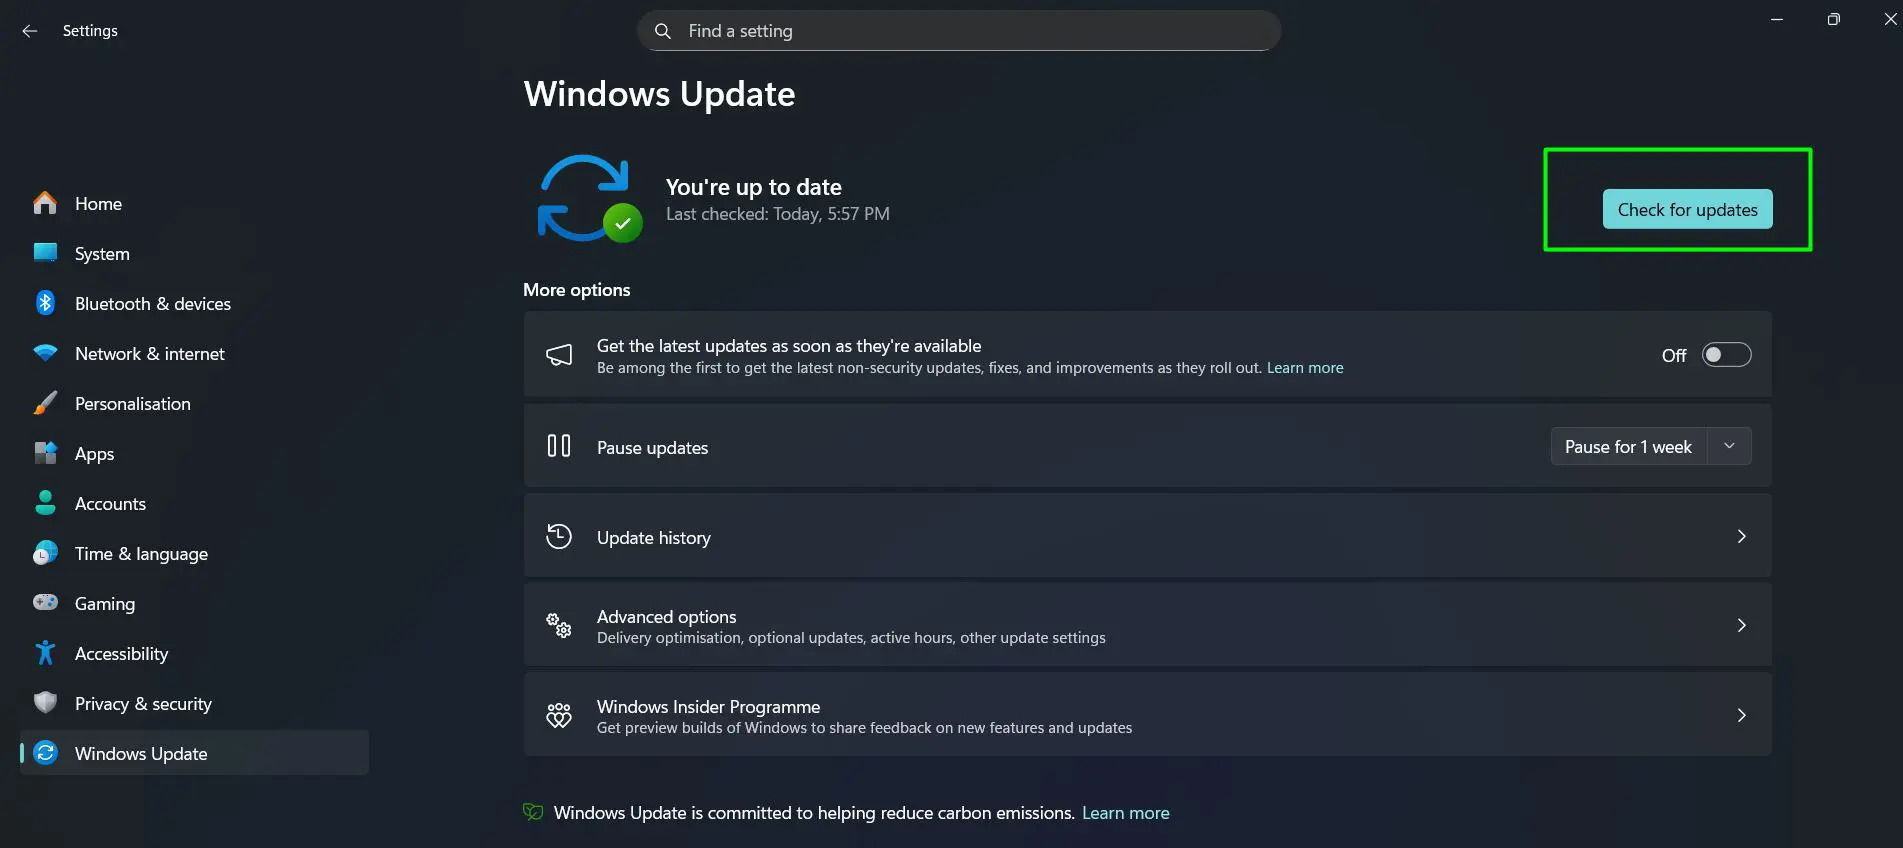
- Step 1: Open Settings > Windows Update
- Step 2: Click Check for updates and install any available updates
- Step 3: For driver updates specifically, visit the laptop manufacturer’s website or use Windows Update’s optional updates section
Tips for Better Battery Life in Windows 11
- Use dark mode where possible – on OLED screens, dark mode meaningfully reduces power draw since black pixels are turned off. Switch easily with this guide on switching to a dark background theme on Windows
- Disconnect peripherals not in use – USB devices, external drives, and even mice draw small amounts of power continuously
- Disable Wi-Fi or Bluetooth when not needed – both radios consume power even when idle
- Avoid charging to 100% repeatedly – most modern laptops have battery health settings; charge to 80% for daily use to preserve long-term capacity
- Close browser tabs aggressively – each open tab in Chrome or Edge consumes RAM and CPU. Clearing browser cache periodically also keeps things running lean
- Reduce display scaling if the screen resolution allows it – lower scaling means less GPU work rendering the interface, available via display scaling settings
- Avoid running intensive tasks like large downloads or updates on battery – schedule them for when plugged in
Common Problems and Fixes
Battery Draining Fast Even with Battery Saver On
Check if any background app is ignoring Battery Saver restrictions. Some apps have permissions set to ‘Always allowed’ which bypasses Battery Saver. Go to Settings > Privacy and security > Background apps and restrict them manually.
Screen Not Dimming After Setting Timeout
If the display stays on longer than expected, check whether any app (like a media player or meeting software) is preventing sleep. Review the lock screen timeout fix guide to resolve this.
Battery Percentage Jumps or Drains Erratically
This usually points to a battery calibration issue or an outdated battery driver. Run a battery report by opening Command Prompt and typing powercfg /batteryreport. Review the report to see capacity history and any flagged issues.
Laptop Not Sleeping When Lid Is Closed
Go to Control Panel > Power Options > Choose what closing the lid does and make sure ‘On battery’ is set to Sleep rather than Do nothing.
Fast Startup Causing Unexpected Battery Use
Fast Startup keeps some components active to speed up boot time, which can cause battery to drain even when the laptop appears off. Disabling it via the guide on disabling Fast Startup in Windows can help in these cases.
Frequently Asked Questions
Does Battery Saver mode significantly affect performance?
Yes, Battery Saver reduces background activity and may slightly throttle processor performance to save power. For browsing, writing, and video playback it’s generally unnoticeable. For gaming or video rendering, it’s better to keep it off.
How much battery life can these settings realistically add?
Results vary by laptop and usage, but combining brightness reduction, sleep adjustments, and background app management can add anywhere from 30 minutes to 2 hours of extra battery life depending on the original battery capacity and usage pattern.
Is it safe to always use Power Saver mode?
Power Saver mode is completely safe. It limits CPU speed and reduces background activity, which extends battery but slows down demanding tasks. It works best for light work like reading, browsing, or typing documents.
Should the laptop always be charged to 100%?
Charging to 100% repeatedly can slowly reduce battery capacity over time due to lithium-ion chemistry. Many manufacturers recommend keeping charge between 20% and 80% for long-term health. Some laptops have a built-in ‘Battery Care’ mode in their settings or companion apps.
Does dark mode actually save battery life on a laptop?
On OLED screens, dark mode saves meaningful battery because black pixels are physically turned off. On standard LCD screens, the difference is minimal since the backlight stays on regardless of pixel color. Check the screen type before expecting significant savings.
How do background apps drain battery if the app isn’t open?
Background apps continue to check for updates, sync data, send notifications, and maintain network connections even when the app window is closed. These small, repeated tasks add up and contribute to steady battery drain over the course of a day.
Does using Wi-Fi drain more battery than a wired connection?
Wi-Fi uses more power than having no network connection, but using Ethernet through a USB adapter can use similar or even more power depending on the adapter. For maximum battery savings, use Wi-Fi selectively and turn off Bluetooth when it’s not in use.
Can a Windows update actually improve battery life?
Yes. Microsoft regularly releases updates that include power management improvements and driver optimizations. Keeping Windows updated ensures the system benefits from these improvements, and outdated drivers can cause components to run less efficiently.
Does screen resolution affect battery life?
Higher resolutions require more GPU processing to render content, which can slightly increase power draw. Lowering display scaling or resolution is a lesser-known but valid optimization, especially on high-DPI screens running at 200% or higher scaling.
What is the fastest single change to extend battery life in Windows 11?
Lowering screen brightness is the fastest and most impactful single change. The display consumes more power than almost any other component during typical use. Dropping brightness from 100% to 60% can add a noticeable chunk of extra battery time with zero performance trade-offs.