Windows 11 comes loaded with pre-installed apps, background services, and telemetry features that most people never use. All of that extra software slows down the system, eats up storage, and runs quietly in the background without permission. Learning how to debloat Windows 11 is one of the fastest ways to get a cleaner, snappier PC experience.
Quick Summary Table
| Method | Best For | Difficulty |
|---|---|---|
| Uninstall Built-in Apps | Removing visible bloatware | Easy |
| Disable Startup Apps | Faster boot times | Easy |
| PowerShell Bloat Removal | Deep app removal | Medium |
| Turn Off Ads and Telemetry | Privacy and performance | Easy |
| Use a Trusted Debloat Tool | Full cleanup, fastest method | Easy |
Method 1: Uninstall Built-in Apps
The most straightforward place to start is removing the pre-installed apps that come with Windows 11. Things like Xbox Game Bar, Cortana, News, Weather, and Tips are often unused but still run in the background and consume resources.
- Step 1: Open the Start menu and go to Settings.
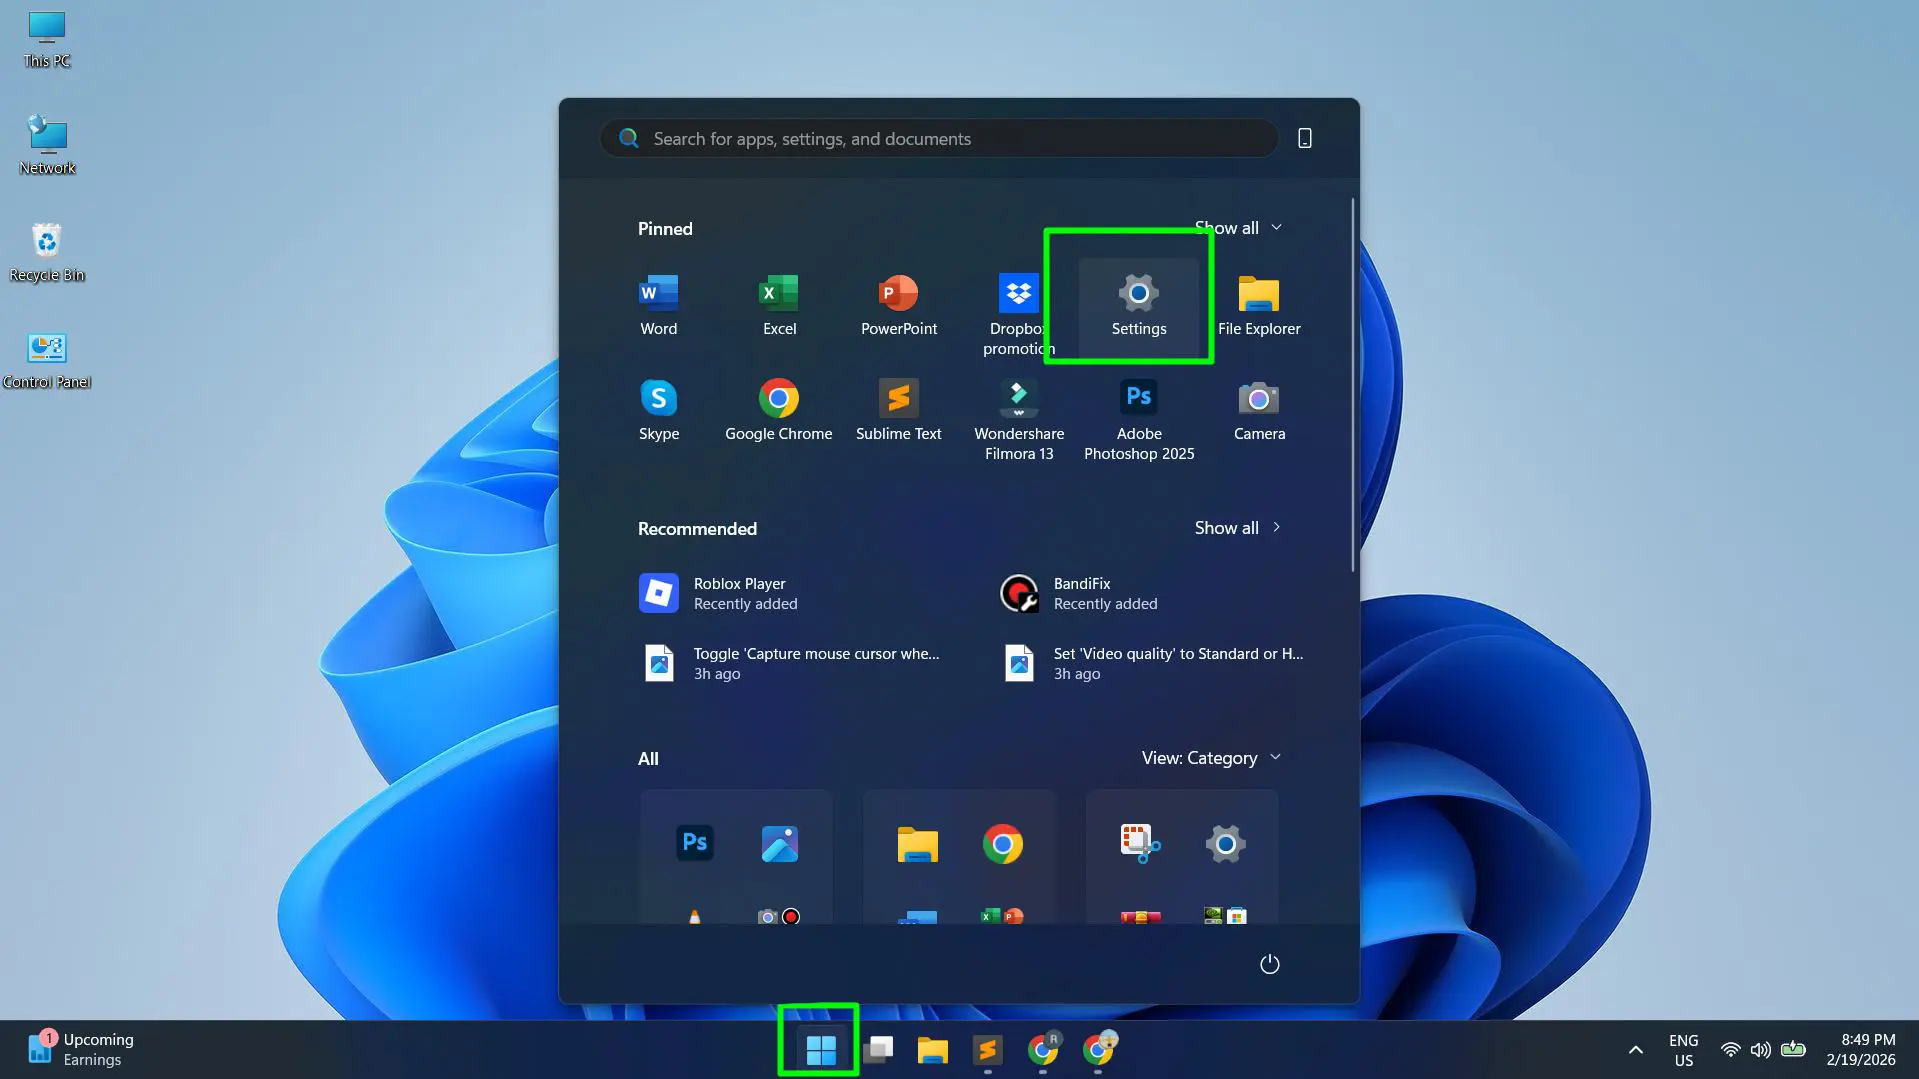
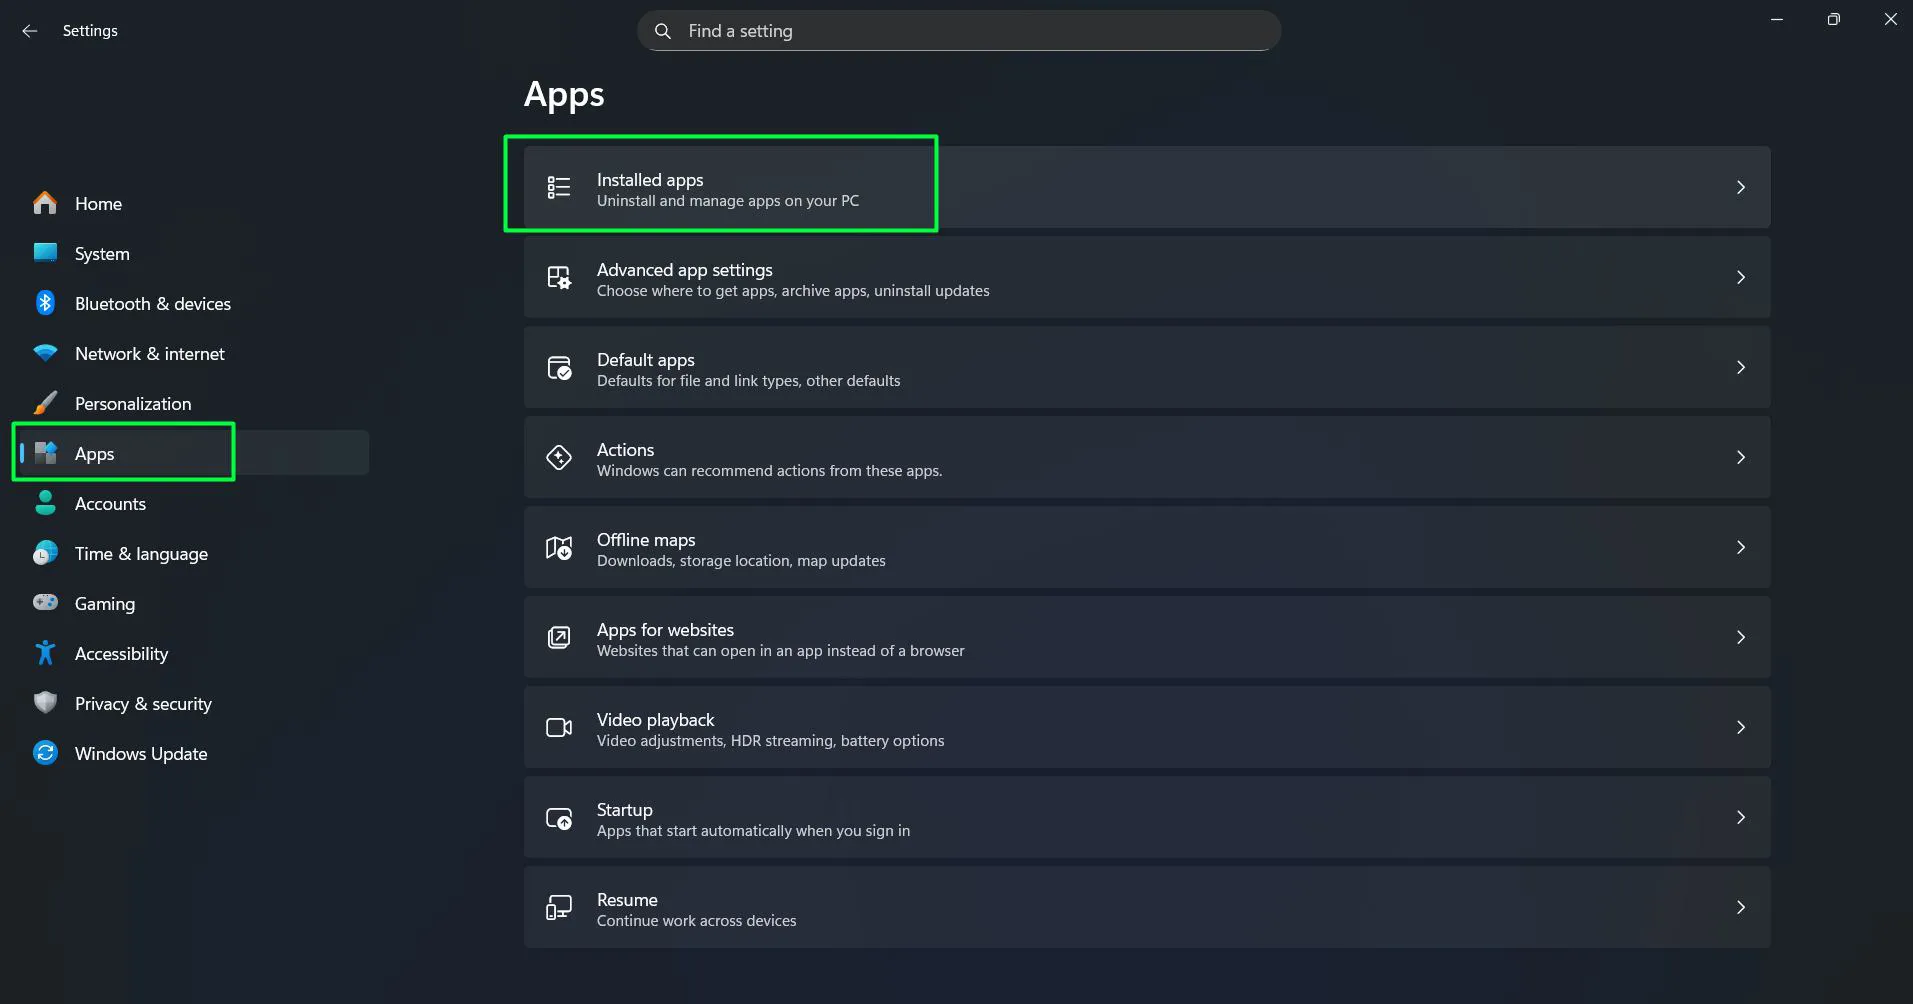
- Step 2: Click on ‘Apps’ then select ‘Installed apps’.
- Step 3: Scroll through the list and identify apps that are not needed.
- Step 4: Click the three-dot menu next to the app and select ‘Uninstall’.
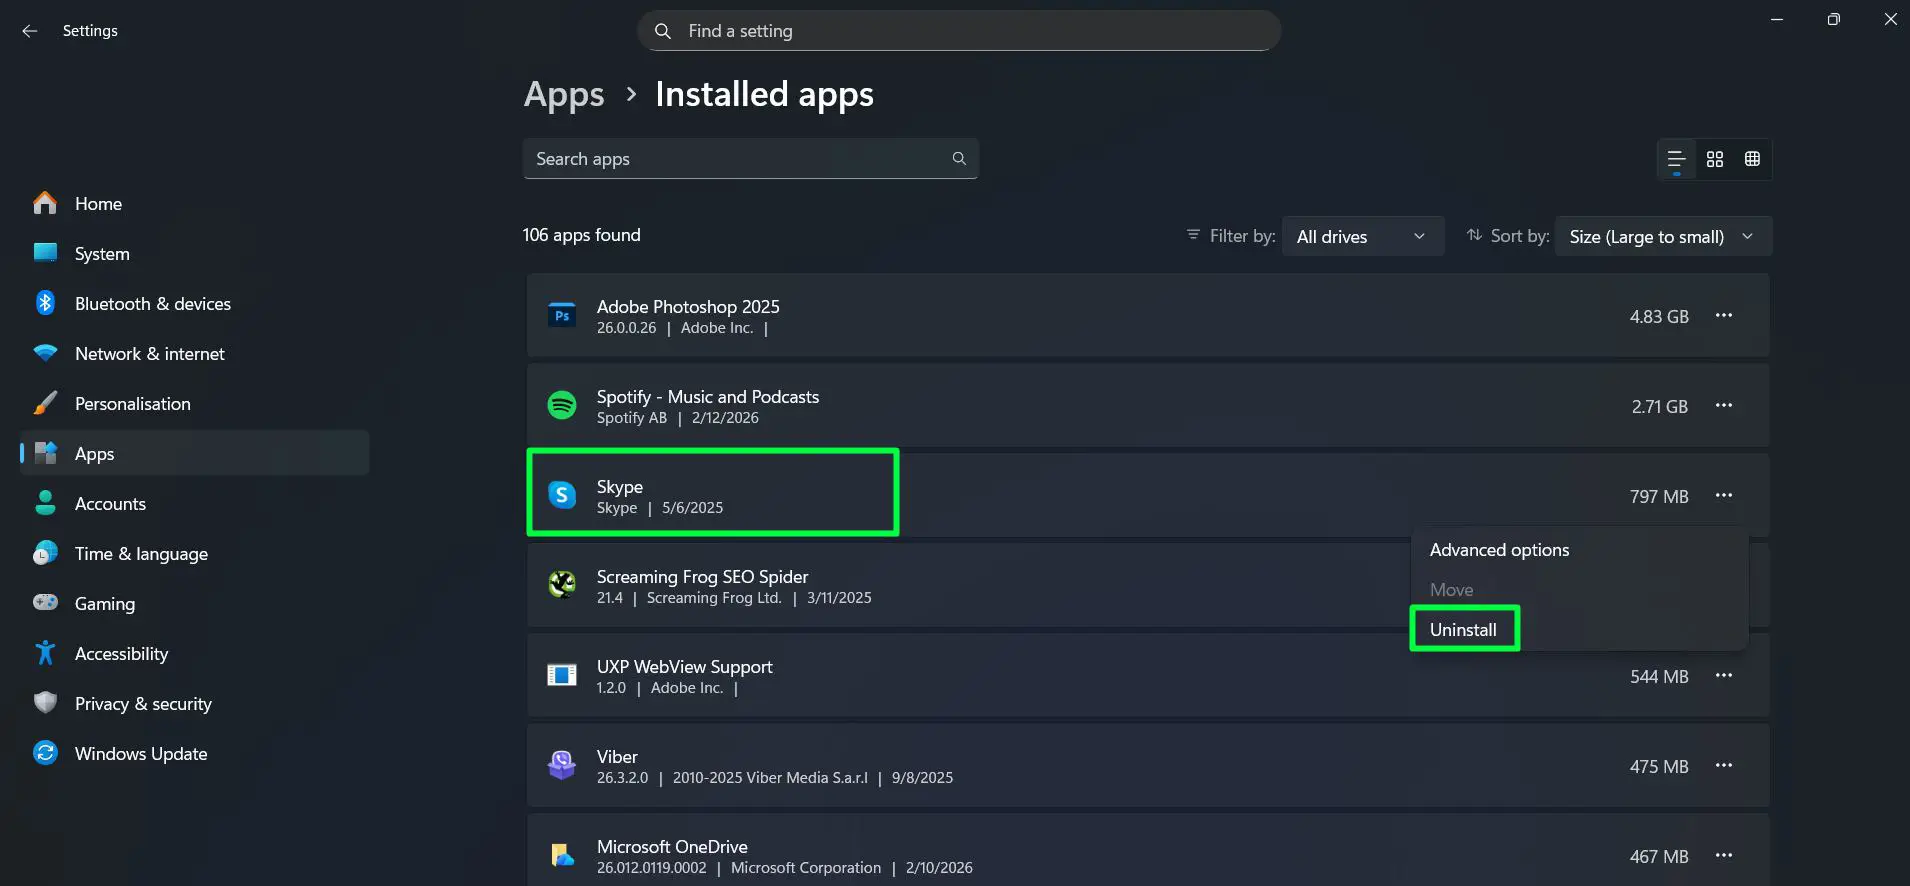
- Step 5: Confirm the uninstall and repeat for each unwanted app.
Common apps worth removing include Clipchamp, Microsoft Teams (personal), Xbox, Get Help, Feedback Hub, and the built-in media apps if a preferred alternative is already installed. This alone can free up several gigabytes of storage and reduce background activity immediately.
Method 2: Disable Startup Apps
Even after apps are installed, many of them quietly add themselves to the startup list. This means every time the PC boots, those programs load in the background – slowing down the startup process significantly. Disabling unnecessary startup apps is a quick win that most people notice right away.
Watch this: How to Disable High-Impact Startup Apps in Windows 11 (Speed Up Boot Time Fast)
- Step 1: Right-click the taskbar or Windows Icon and select ‘Task Manager’.
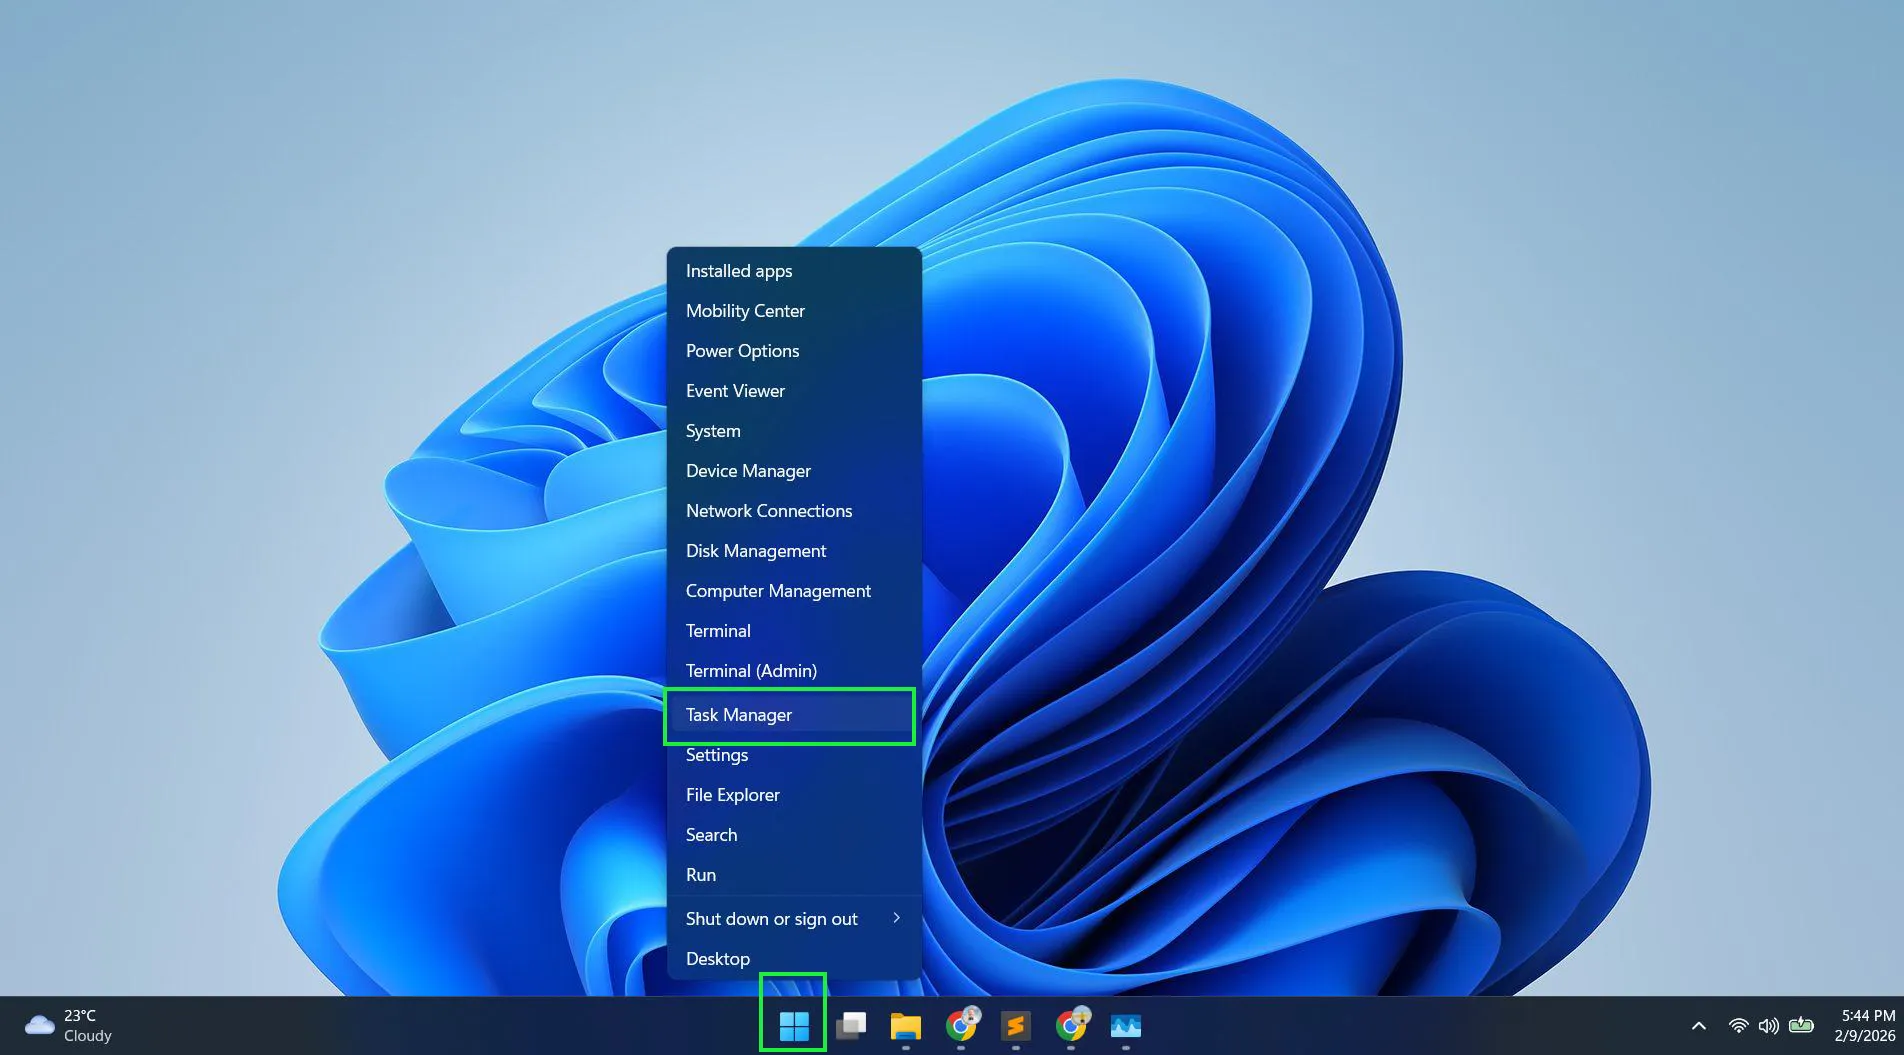
- Step 2: Click on the ‘Startup apps’ tab on the left.
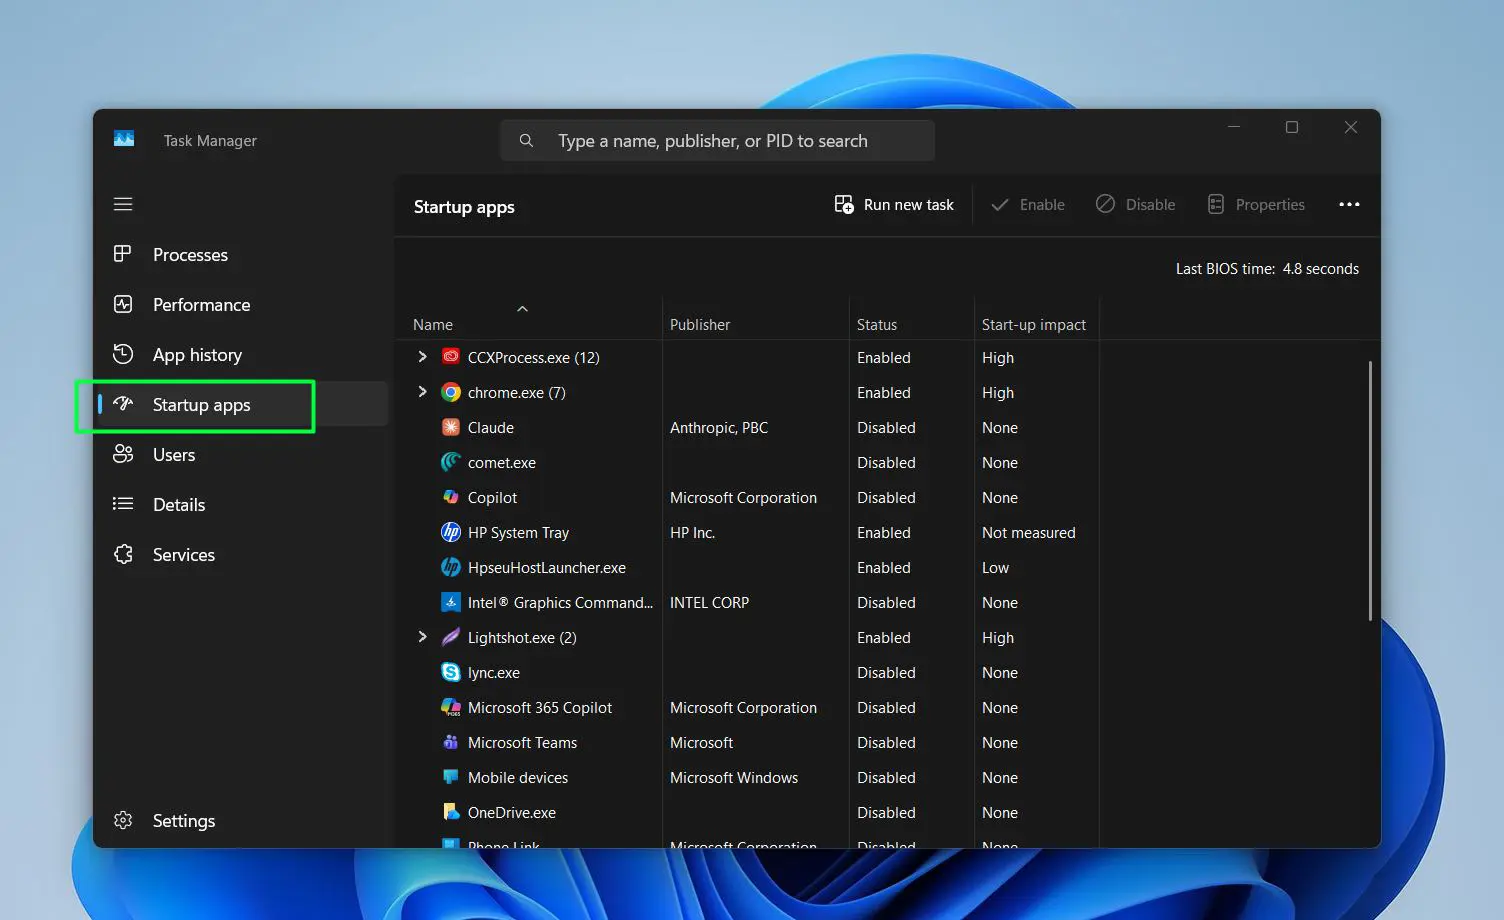
- Step 3: Review the list and look at the ‘Startup impact’ column.
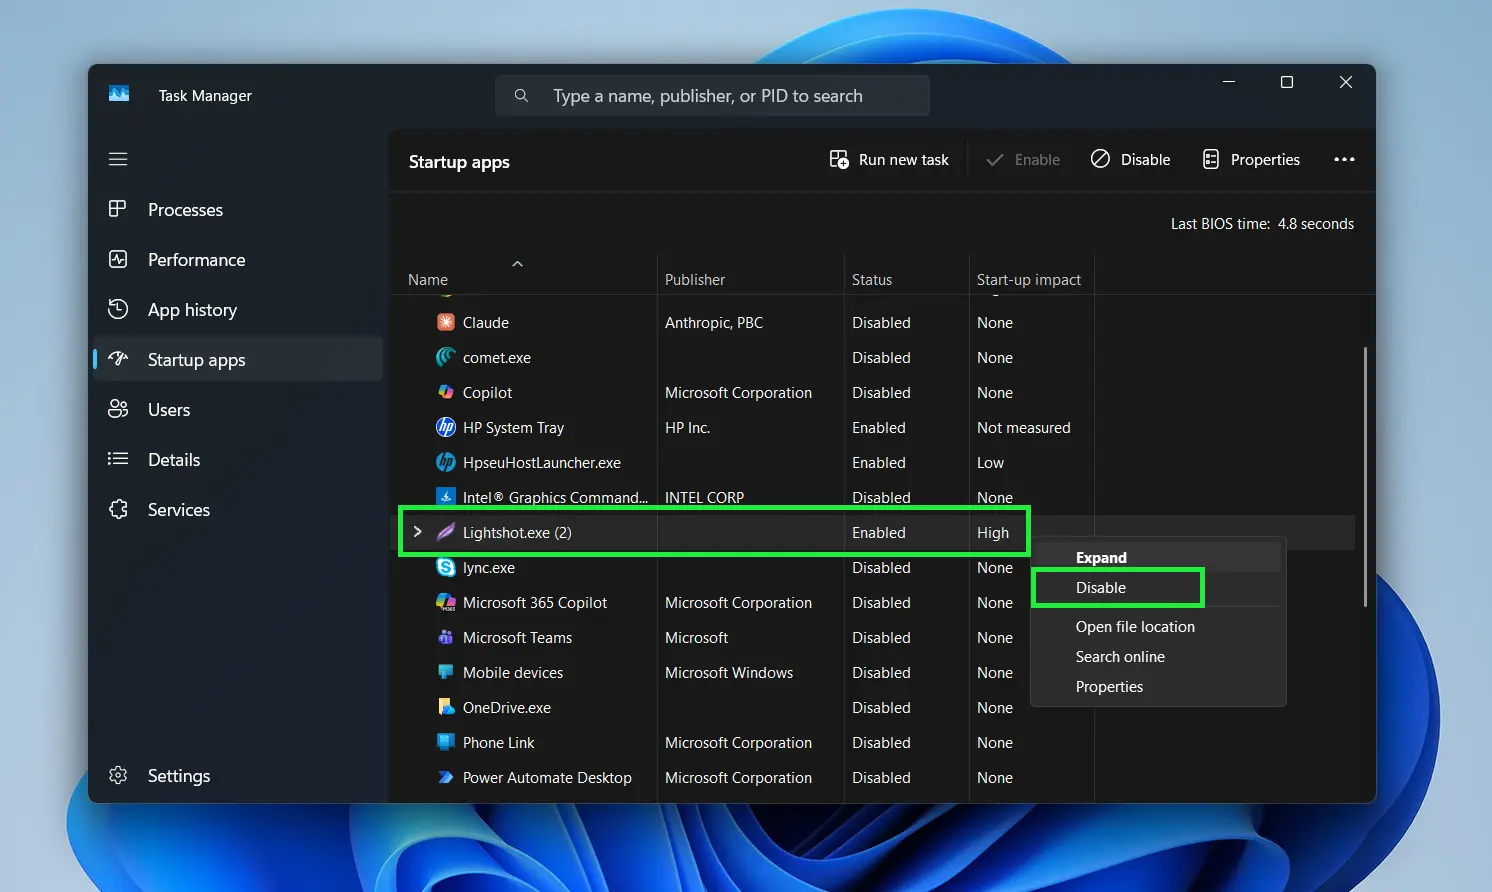
- Step 4: Right-click any app that is not needed at startup and select ‘Disable’.
- Step 5: Restart the PC to see the improvement in boot time.
Focus on disabling high-impact items first. Apps like Spotify, OneDrive, Discord, and browser update helpers are common culprits. Disabling startup does not uninstall the app – it simply stops it from loading automatically.
Pro Tip: Sort the startup list by ‘Startup impact’ to prioritize which apps to disable first. High-impact apps are the biggest drag on boot performance and should be addressed before anything else.
Want faster laptop boot times on Windows? Check this guide
Method 3: PowerShell Bloat Removal
Some built-in Windows apps cannot be uninstalled through the Settings menu. These are provisioned system apps that require PowerShell commands to remove. This method gives much deeper control over what stays and what goes on the system.
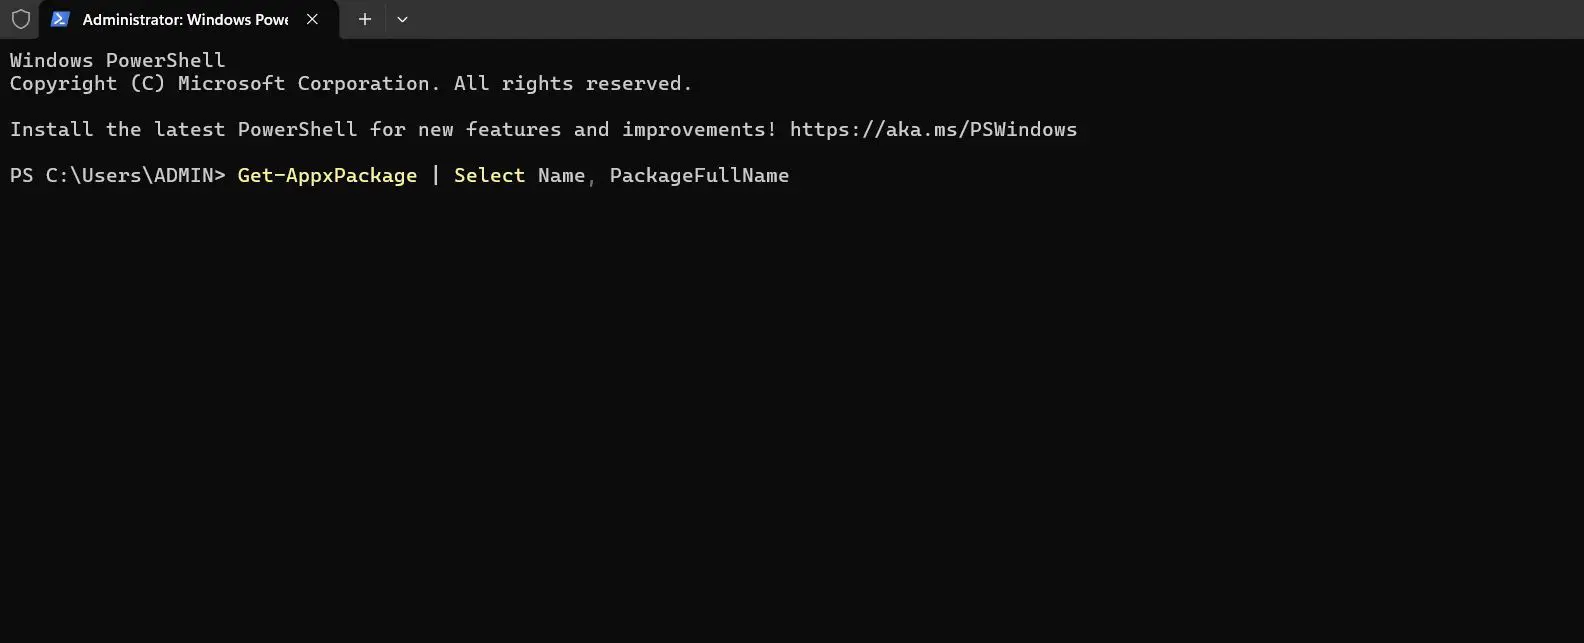
- Step 1: Right-click the Start button and select ‘Terminal (Admin)’.

- Step 2: To see all installed packages, run this command:
Get-AppxPackage | Select Name, PackageFullName
- Step 3: To remove a specific app, use:
Get-AppxPackage -Name 'AppNameHere' | Remove-AppxPackage
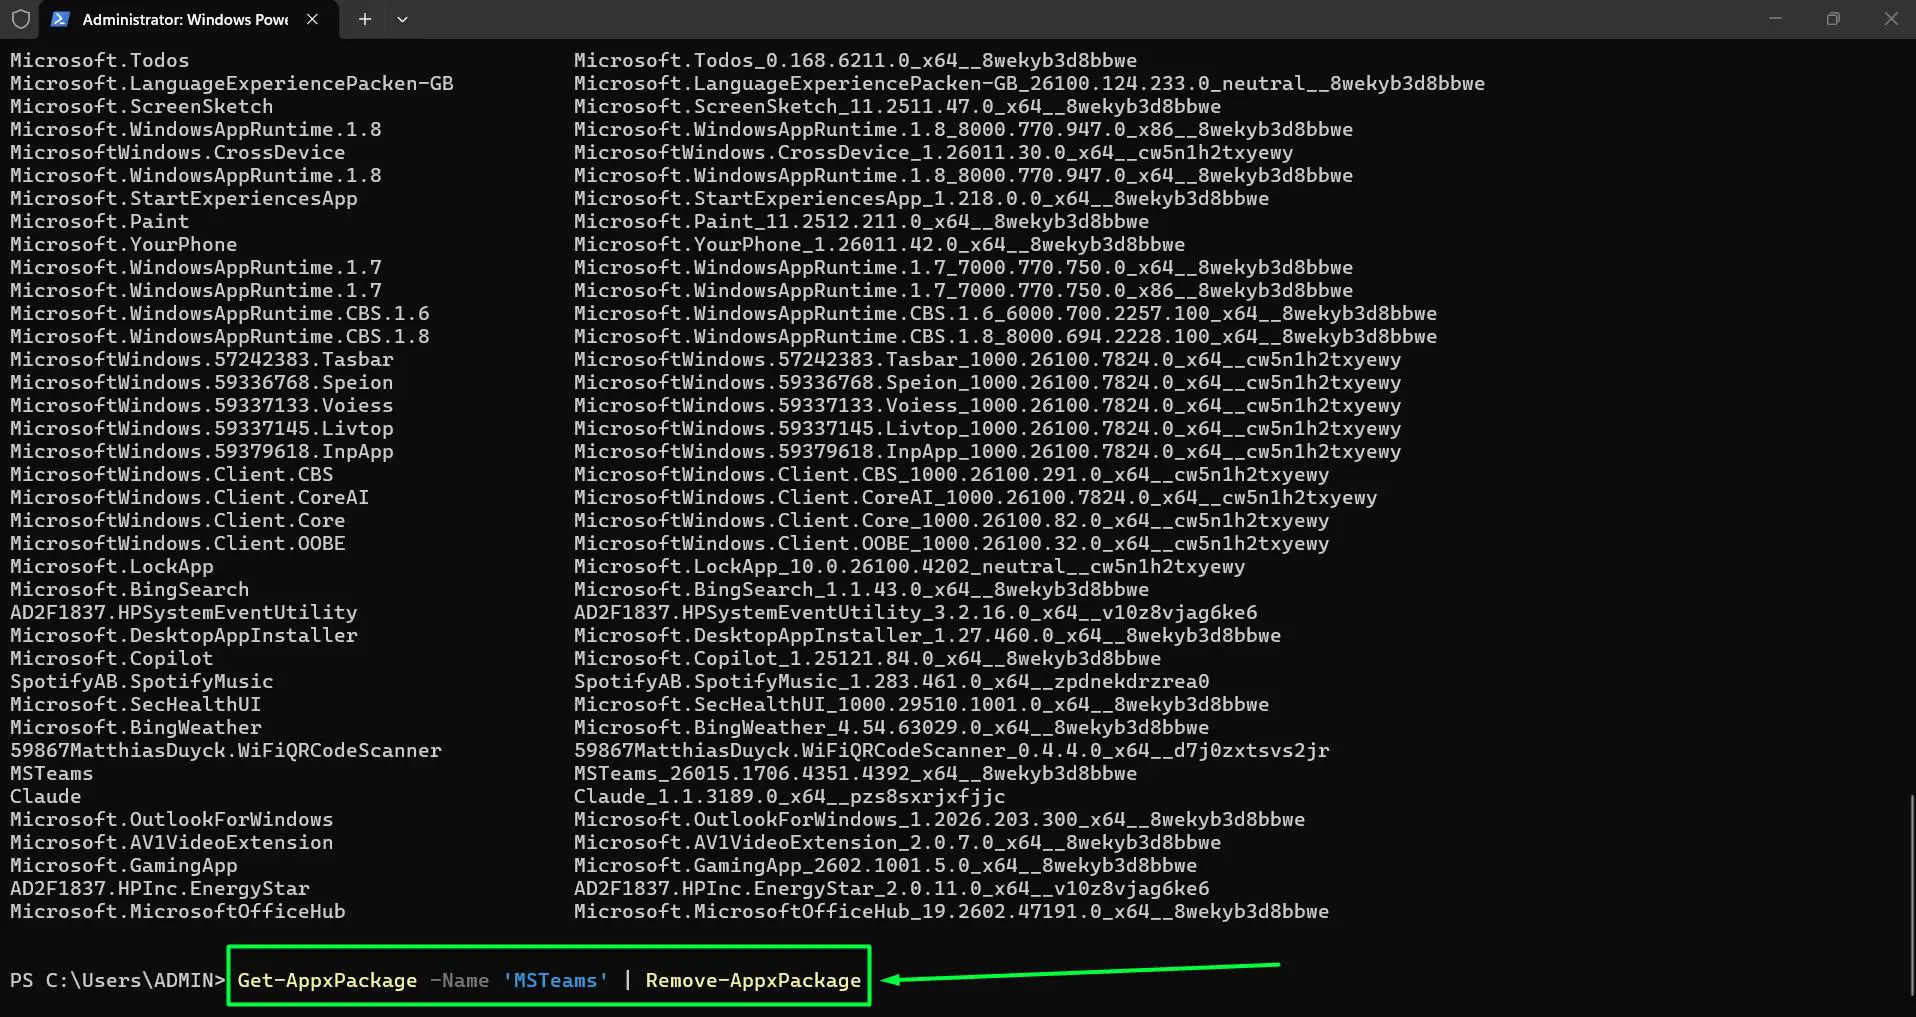
- Step 4: Replace ‘AppNameHere’ with the actual package name from the list.
- Step 5: Repeat for each app to be removed and restart when done.
Some commonly removed packages via PowerShell include Microsoft.BingWeather, Microsoft.GetHelp, Microsoft.MicrosoftSolitaireCollection, and Microsoft.ZuneMusic. Always double-check the package name before running the removal command to avoid unintentionally removing something important.
For those managing Windows settings regularly, becoming familiar with PowerShell commands opens up a lot of advanced control that the graphical interface simply does not offer.
Method 4: Turn Off Ads and Telemetry
Windows 11 collects diagnostic data, shows ads in the Start menu, and sends usage information to Microsoft servers by default. Turning these off reduces background network activity and gives back a noticeable amount of privacy and performance.
Watch this: How to Turn Off Ads and Telemetry in Windows 11 (Improve Privacy & Performance)
- Step 1: Open Settings and go to ‘Privacy and security’.
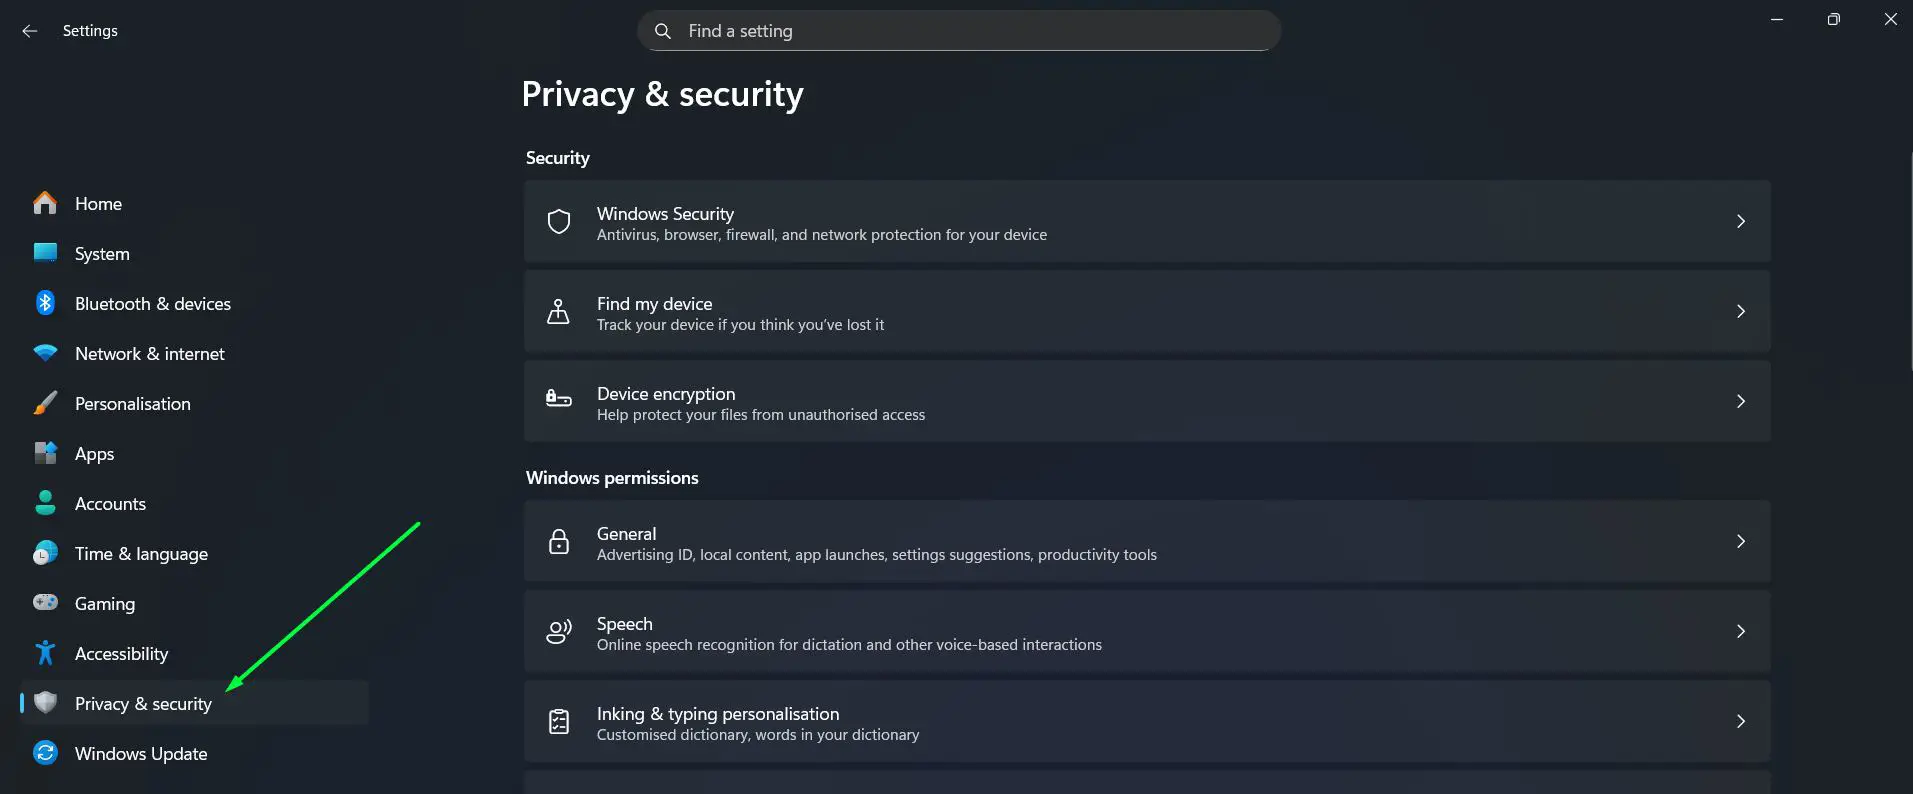
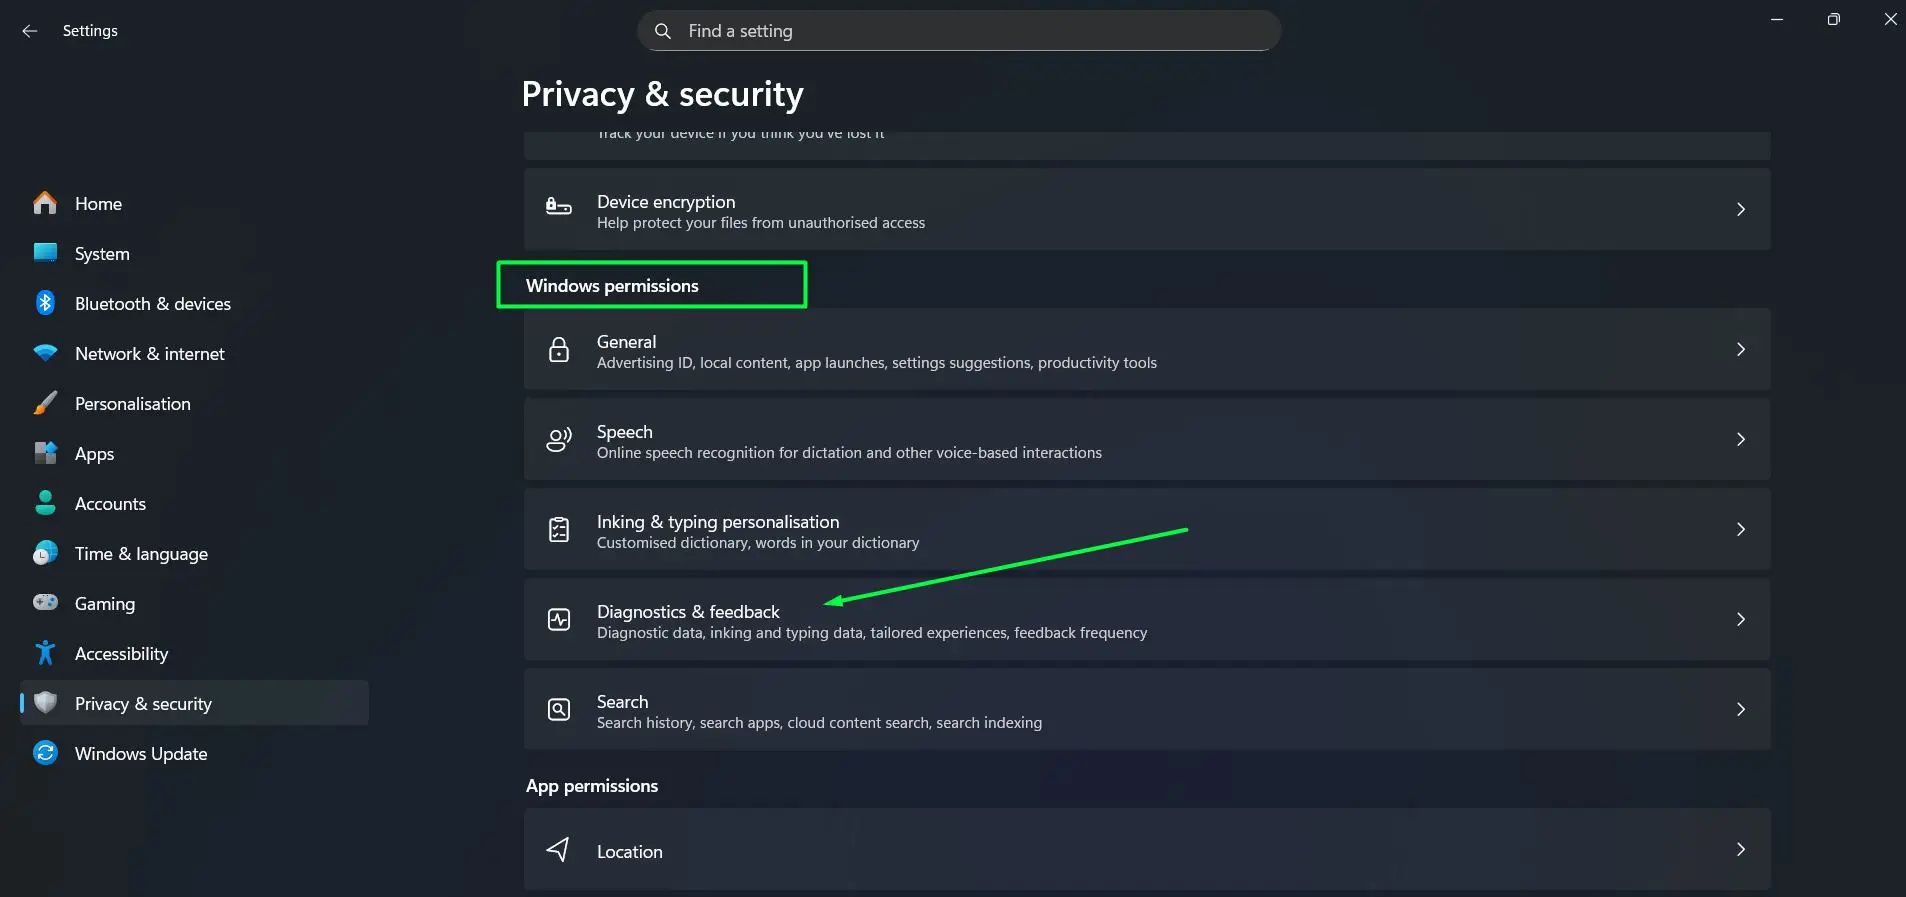
- Step 2: Under Windows permissions, Click ‘Diagnostics and feedback’.
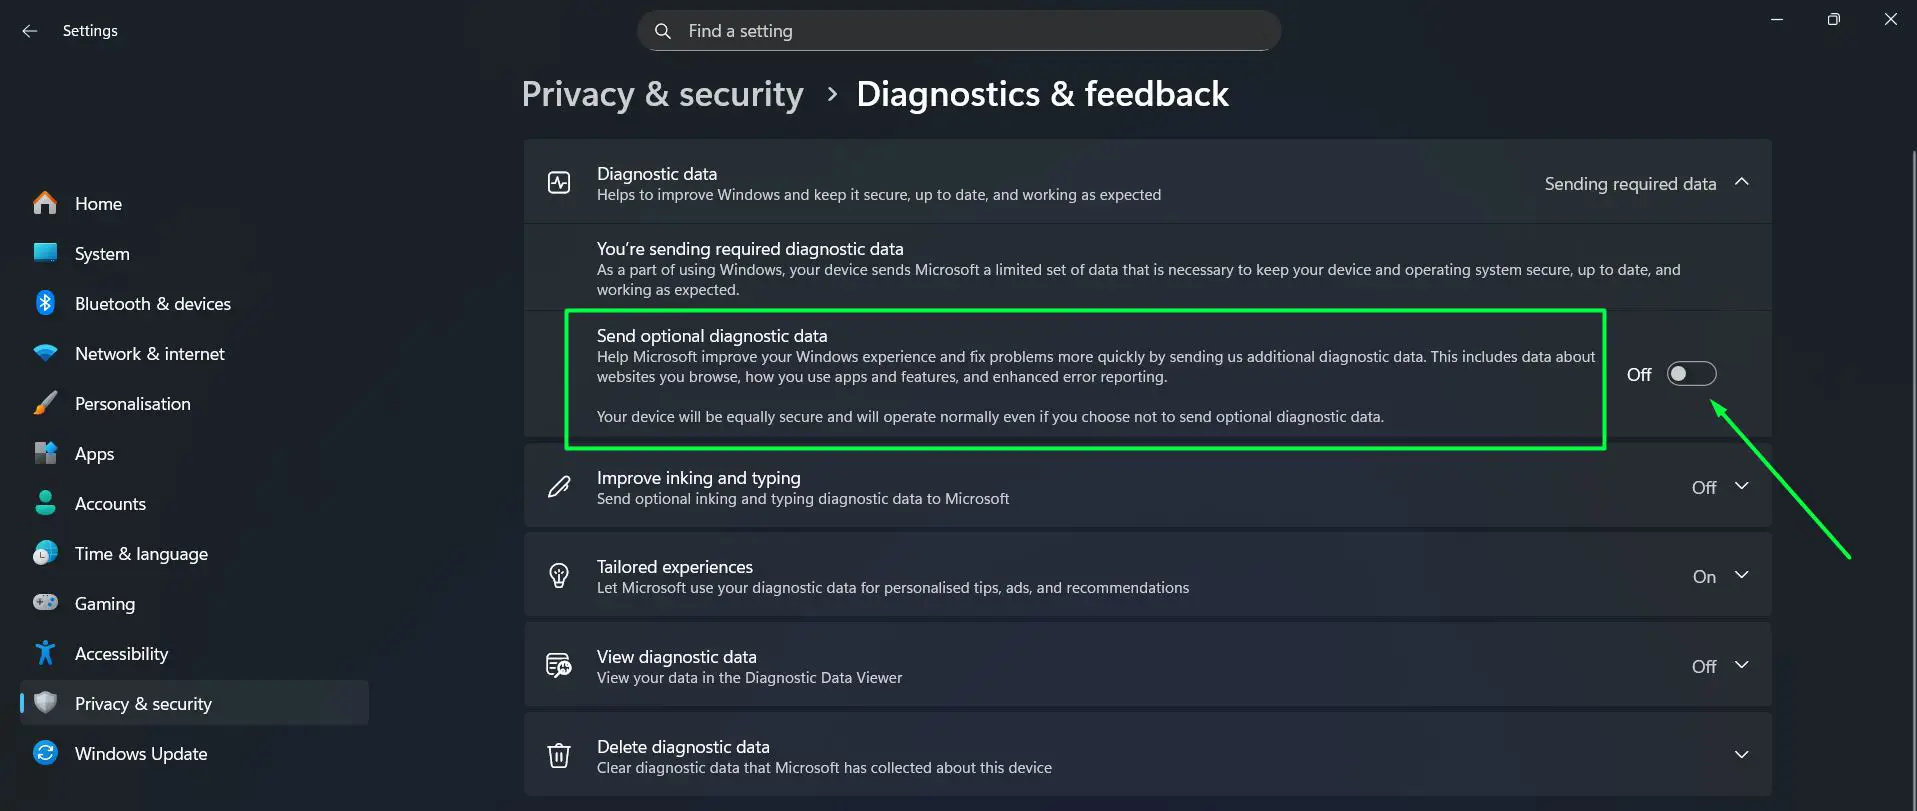
- Step 3: Under ‘Diagnostic data’, toggle off ‘Send optional diagnostic data’ – this will also automatically disable ‘Improve inking and typing’ since it depends on optional data being enabled.
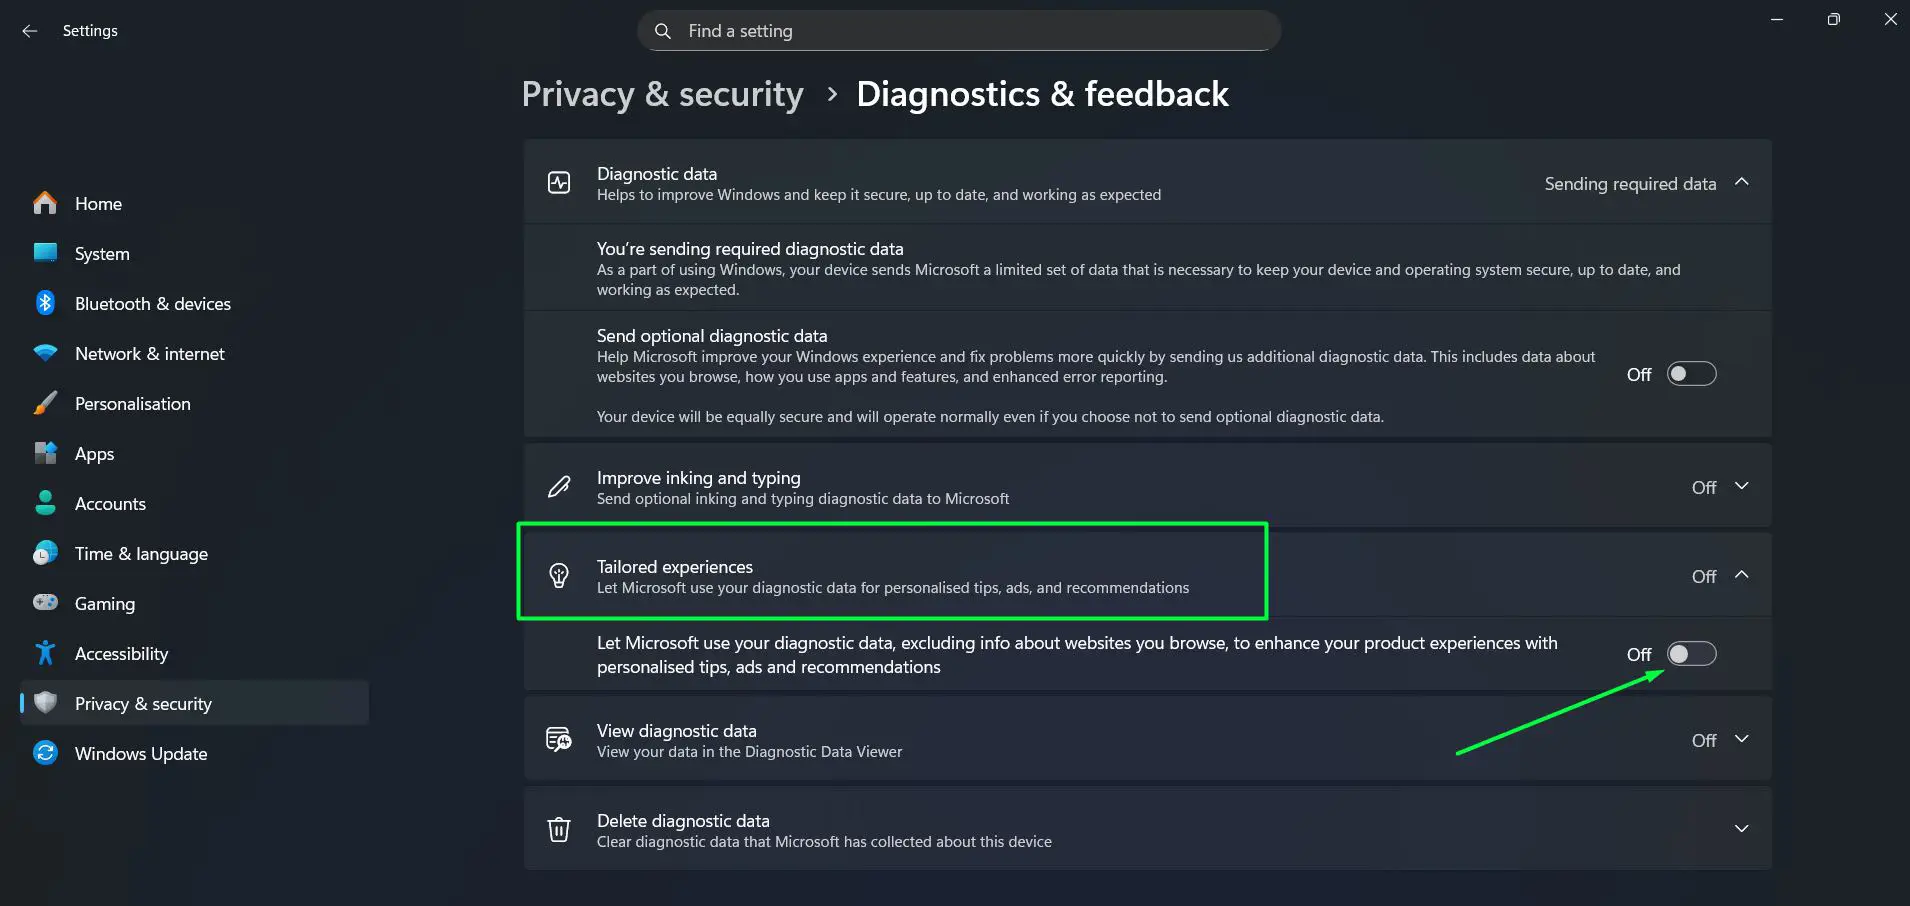
- Step 4: Click on ‘Tailored experiences’ and toggle it off to disable personalized tips, ads, and recommendations based on diagnostic data.
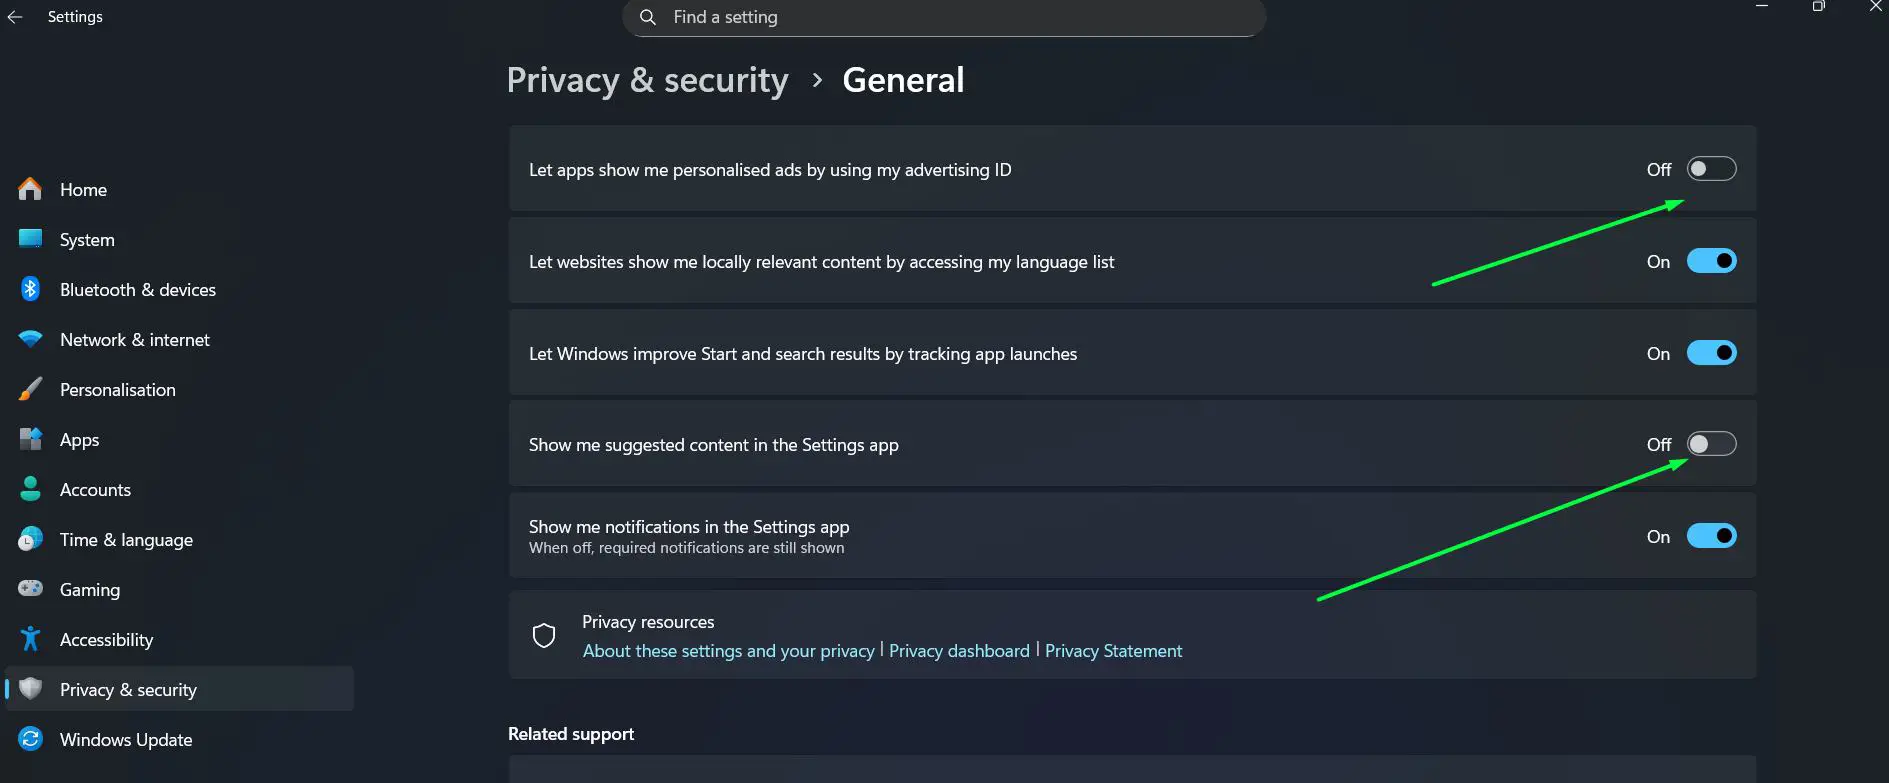
- Step 5: Go back to ‘Privacy and security’ and click ‘General’.
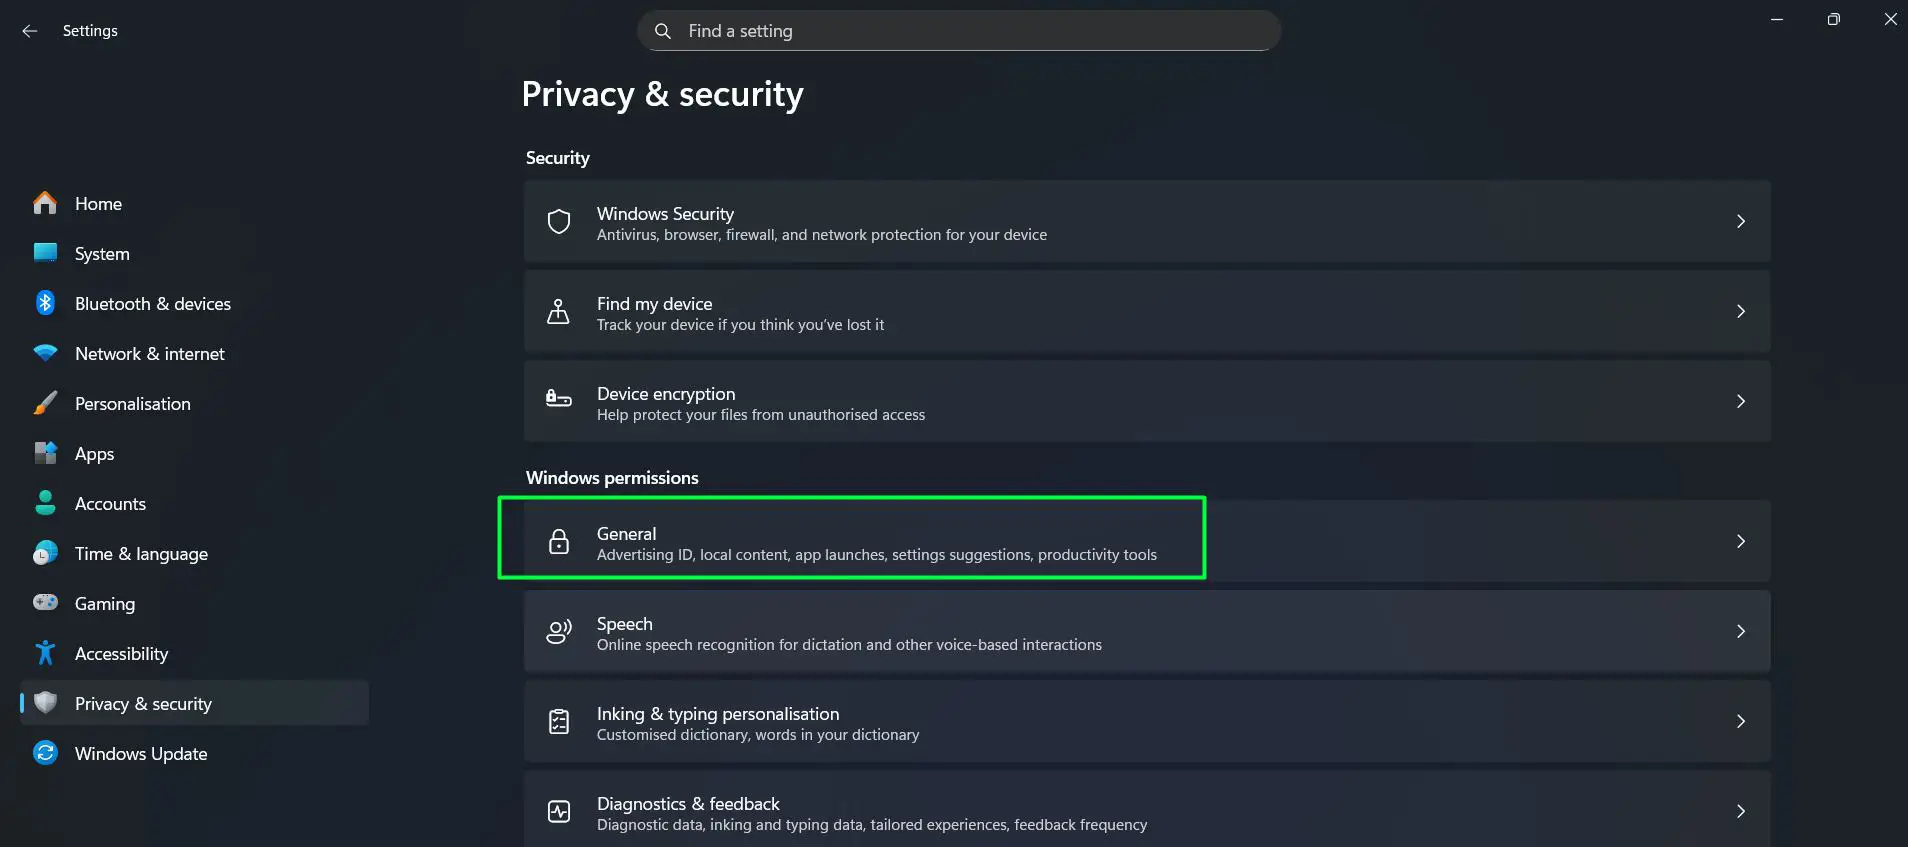
- Step 6: Toggle off all options including ‘Let apps use advertising ID’ and ‘Show me suggested content in the Settings app’.
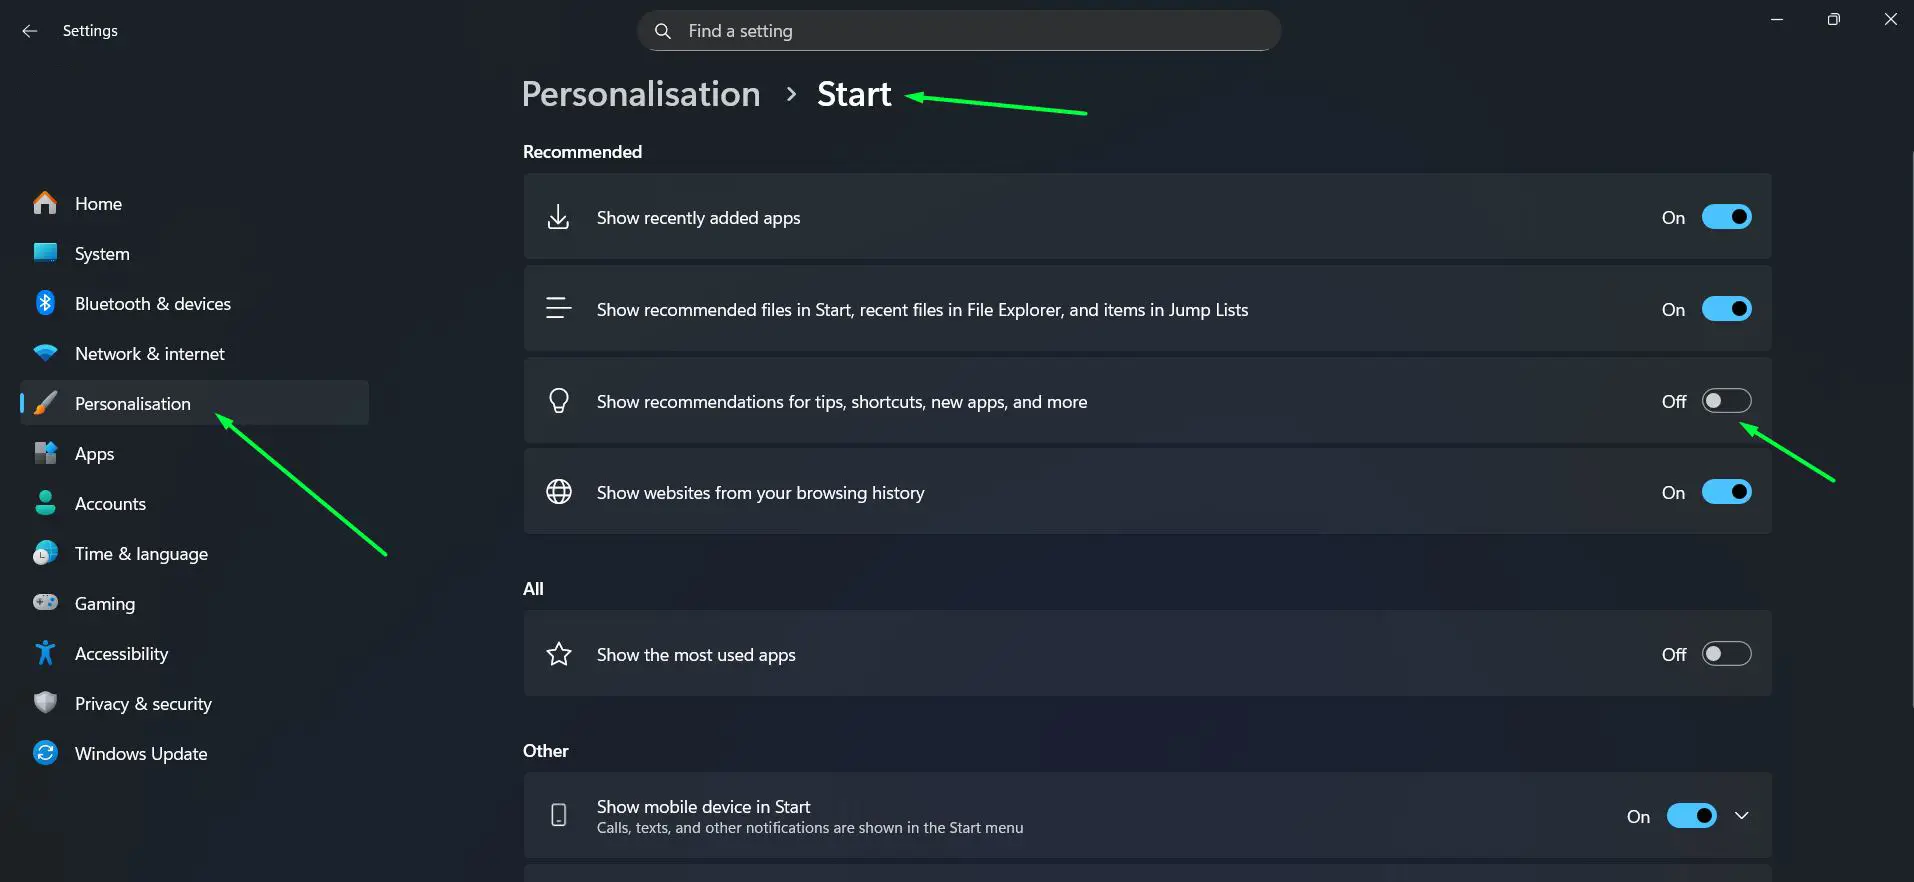
- Step 7: Navigate to ‘Settings’ – ‘Personalisation’ – ‘Start’ and turn off ‘Show recommendations for tips, shortcuts, new apps, and more’.
These changes stop Windows from serving personalized ads inside the operating system itself and reduce the frequency of background data transmissions. It is a small but meaningful step toward a cleaner and more private experience.
Method 5: Use a Trusted Debloat Tool (Fastest and Cleanest)
For those who want a thorough cleanup without manually hunting down every setting, a dedicated debloat tool handles everything in one pass. The most widely trusted option in the Windows community is Chris Titus Tech’s Windows Utility, also known as ‘WinUtil’. It is open-source, actively maintained, and widely used by both casual users and IT professionals.
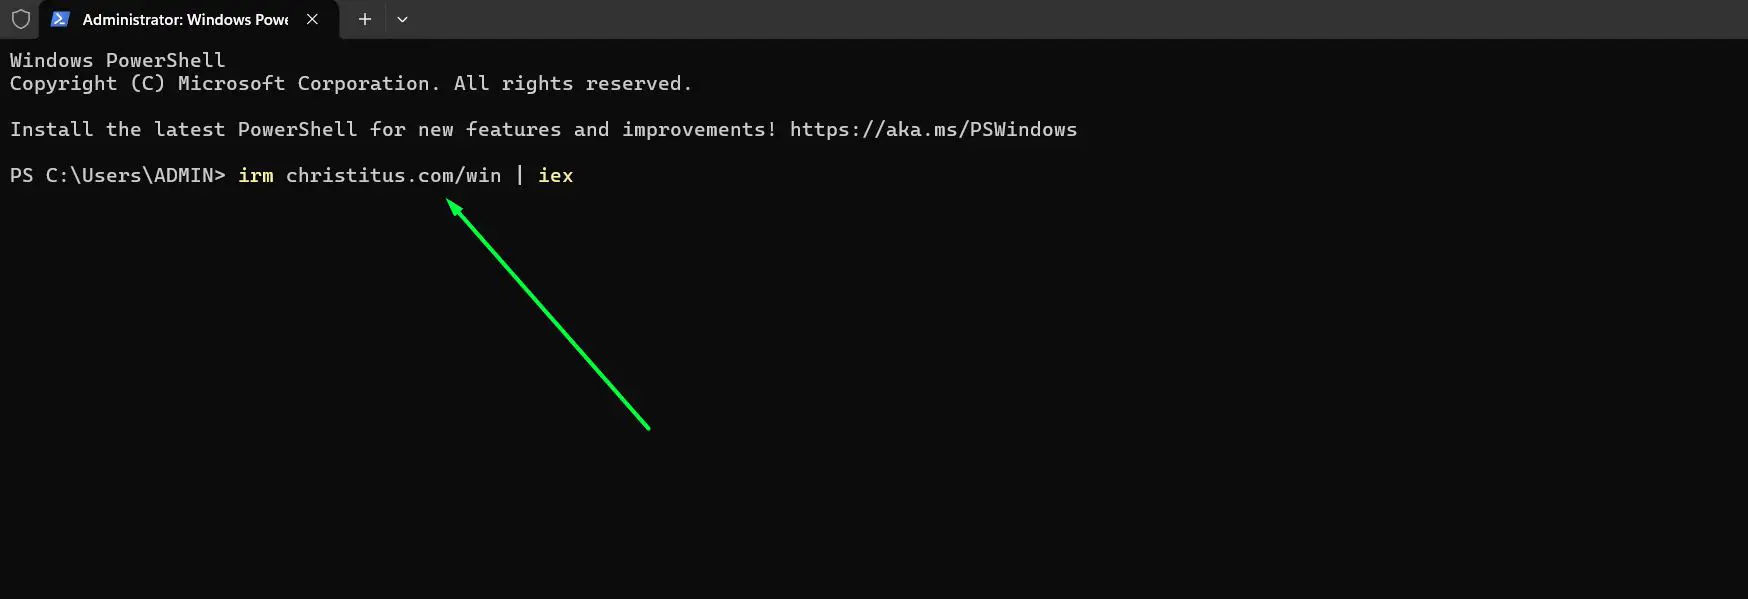
- Step 1: Right-click the Start button and open ‘Terminal (Admin)’.
- Step 2: Run this command to launch the tool:
irm christitus.com/win | iex
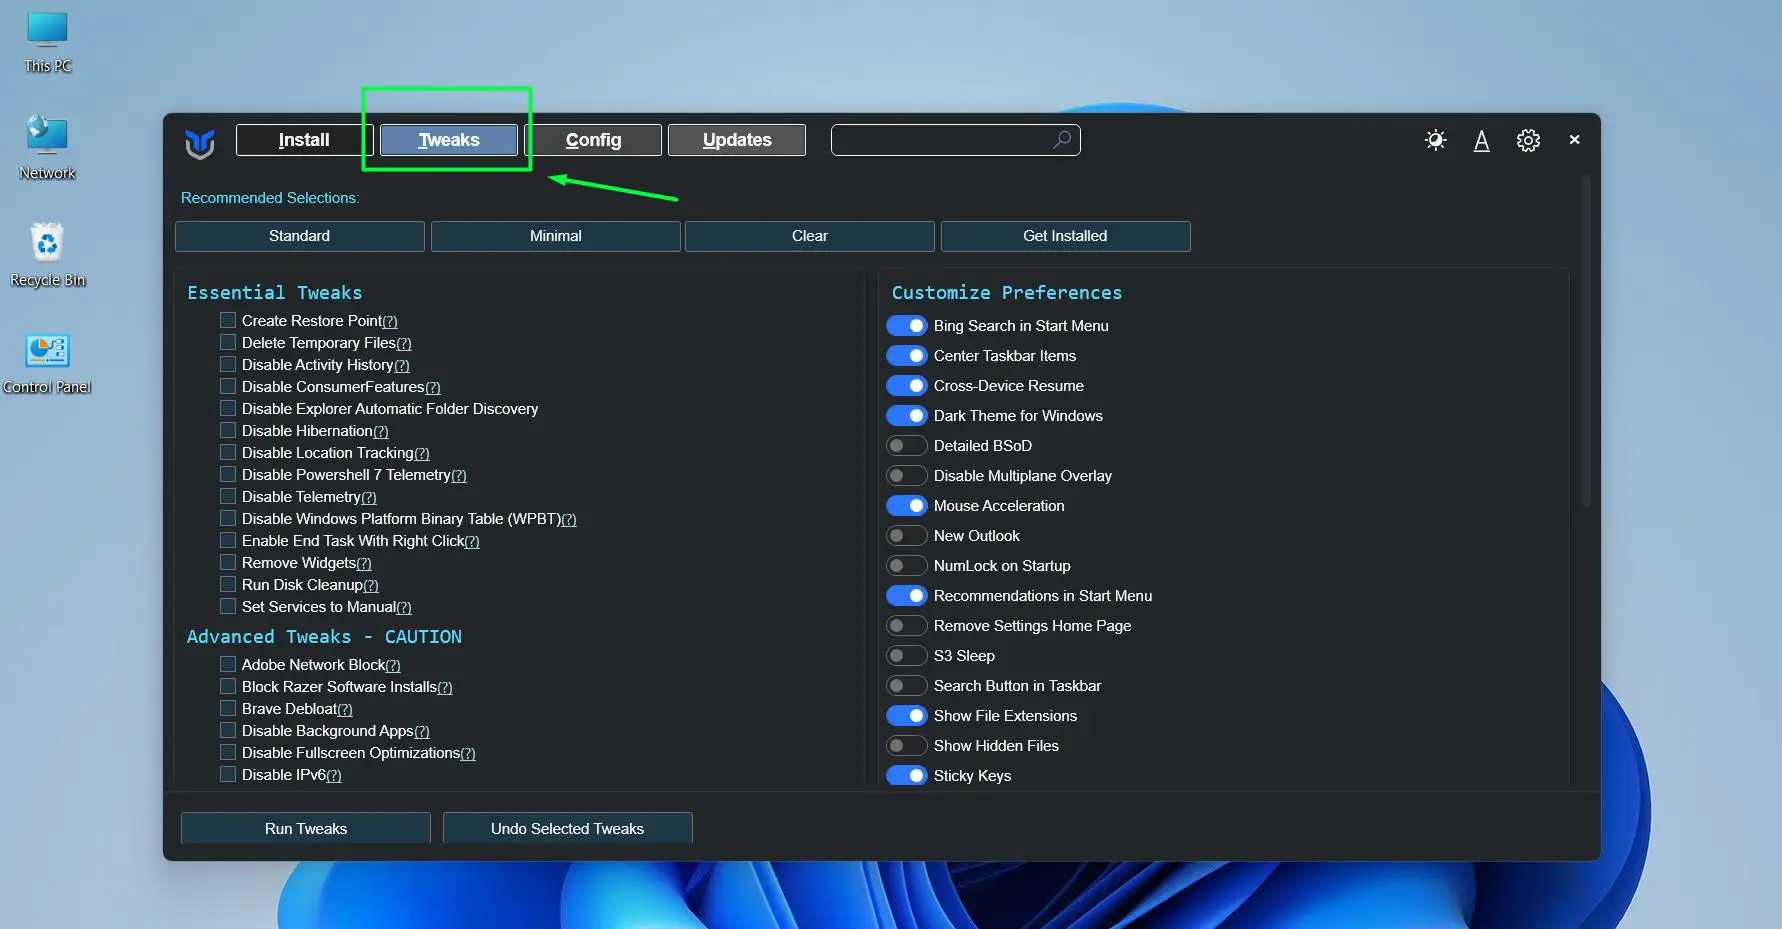
- Step 3: A graphical interface will open. Navigate to the ‘Tweaks’ tab.
- Step 4: Under ‘Recommended Selections’, choose a preset – ‘Standard’ for most users or ‘Minimal’ for a lighter cleanup. Alternatively, manually check individual options under ‘Essential Tweaks’ such as ‘Disable Telemetry’, ‘Disable Activity History’, and ‘Remove Widgets’.
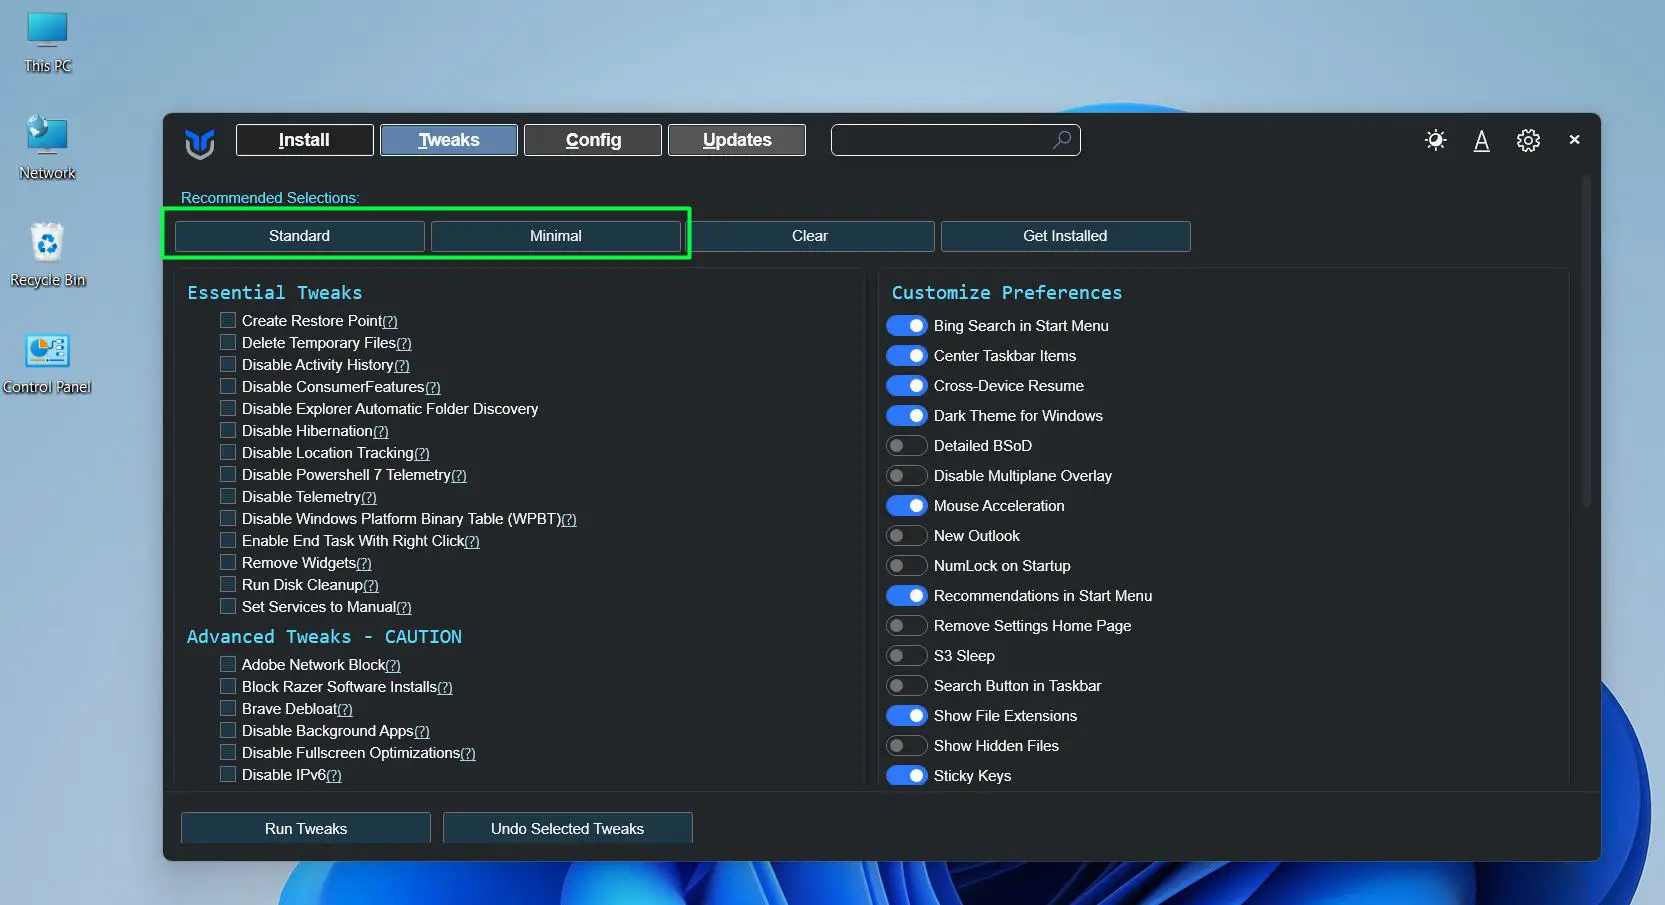
- Step 5: On the right side under ‘Customize Preferences’, toggle off features that are not needed such as ‘Bing Search in Start Menu’ and ‘Recommendations in Start Menu’.
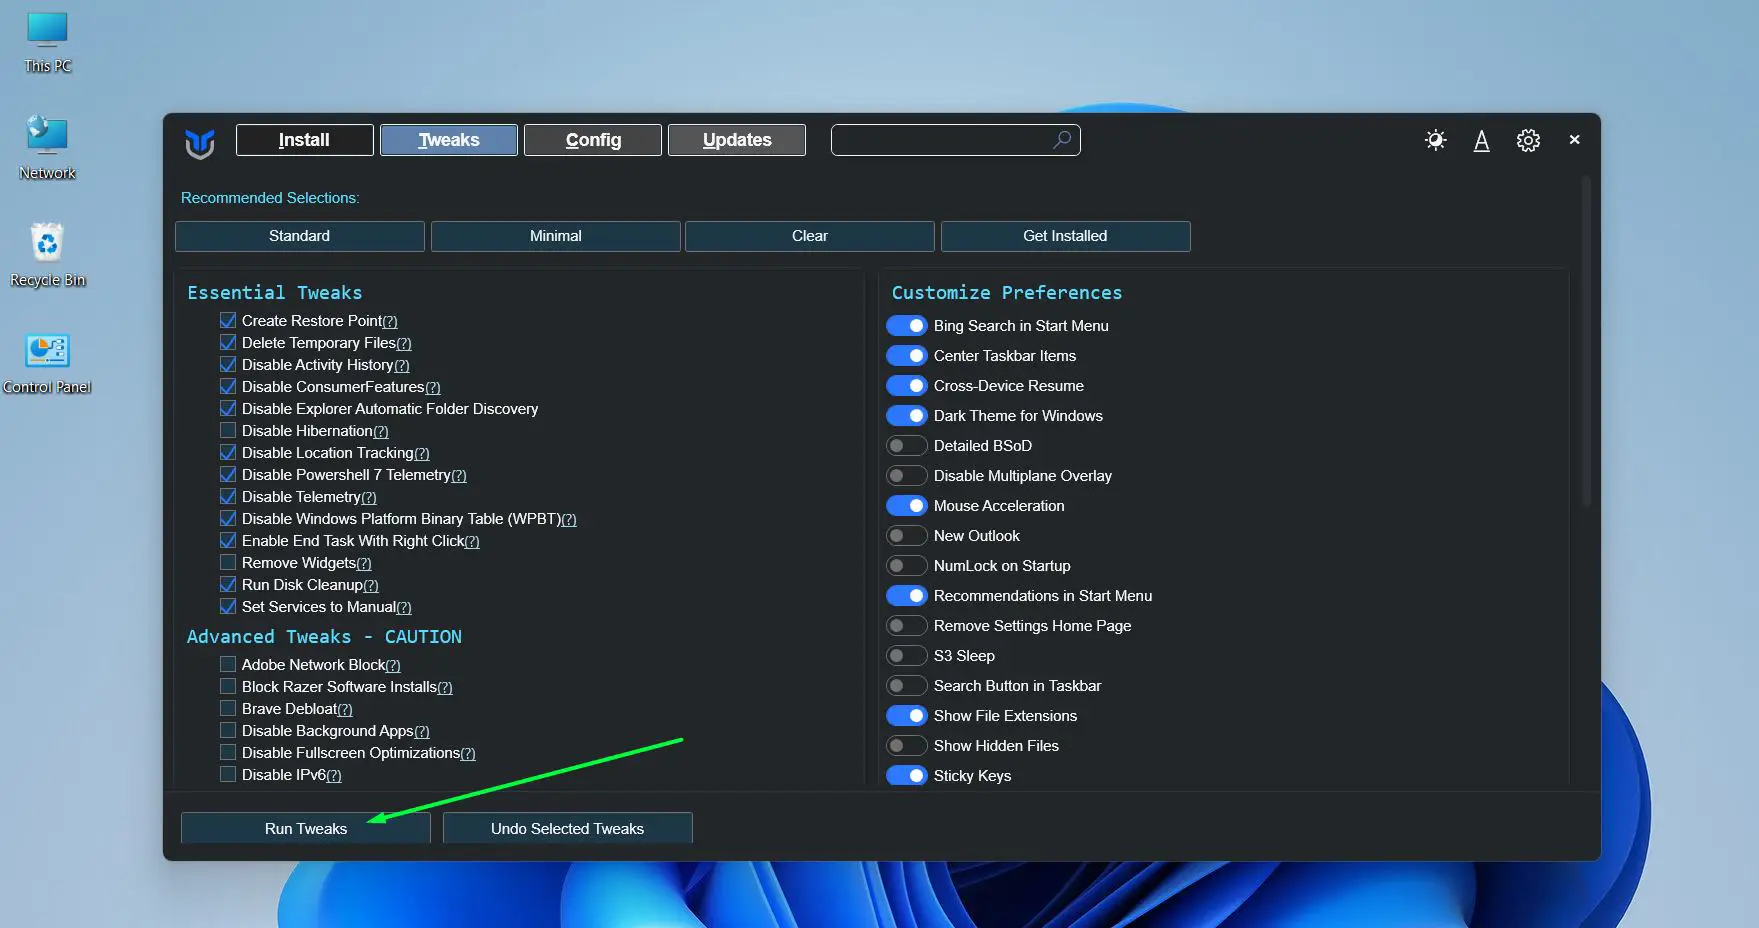
- Step 6: Click ‘Run Tweaks’ at the bottom left and let the tool apply the selected optimizations.
- Step 7: Restart the PC once the process is complete.
This tool can remove bloatware, disable telemetry, apply performance tweaks, and install or uninstall software all from one place. It is the fastest method for a full debloat and is particularly useful after a fresh Windows 11 installation.
Pro Tip: Always run debloat tools right after a clean Windows 11 install, before adding personal files or software. Starting from a clean slate gives the best results and avoids having to undo changes later.
Keeping the system lean also matters beyond software. Understanding how hardware interacts with Windows performance helps make smarter decisions about what to keep and what to cut.
Tips for a Cleaner Windows 11 Experience
- Create a system restore point before making major changes, especially when using PowerShell or debloat tools.
- Revisit startup apps every few months since new software installs often add themselves back to startup automatically.
- Use the built-in Storage Sense feature under Settings – System – Storage to automatically clear temporary files on a schedule.
- Avoid installing software bundles that include optional extras – always choose ‘Custom install’ and uncheck anything unrelated to the main program.
- Check the ‘Background apps’ setting under Settings – Apps – Installed apps to prevent apps from running in the background unnecessarily.
Common Problems When Debloating Windows 11
PowerShell command returns an error
This usually happens when the terminal is not running as Administrator. Close it and reopen by right-clicking the Start button and selecting ‘Terminal (Admin)’ before running the command again.
App comes back after removal
Some Microsoft apps reinstall themselves through Windows Update. After debloating, check Windows Update settings and disable automatic app recommendations. Using PowerShell to remove provisioned packages (not just per-user packages) prevents reinstallation for new user accounts as well.
Debloat tool does not open
This can happen if Windows Defender blocks the script. Temporarily allowing the script to run through PowerShell execution policy settings usually resolves it. Run Set-ExecutionPolicy RemoteSigned in an admin terminal before launching the tool, and revert it afterward if preferred.
System runs slower after changes
This is rare but can happen if a critical background service was disabled. Using System Restore to revert to the restore point created before starting is the safest fix. This is exactly why creating that restore point beforehand matters so much.
Frequently Asked Questions
Is it safe to debloat Windows 11?
Yes, when done carefully. Removing unused apps and disabling unnecessary startup items carries very little risk. Using PowerShell or debloat tools requires a bit more caution, but creating a restore point beforehand keeps everything reversible.
Will debloating Windows 11 speed up the PC?
In most cases, yes. Fewer background processes mean more RAM and CPU headroom for the apps that actually get used. Boot times also improve noticeably after disabling high-impact startup apps and unnecessary services.
Can removed Windows 11 apps be reinstalled?
Most apps removed through Settings can be reinstalled from the Microsoft Store. Apps removed via PowerShell can also be reinstalled using the Add-AppxPackage command with the correct package source.
Does debloating Windows 11 void the warranty or break updates?
Removing apps and adjusting settings does not void any warranty. Windows updates will still work normally. In rare cases, a major feature update may reinstall some Microsoft apps, which can simply be removed again afterward.
What is the fastest way to debloat Windows 11?
Using a trusted tool like Chris Titus Tech’s WinUtil is the fastest all-in-one method. It handles app removal, telemetry settings, and performance tweaks in a single session without requiring manual steps for each individual setting.
How often should Windows 11 be debloated?
A thorough debloat after a fresh install is usually enough. However, checking startup apps and installed programs every few months is a good habit, especially after major Windows updates that may restore some default settings or apps.