Device Manager is one of the most useful built-in tools in Windows. It lets you view, manage, and update all the hardware connected to a PC – from graphics cards and network adapters to USB controllers and audio devices. Whether there is a driver issue to fix or just a need to check what hardware is installed, knowing how to open Device Manager on Windows 10/11 is an essential skill for any Windows user.
Quick Summary Table
- Method 1: Right-click the Start button and select ‘Device Manager’
- Method 2: Press Windows + X and click ‘Device Manager’
- Method 3: Search ‘Device Manager’ in the Windows Search bar
- Method 4: Use the Run dialog – press Windows + R, type devmgmt.msc
- Method 5: Open through Control Panel under Hardware and Sound
- Method 6: Use Command Prompt or PowerShell with the command devmgmt.msc
- Method 7: Access it through Windows Settings (Windows 11)
How to Open Device Manager on Windows 10/11 – All Methods
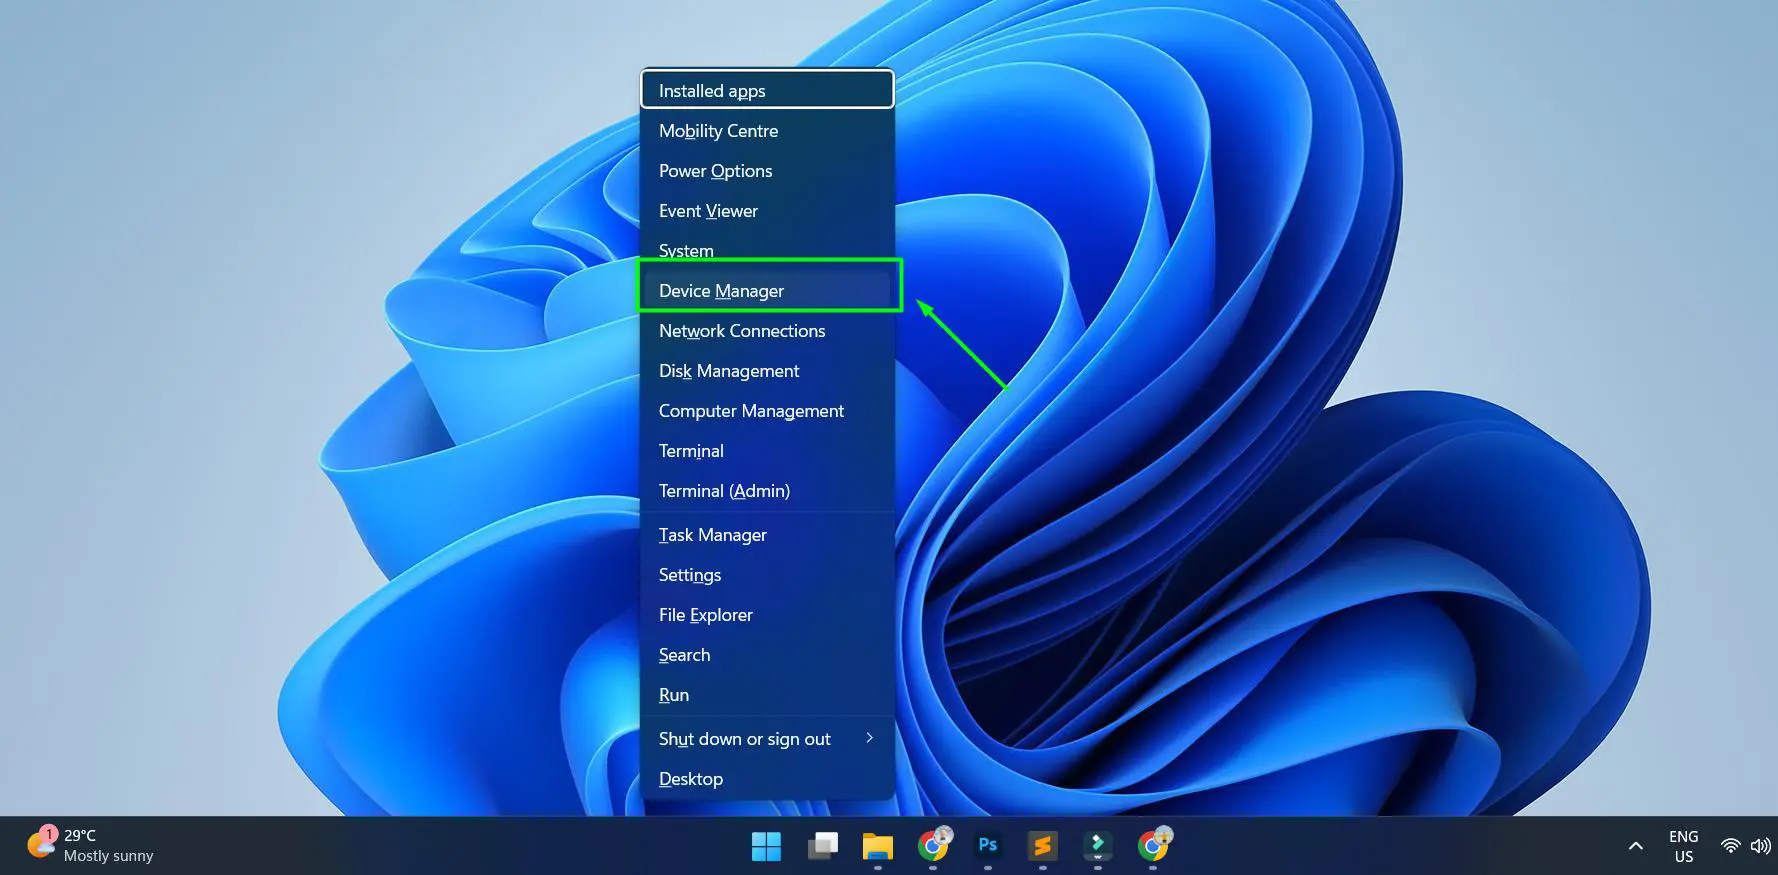
Method 1: Right-Click the Start Button
This is the fastest method and works on both Windows 10 and Windows 11. Most people find this the most convenient option since it takes just two clicks.
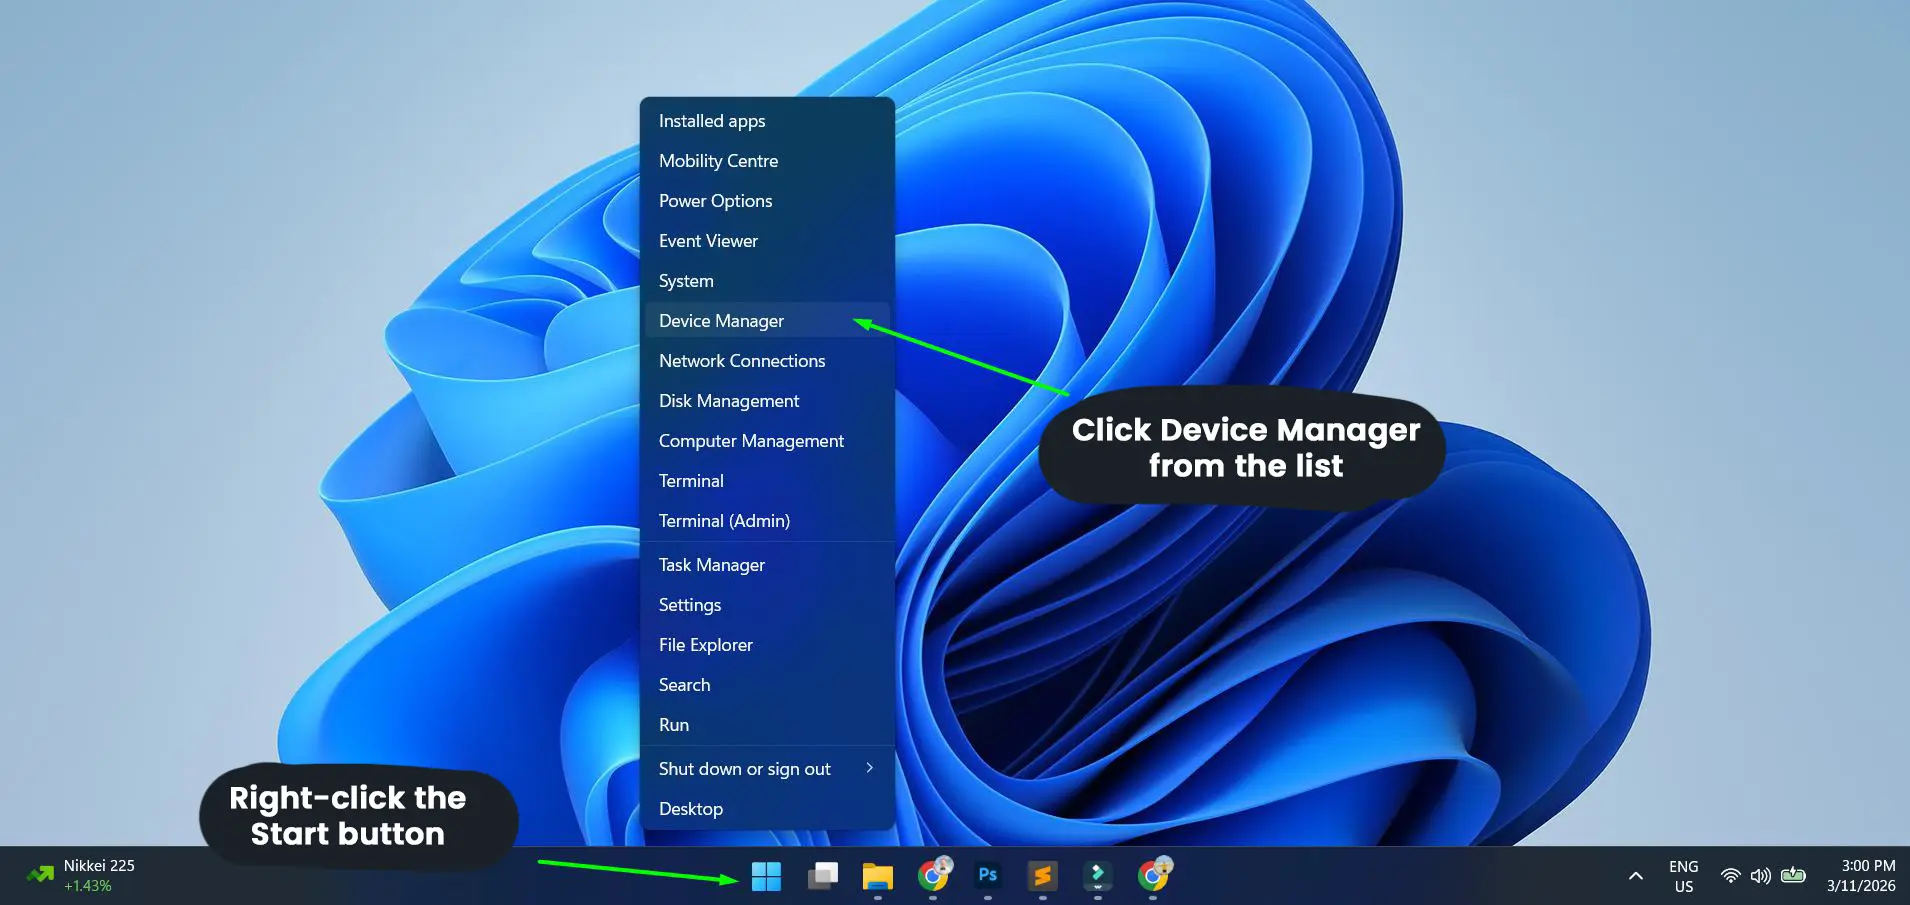
- Step 1: Right-click the Start button on the taskbar (bottom-left corner)
- Step 2: A quick-access menu will appear
- Step 3: Click Device Manager from the list
That is it – Device Manager opens immediately. No need to navigate through multiple menus.
Method 2: Use the Windows + X Keyboard Shortcut
The Windows + X shortcut opens the same Power User menu as right-clicking the Start button. This works great if the keyboard is preferred over the mouse.
- Step 1: Press Windows + X on the keyboard at the same time
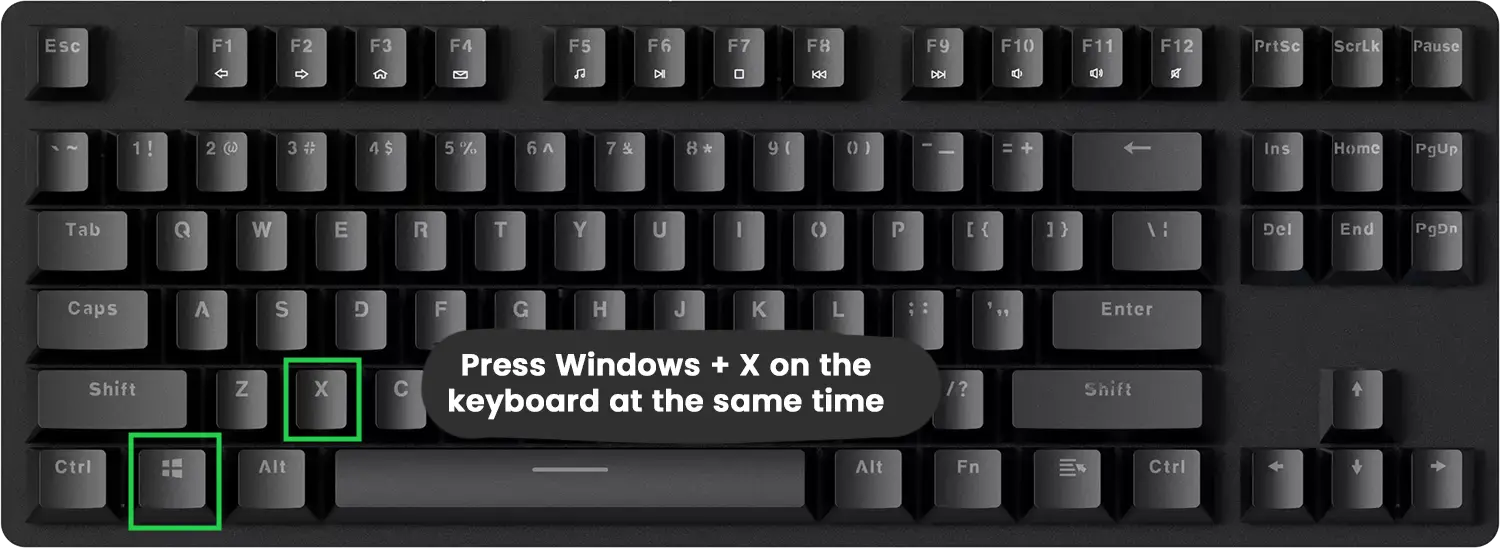
- Step 2: The Power User menu will appear on screen
- Step 3: Click Device Manager or press M on the keyboard to select it
Method 3: Search via the Windows Search Bar
Windows Search is always a reliable way to find built-in tools quickly. This method is great when you are not sure where something is located.

- Step 1: Click the Start button or press Windows + S to open the search bar.
- Step 2: Type Device Manager
- Step 3: Click Device Manager from the search results that appear
Method 4: Use the Run Dialog (devmgmt.msc)
The Run dialog is one of the classic ways to open Windows tools directly. The key is knowing the right command – devmgmt.msc – which launches Device Manager instantly.
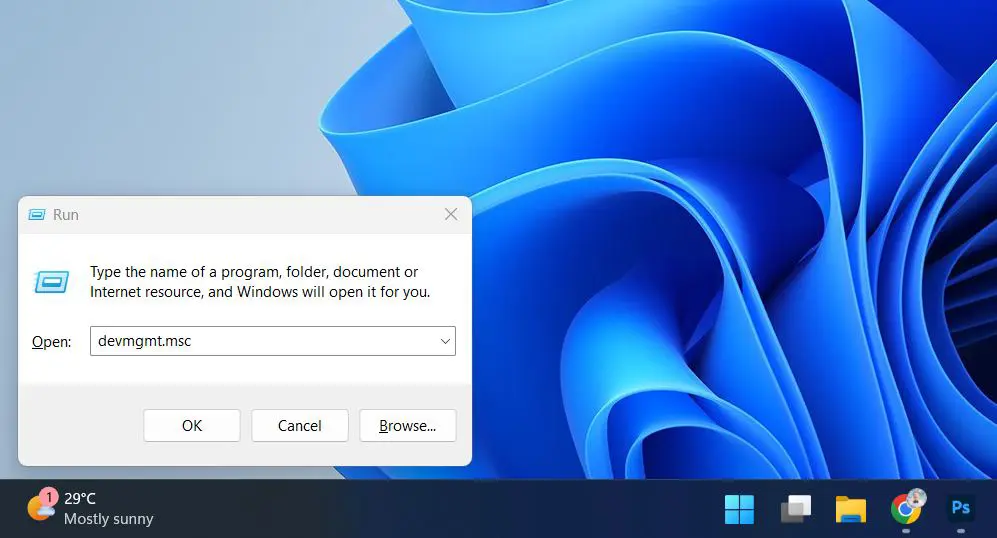
- Step 1: Press Windows + R to open the Run dialog box
- Step 2: Type devmgmt.msc in the text field
- Step 3: Press Enter or click OK
This works best when speed is important or when the Start menu is not responding properly.
Pro-Tip: The command devmgmt.msc can also be typed directly into the Windows Search bar or the File Explorer address bar to open Device Manager – no need to open the Run dialog first.
Method 5: Open Through Control Panel

Control Panel is the traditional route. It takes a few more steps but is useful for those who prefer navigating through system settings manually.
- Step 1: Open Control Panel by searching for it in the Start menu
- Step 2: Click on Hardware and Sound
- Step 3: Under the ‘Devices and Printers’ section, click Device Manager
Method 6: Open Device Manager via Command Prompt or PowerShell
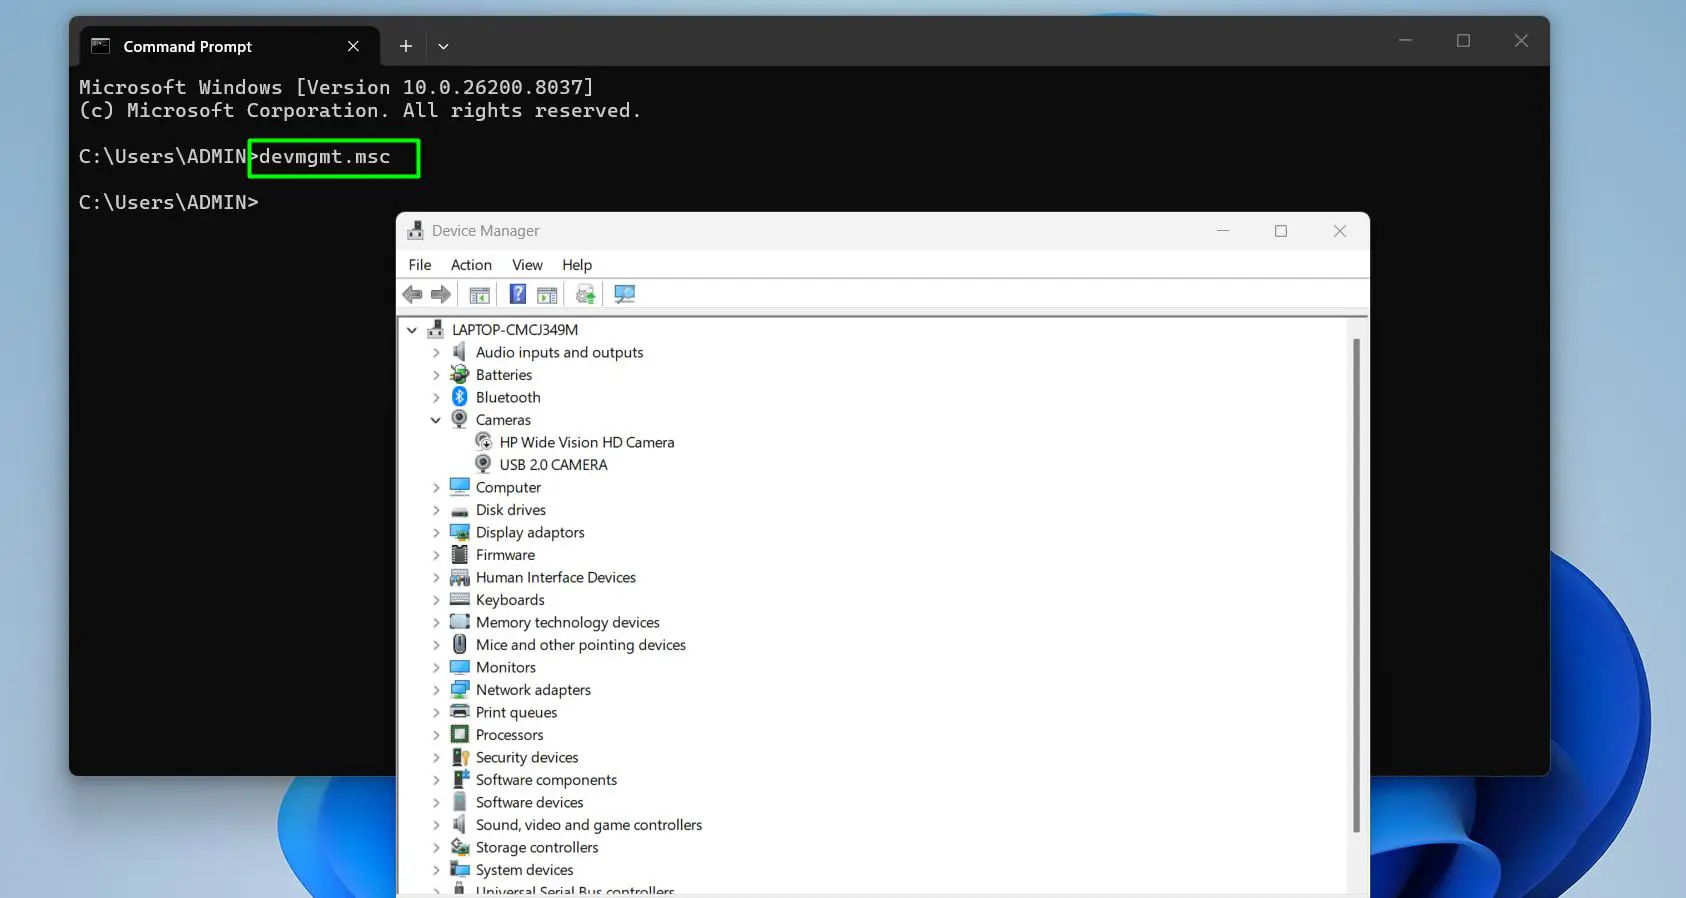
For those comfortable using the command line, Device Manager can be launched directly from Command Prompt or PowerShell. This is especially handy in administrative or scripting scenarios. Learning how to run CMD as administrator can also help when elevated permissions are needed.
- Step 1: Open Command Prompt or PowerShell – search for either in the Start menu
- Step 2: Type the following command: devmgmt.msc
- Step 3: Press Enter and Device Manager will open
Method 7: Open via Windows Settings (Windows 11)
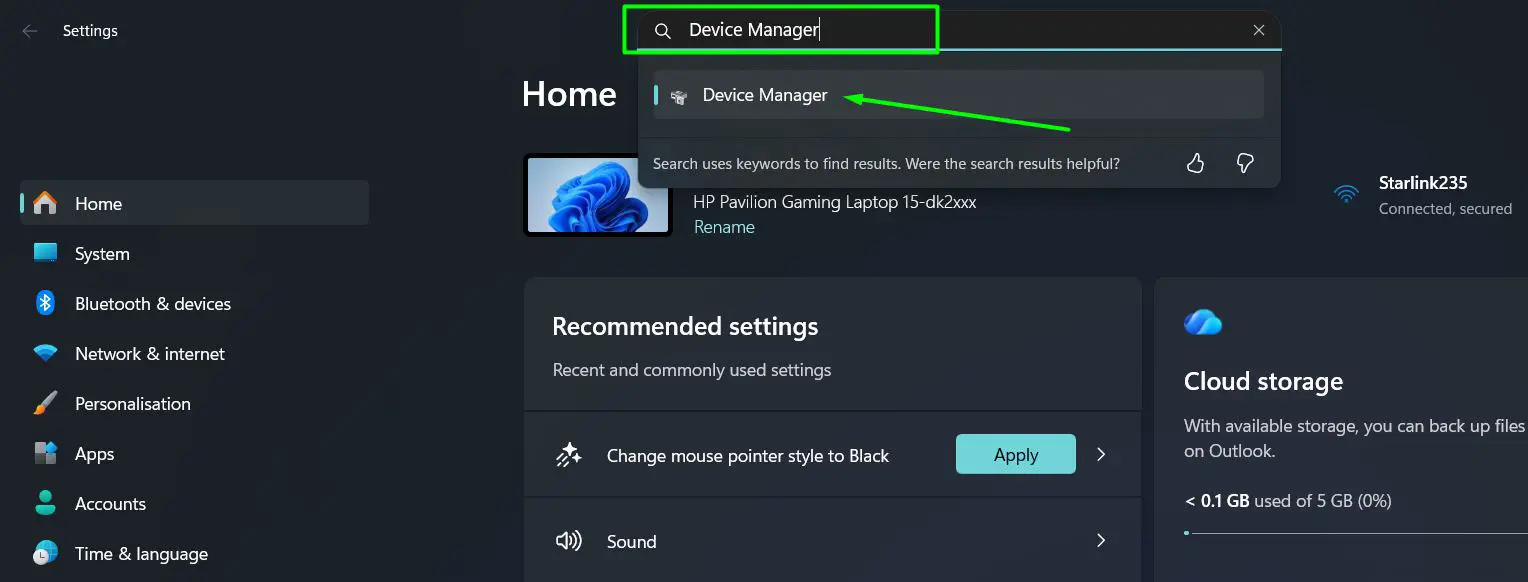
Windows 11 made it easier to find Device Manager through the Settings app, which is a useful route for those who already have Settings open.
- Step 1: Press Windows + I to open Settings
- Step 2: In the search bar at the top of Settings, type Device Manager
- Step 3: Click the Device Manager result that appears
What to Do After Opening Device Manager
Once Device Manager is open, the full list of hardware categories installed on the PC appears. Each category – such as Display Adapters, Network Adapters, or Sound, Video and Game Controllers – can be expanded by clicking the arrow next to it.
A yellow warning icon next to a device means there is a driver issue. Right-clicking any device gives options to update the driver, disable it, uninstall it, or view its properties. For example, if a Bluetooth device is acting up, Device Manager is the right place to start. The guide on reinstalling Bluetooth drivers on Windows walks through the full process once Device Manager is open.
Managing driver updates through Device Manager is also useful for printers. If a printer needs a driver refresh, starting from Device Manager gives direct access – and this guide on updating printer drivers covers the full steps.
Pro-Tip: If a device has a yellow exclamation mark icon in Device Manager, right-click it and choose ‘Update driver’ first. If that does not resolve it, try ‘Uninstall device’ and then restart the computer – Windows will attempt to reinstall the driver automatically on reboot.
Tips for Using Device Manager
- To see hidden or non-present devices, click the View menu in Device Manager and select ‘Show hidden devices’ – useful when troubleshooting ghost devices or old hardware.
- Always create a restore point before making major driver changes – this gives a safe fallback if something goes wrong.
- If Device Manager shows a device with a down arrow icon, that means the device has been disabled. Right-click it and choose ‘Enable device’ to turn it back on.
- The Action menu at the top of Device Manager has a ‘Scan for hardware changes’ option – handy after plugging in new hardware that has not appeared yet.
- Device Manager can be run from any user account, but making changes such as updating or uninstalling drivers requires administrator privileges.
Common Problems When Opening Device Manager
- Device Manager opens but is blank or empty: This can happen if Windows services are not running properly. Open the Run dialog, type services.msc, and ensure the Plug and Play service is running.
- Access denied error: Device Manager requires administrator access to make changes. Make sure the account being used has admin rights, or right-click and choose ‘Run as administrator’ when opening it via Command Prompt.
- Cannot find Device Manager in search results: Try using the Run dialog with the command devmgmt.msc as a reliable fallback method.
- Device Manager crashes immediately after opening: This may be a sign of corrupted system files. Running sfc /scannow in an elevated Command Prompt can help diagnose and repair system file issues.
- A device does not appear in Device Manager: Use the View menu and enable ‘Show hidden devices’. Also check physical connections and try the Action > Scan for hardware changes option.
Frequently Asked Questions
What is Device Manager in Windows?
Device Manager is a built-in Windows tool that displays all the hardware components installed on a computer. It allows users to view device status, update drivers, disable or enable devices, and uninstall hardware components. It is part of the Microsoft Management Console (MMC).
How do I open Device Manager quickly on Windows 10 or 11?
The fastest way is to right-click the Start button and select ‘Device Manager’ from the menu. Alternatively, press Windows + X and then press M on the keyboard. Both methods open Device Manager in under two seconds.
Can Device Manager be opened without administrator rights?
Device Manager can be opened and viewed by any user account, but making changes – such as updating, disabling, or uninstalling drivers – requires administrator privileges. A standard user account will see the devices but will not be able to modify them.
What does a yellow exclamation mark in Device Manager mean?
A yellow exclamation mark on a device in Device Manager indicates a problem – usually a missing, outdated, or corrupted driver. Right-clicking the device and selecting ‘Update driver’ is the first step to resolving the issue.
How do I open Device Manager from Command Prompt?
Open Command Prompt or PowerShell, type devmgmt.msc, and press Enter. Device Manager will open immediately. The same command works in the Run dialog (Windows + R) and the Windows Search bar.
Is Device Manager available on all versions of Windows 10 and 11?
Yes, Device Manager is included in all editions of Windows 10 and Windows 11, including Home, Pro, Enterprise, and Education versions. The steps to open it are the same across all editions.
What is the Device Manager shortcut command?
The shortcut command for Device Manager is devmgmt.msc. This can be entered in the Run dialog (Windows + R), the Windows Search bar, Command Prompt, PowerShell, or the File Explorer address bar.
Can Device Manager help fix a driver issue?
Yes, Device Manager is the primary tool in Windows for managing and fixing driver issues. It can update drivers, roll back to a previous driver version, uninstall a driver, and scan for new hardware. For a full walkthrough on fixing specific driver problems, resources like the guide on reinstalling Bluetooth drivers provide detailed steps.
Why is Device Manager not showing all my devices?
By default, Device Manager hides devices that are not currently connected. To show all devices including disconnected ones, click the View menu in Device Manager and select ‘Show hidden devices’. Then run a hardware scan from the Action menu to refresh the list.
How do I access Device Manager on a Windows 11 PC without a mouse?
Press Windows + X on the keyboard to open the Power User menu, then press M to select Device Manager. Alternatively, press Windows + R, type devmgmt.msc, and press Enter. Both methods work entirely with the keyboard.