PC Health Check in Windows 11 is a free tool from Microsoft that gives a quick overview of the device’s condition in one place. Once opened, it displays key details like storage capacity, battery health, Windows Update status, startup time, and more – all under a simple ‘PC health at a glance’ dashboard. This guide walks through how to download, open, and use every section of the app step by step.
Key Takeaways
- PC Health Check is a free Microsoft tool that shows a full health overview of a Windows 11 device.
- The app needs to be downloaded first since it does not come pre-installed on all Windows 11 devices.
- The dashboard covers Windows Backup, Windows Update, Battery capacity, Storage capacity, and Start-up time.
- The left panel shows device specs like RAM, storage size, and device age at a glance.
- Each section has a ‘See details’ option that links directly to the relevant Windows setting.
How to Use PC Health Check in Windows 11
The steps below follow the exact layout of the PC Health Check app, starting from downloading it all the way through each section on the dashboard.
Step 1: Download and Install PC Health Check
- Click here to download the Microsoft Official PC Health Check installer – the file will download automatically.
- Run the installer file once it finishes downloading.
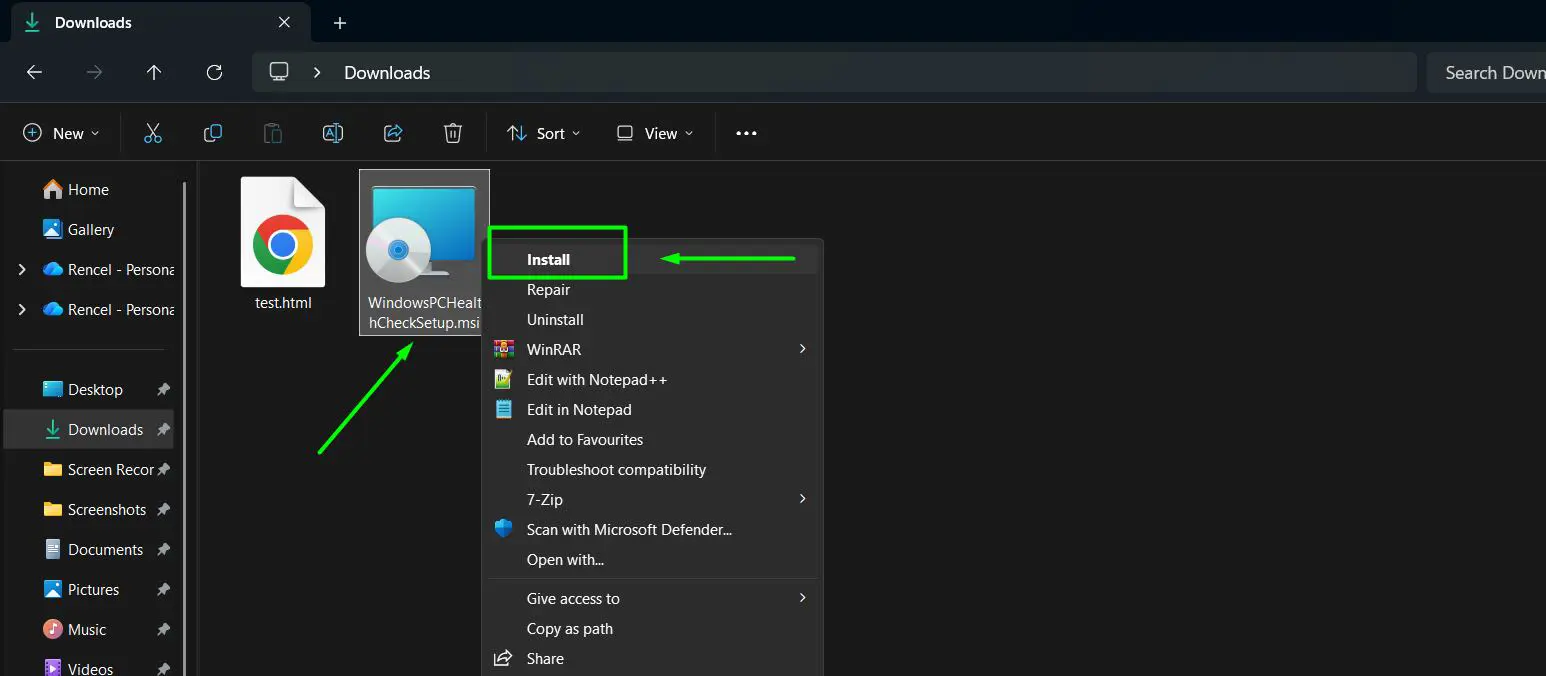
- Follow the on-screen prompts to complete the installation – it takes less than a minute.
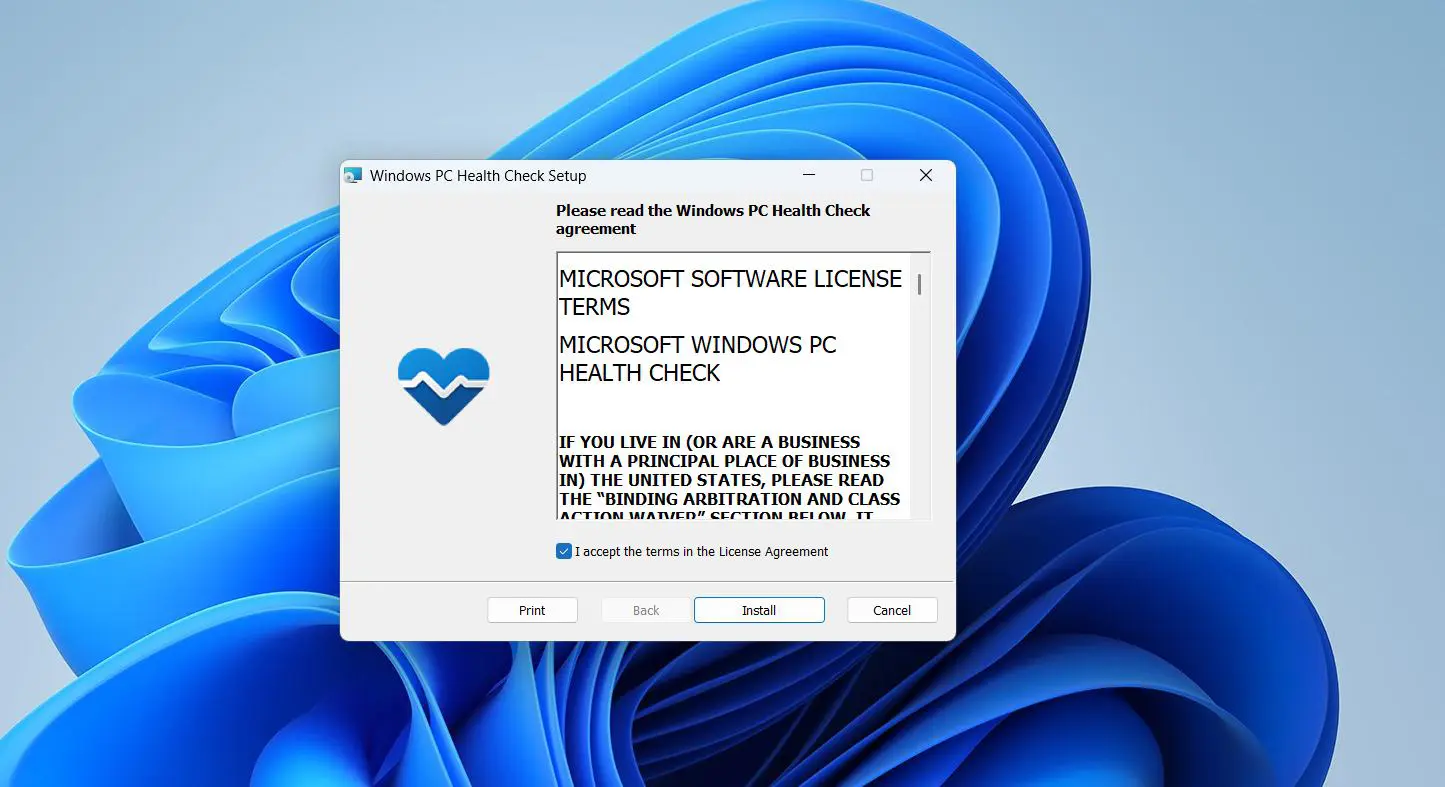
The app is free and comes directly from Microsoft. No third-party sources are needed.
Looking for your Downloads folder? See this step-by-step guide
Step 2: Open PC Health Check
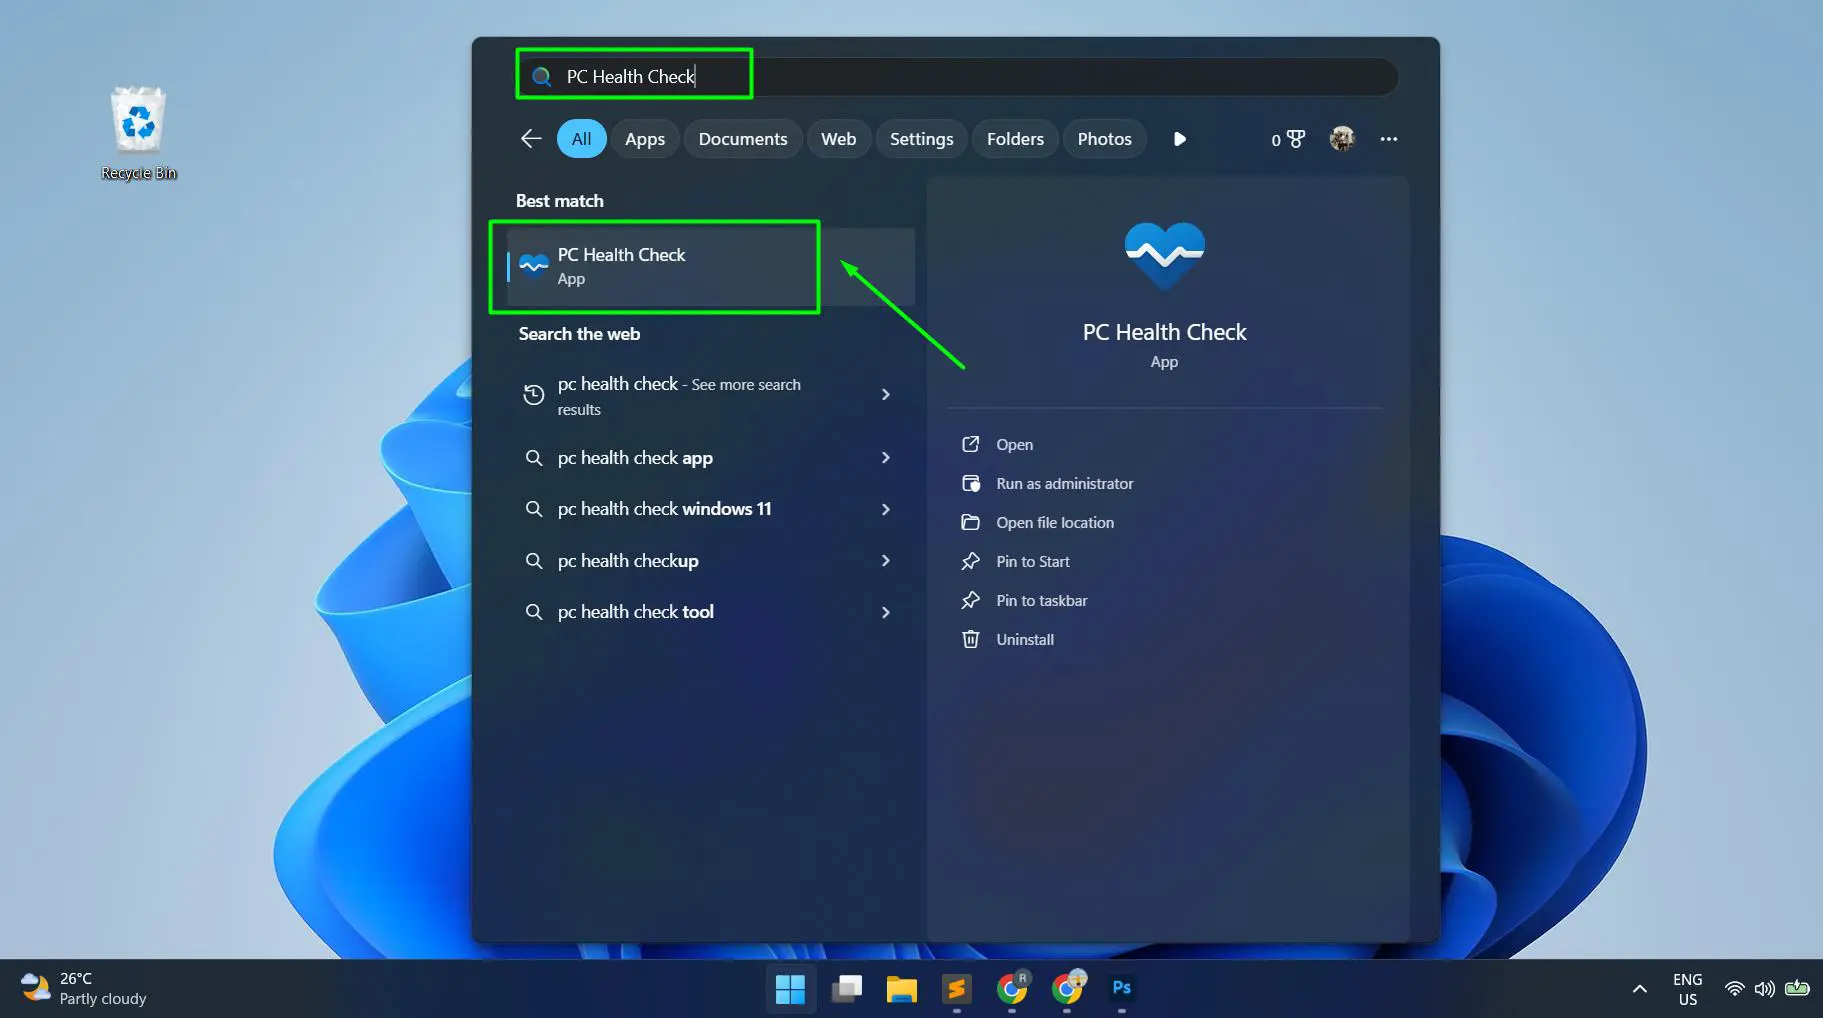
- Press the Windows key on the keyboard.
- Type PC Health Check in the search bar.
- Click the app from the search results to open it.
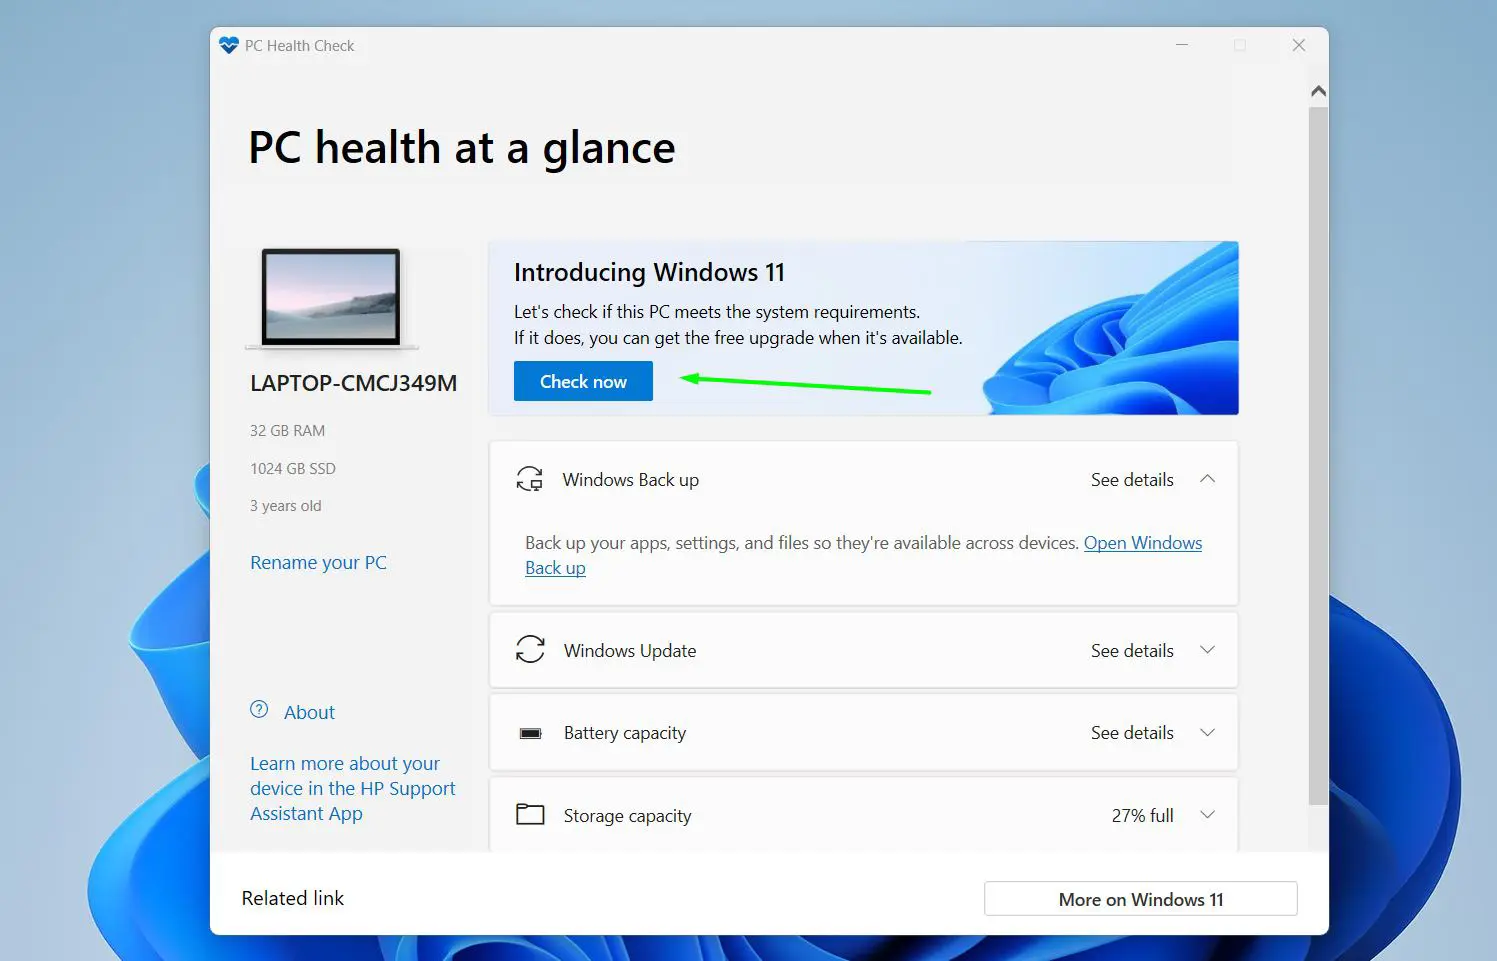
Once open, the app loads straight to the PC health at a glance dashboard. The left side shows the device name, RAM, SSD size, and how old the device is. The right side lists all the health categories to review.
Step 3: Run the Windows 11 Compatibility Check
- On the dashboard, find the Introducing Windows 11 banner at the top right.
- Click the Check now button to run a compatibility scan on the device.
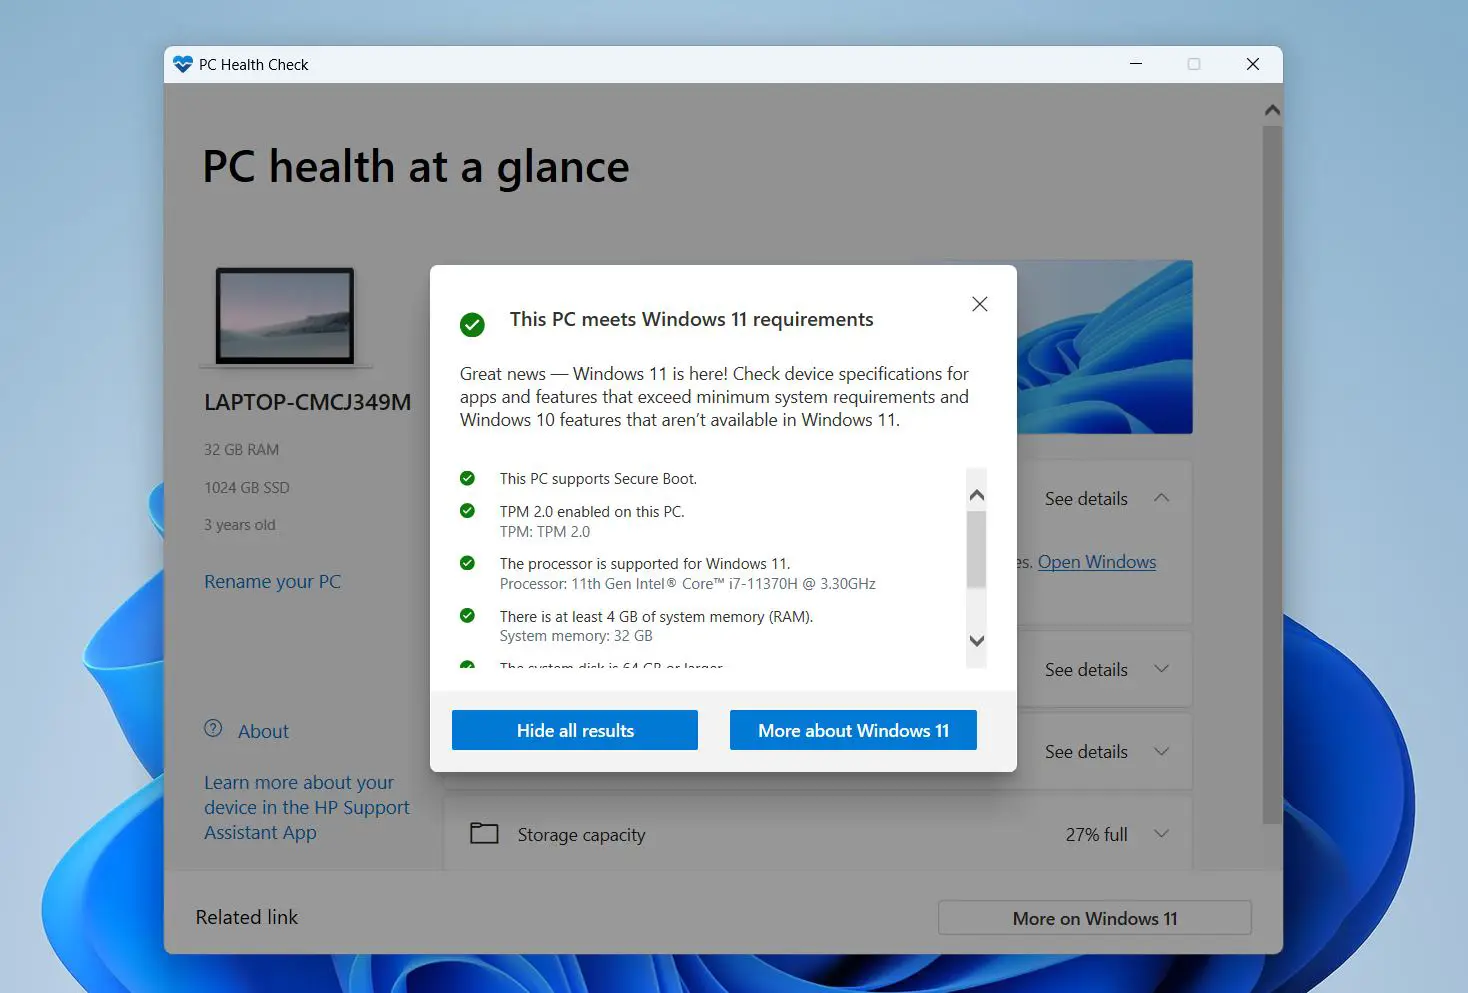
- Click See all results to view the full breakdown of each requirement – including Secure Boot support, TPM 2.0, processor compatibility, system memory (RAM), and disk size.
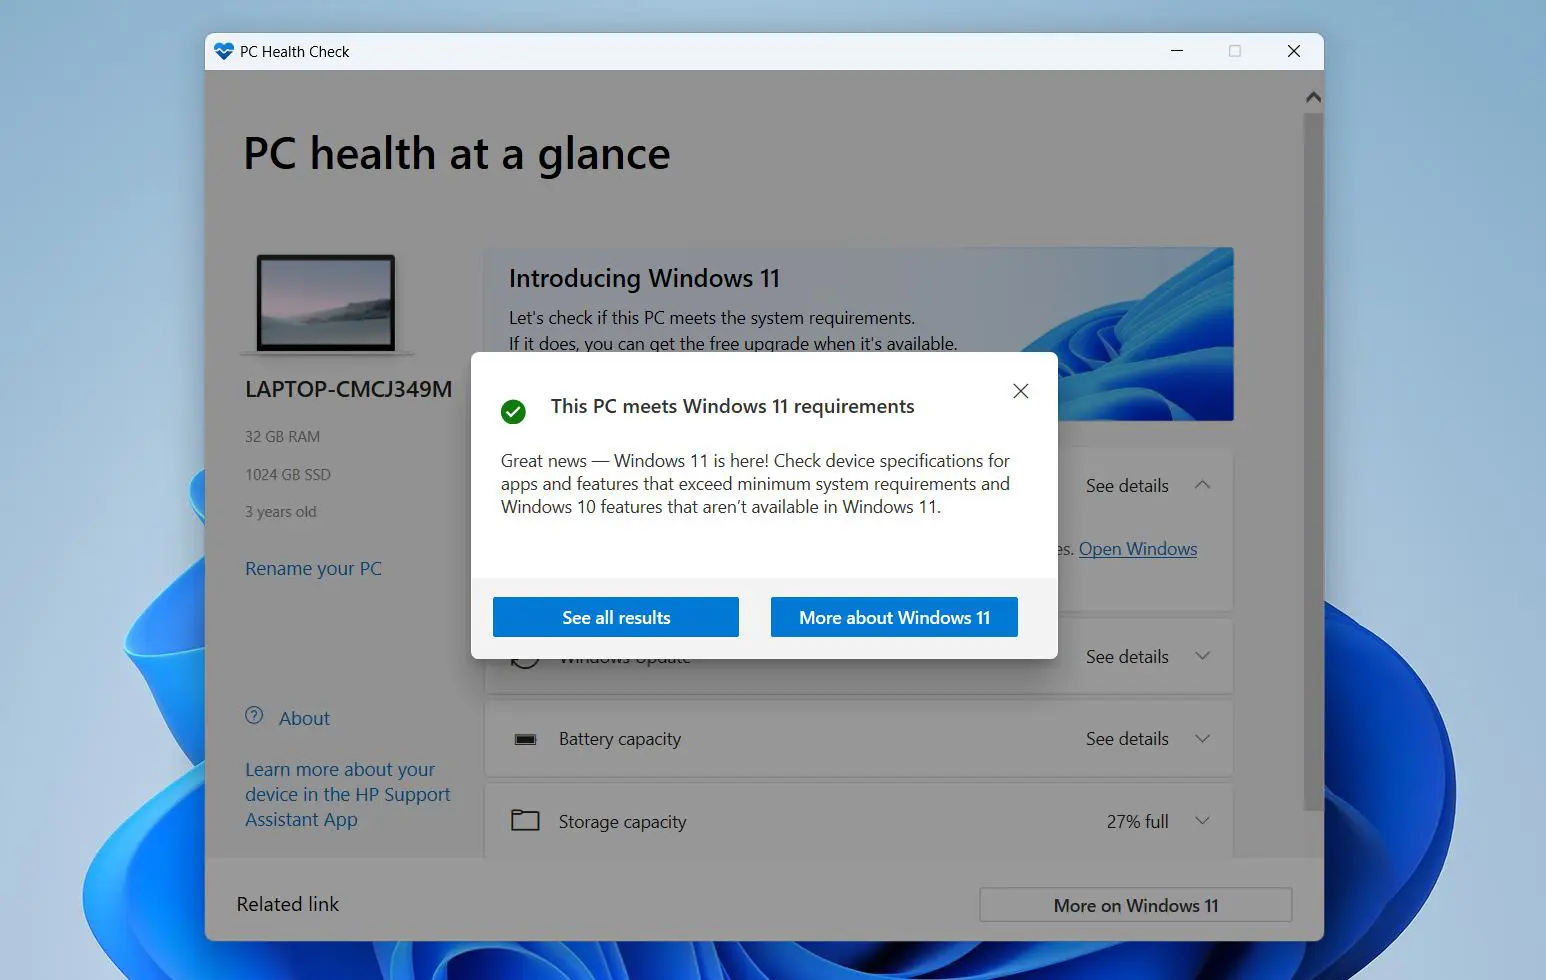
- A popup will immediately appear showing ‘This PC meets Windows 11 requirements’ with a green checkmark if the device passes.
- Click More about Windows 11 to learn more about the upgrade.
If all items show green checkmarks, the device is fully compatible with Windows 11. More detail on compatibility is covered in the Windows 11 compatibility checker guide.
Step 4: Check the Device Info Panel
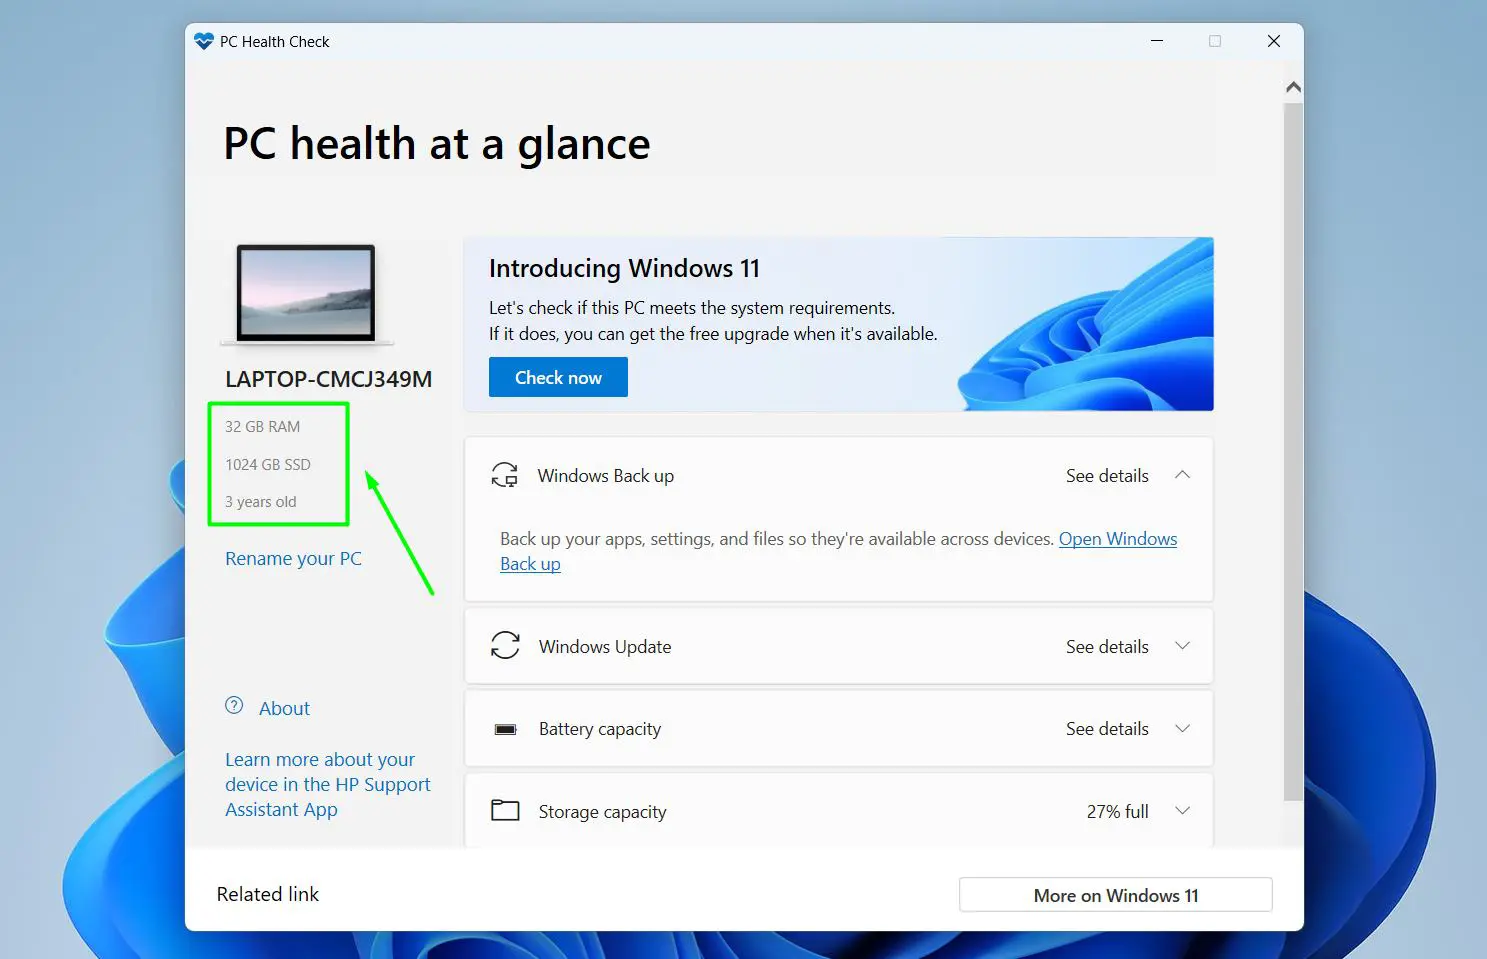
- Look at the left panel of the dashboard to see the device name, RAM, storage size, and age of the PC.
- This panel also includes a Rename your PC link if the device name needs to be updated.
This is a quick way to confirm what hardware is inside the machine without digging into Settings. Most people find this useful when checking if the specs still hold up for current workloads.
Step 5: Review Windows Backup
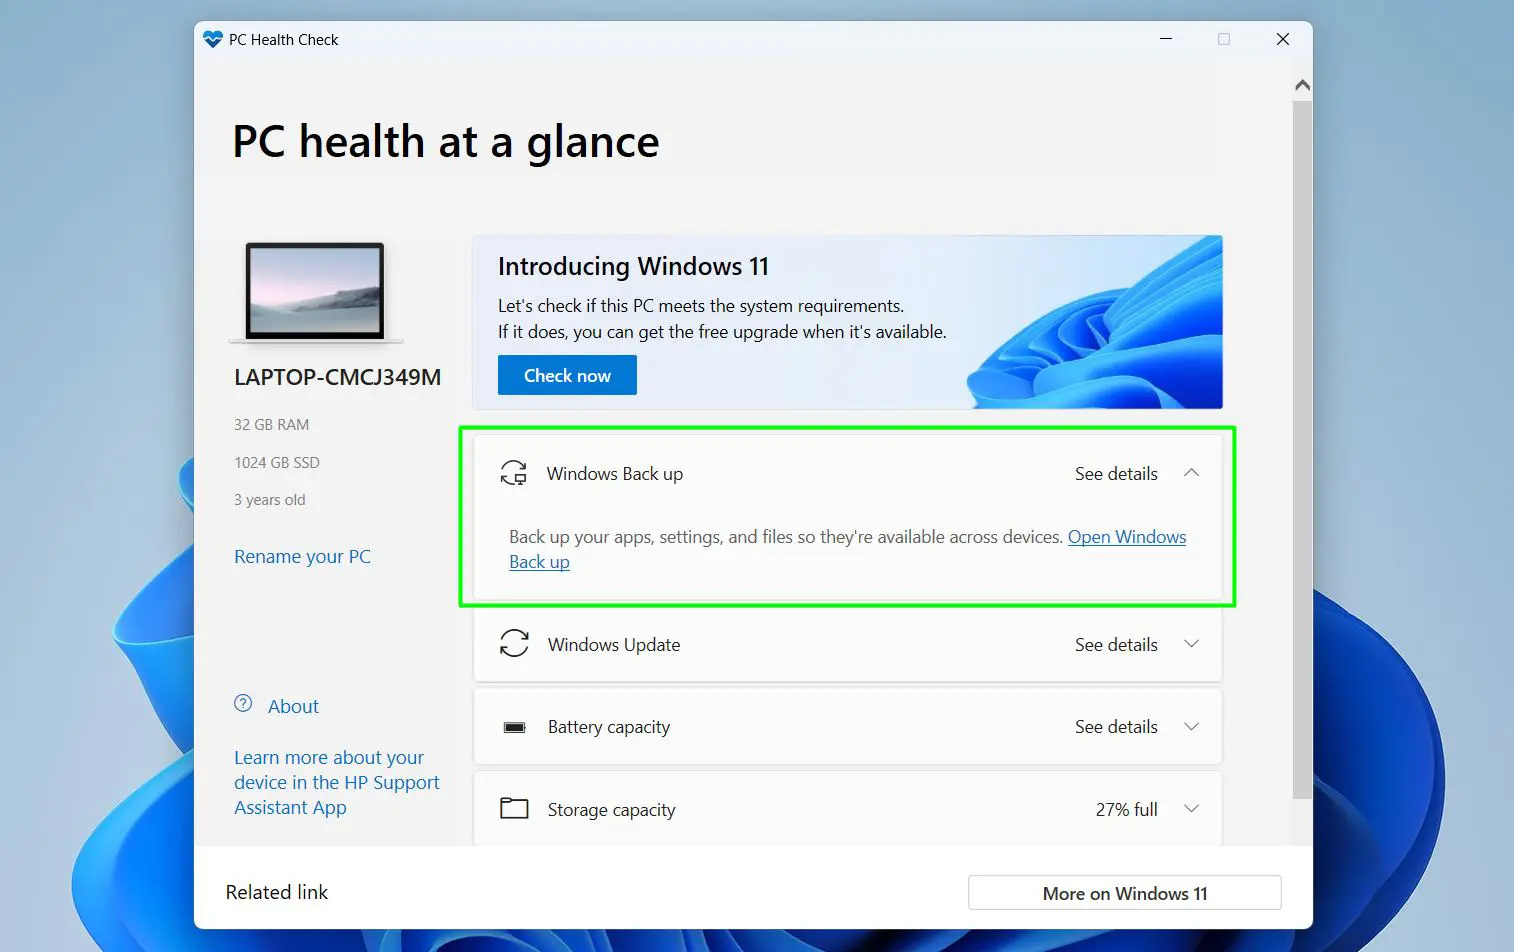
- Click on the Windows Backup section on the right panel.
- The section expands to show whether apps, settings, and files are being backed up to the Microsoft account.
- Click Open Windows Backup to go directly to the backup settings and set it up if needed.
Backup is often the most overlooked section. Having a backup running means files and settings are safe even if something goes wrong with the device later.
Pro-Tip: If the backup section shows that nothing is backed up yet, set it up before doing anything else. It only needs to be configured once and then runs automatically in the background.
Step 6: Check Windows Update Status
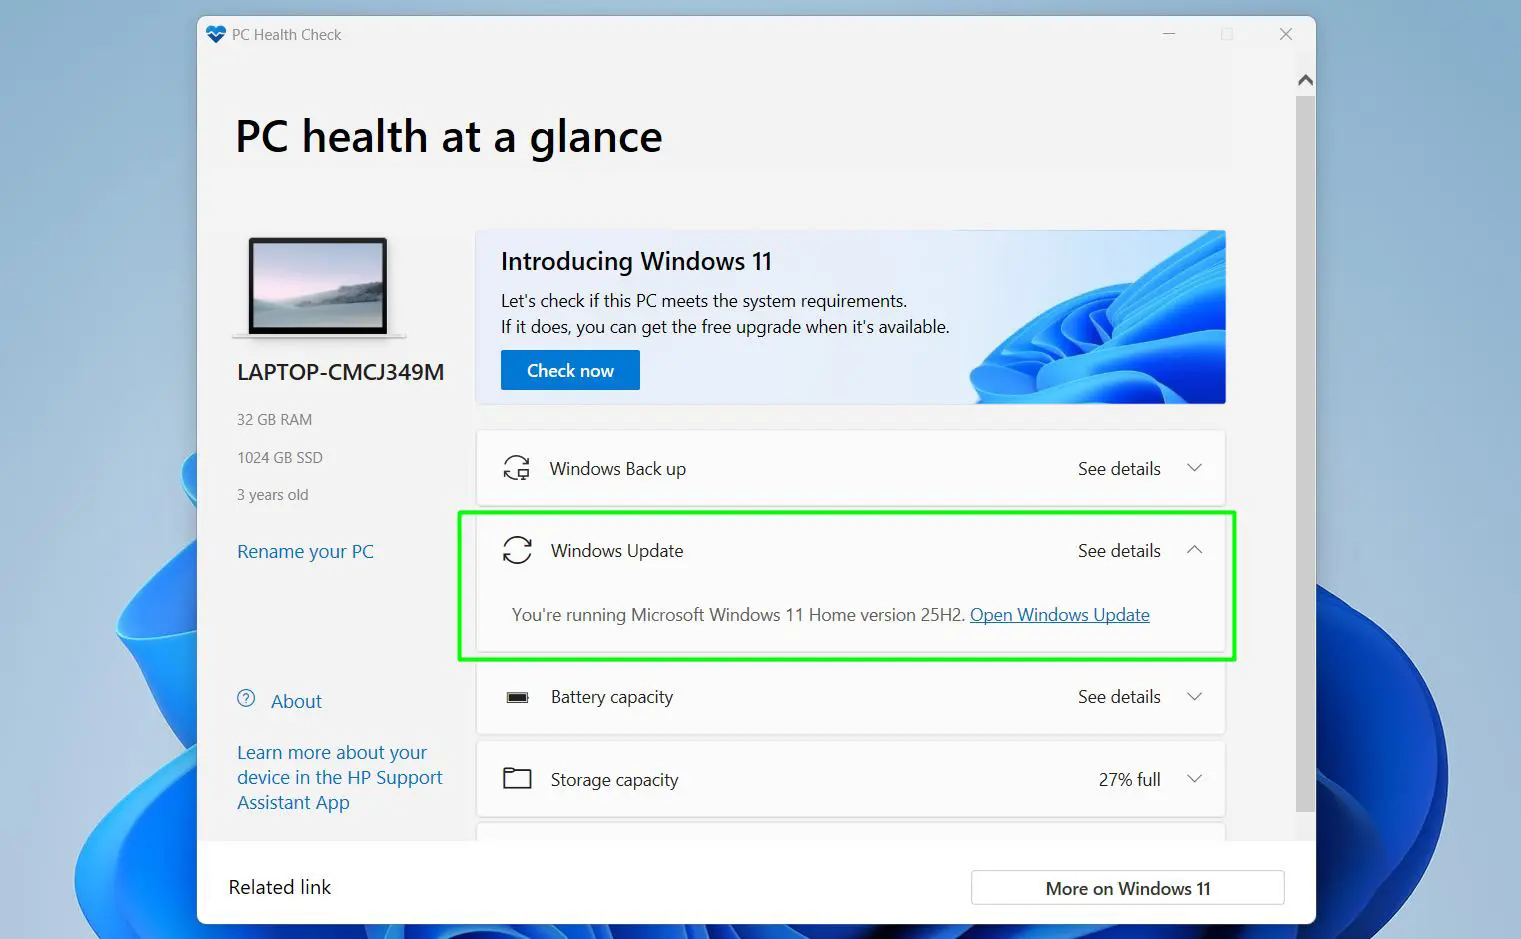
- Click See details on the Windows Update section to expand it.
- The app shows the current Windows version running on the device – for example, ‘You’re running Microsoft Windows 11 Home version 25H2’.
- Click Open Windows Update to go directly to Windows Update settings and check for any available updates.
Keeping Windows updated is one of the simplest ways to keep a PC running well. Updates include security patches, bug fixes, and performance improvements. Staying current also helps with driver compatibility – including things like Bluetooth drivers and printer drivers.
Step 7: Check Battery Capacity
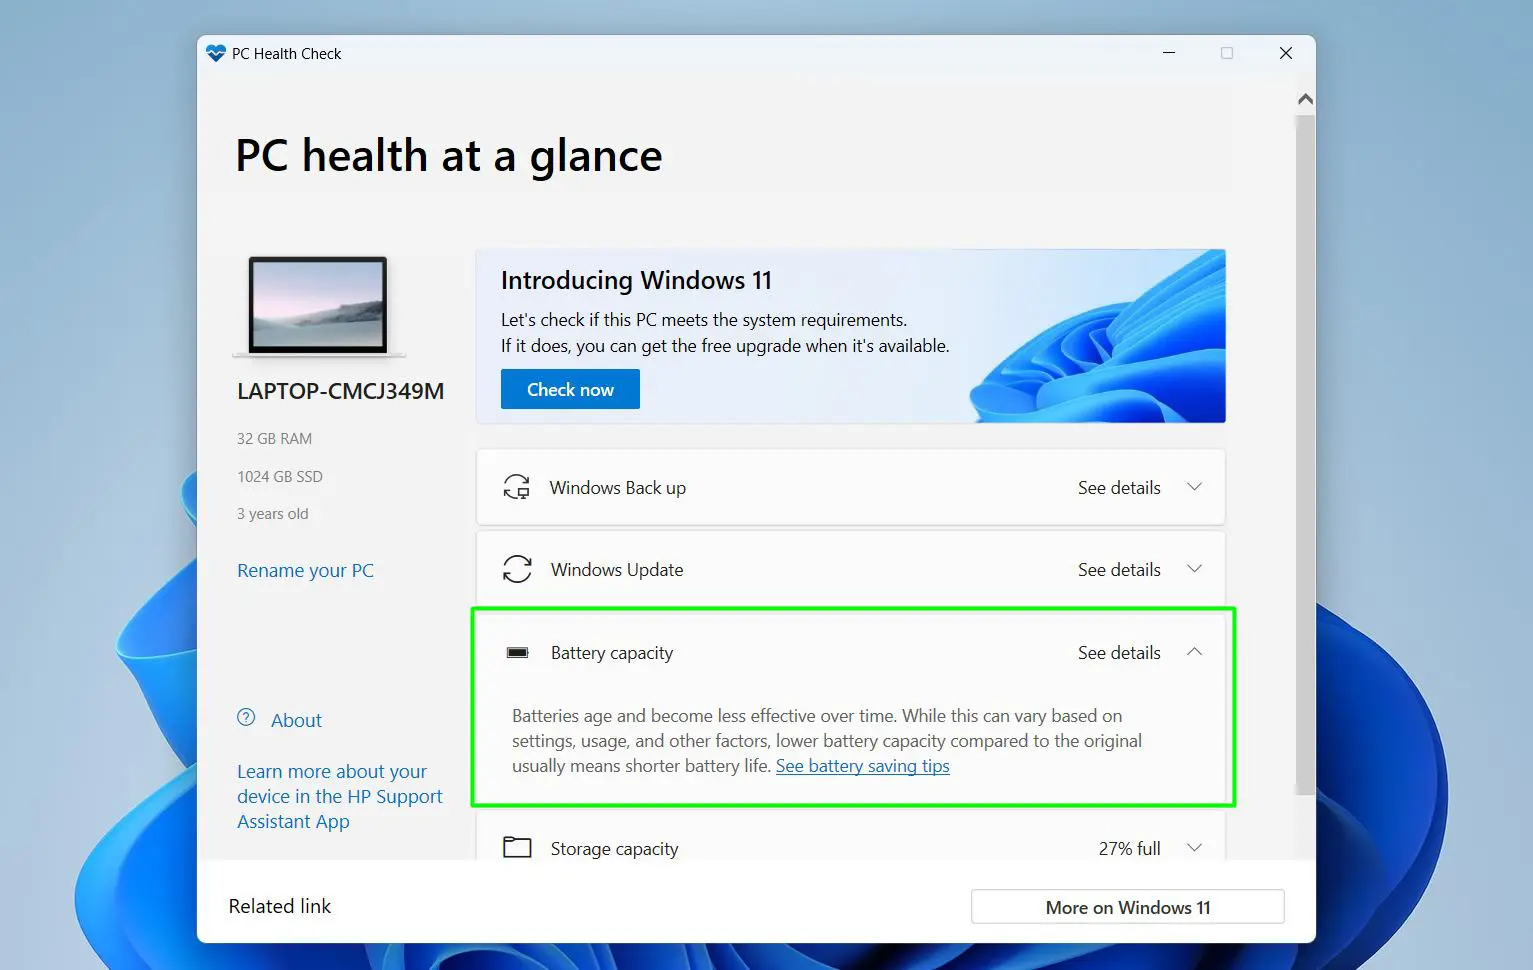
- Click See details on the Battery capacity section to expand it.
- The app explains that batteries age and become less effective over time, and that lower battery capacity compared to the original usually means shorter battery life.
- Click See battery saving tips to get recommendations on extending battery life.
Battery wear depends on settings, usage, and other factors. If the battery is no longer lasting as long as it used to, adjusting power and sleep settings is one of the most effective ways to squeeze more life out of each charge.
Step 8: Review Storage Capacity
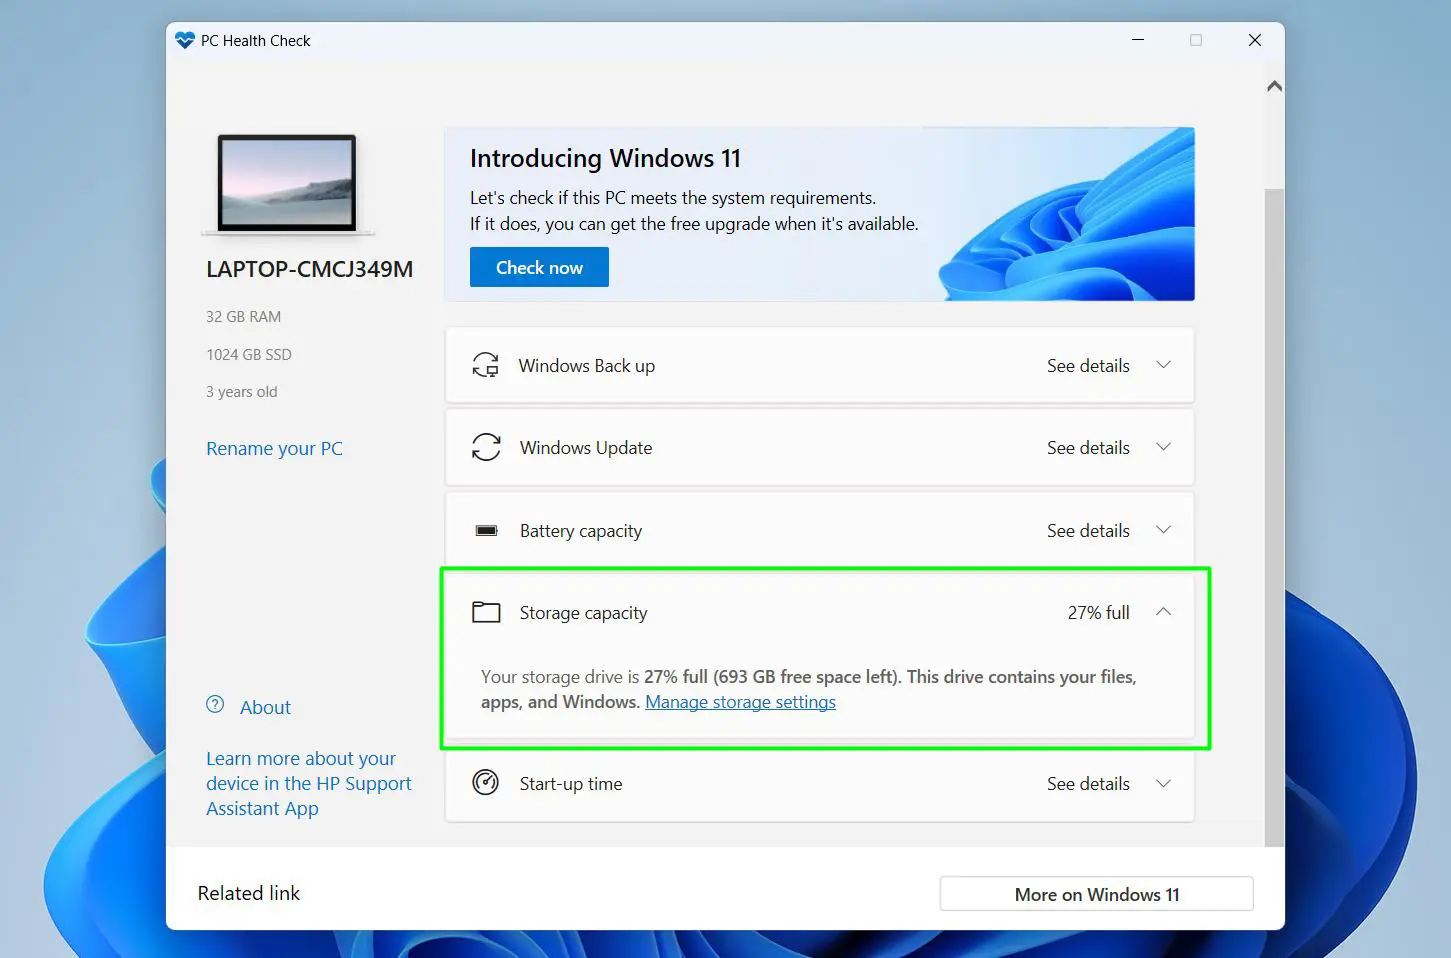
- Click See details on the Storage capacity section – it already shows the usage percentage on the right, for example ‘27% full’.
- The expanded section shows the exact amount of free space remaining, for example ‘693 GB free space left’, and confirms this drive contains files, apps, and Windows.
- Click Manage storage settings to open Storage settings and free up space if needed.
Low storage slows down the entire system. Windows needs free space to handle updates, temporary files, and virtual memory. A good first step when storage is getting full is to clear app cache data and remove programs that are no longer used via Add or Remove Programs.
Pro-Tip: If storage is at 80% or more, start freeing up space before it causes slowdowns. Windows typically starts struggling well before the drive is completely full.
Step 9: Check Start-up Time
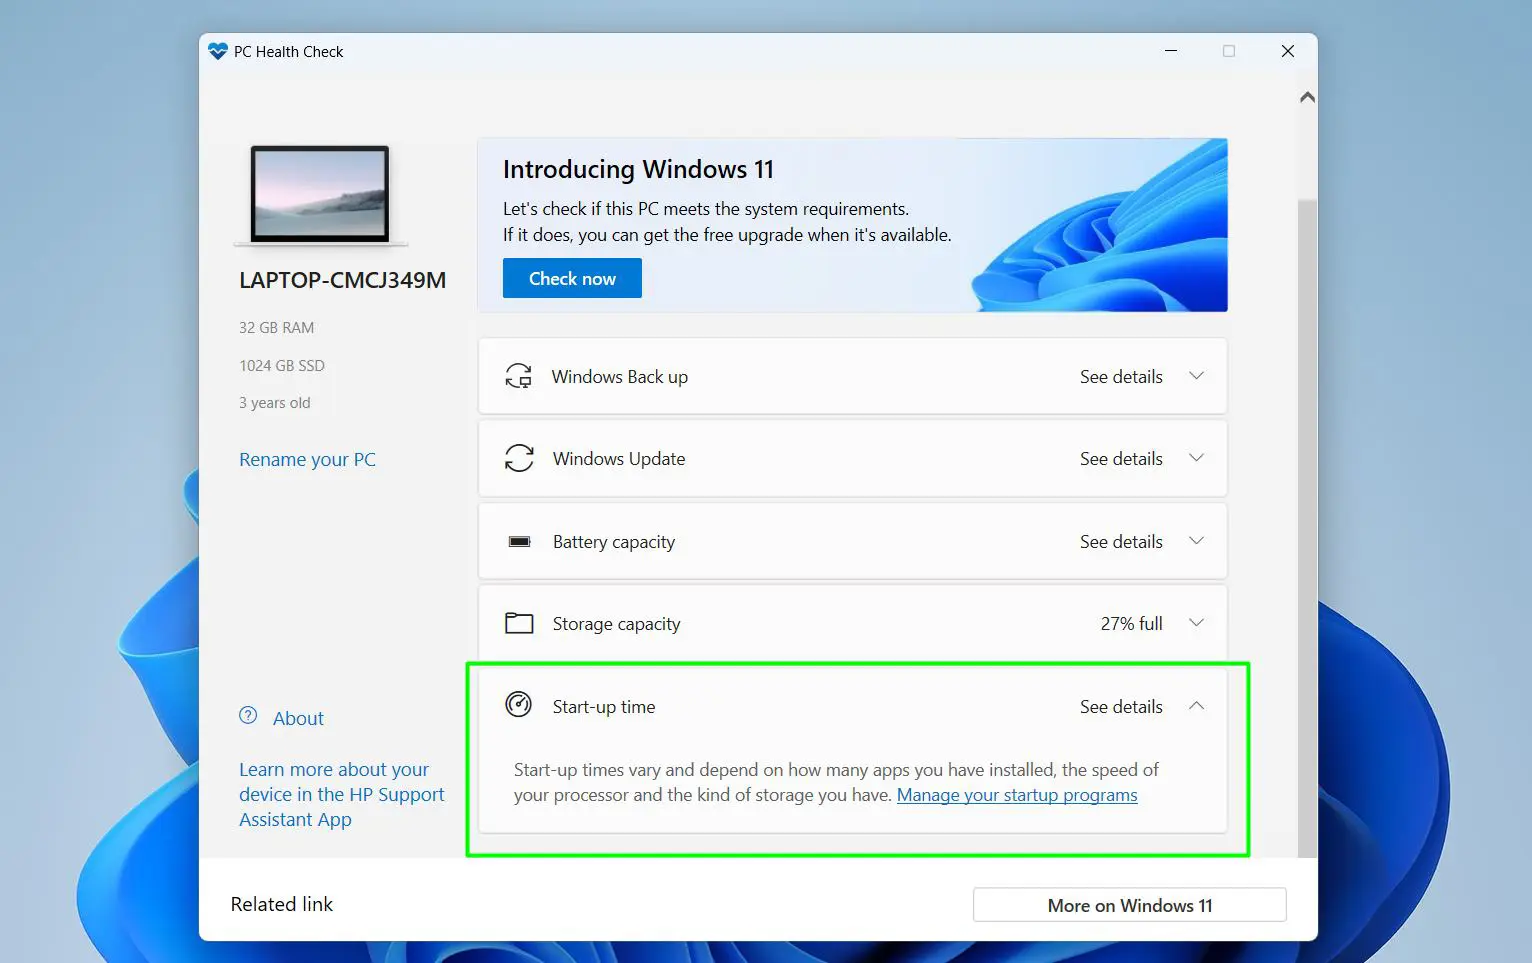
- Click See details on the Start-up time section to expand it.
- The app explains that start-up times vary and depend on how many apps are installed, the speed of the processor, and the kind of storage the device has.
- Click Manage your startup programs to open Task Manager where high-impact startup apps can be disabled.
Too many apps launching at startup is one of the most common reasons a PC boots slowly. Disabling the ones that do not need to run immediately makes a noticeable difference. The full guide on improving laptop boot performance covers this in more detail.
Tips for Getting the Most Out of PC Health Check
- Run the app once a month to catch issues like low storage or missed updates before they cause problems.
- Use the ‘Check now’ button in the Windows 11 section to confirm the device still meets all system requirements.
- Combine the results with Windows Security for a more complete picture – PC Health Check covers performance while Windows Security handles threats. Check the guide on updating Windows Security signatures manually to make sure protection is current.
- If startup time is consistently slow even after managing startup apps, consider checking how to debloat Windows to remove unnecessary background processes.
- Storage filling up regularly? Also try clearing the browser cache since it can quietly take up a large amount of space over time.
Common Issues When Using PC Health Check
PC Health Check App is Not Found After Installing
Try restarting the PC after installation. The app should then appear when searching ‘PC Health Check’ from the Start menu. If it still does not show, re-download the installer from the official Microsoft link and run it again.
The App Opens But Shows No Data
This usually happens when Windows is not fully updated. Go to Settings, open Windows Update, install any pending updates, restart the PC, and open PC Health Check again.
Battery Capacity Section Shows No Information
This is expected on desktop PCs since there is no battery to report on. On laptops, if the section appears empty, updating the device drivers usually resolves it.
Start-up Time Section Shows a Very Slow Boot
Click ‘Manage your startup programs’ directly from the section to open Task Manager. Disable any high-impact apps that do not need to run at boot. If the issue persists, checking GPU usage statistics and background processes can help identify other causes.
Frequently Asked Questions
What does PC Health Check show in Windows 11?
The app shows a ‘PC health at a glance’ dashboard that includes device specs (RAM, storage size, age), Windows Backup status, Windows Update status with the current Windows version, battery capacity, storage usage with free space details, and startup time information.
Is PC Health Check free?
Yes, it is completely free. It is an official Microsoft app available at no cost via the official Microsoft installer link.
Does PC Health Check come pre-installed on Windows 11?
Not always. It does not appear as an installed app on all Windows 11 devices and needs to be downloaded and installed manually from Microsoft’s website.
How do I open PC Health Check after installing it?
Press the Windows key, type ‘PC Health Check’ in the search bar, and click the app in the results. It opens directly to the health dashboard.
What does the ‘Check now’ button do in PC Health Check?
Clicking ‘Check now’ runs a Windows 11 compatibility scan on the device. A popup appears showing a green checkmark for each passed requirement including Secure Boot, TPM 2.0, processor compatibility, RAM, and disk size. If all items pass, the device is fully compatible with Windows 11.
How often should PC Health Check be run?
Once a month is a good habit for most users. If the PC starts feeling slow or updates have been failing, running it right away is a solid first step to see what needs attention.
Can PC Health Check fix issues automatically?
No, it is a diagnostic tool only. Each section provides a direct link – like ‘Open Windows Update’, ‘Manage storage settings’, or ‘Manage your startup programs’ – that leads to the relevant Windows setting where the fix can be applied manually.
Why is storage showing as full even after deleting files?
Deleted files stay in the Recycle Bin until it is emptied and still count toward used storage. Browser cache and app data also build up over time. Emptying the Recycle Bin and clearing cached data are the quickest ways to recover space.
Does PC Health Check scan for viruses?
No. Virus and malware scanning is handled by Windows Security (formerly Windows Defender), which is a separate tool. PC Health Check focuses purely on system performance and health – not security threats.
What does the device age shown in PC Health Check mean?
It shows how old the device is based on its manufacturing or registration date. This is useful context when reviewing battery health or deciding whether a hardware upgrade makes more sense than continuing to maintain an aging machine.